
To enable DNSSEC on your domain, follow these two simple steps:
- Generate DNSSEC keys through cPanel.
- Add the DS record via the Customer Area.
With SupportHost, DNSSEC is available on all TLDs.
Here’s a step-by-step guide on activating DNSSEC:
Table of Contents
Generate DNSSEC keys via cPanel
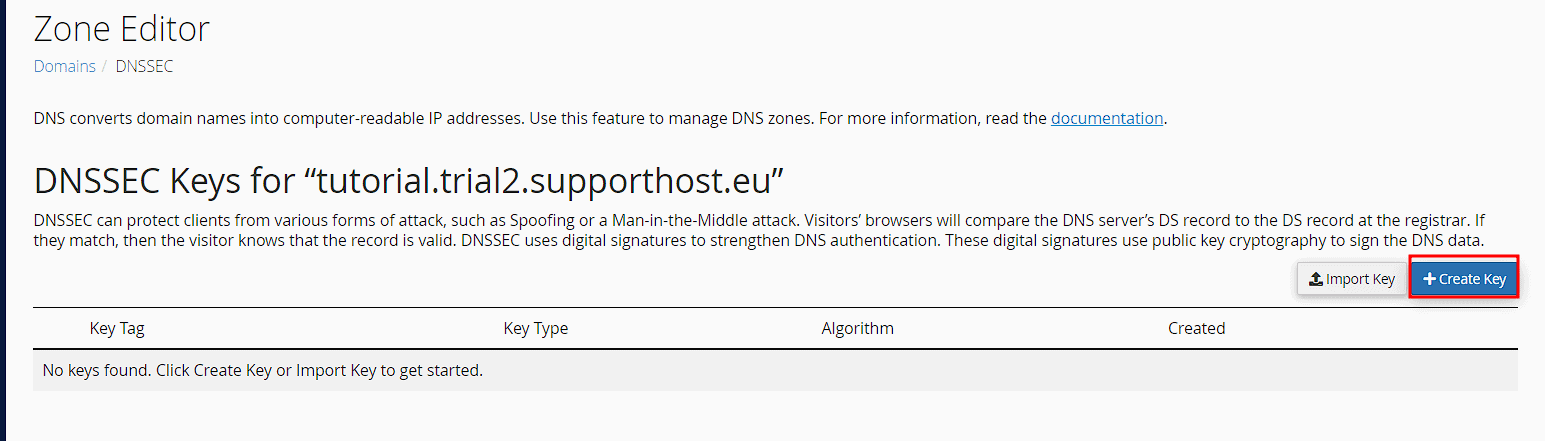
Log-in to cPanel and under the “Domains” section, click on “Zone Editor.”

You’ll see a list of associated domains. For the domain you wish to enable DNSSEC on, click the “DNSSEC” button.

In the DNSSEC settings, click on “Create Key” to generate the public keys (KSK and ZSK) used to encrypt your data.
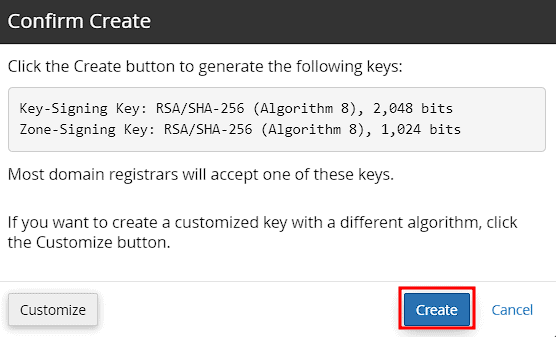
A window will appear showing the algorithm used to create the DNSSEC keys. Click “Create” to proceed.
Add the DS Record via the Customer Area
Log into the customer area and go to the “Domains” section.

Locate the domain for which you want to activate DNSSEC, and click the wrench icon to access domain management.

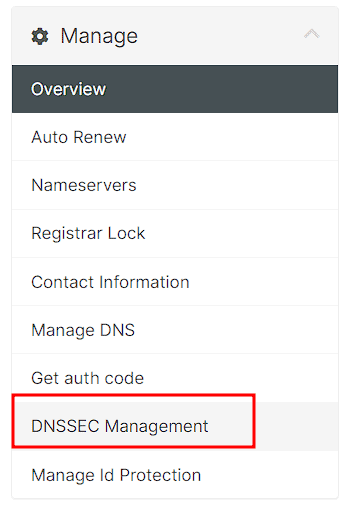
From the left-hand menu, click on “DNSSEC Management” under the “Manage” section.
The next steps differ depending on the type of domain you are activating DNSSEC for:
- All domains.
- .eu domains.
Activating DNSSEC for all TLDs (except “.eu”)
This procedure applies to all top-level domains (TLDs) where DNSSEC can be activated, excluding “.eu” domains. If you wish to enable DNSSEC for “.eu” domains, please follow the steps in the next section of this tutorial.
From the “DNSSEC Management” panel, you can input the necessary information to create the DS (Delegation Signer) record.
The required data were generated earlier when setting up the DNS Zone for DNSSEC. You can locate this information in cPanel by opening the Zone Editor tool and selecting DNSSEC > View DS Records.
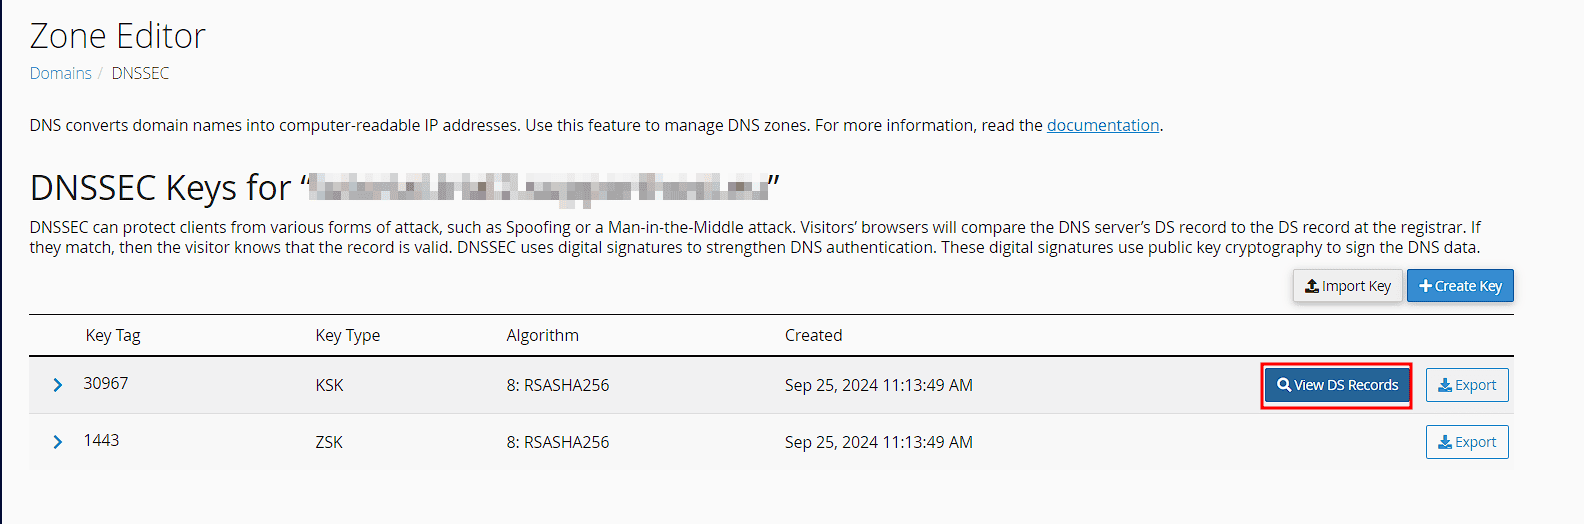
Next, transfer the data from the cPanel screen (displayed on the right) to the Customer Area screen (on the left). You will need to enter the Key Tag, Algorithm, Digest Type, and Digest.

To complete the process, click “Save Changes.” A confirmation message will appear, indicating that DNSSEC has been successfully enabled.

If you wish to disable DNSSEC, simply click the “Disable” button in this section. Disabling DNSSEC will remove the DS records you previously entered.
If you make any changes to the DS record, you will need to click the “Save Changes” button again to apply the updates.
Activate DNSSEC for “.eu” Domains
For “.eu” domains, the DNSSEC activation process differs slightly from other TLDs.
In the Customer Area, navigate to “Domains,” then select the wrench icon next to the desired domain and click on “DNSSEC Management,” as shown in the previous steps.
For “.eu” domains, you only need two pieces of information: the algorithm type and the public key (Public DNSKEY).
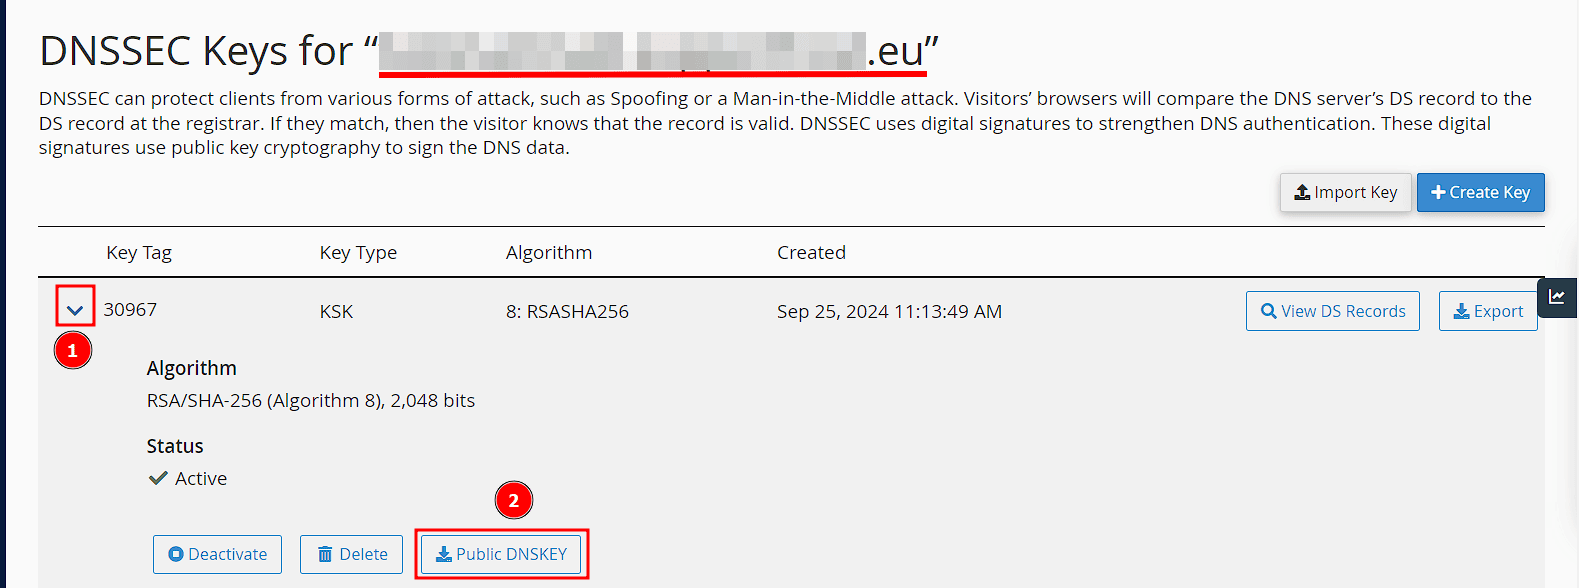
In cPanel, after creating the DNSSEC keys (as outlined in the earlier part of this tutorial), open the “Zone Editor” tool and click on “DNSSEC.”
Expand the section for the “KSK” (Key Signing Key) by clicking the arrow to the left.
- Here, you’ll find the algorithm used, for example, RSA/SHA-256 (Algorithm 8).
- Select the same algorithm in the Customer Area, as shown in the screenshot.

Next, click on “Public DNSKEY” in cPanel.
A new screen will appear where you can copy the “Public DNSKEY” using the “Copy” button.
In the Customer Area, paste this public key and click “Enable.”

A notification will confirm that DNSSEC has been successfully enabled.
To disable DNSSEC, click the “Disable” button.
Ready to build your WordPress site?
Try our service free for 14 days. No obligation, no credit card required.

