
The cPanel file manager lets you manage the files and folders on the server. With this tool it’s possible to view files, modify, move, copy them and also manage the files’ permissions.
Let’s see, one by one, all the operations that we can perform in the file manager.
Table of Contents
How to access the file manager
After the cPanel login, we can access the File Manager from the file section of the main screen of our control panel clicking on “File manager”.

After opening it, you will see in the left portion of the screen the hierarchy of the folders on your server. Clicking on one of these folders will open it, and its contents will be showed in the central part of the screen.

When you open the file manager, you will automatically see the content of a folder. The default file manager setting allows you to directly open the account’s root folder (home).
You can also decide to set another folder so that it opens automatically when you access the File manager. Let’s see how to do it from the settings.
The file manager settings
At the top right you will see the button to access the settings (you recognize it by the cog symbol).

The settings allow you to choose which folder to open at startup. As you can see in this screenshot, the home directory should be set by default.
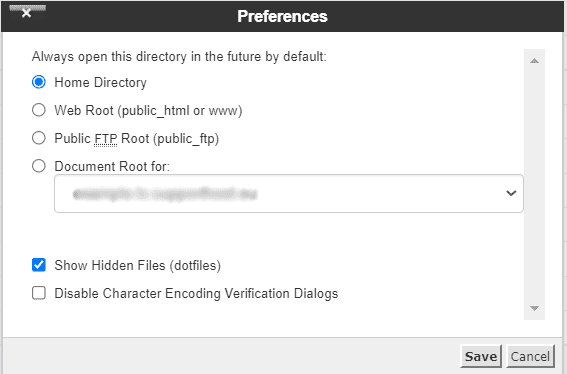
You can choose to change it and open any of these folders:
- Webroot: public_html or www folder
- FTP root: public_ftp folder
- Document root: in this case, you can choose the folder of which domain to open from the drop-down menu (it can be useful if you have a multidomain account or a subdomain)
From the settings, you can also decide to show hidden files (for example, .htaccess file) which, by default, are not visible. To do this, check the “Show hidden files (dotfiles)” item.
Every time you open a file from the file manager to edit it, a warning will appear telling us to select the encoding we want to use (uft-8, utf-7, and so on).
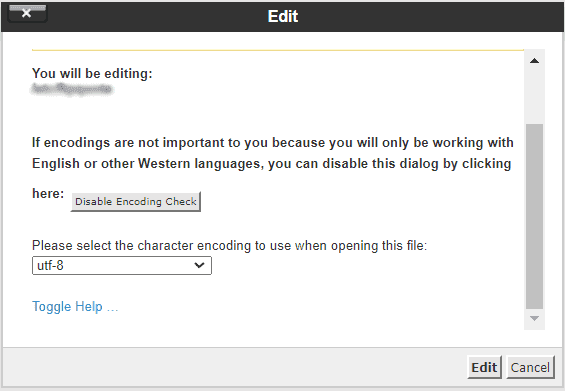
The file manager preferences allow you to suppress this warning about file character encoding. To stop showing the warning, in fact, check the item next to Disable character encoding verification dialogs as you see in this screen:
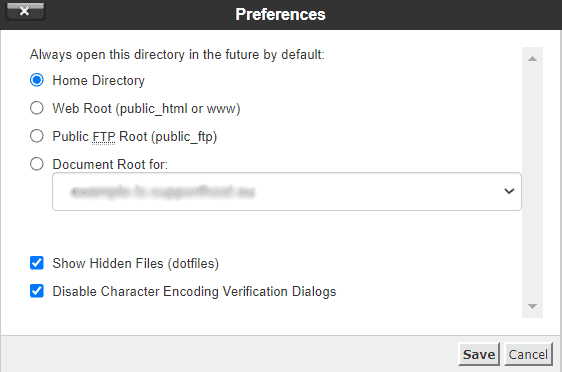
After selecting the folder, or working on the other settings, click on Save to secure the changes. If you decide you don’t want to change anything, click on Cancel.
Create new files and folders
Create a new file
To create a new file, click on the File button in the top bar of the file manager, as you see here:

A popup will open from which you can choose the file name (complete with extension), which you will enter in the “New file name” field.
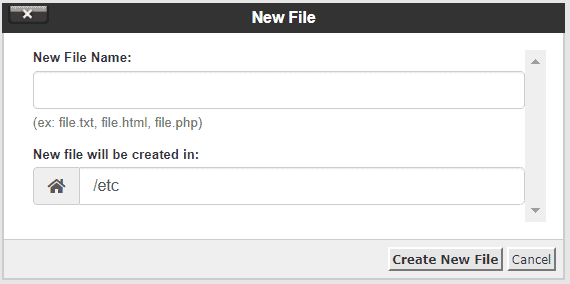
In the field identified by the house symbol, you will see the path where the file will be created. The path is created automatically based on the folder you are in, but you can also change it. When you are done, click on “Create New File” to create the file.
Create a new folder
To create a new folder, click on the Folder button in the top bar:

In the new window, choose the name of the folder you want to create. The folder will be created in the location where you are. You can see the path indicated or enter a different one if you want to create it in another location.
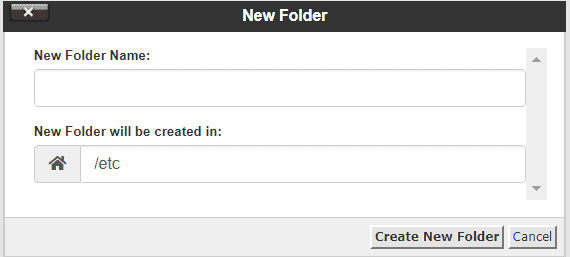
After verifying the name and path, click on Create New Folder.
Search for a file or folder
If you want to search for a specific file or folder, you can use the search bar at the top by typing the name of the file you want to find in the For field.

You can choose to search all files in the current folder (current directory) or public_html from the drop-down menu.
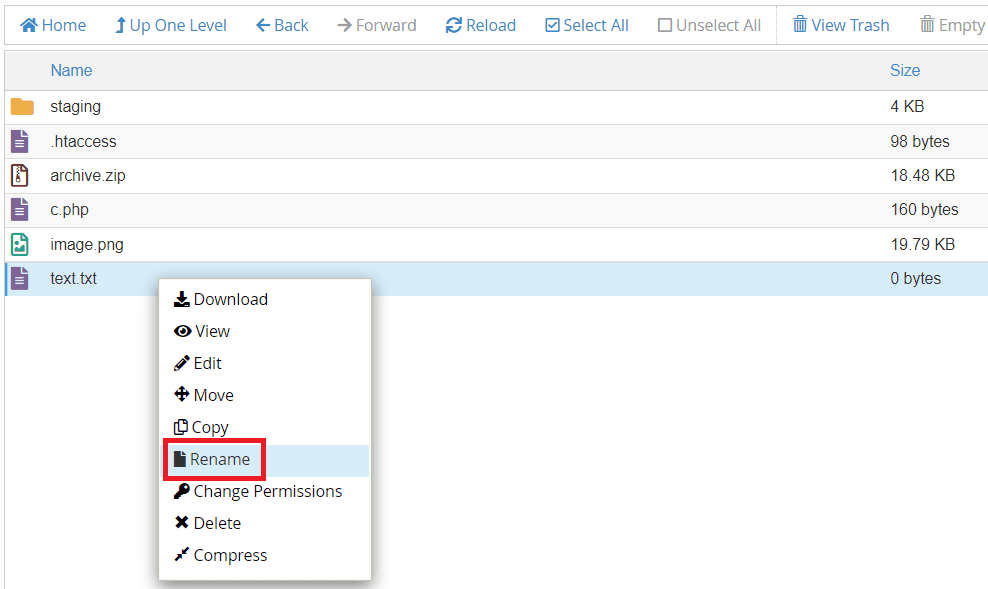
Rename a file or folder
If you want to change the name of a file or folder from the fine manager, right-click on the object in question and select Rename from the options.
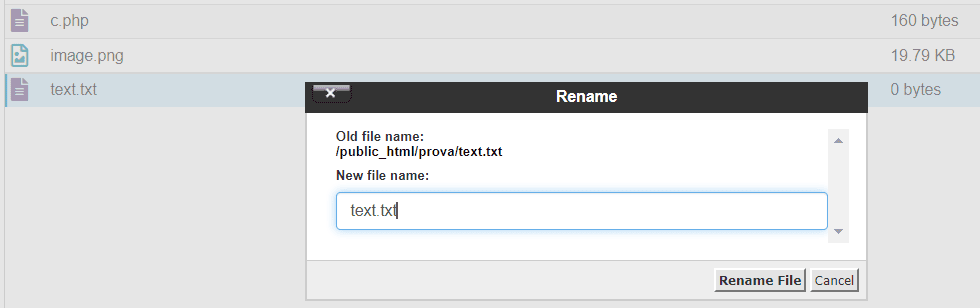
This will open a new dialog where you can change the name of the file (as in this example) or folder. After changing the name, click on Rename File.
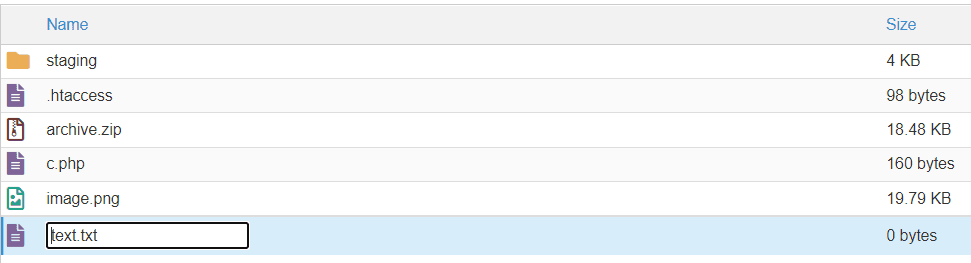
You can also change the name by double-clicking on a file or folder and then change the name.
Move and copy files and folders
Move files and folders
If you want to move an existing file or folder with the file manager, click on the element you want to move and then click on the Move button on the top bar:
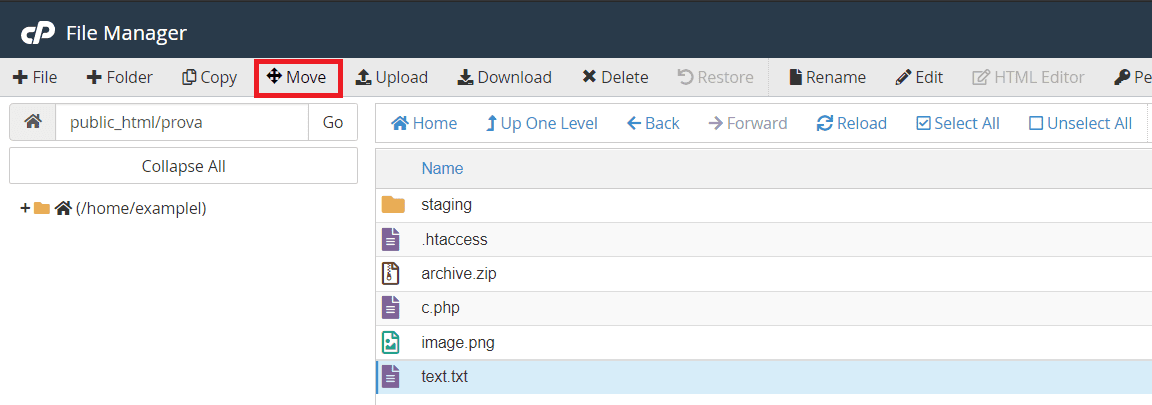
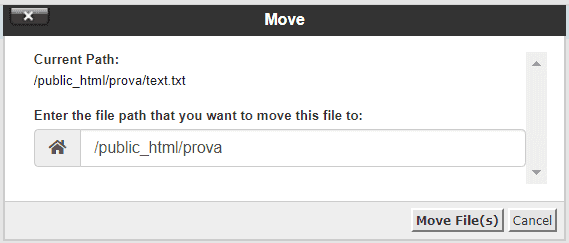
In the new window, you will need to indicate the destination path that is the folder where you want to move the file, and confirm by clicking on Move File(s).
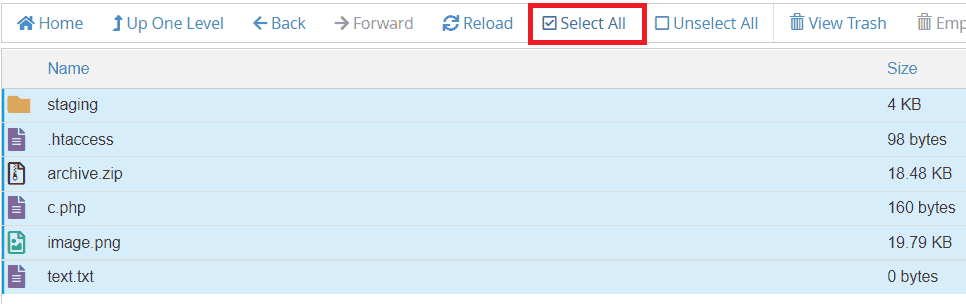
You can also use this method to move multiple files at the same time. If you want to select all the files in a folder, click on Select All and then on Move, following the previous steps again. If, on the other hand, you want to select only a few, click on the ones you are interested in while holding down Ctrl on the keyboard.
Copy files and folders
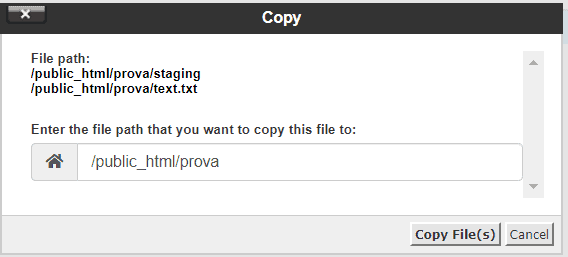
If you want to create a copy instead of moving files or folders, select the files (and/or folders) and then click Copy.

In the new window, specify the destination and click on Copy File(s).
Please note that you cannot have two copies of the same file (with the same name) in the same folder.
Delete and restore files and folders
Delete files and folders
If you want to delete one or more files (or folders) from the file manager, select them and click Delete:

After clicking, a window will appear asking you to confirm the operation. By clicking on Confirm, the files will be moved to the Trash.

If, on the other hand, you want to permanently delete them, you will have to check the box next to the item Skip the trash and permanently delete the files.
Restore files and folders from trash
If you accidentally deleted a file or folder, you can always restore it by accessing the trash bin from the file manager. Click on View Trash to see all the elements in the trash.

Warning: when deleting files permanently, you will not be able to recover them, and you will not find them in the trash.
In the trash, you will see the files you have deleted, to bring them back to the original folder, just select them and click on the Restore button on the bar.

Alternatively, you can also right-click and select the Restore item. In any case, you will then have to confirm in the next dialog box by clicking on Restore File (s).
Upload and download files and folders
Upload a file
From the cPanel file manager, you can also directly upload a file or folder. First, open the folder where you want to upload the files and then click Upload as you see here:

A new browser window will open like the one you see here:

To upload files, you can simply drag and drop them to this screen, or click Select File and then choose them from your computer. After the files have been uploaded you can click Back to … to return to the previous folder, where you will see the files you uploaded.
Download a file
From the file manager, you can also download a file to your computer, select the files or folders you want to download and then click Download.

Choose the path where you want to save the files on your PC and click Save.
Compress files and extract compressed files
Compress files
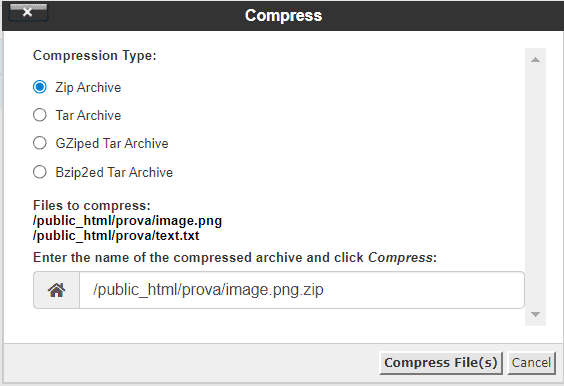
If you want to create an archive containing multiple compressed files, you can do it directly from the file manager. Select the files you want to compress and click Compress:

From the window that will be shown, you can decide the name to give to the archive and what type of compression to use among these options: Zip, tar, tar with GZip, tar with BZip2.
Extract files from an archive
The cPanel file manager also allows you to extract the files contained in an archive, provided that one of the following compressions has been used: Zip, BZip2, and GZip.
To do this, select the archive and then click on Extract:

In the new window, indicate the path where you want the archive to be unpacked and then click on Extract File (s).
View and edit files
If you want to view the contents of a file (text file, Html image, php, and so on), just select the file and click on the View button.

The file manager enables you to edit files with two different methods: a classic editor and an HTML editor.
Edit a file
To edit a file using the traditional editor, just select it and click Edit.

If you aren’t sure about what to do when editing a file, it is best to create a backup copy to restore if necessary.
Edit files with HTML editor
This editor only works with HTML files making it easy to edit this type of file. Select a file with this extension and then click HTML Editor to open it.

Change file permissions
From the file manager, you can choose whether to set specific permissions to allow access only to certain user types to the files.
You can set permissions for both individual files and entire folders. Select the folder or file you want to edit and click on Permissions.

You will see that there are different kinds of permissions. You can choose which permissions you want to give to a certain file or folder.
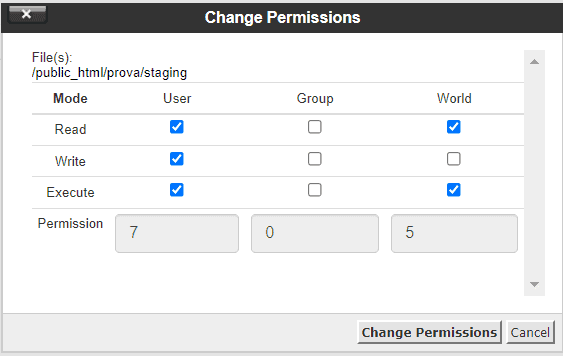
- Read: the user can read the file, that is, view it
- Write: allows you to edit the file
- Run – lets you run files
The permissions can be granted to the single user (ie the owner of the file), to the group (ie all users who are in the group), or to everyone.
Ready to build your WordPress site?
Try our service free for 14 days. No obligation, no credit card required.