Modifying the directives in the php.ini file allows you to regulate how scripts and applications written in PHP language can use system resources.
On all our web hosting you can change the PHP version and edit the php.ini file using cPanel.
Table of Contents
Warning: If you are using PHP selector to change your PHP version, you need to edit the php.ini from its graphic interface
What is php.ini file
Php.ini is a configuration file that, through some directives, allows you to manage important variables for the functioning of applications written in PHP.
Through this file it is possible to edit some configuration parameters, such as the file loading size and the resource limits.
When you use a CMS, such as WordPress, sometimes themes and plugins need to some values to be edited.
How php.ini file works
Initialization files, with .ini extension, have a very intuitive structure. Insert a new directive in the php.ini file is simple, just follow this syntax.
Directive = value
The symbol “;” inserted at the beginning of a string represents a comment. Comments are completely ignored.
Edit php.ini with cPanel
In order to create and edit your php.ini file, you will first need to login to cPanel.
Scroll down to the “Software” section and select “MultiPHP INI Editor“.

You can choose to use the basic mode or choose the editor mode, which allows you to manually enter directives.
Select “Basic mode” and choose the path where you want to save the new configuration.
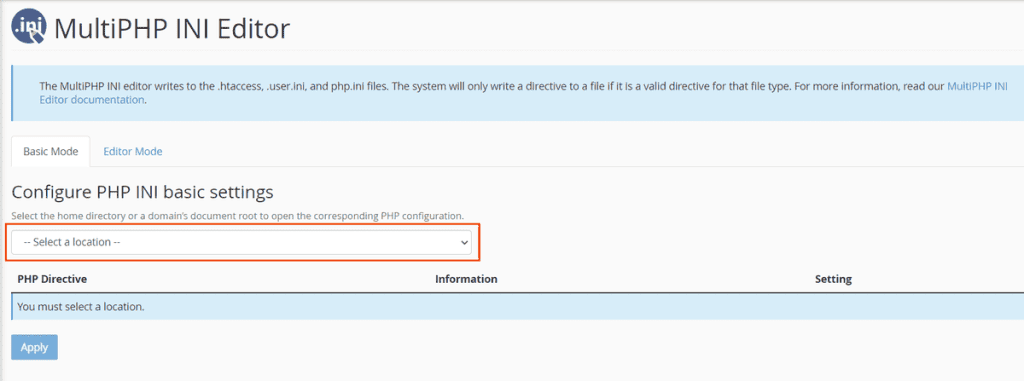
By selecting “Home directory” the changes in the php.ini file will take effect on all websites associated with the account.
Once you choose the path, you will see some directives that you can modify.
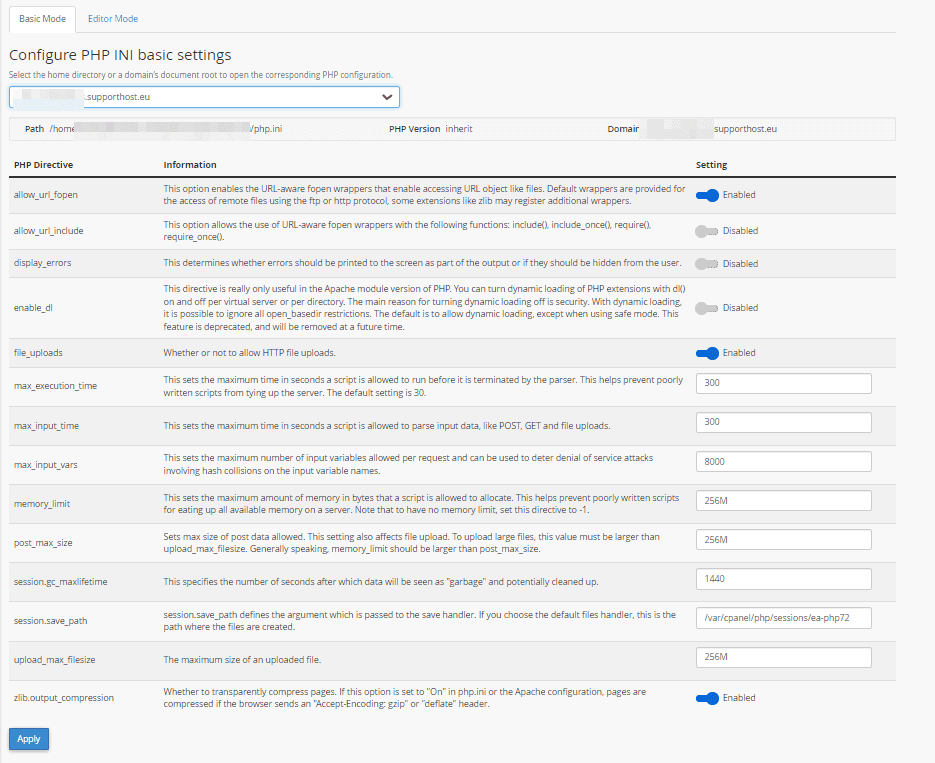
After changing the values according to your needs, press “Apply” to save the changes.

If everything went well, you will see a success message at the end of the modification.

Directives list
To manage all the parameters of the php.ini file you can also use the “Editor mode”.
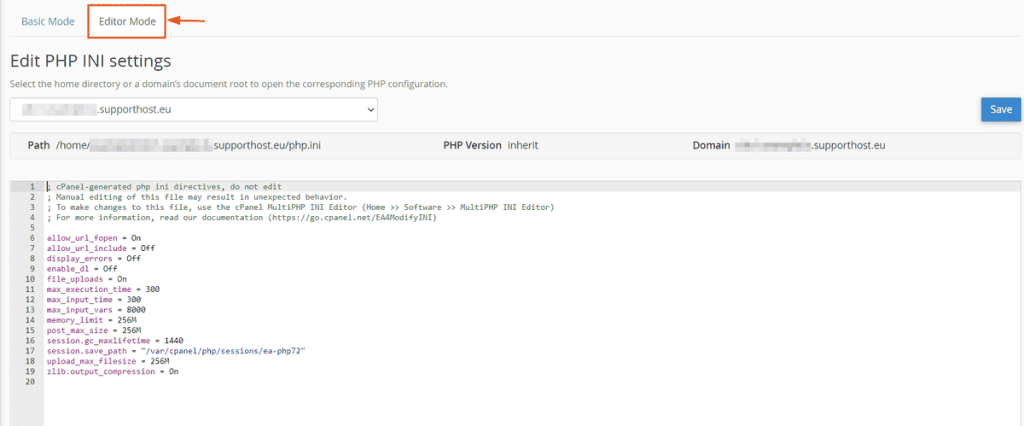
Below are only some of the directives present among the configurable settings of cPanel, but you can add more by consulting the complete list of php.ini directives.
Memory_limit
Modifying this value, you’ll change the size of RAM available to execute operations.
Post_max_size
This parameter indicates the maximum size for POST requests.
Upload_max_filesize
Allows you to define the maximum size of files you can upload to the server.
Max_input_vars
It allows to manage the maximum number of input variables.
Max_execution_time
This parameter allows you to set the maximum time limit in which a php script can be executed.
Zlib.output_compression
Allows you to enable gzip compression, giving your users faster loading times for resources.
Display_errors
Is used to display php errors and warnings. Useful in case you have display or operating problems with your website.
Create and edit php.ini file from File Manager
You can access and edit php.ini files on your web space using a file manager or via FTP protocol.
In order to create a new php.ini file, login to cPanel and scroll down to the “File Manager” section.

At this point, locate the path where you want to create your file and press the “File” button on the top bar.

As a file name, enter “php.ini” and click on “Create new file“.
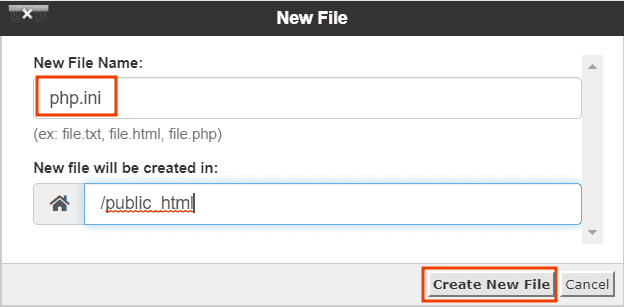
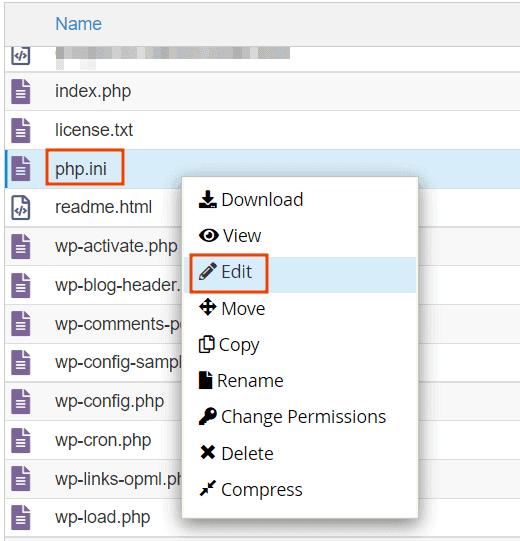
Now select the file you just created and right click on it. From the drop-down menu that opens, select “Edit“.
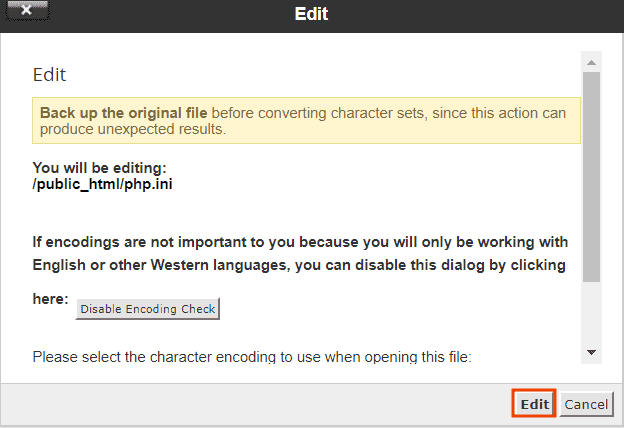
A confirmation window will appear, select “Edit” again to begin editing the file.
Within the file, you will be able to enter the various directives. Once you have completed the changes, click on “Save Changes” to make the changes.


