If you run a website, you may have heard of hotlinking before. It is usually considered bad practice because it can be detrimental to a website.
In this short tutorial, I will explain what hotlink protection is and how to enable it on your website.
Table of Contents
What is hotlink protection and what is it for
Hotlinking is known as the act of stealing a website’s bandwidth by connecting directly to its resources, such as images or videos.
This practice can have several drawbacks, not only in terms of your website’s performance but also in terms of the traffic it can generate.
It may happen that other users, by directly implementing your images on their websites, can rank themselves better on Google Images, stealing the traffic you have been striving to create for a long time.
When a website embeds your resources directly, it connects to your website by leveraging your bandwidth to show these resources to its visitors.
Hotlink protection prevents other websites from linking directly to files, images, or videos on your website, solving these problems.
How to activate hotlink protection
There are several ways to enable hotlink protection. The easiest way is to enable it through cPanel.
After logging in to cPanel, you have to scroll down the page and select the item “Hotlink Protection“.

From this screen, you can configure all the tool’s settings.
To enable hotlink protection, simply click on the blue “Enable” button.

If the operation was successful, you will see a success message.
Configure hotlink protection
Still, from the same page, you can define some settings that will allow you to customize the hotlink protection.
For example, you can allow hotlinking from certain websites. To do this, enter their URL in the “URLs to allow access” field, as displayed in the below image.

It will allow all the websites you have specified to embed your resources directly.
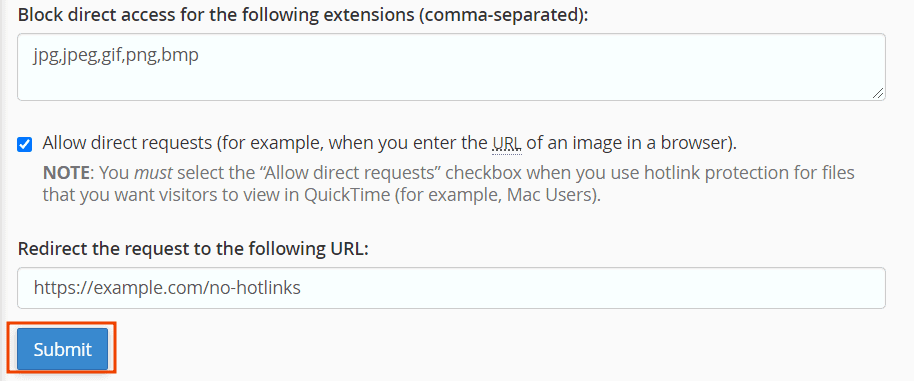
You can also define the various file formats to which you want to deny access. You will simply have to write the various file extensions in the appropriate field, separating them with a comma.

By checking the “Allow direct requests” box, you will allow anyone to be able to view your resources only in the case of direct access (such as typing the URL of the resource in the search bar of the browser).

You can also decide to create a custom page on your website, which will be shown whenever someone tries to access your resources.
After you have created the page on your website, just enter the URL of the page in the “Redirect the request to the following URL” field.

After performing all the changes, you will need to click on the “Submit” button to apply the changes.

Disable hotlink protection
If you want to disable hotlink protection, first, you need to make sure it is enabled.
In case the protection is enabled, you will see the “Disable” button.

After clicking on the “Disable” button, a success message will be displayed confirming that the operation was successful.

