
With SupportHost, you can upgrade or downgrade your hosting plan at any time and without downtime. You can move from a plan to another directly from the client area.
In this tutorial, we will see how to upgrade or downgrade the plan and change the billing period.
Table of Contents
How to upgrade or downgrade
If you are upgrading from one account to another on the same type of server, the transition will be instantaneous, as soon as the payment is received.
Otherwise, if you are migrating from one server to another (e.g., from Apache to LiteSpeed), the request is handled by our operators.
In both cases, during the upgrade, your website will remain accessible, and there will be no downtimes.
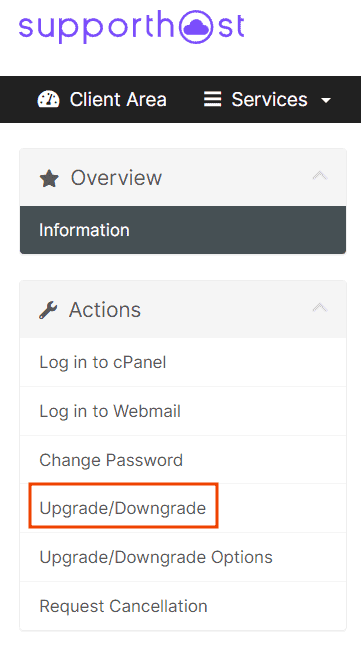
Let’s see how to upgrade or downgrade your current plan. First, login to the client area with your credentials and click on Services.

You will see a list of active products and services on the account, click on the product you want to upgrade or downgrade to access the service details.

In the Actions menu on the left of the screen, click on the Upgrade / Downgrade option as indicated below.
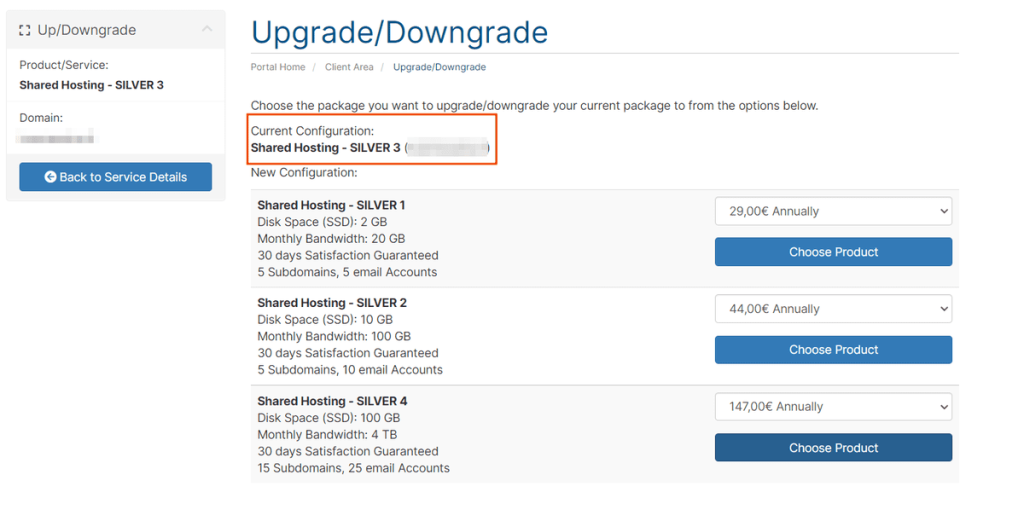
On the new screen, you will see a list of all possible upgrade or downgrade options for your current plan.
At the top, however, as highlighted on the screen below, the current configuration is shown.
By clicking on the drop-down menu next to each upgrade or downgrade option, you can select the billing period.
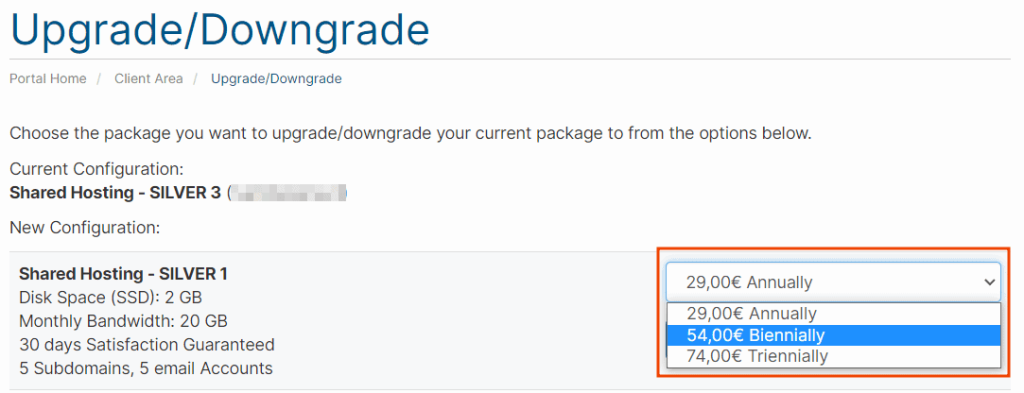
After selecting it, click on the blue “Choose Product” button to continue.

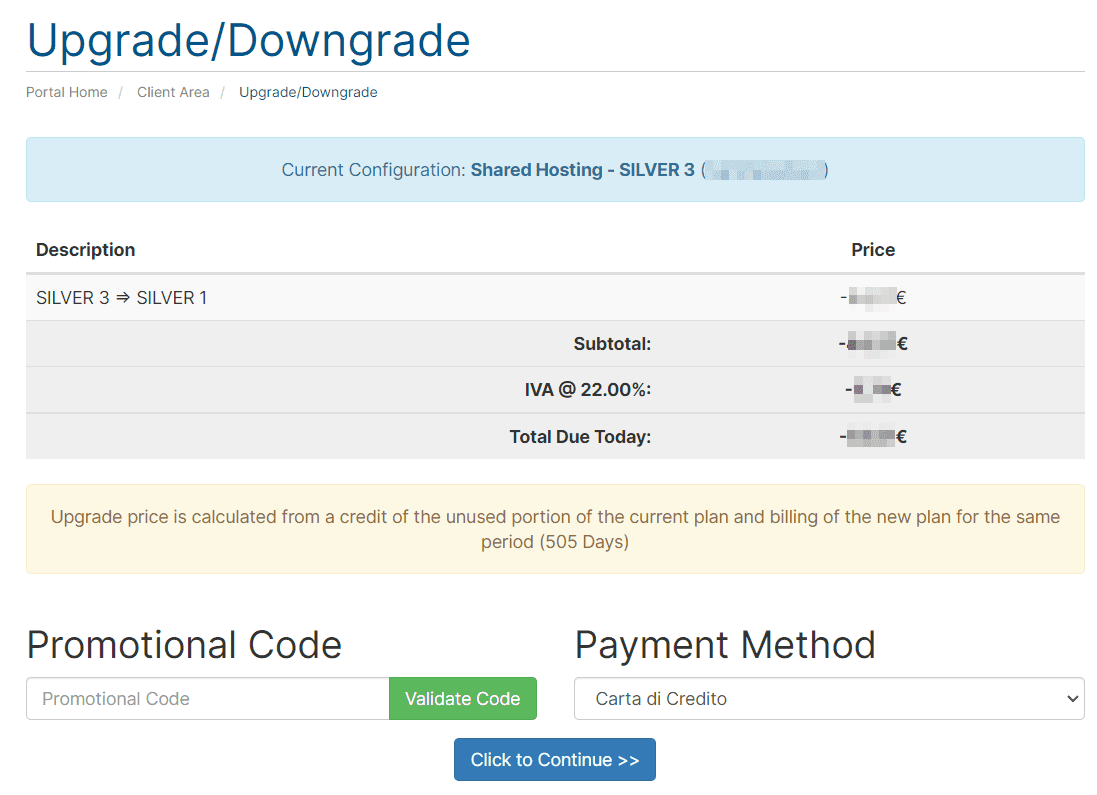
On the next screen, you will see the expense summary and can proceed with the payment if happy.
How the cost of an upgrade or downgrade is calculated
The transition to a higher plan than the current one (upgrade) requires the payment of the difference.
If, on the other hand, you are downgrading you must pay a fixed cost of 10€ you are not entitled to any credit.
Upgrade and downgrade for multidomain account
If you have purchased a semidedicated hosting account (multidomain) and have multiple domains, by default, you can only upgrade from one semidedicated plan to another.
If you want to downgrade from a semidedicated account (multidomain) to a shared hosting (which can only be associated with a single domain), you must first remove all addon and parked domains.
At this point, you will need to wait for 24 hours for the system to synchronize the changes. After 24 hours have passed, you can proceed with the downgrade to a shared plan.
How to change the billing period
From the client area, you can change the billing period of your plan if you are upgrading to a higher or lower plan. As seen in the previous sections, during the upgrade/downgrade procedure, you will be prompted to select the new billing cycle.
If you want to change your billing period without upgrading or downgrading your plan, just open a ticket. Access the client area and click on Support -> Open ticket.

On the next screen, select the Sales department and send your request specifying the service for which you want to change the billing period.

Ready to build your WordPress site?
Try our service free for 14 days. No obligation, no credit card required.