
When managing a website, it is not surprising for you to feel the need to have several email addresses at your disposal. For example, you may decide to create email accounts for your collaborators or to sort the various types of requests you commonly receive.
In this short guide, I will show you how to create and manage a new email account with cPanel to better organize communications with the users of your website.
Table of Contents
How to create an email account
To create a new email account, the first step you need to do is to log into the client area and click on the “Services” tab.

Once the page loads, your currently active hosting plans will be displayed. Select the one you are interested in managing.

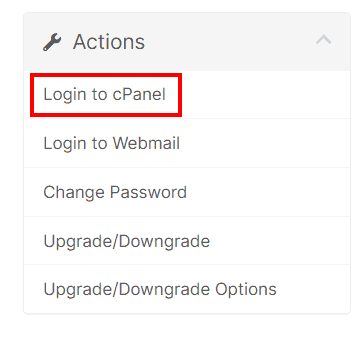
In the “Actions” panel, click on the item “Login to cPanel“.
In this new window that pops up, you will find the “Email” section. Simply access the “Email Accounts” section by clicking on it with the mouse.

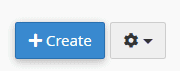
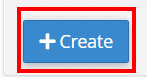
All your email accounts will be listed here. If you don’t have any and want to create a new one, you will need to click on the “Create” button.
In the “Username” field, you will need to enter the name you want to give to your email address.

In the “Password” field instead, you can choose between two choices:
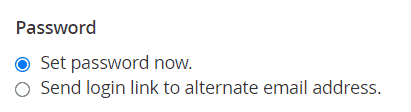
Set password now: This will allow you to set a password for your email account straight away.
Send log-in link to alternate email address: by checking this field instead, you’ll see appearing a box to fill in with an email address. An email will be sent to the address you choose so that you can complete this step at a later time.
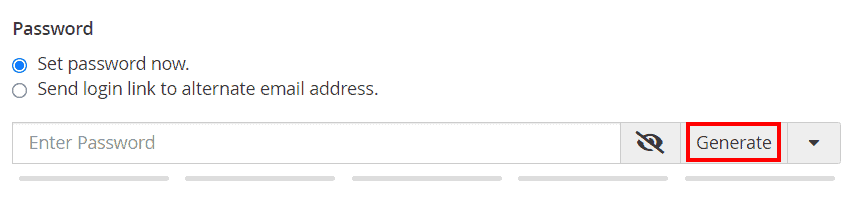
In this case, we are interested in creating an email account immediately, so let’s choose “Set password now” and fill in the “Password” field by setting your password or generating it automatically by pressing the “Generate” button.
It’s possible to change the password of the email account at any time, so don’t worry if something goes wrong.
By clicking on the item “Edit Settings“, located near the text “Optional Settings“, you can instead configure some advanced options related to your new account, such as setting the disk space limit that the email account can use.

Once you have filled in all the fields, you can complete the account creation by clicking on the “Create” button.
We remind you that the newly created email account can be used with any email client. If you want to know how to proceed, consult the guide dedicated to email client configuration.
Log in to an email account
Now that you have created the email account, all you have to do is access the email inbox to test if everything works correctly.
Go back to the cPanel “Email Accounts” area and click on the “Check Email” button.

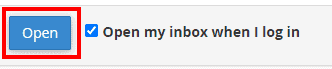
From the webmail page, you can choose which software to use to manage your inbox, RoundCube is set as default, but you can change it with “Horde” By simply clicking on its logo.

By enabling the “Open my inbox when I log in” option, it will be possible to skip this step later on.

After selecting the webmail that will help you manage your email account, you have to press the blue “Open” button.
If you have completed the procedure correctly, you should be logged in to your new email account, and you will be ready to use it.
How to manage the email account
In the following steps, I’ll show you how to manage some of the aspects of your email accounts. Specifically, I will show you how to set space limits and configure access, send and receive restrictions.
We remind you that it is possible to redirect the email received to another email address by creating an email forwarder.
Change the email quota
Our hosting plans have space limits, within these limits it’s possible to decide how to manage the available resources.
To set a space limit for an account, you will need to follow these easy steps.
First, access the “Email Accounts” section on cPanel.
Locate the email account to which you want to apply the changes and press the “Manage” button.

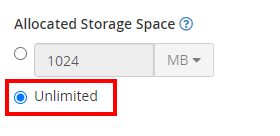
Using the “Allocated Storage Space” option, by entering any number in this field, it will be possible to limit the space that your email account can use.
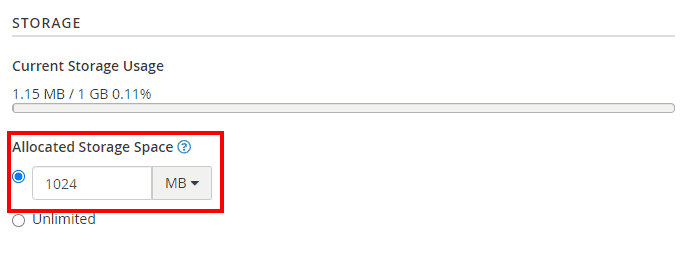
If you don’t want to set any space restrictions select “Unlimited“.
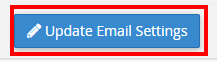
To make the new changes effective, click on the “Update Email Settings” button.
Restrict an email account
If you need to suspend the reception of new emails, or if you want to block access to an email account, go to the “Email Accounts” area of cPanel and press the “Manage” button next to the mailbox you want to change.
Scroll the page until you find the item “Restrictions“, then choose the options you wish by checking the “Suspend” field:

Receiving Incoming Mail: This will allow you to interrupt the reception of all new incoming emails.
Sending Outgoing Email: you will deny the ability to send emails from this email address.
Logging In: selecting the “Suspend” field will make it impossible to access the mailbox.
After checking the fields, click on the “Update Email Settings” button to make the changes effective.
Delete email accounts
If you decide to delete an email account, you need to go to cPanel, in the “Email Account” section, and click on the “Manage” button next to the email account you wish to delete.
At the bottom of the page, you will find a button that says “Delete Email Account“.
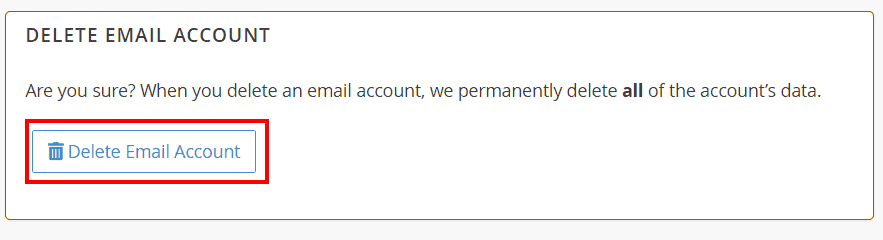
By clicking on it, a warning message will appear. Just click on “Delete” to permanently delete the account.
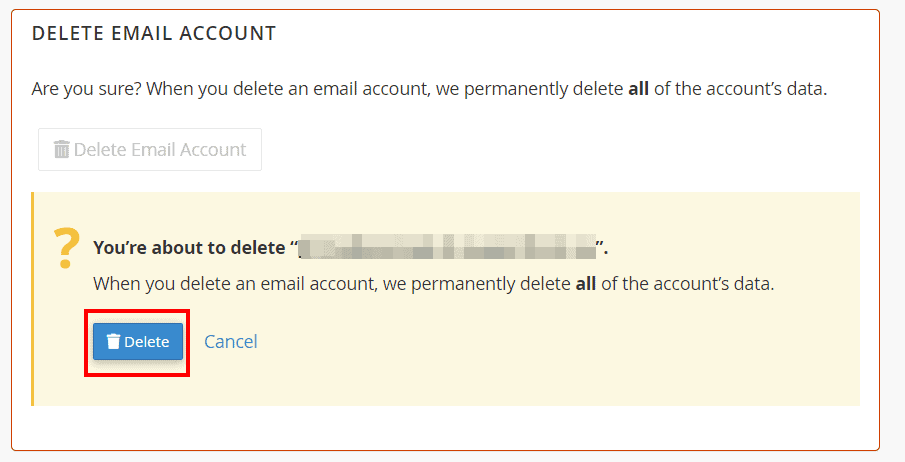
In case the account deletion was successful, a confirmation message will appear.

Ready to build your WordPress site?
Try our service free for 14 days. No obligation, no credit card required.