A domain redirect is a redirect from one address to another. For example, when a user visits the SupportHost.net addresses, he is redirected to the SupportHost.com website
With SupportHost, you can set up a domain redirect in a few simple steps and at no additional cost.
This way, you can buy different domain extensions and have them all redirect to the main domain by simply setting a domain redirect.
This can be useful for brand protection purposes and to prevent others from registering the same domain with different extensions.
In these cases, usually, it is convenient to use a 301 redirect to let everyone know that this is a permanent redirect.
Table of Contents
For those who have purchased only the domain
There are two methods you can use to manage the redirect if you have purchased only the domain:
- Set up the redirect after activating DNS manager;
- Use CloudFlare.
How to set up a redirect using the DNS manager
If you have only purchased the domain without a hosting plan, you can set up the redirect through DNS manager.
Once activated, you will have access to domain management functions, including the “Redirects” feature, allowing you to configure the redirection of your domain.

Alternatively, you can use Cloudflare to set up a redirect.
Set up a domain with redirects using Cloudflare
As an alternative method we can use Cloudflare. The free plane is enough for this.
Let’s add our domain on Cloudflare by following the wizard on their website. Once we have added the domain, we change the domain nameservers to make it point correctly to Cloudflare.
As soon as the domain points correctly to Cloudflare, click on rules at the top to create a redirect rule.

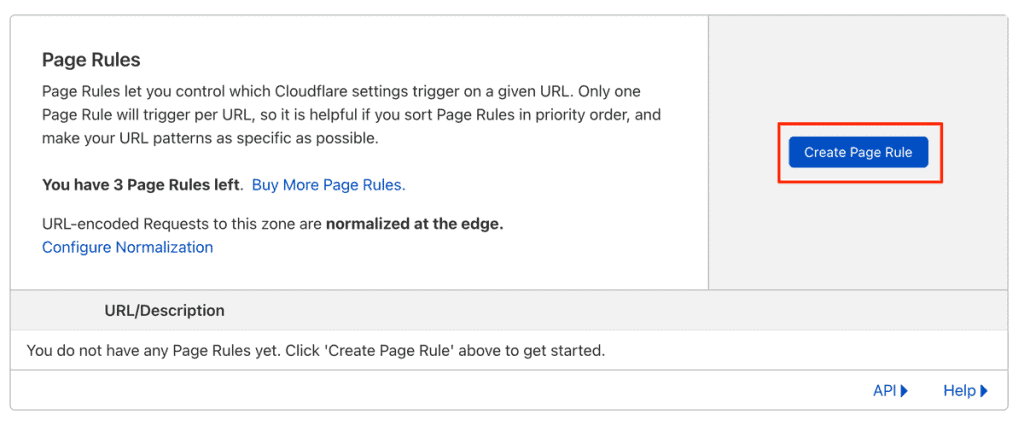
Then click on “Create page rule” to create the rule.
In the next page, we fill in the fields like this:
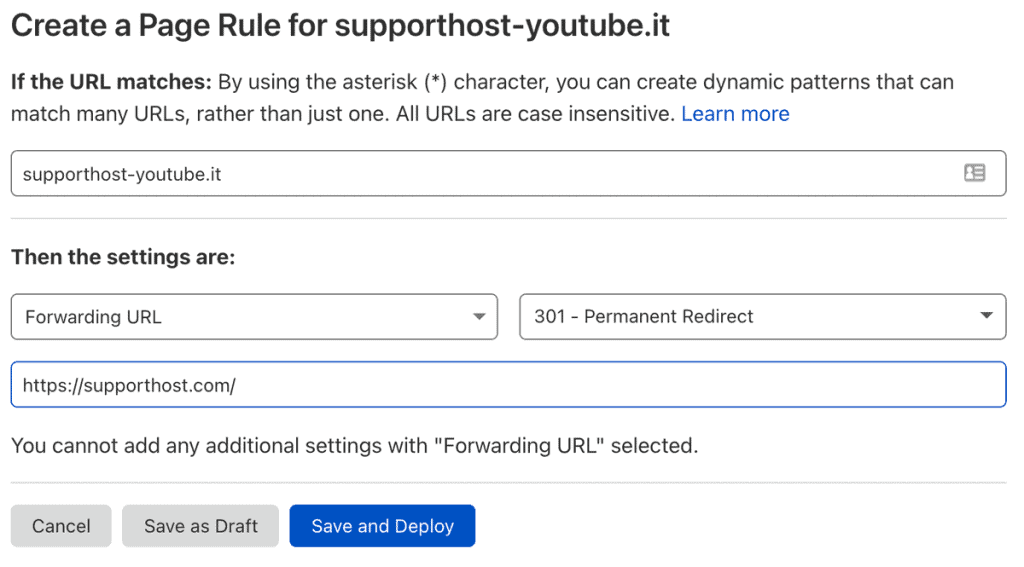
To apply the rule, just click on “Save and Deploy“. If the domain points correctly to Cloudflare, the redirect will work instantly.
If you want to set the redirect so that the internal pages redirect to the relative page on the new domain (for example vecchiodominio.it/pagina1 must redirect to nuovodominio.it/pagina1) You just have to add two parameters after the url, like in the image below.
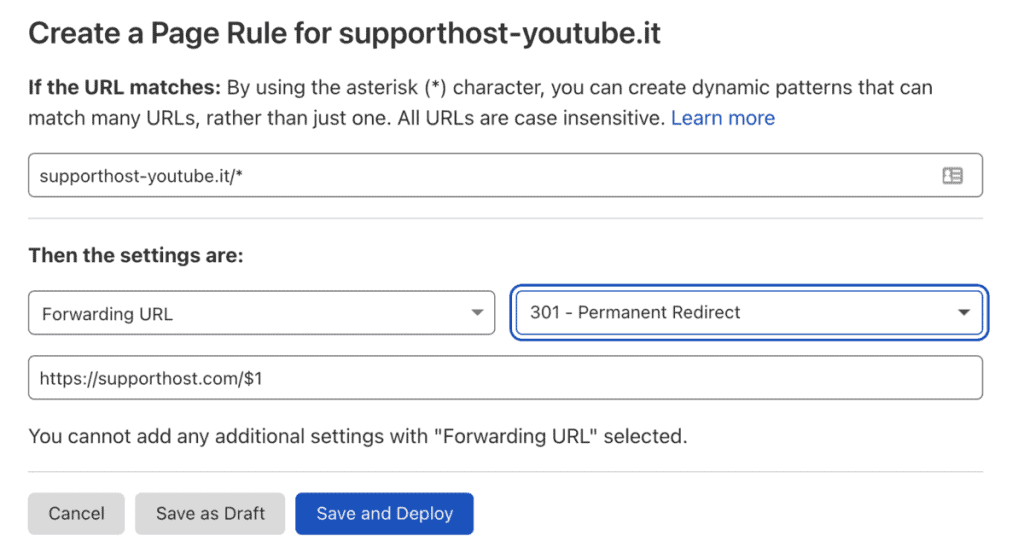
To be safe, it is recommended to set another rule by including “www.” before the domain name. This way, we are sure that when the domain is visited in all its versions, the 301 redirects will work as expected.
Once we have set all the rules, we should see them like this:

We can check if this works correctly by using a service like Redirect checker.
If we no longer need the redirect in the future, we can temporarily disable the rule by clicking on the green selector.
If you want to delete it, just click on the “X” icon on the right.
We can edit the rule by clicking on the edit icon, and we will return to a screen similar to the one we saw before while creating the rule.
If you have purchased domain and hosting
If you have purchased a domain and hosting, you can set up the redirect in two ways:
- Using the “redirects” tool inside cPanel;
- Editing the .htaccess file.
Set up the redirect via cPanel
If you have purchased a hosting plan, you can also set up a domain with redirects using cPanel. To do this, just log in the client area and then click on the “Services” tab.

Now select the hosting plan you want to change.

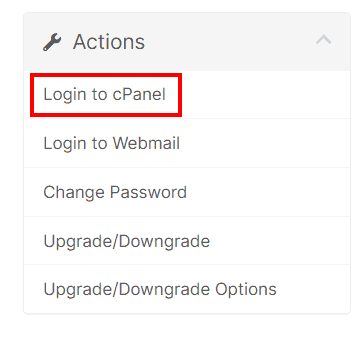
On the page that opens, click on the item “Login to cPanel” in the “Actions” menu.
Now, find and select the tool “Redirects” in the DOMAINS section.

From this page, it will be possible to enter all the data to be able to create a redirect. You have to fill in all the fields like this.
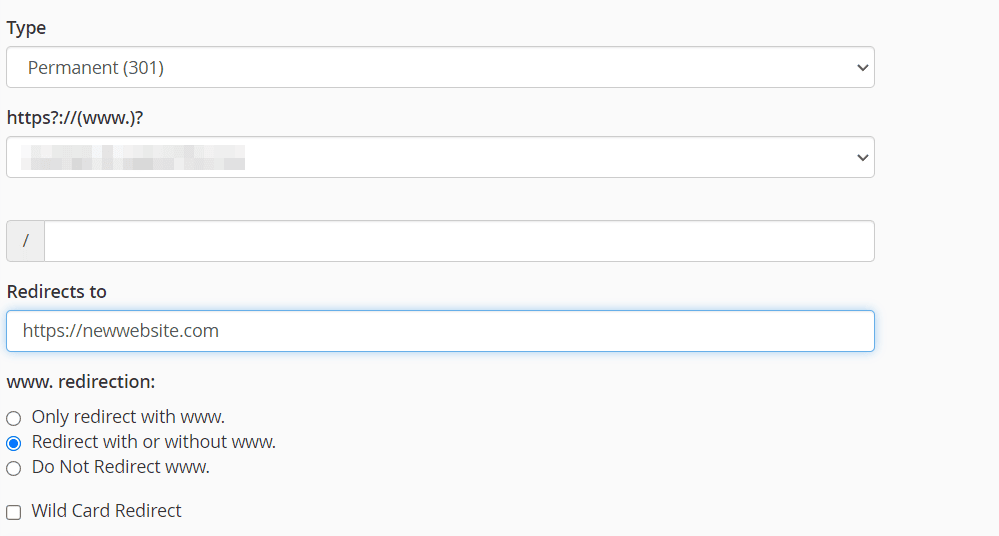
Once the changes have been made, we just have to save the changes by clicking on the “Add” button.

If we have entered all the data correctly, an informational message will come out.

We can see the changes made by typing our old URL in the address bar of the browser, or we can use a redirect checker like before.
Edit the .htaccess file
There is another way to create a domain redirect, and that is by editing the “.htaccess” file.
The .htaccess file is a text file and is present on every website. To modify it, you need to access cPanel and clieck on the “File Manager” icon.

The .htaccess file is usually located in the “public_html” folder, if you can’t see it, press the “Settings” button in the top bar.

In the preferences, check the box “Show hidden files (dotfiles)” and click on “Save”.

Now, returning to the “public_html” folder you should be able to see the file. Select it and click on “Edit“.

As soon as you try to edit this file, a warning message will appear, ignore it and press the “Edit” button.
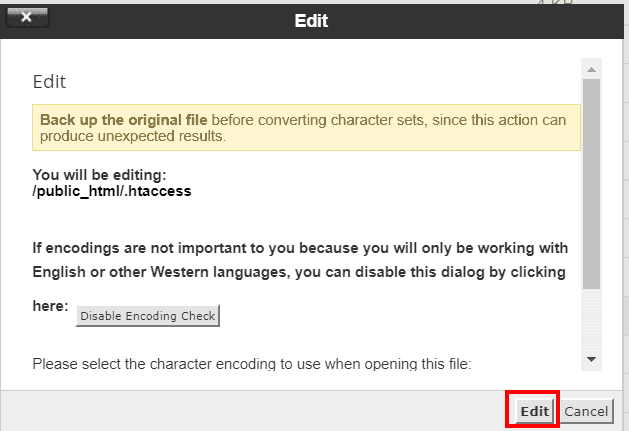
Here you can enter the new redirect rules. For example, if you want to redirect all urls form the old domain to a new one, just edit and add the following code:
RewriteEngine On
RewriteCond %{HTTP_HOST} !^www\.oldwebsite\.com$
RewriteRule (.*) http://www.newwebsite.com/$1 [R=301,L]
RewriteCond %{HTTP_HOST} !^oldwebsite\.eu$
RewriteRule (.*) http://www.newwebsite.com/$1 [R=301,L]
Once you have added all the necessary rules, press the “Save changes” button to complete the procedure and make the changes effective.


