The cPanel Backup Wizard function is a simplified procedure of the cPanel backup function. You can use it to create a full or partial backup of the website and restore it from a recent backup.
Let’s see how to create a full website backup, download partial file and database backups, and restore them individually.
Table of Contents
cPanel Backup Wizard: Create a full backup
After logging in the cPanel, scroll to the File section and click Backup Wizard.

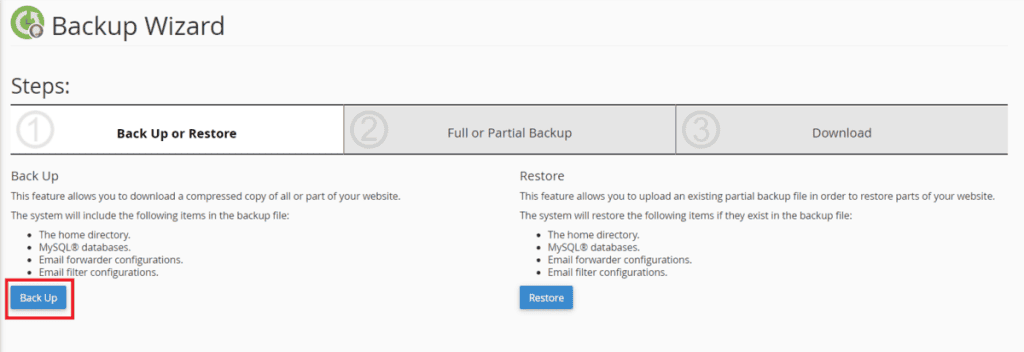
The first thing to do is to choose whether to backup or restore our website. In this case, we choose backup by clicking on the Backup button.
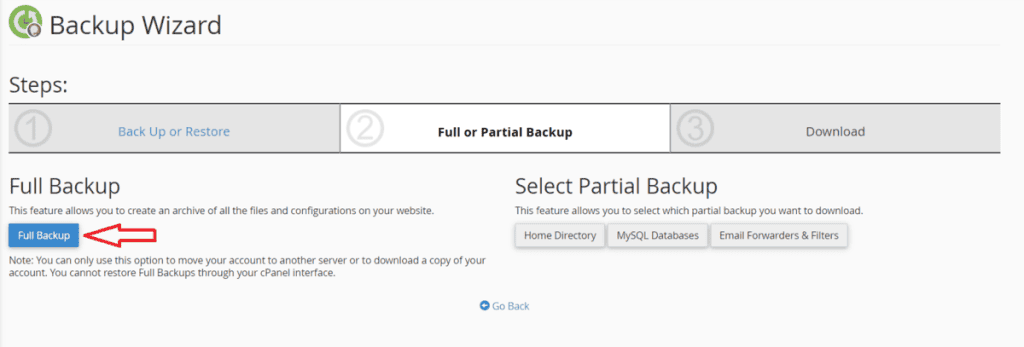
We then select the full backup option to proceed with the creation of a compressed archive that will contain all the files of the website.
In the next step, we will be able to choose where to store the backup. Usually, the best option is to leave the default option, which is Home Directory. This way, the data will be stored on the server in the root folder.
Alternatively, you can use a remote server to save the backup files (Remote FTP server). In this case, we will have to enter the data to access the server via FTP (username, password, and port) in the fields that appears when we select this option.
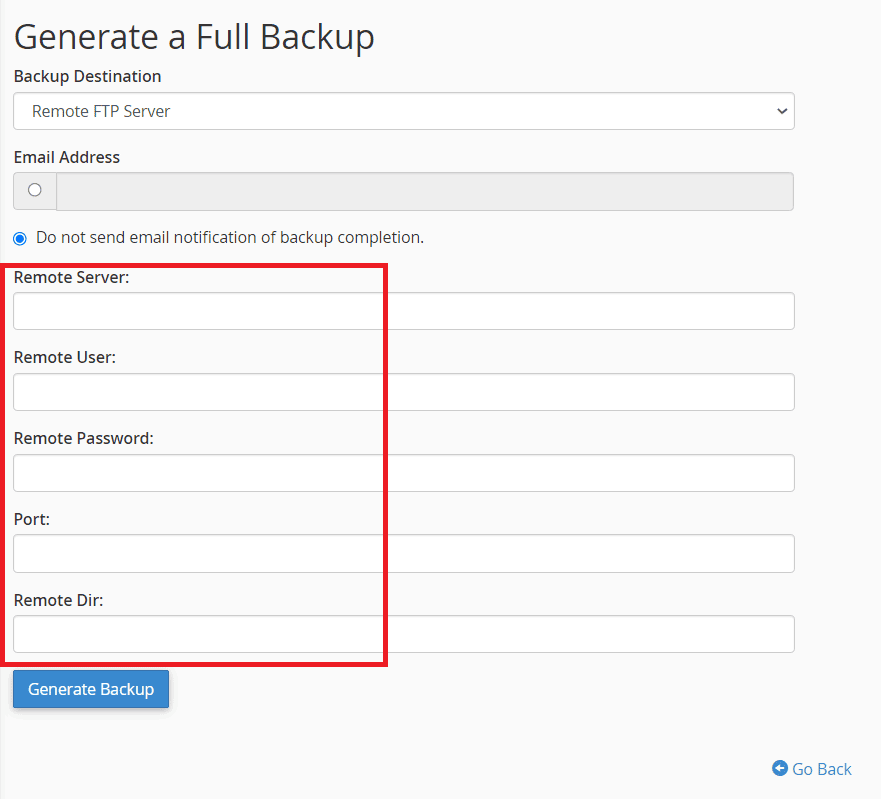
In the email address field, we can enter the email where to receive a notification once the backup creation is complete, and we can download the archive. If we do not want to be notified, we choose the option Do not send email notification of the backup completion.
When you are satisfied with the settings, click on Generate backup and wait for the archive to be created.
As cPanel tells us, the full website backup function itself creates an archive which cannot be used directly for recovery. If you want to restore a full backup of your account, you cannot proceed on your own, but you need to contact support.
In which cases, then, can a full backup be useful? For example, if you have to transfer the site because you have decided to change hosting or if you want to keep a copy of your files.
For the restore, you can use only partial backups instead, as we will see later in this tutorial.
Now that we’ve created our full backup, we can only download it, since we can’t use it to perform a restore. Let’s see how to do it.
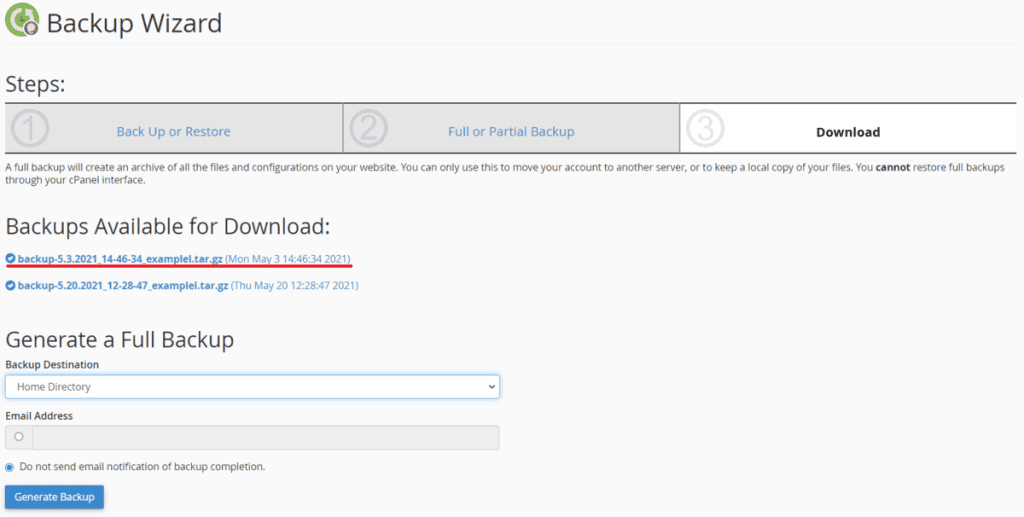
Let’s go back to the guided backup section and proceed to step 3 (Download) by clicking on Backup and then on Full Backup. In this screen, besides the possibility to generate another full backup, we will see the backup we just created in the Backup available for download list. To download it, simply click on the name of the backup and save it on your computer.
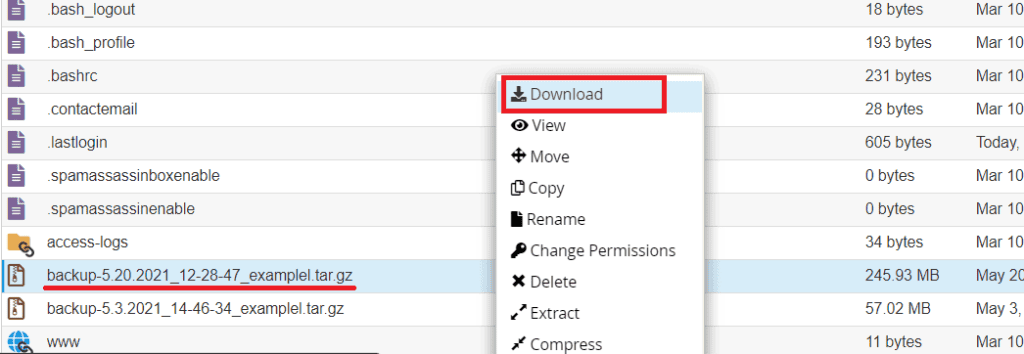
If we chose the home directory option, we will find our archive with the website backup on the home page. We can, therefore, also use the file manager to download it.
We just need to right-click on the backup that interests us and then click on Download as you see on this screen.
Create a partial backup
The cPanel backup wizard also allows us to create partial backups of files, databases, and email accounts. These backups can be used for recovery.
Click on the Backup Wizard from the File section of cPanel.

Let’s click on Backup.

Now let’s choose which partial backup to download from these three options:

Home directory: Download a backup of all website files.
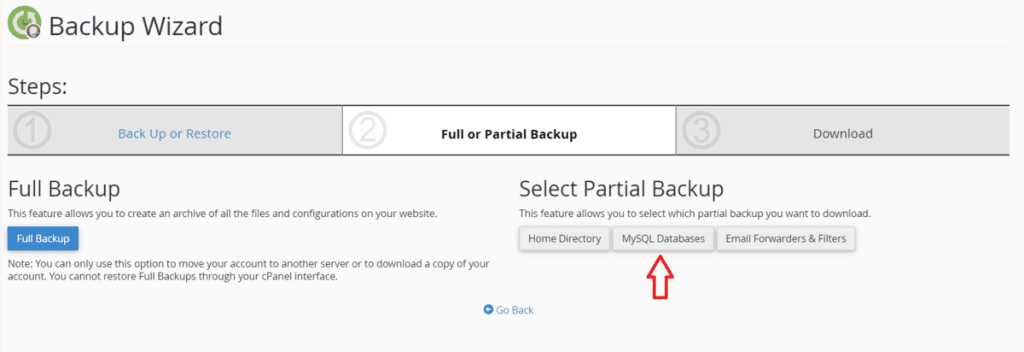
MySQL databases: to download a database backup.
Email Forwarders & Filters.
cPanel Backup Wizard: backup and restore files
To download a backup of your files, just click on the Home directory from the partial backup options.
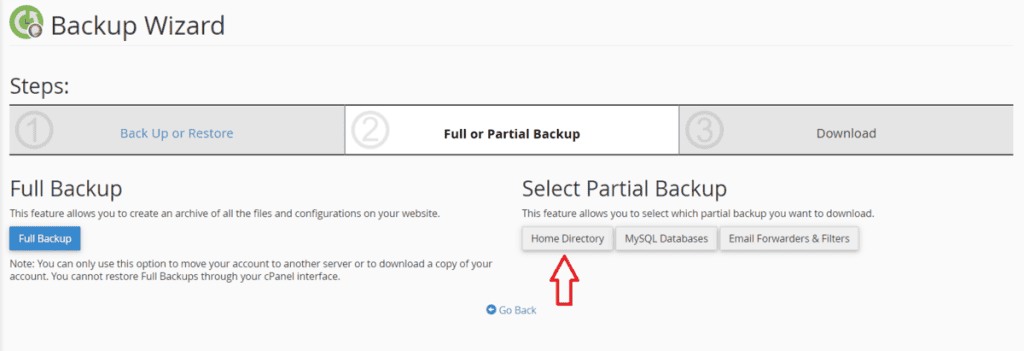
Then click on the Home directory button and save the file on our computer.

To restore a partial backup, go back to step 1 by clicking on Back Up or Restore as you can see here:

Click on Restore.
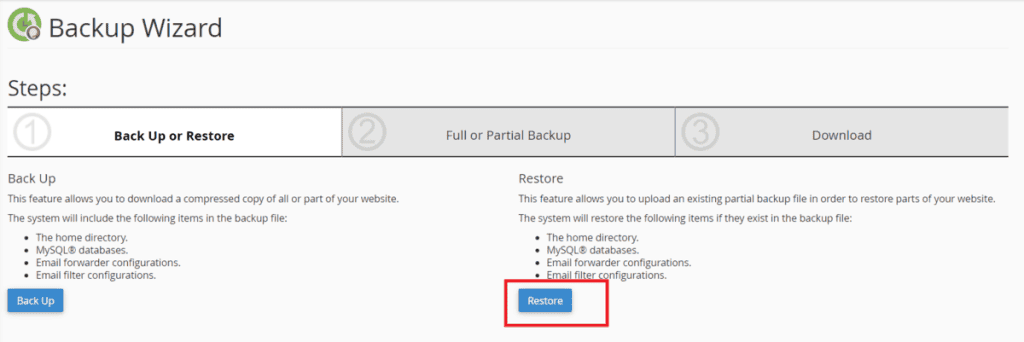
We choose which elements to restore, in our case Home directory to restore the backup of the website files.

We click on Choose File and select the archive from our computer. Then click on Upload to proceed with the restoration.
cPanel Backup Wizard: database backup and restore
To perform a database backup, we can use the cPanel backup wizard. Click on Back Up and then on MySQL Database from the partial backups section.
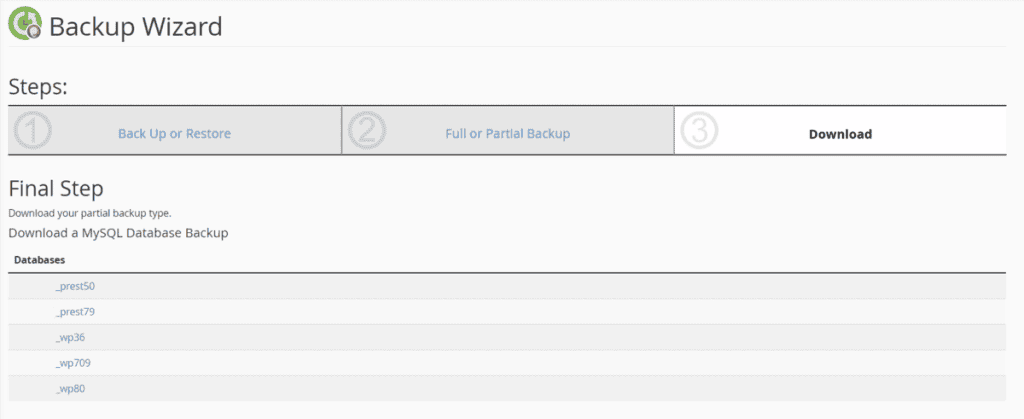
We choose one of the databases in the list and click on the database name to download the backup.
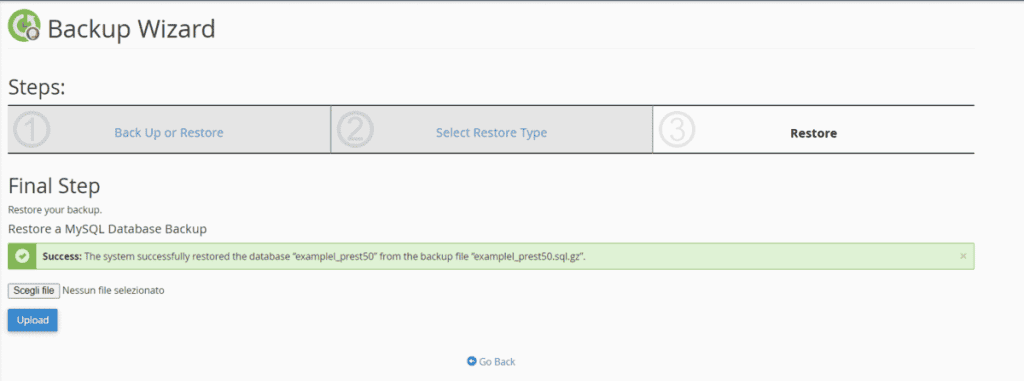
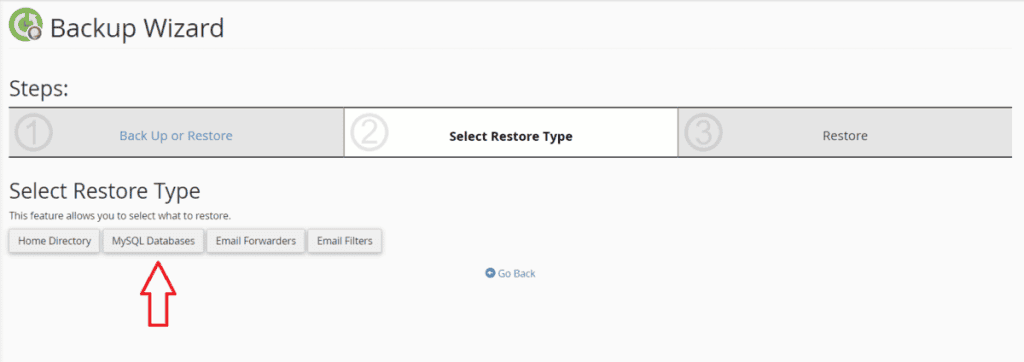
To restore a database backup, go back to step 1 Backup or Restore and click on Restore, then choose MySQL Database from the options.
Click on Choose file, select the file we previously downloaded to your computer and click on Upload.
