
In this WordPress tutorial we will see how to use the most commonly used CMS (currently 43% of websites are based on WordPress).
We’ll learn the basics of WordPress starting from the installation and settings, all the way to creating all the elements of the site. We’ll see how to create categories, tags, pages and articles, with an in-depth look at using the block editor.
One of the strong points of WordPress, is that you’re able to assign roles to each contributor, so we’ll devote an entire section to managing user roles.
In this WordPress tutorial: the complete guide, we will also go over how to install plugins and themes, how to create navigation menus and how to use widgets. In the final section of this guide, we’ll see how to use the tools built into the CMS, including the new features to make sure your site is in line with GDPR.
Table of Contents
Install WordPress
Let’s start with the basics and see how to install WordPress.

To use WordPress we must have the CMS (free) and we have several alternatives:
- Develop the site locally, in that case check the guide on how to install WordPress locally.
- Choose a WordPress hosting and have WordPress installed already.
- Install WordPress with an automatic installer like Softaculous.
- Use manual installation.
Don’t have a site yet and want to start getting your hands dirty right away? Try our free WordPress hosting for 14 days.
For more details on installing with any of the above mentioned methods, check our guide on how to install WordPress. In this section of our WordPress tutorial: the complete guide, let’s see how to install WordPress with Softaculous quick installation.
Install WordPress with Softaculous
With our plans shared hosting, semidedicated hosting, dedicated servers and VPS cloud hosting, you can use Softaculous to install over 400 different applications, including WordPress.
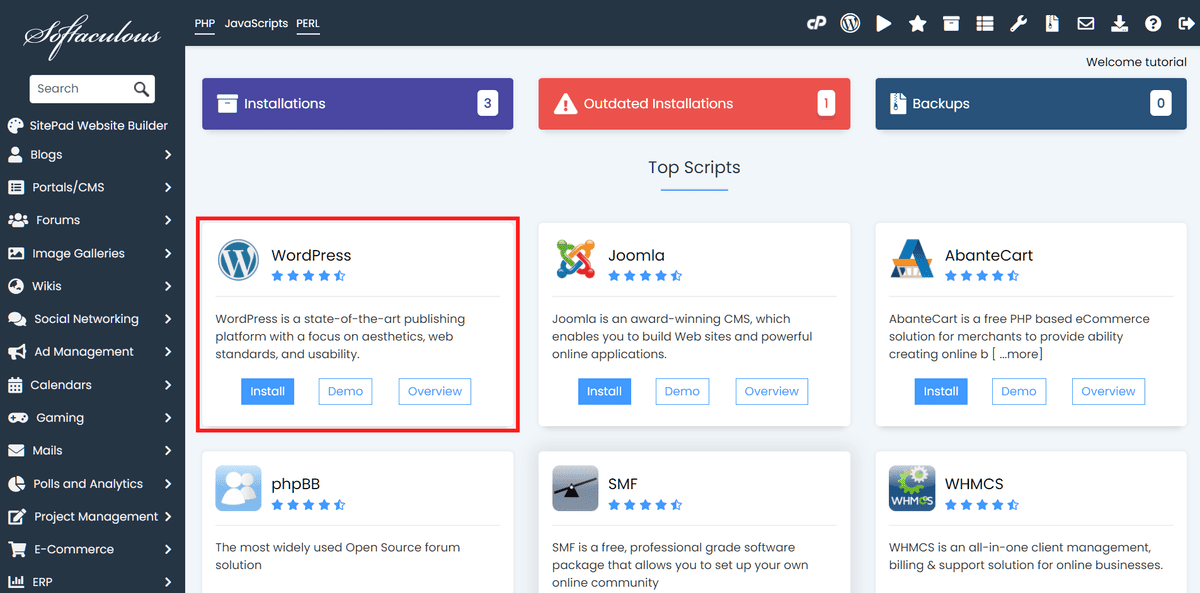
To install WordPress with Softaculous, we simply run the login to cPanel and click on Softaculous Apps Installer from the “Software” section.

On the Softaculous home page, we will see a number of main scripts, including WordPress. If you don’t see it, just use the search bar in the left side of the menu.
So we should just click on WordPress to see the details before installation.
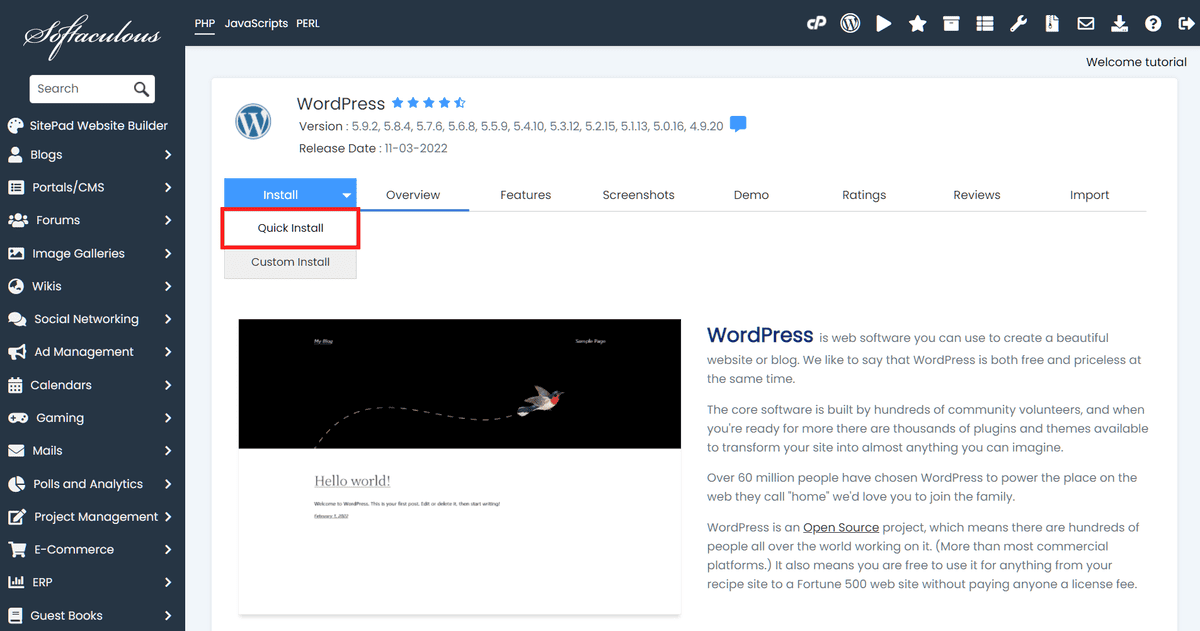
From the new window click on Install and then on Quick Install.
At this point we can review the settings, before starting the installation.
Software Settings
In this section, we need to choose the domain in which to install WordPress. If you have multiple domains associated with the account, you will see more options in the drop-down menu. We can also install WordPress in a subfolder and not in the root, by specifying the folder in the field.
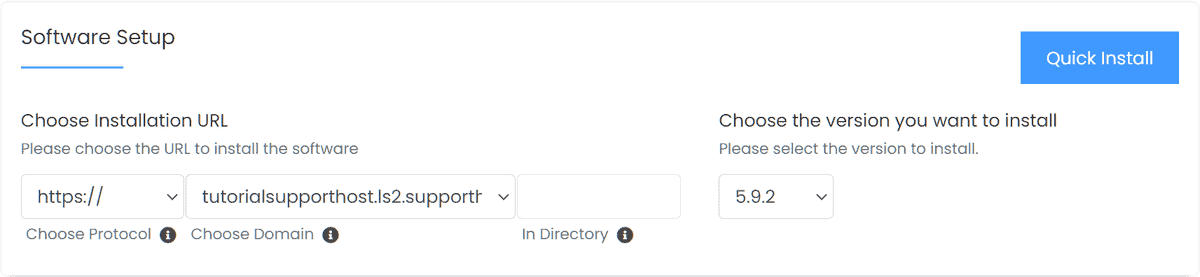
By default the latest available version will be set, which is currently version 5.8.2, but you can choose to install an earlier version by selecting it from the drop-down menu.
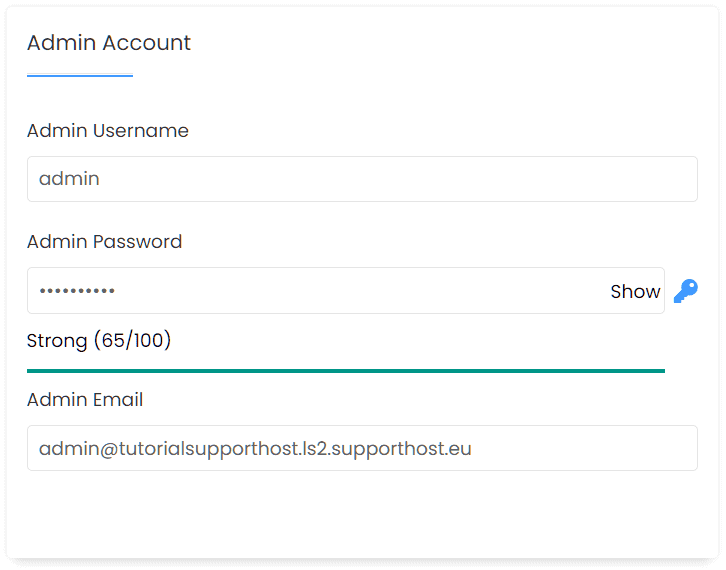
Account admin
In this section we are going to enter the administrator data, that is, username, password and email address.
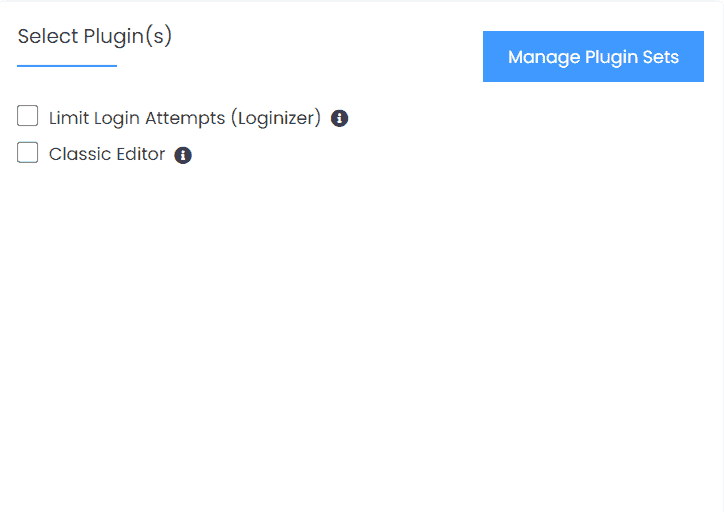
Select plugin(s)
From this section we can choose whether to install some plugins. We can also create a set of plugins for future installations by clicking on Manage Plugin Sets.
Select theme
The last thing to do before proceeding with the installation is to choose a theme for our site.

Install
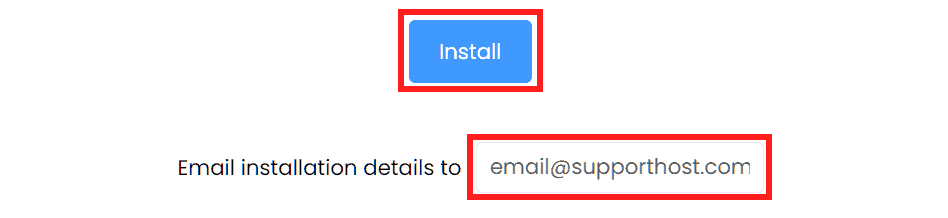
After verifying the settings of our installation, all we have to do is click on the Install button at the bottom of the page and wait for the procedure to complete.
In the field Send installation details to: we can enter the email address to receive a notification with the summary of the installation.
WordPress tutorial: dashboard
The WordPress dashboard is the main page you’ll see whenever you access the backend of your WordPress site. As you can see in this screenshot, the dashboard is organized into three elements:
1: the navigation menu
2: the toolbar
3: Dashboard.

Let’s see the functions of each element in detail.
The navigation menu on the left allows you to access the management of all site elements (articles, pages, media, etc.), settings and tools.
By clicking Shrink Menu you can shrink the side menu like this:

The toolbaris the top bar you will see on the dashboard and site pages (only if you are an authenticated user). In this bar we can find a series of buttons as you see shown in the screenshot below.

1) WordPress logo: allows you to get information about the installed WordPress version and contains links to the WordPress.org website, documentation and official support.
2) Site name: (in the example My Blog) when you are in the back-end it allows you to access the front-end of the site by opening the home page.
Instead, when you’re in the front-end it allows you to quickly access the dashboard, themes, widgets or menus.

3) comments: shows if there are new comments and redirects to the management page to moderate, reply or delete them.
4) New: allows you to quickly create a new article or page, add media, or create a new user.
5) Account Name: Allows you to see the user profile information such as nickname and username. From here you can access the profile settings (Edit Profile) or logout by clicking on Logout.

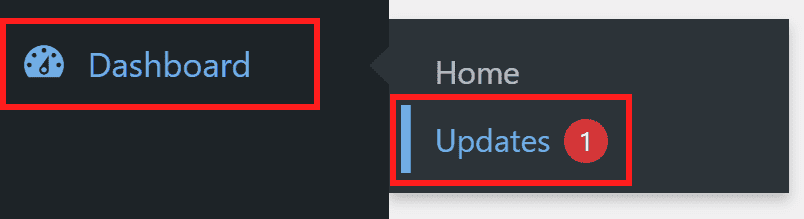
If there are any updates you will also see this symbol highlighted in the screenshot below.

By clicking on it, you will be able to open the management page for core and plugin updates. Another way to access the updates is to hover over the Dashboard from the navigation menu and click on Updates.
Remember that plugins can add other elements to the toolbar, as you can see in this example, in the case of Polylang, a plugin to create a WordPress multilingual website.

Let’s move on to the Dashboard itself, which is the central portion of the page. The dashboard, or Dashboard in the English version, features quick access functions organized into widgets.
Also, at the top there’s a Help function.

By clicking on it, you can access basic information about the navigation menu and widget re-organization, which we’ll take a look at in a moment. Also, on the right, you’ll find links to the official WordPress documentation and Support section.

Dashboard Widget
The default setting includes 6 widgets: Hello!, At a Glance, Activities, Quick Draft, WordPress Events & News and Site Health Status.
Hello! (Welcome)
It allows you to access the main functions you might need if you are creating a new site (edit home page, add more pages, add an article, view the site, and so on).
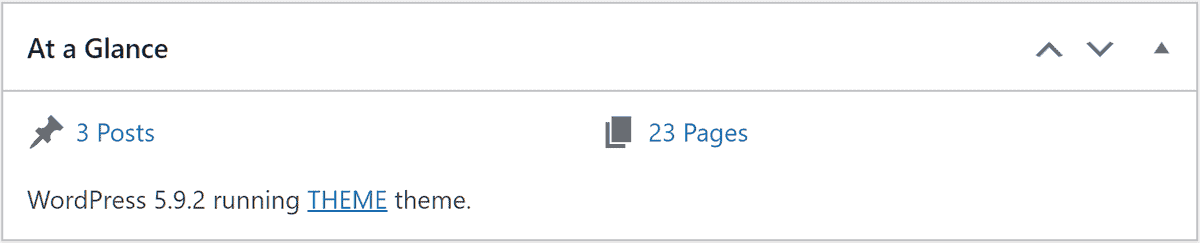
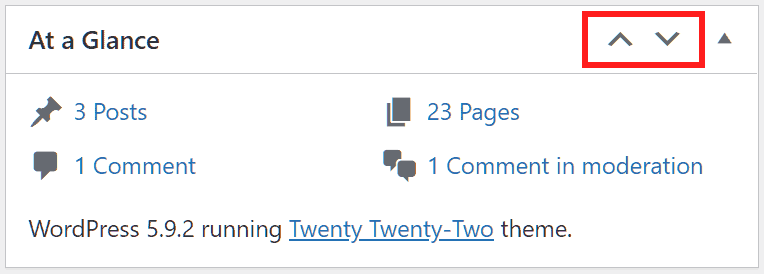
At a Glance
This section lists the number of posts, pages and comments on your site. By clicking on one of the entries you will be redirected to the various sections.
As you can see from the screenshot below, it also shows the WordPress version, the theme in use and, if active, the “Discouraged Search Engines” setting. We’ll talk more about this feature and see how to use it later.
Activity

This section shows you the most recent activity on the site, i.e. the latest articles (Recently Published), scheduled articles (Publishing Soon) and the latest comments (Recent Comments).
From the widget you can also manage comments already posted by moderating them, editing them, trashing them, marking them as spam or replying to them.

By default, new comments will be automatically put in the moderation queue and will be shown with a Pending notice and a red bar on the side, as seen in this screenshot. In this case you can choose whether to approve them, in addition to the actions we saw earlier.

If you have new comments they will also be shown in the top bar, as you see in this example.

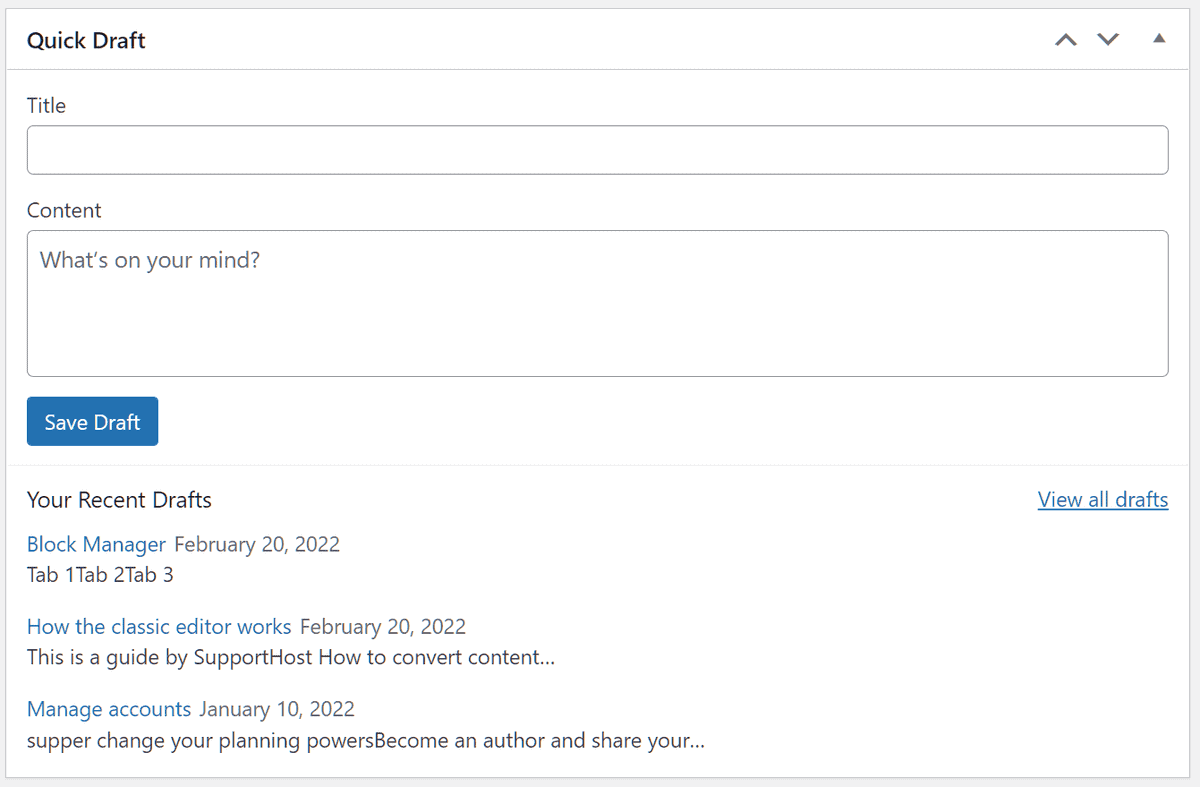
QuickDraft
This widget allows you to quickly create a new draft of an article, you just need to enter the title and content and then click save draft. In this section, you will also see a list of recent drafts with title, date and the beginning of the post content.
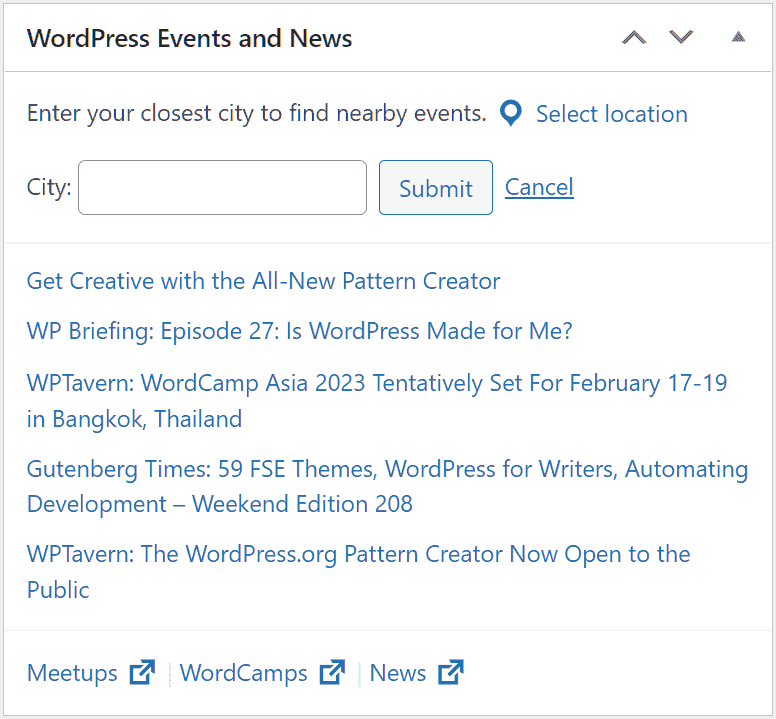
WordPress Events and News
The widget allows you to see a list of official events and news that come directly from the WordPress blog.
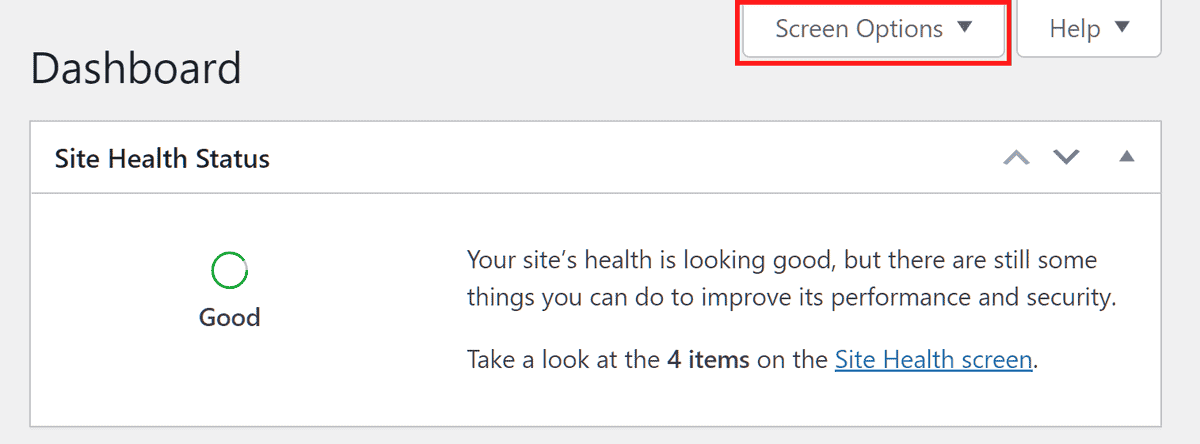
Site Health Status
This widget informs us about possible problems that should be solved to improve the security or performance of the site.

Customizing dashboard widgets
From the WordPress dashboard, by clicking on Screen Options we can choose which widgets to show.
All we have to do is uncheck the widgets we want to hide and they will be automatically removed from our dashboard. Keep in mind that at any time you can restore them by going to tick the individual widgets again.
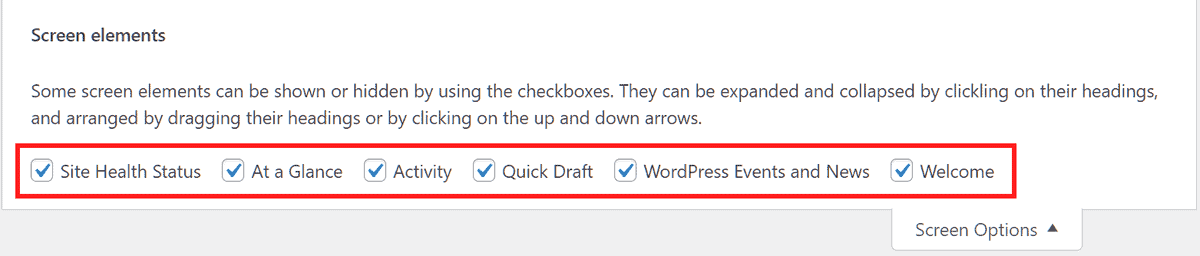
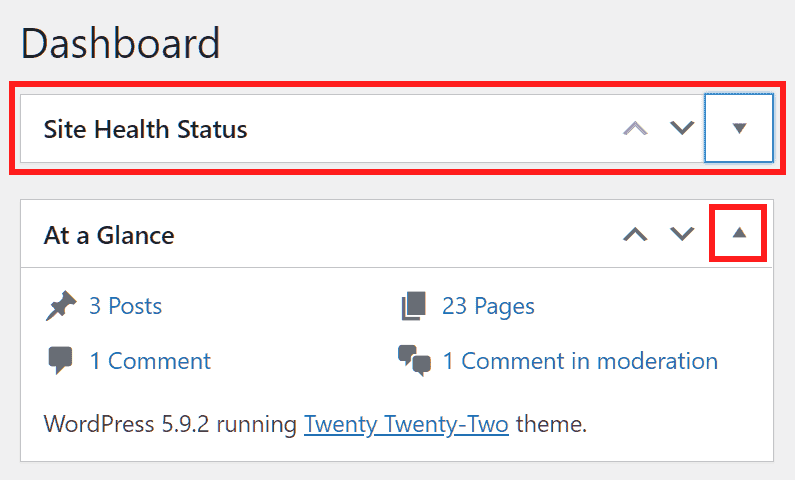
Widgets can also be rearranged differently, one method is to drag and drop items to the desired location.
First place the mouse over the title bar of the widget you want to move and you’ll see the cursor change shape, then drag the item as you see here.

You can also move elements around using the directional arrows.
To minimize and expand widgets you just need to click on the right arrow in the widget title bar or even directly anywhere else in the bar.
WordPress tutorial: settings
In this section of our WordPress tutorial, the complete guide, we’ll look at site settings, starting with general ones like the site title and motto to settings on comments, media and privacy.
From the settings item in the navigation menu we can access these sections: General, Writing, Reading, Discussion, Media, Permalink and Privacy. Let’s take a look at them one by one.
Settings -> General
The general settings of WordPress allow us to change some aspects of the site such as title, language and time. Let’s look specifically at all the options we have available.

Title of the site: in this field we can insert the title of the site, that is the one that will be displayed in the title bar in the browser.
Motto: here you can insert a short description of your site, depending on the theme it could appear just below the site title, as you see in this example.

WordPress address (URL): this is the URL of the WordPress installation, i.e. the address where the core files are located.
Site address (URL): this is the URL of the site, it can be the same or different from the WordPress address. It’s basically the address that people will have to type in to reach your site.
Administration email address: in this field you will see the email address you entered during installation.
Registration: if you check this option, you will allow anyone to register to your site. If you allow registration, when a user visits the login page of your WordPress site, they will see the Register option and be able to proceed with the registration.

If the Enrollment option is turned off, the login page will look like this.

Keep in mind that even if Membership is disabled you can add new users to the site as an administrator. Let’s see how to do that in the following sections, when we deal with user creation and management.
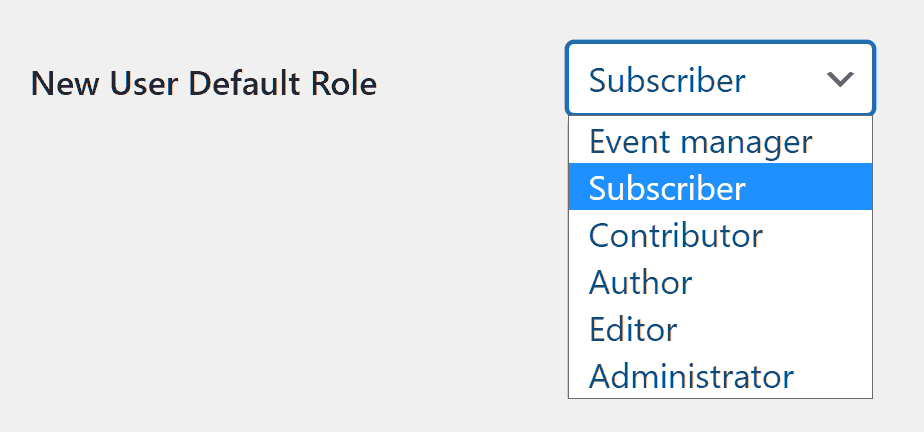
Default new user role: from the drop-down menu next to this option you can choose what role new registered users will have. We’ll come back to user roles in later sections of this WordPress tutorial: the complete guide.
Site language: allows you to change the language of the site.
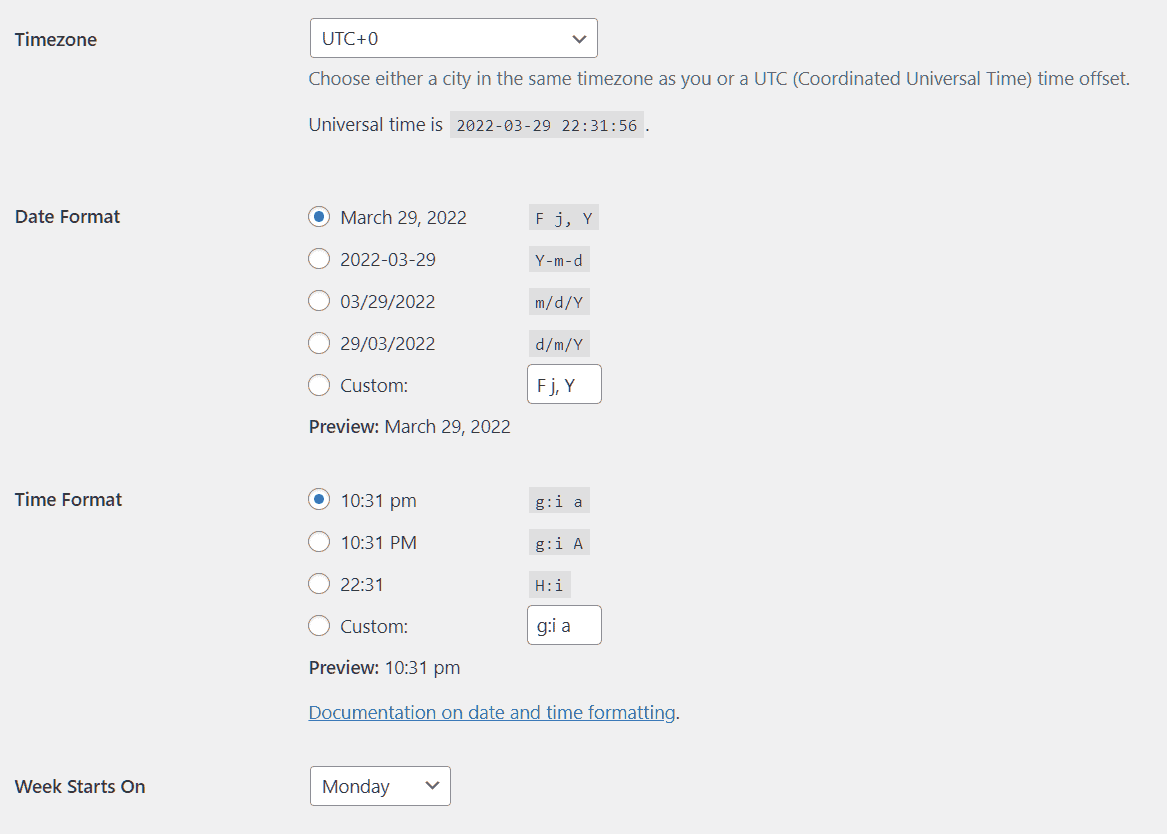
Time zone: you can set the time zone you prefer.
Date format: you can choose which date format to use, it will be the way the dates will appear on the site, for example the date of when the articles were published.
Time format: as with the date format, you can choose the time format.
The week starts on: you can choose the day the week starts, this setting will change the WordPress calendar. For example if we set “Sunday”, our calendar will look like this.

If you change the settings remember to click on the Save Changes button at the bottom of the page to make them effective.
Settings -> Writing
The writing settings on WordPress allow us to define default options for articles.

Let’s take a look at the different options one by one, but keep in mind that if you’re creating your first site, the only option you might need in these early stages is the default category for articles.
Note that in the beginning you may also see the “Formatting” entry that allows you to convert emoticons and fix code errors automatically.
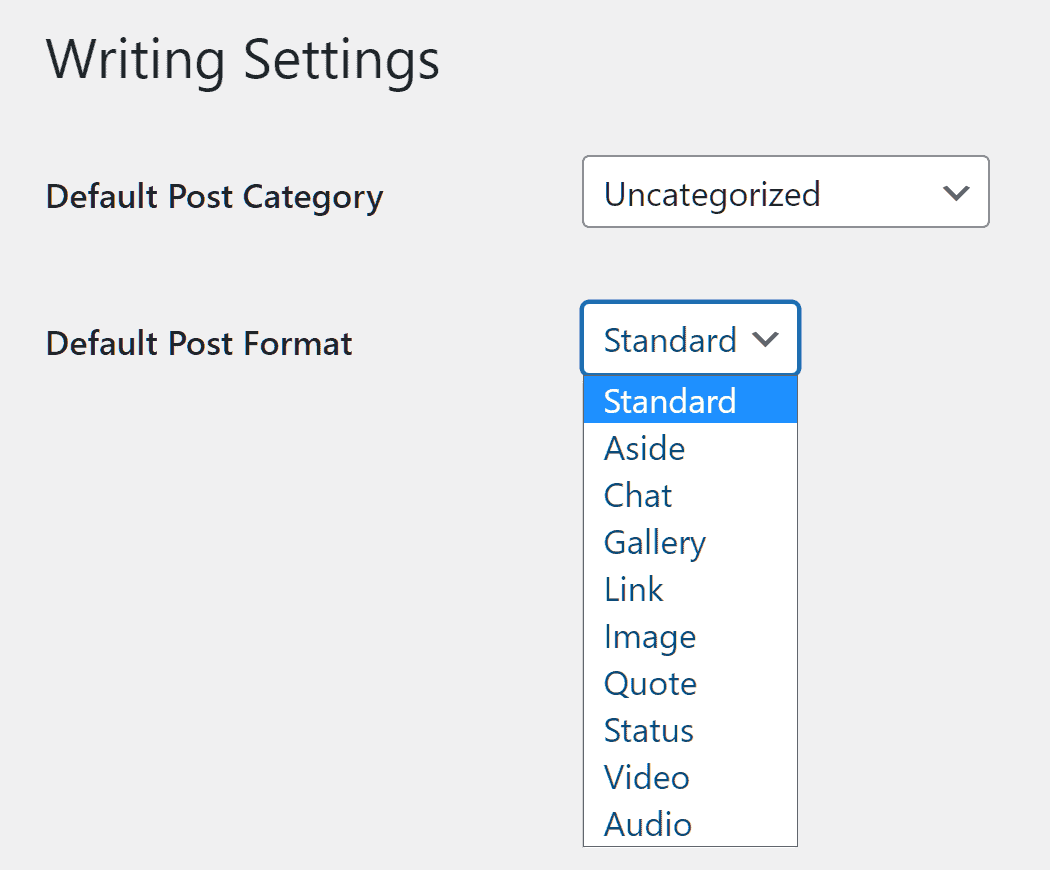
Default article category: from here you can set the default category that will be assigned to articles if you don’t set any other category. If you haven’t created any categories yet, the posts you create will be assigned to the “Uncategorized” category.
Default article format: this option allows you to choose the default article format. The options available vary depending on the theme you’re using, for example with the default Twenty-Twenty-One theme you’ll have these options.
Publish articles via email: from this section you can set up an email address to publish articles via email. To do that you’ll have to create an email account using POP3 protocol. For more details you can refer to the WordPress documentation.
Update services: in this field you can insert other site update services besides the default one. In Codex you can find more information and the list of other services.
Also in this case, after making changes remember to click on Save Changes to make them effective.
Settings -> Reading
The WordPress reading settings allow us to choose which page to show as the home page and the number of articles that will be shown on the main page.

Your homepage show: allows you to choose whether to show on the main page of the site your latest articles or a static page. If you choose the second option, you will have to select the page to be used as the homepage and the page that contains the articles instead.
Blog pages display at maximum: choose the maximum number of most recent articles to show. The default value is 10.
Feeds display the most recent: sets the number of articles in the feed.
For each article in the feed, include: choose whether to display only the summary or all the text of the articles in the feed.
Search engine visibility: this is one of the most important options. If your site is still under construction and you don’t want it to be found by your audience, you can enable this option to ask search engines not to index your site. Remember that when your site is ready, you will have to disable this option. Inany case, as we said at the beginning, you will notice that the option is active from the At a Glance widget on the dashboard.
Settings -> Discussion
In this section of our WordPress tutorial we will see what settings WordPress provides us with for comments.

Default publication settings
In this section you will find the default settings for new items and you can:
- send a notification to other blogs (if they were linked in the article)
- allow links from other blogs (pingback and trackback)
- enable comments for new articles.
These are general settings for new articles, but you can change them on each individual article, as we’ll see in the dedicated section later on in this WordPress tutorial.
Other comment settings
From here you can choose whether to make it mandatory to enter the name and email address for users who want to leave a comment.
In addition, you can also choose to allow comments only to registered and logged-in users of the site.
You can set a time frame within which to leave comments open, for example closing comments after 14 days from the date of posting.
You can also manage the cookie option, allow nested responses (by choosing the depth level), and choose whether to split comments by page. Additionally, you can choose whether to display comments from the least recent or the most recent.
In the next section, Send me an email whenever, you can manage notifications, so you can receive an email when a new comment is added or when a comment needs to be moderated.
You can choose whether all comments must be approved manually or whether to allow publication in case the same author has had a comment approved before.

Comment Moderation: you can choose whether to put comments that contain a certain number of links or series of words in the moderation queue.
Words not allowed in comments: in this case the system will move comments containing the words listed in this field to the trash.
Avatar: from this section you can choose whether to show avatars for users who create comments. You can also set a default avatar among the available options.
After making changes, click the Save Changes button to apply them.
Settings -> Media
From this section you can manage your media settings. Keep in mind that for each image you upload to your WordPress site, several copies will be created in different sizes.

In this section you can see the default size of the various files that will be created:
- Thumbnail Size: 150 px x 150 px
- Average size: 300 px x 300 px
- Large size: 1024 px x 1024 px.
The File Upload section lets you decide where to save the media.
If you check the Organize uploads into month and year based folders option, subfolders will be created in the uploads folder to organize media by date.
Otherwise all files will be uploaded to the uploads folder. (Path: wp-content/uploads)
Settings -> Permalink
WordPress’ permalink settings allow us to decide the structure of the site’s URLs among these options:

Simple: the URLs will look like this http://example.it/?p=123
Date and name: the URLs will be structured to show the date (year/month/day) and the name of the article, as in this example: http://example.it/2021/11/20/example-article/
Month and name: identical to the previous one, but in this case only the year and month will be shown, like this: http://example.it/2021/11/example-article/
Numerical: instead of the article name, a number will be shown, like this: http://site1.example.ls.supporthost.eu/archives/123
Article name: this option allows you to show only the name of the article in the URL, like this: http://example.it/example-article/
This is the best option (from a SEO point of view) because it is short and understandable.
Custom structure: you can choose to use a custom structure using the default tags you see below (year, article ID, author, etc).
Warning: keep in mind that it is not advisable to change permalinks on an existing site. The best option is to carefully choose the settings to use when you are creating the site for the first time.
In fact, after the changes, the links you had shared will no longer work and will lead to a 404 error page. If you were to change the structure later, you will need to make sure that the old links are redirected to the new ones.
Permalink: additional settings (optional)
From this section you can choose to use customize labels for categories and tags.
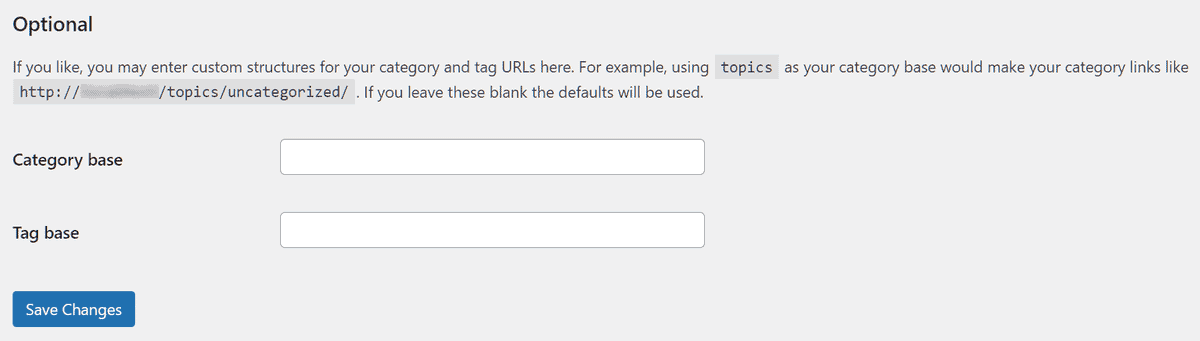
If you don’t set them, the default options will be used, for example the URL of the “General” category page will be:
https://example.it/category/general/
But if you set a different value in the category base, for example “topics”, the URL will become:
https://example.it/topics/general/
Settings -> Privacy
WordPress privacy settings allow you to create the privacy page.

By clicking on Create you will be redirected to the creation of a new page and you can go and edit the template that is automatically generated.
After creating the page, be sure to select it from the drop-down menu next to Change Privacy Policy Page and click on Use This Page.
WordPress tutorial: categories
In this section of our WordPress tutorial we will see how to manage categories. First, let’s start with the definition: a category is nothing but a section of the site that groups a series of articles.
Categories, then, allow you to organize articles into groups based on topics. For example, in our blog we have the WordPress category to group all the articles focused on this CMS.
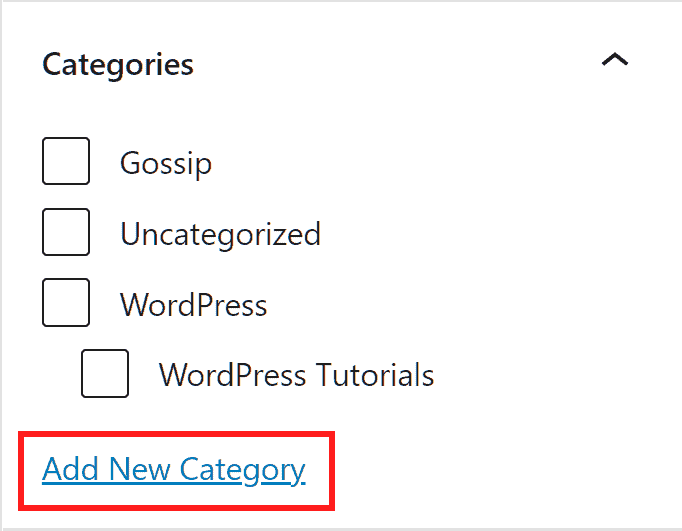
Create a category
To create a new category on WordPress let’s click on Articles → Categories.

In this section, under the heading Add a new category, you will see the fields to fill in.

Name: enter the name of the category, remember that it must be unique, there cannot be two categories with the same name.
Slug: this will be displayed in the category URL, typically you can use the category name.
Parent category: if you want to create a subcategory, you can choose the parent category from this menu. For example, you could create a “WordPress Tutorials” category as a subcategory of “WordPress”.
After you have filled in all the fields, to create a new category just click on Add a new category.
The new category will appear in the box next to it where you will see the name, description, and slug, as well as a Count column where you will see the number of items assigned to each category.

You can create a new category directly while you are creating an article. From the box on the right Categories, in addition to being able to choose from the available categories, you can add a new one by clicking Add a new category.
You will then need to enter the category name and establish the hierarchy. In this example we are going to create the “Plugins” category as a subcategory of “WordPress”.
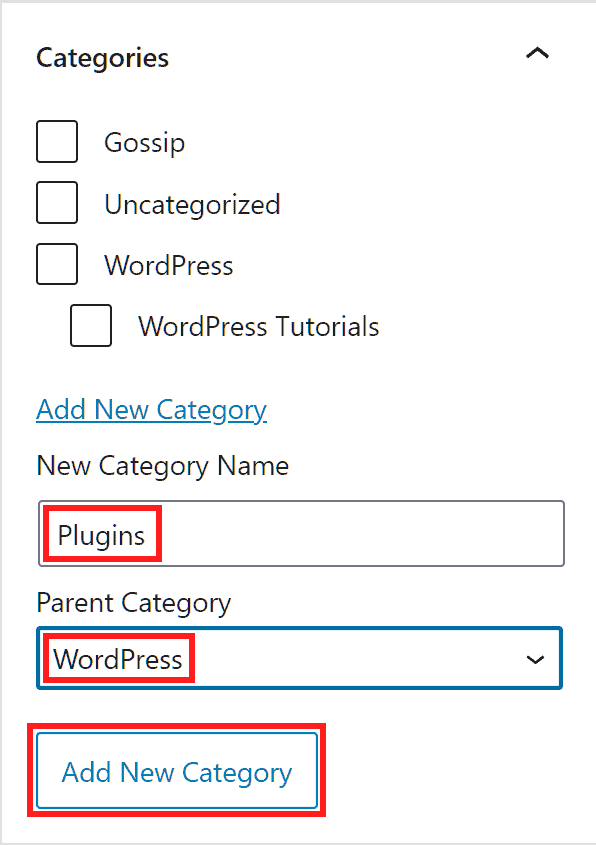
Keep in mind that when you create a category this way, the slug will be generated automatically. You can always edit the category later, as we see in the next section.
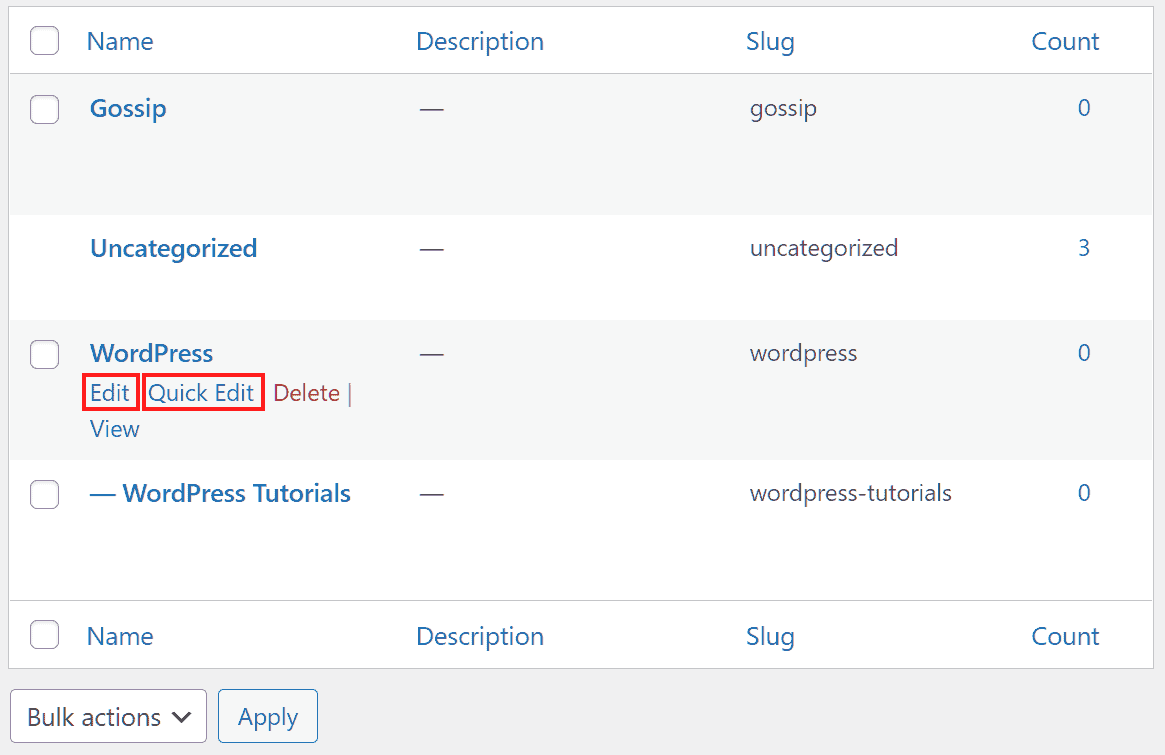
Edit a category
To edit a category on WordPress we just need to go to Articles → Categories, locate the category we are interested in and click on Edit or Quick Edit.
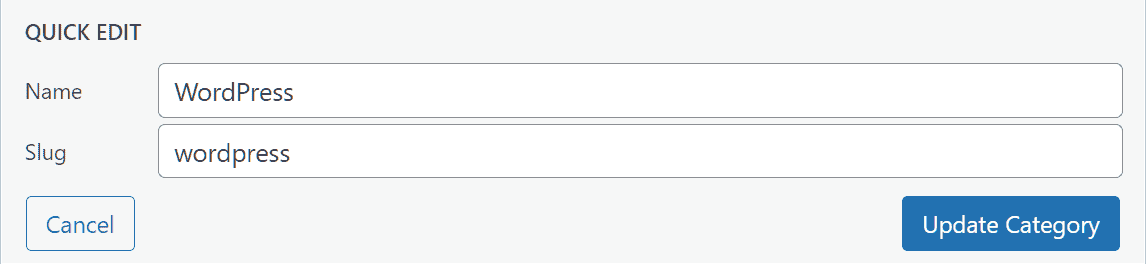
The quick edit allows us to change the category name or slug. Then click on Update Category to confirm the changes or Cancel to undo them.
Clicking on Edit, on the other hand, allows you to change the description and hierarchy as well, giving the category a parent category.

Delete a category
From the section Articles → Categories we can delete a category by clicking on Delete. We will then be asked for confirmation to proceed. Remember that deleting a category is permanent.

When you delete a category, articles assigned to that category will be automatically assigned to the default category. You cannot delete the default category. If you want to delete it, you must first set a new default category (Settings → Writing).
WordPress tutorial: tags
After seeing how to create a category, let’s continue with our WordPress tutorial and see how to manage tags. WordPress tags, along with categories, are part of the taxonomy or elements that help us organize the content of our site.
Keep in mind that categories are necessary, you must create at least one category for your articles or use the default category. Tags, on the other hand, are optional, you can then choose whether or not to use them on your site.
Unlike categories, tags are not hierarchical. This means that you can create categories and subcategories, as we saw in the previous section of this WordPress tutorial of ours, but you can’t do the same with tags.
Each tag, therefore, is unique and separate from the others and allows you to group articles by themes or points that are touched upon. The usefulness of tags comes into play especially when you want to group articles that belong to different categories.
For example in a blog where you have “Movies” and “TV Series” categories, it might be useful to create a tag for each genre (Action, Drama, Fantasy, Comedy and so on). By doing so, the “Action” tag would group together articles that belong to both the “Movies” and “TV Series” categories.
Create a tag
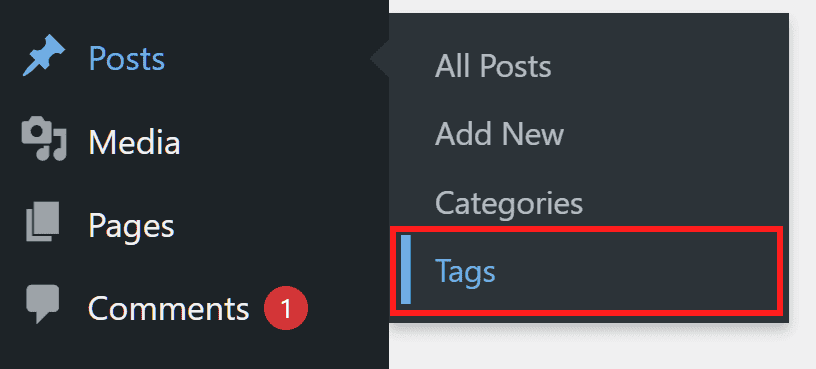
Click on Articles → Tags to access the WordPress tag management.
From this section you can create a new tag and see the list of tags already created. To create a new tag just fill in the fields under “Add new tag“:

Name: enter the name of the tag, it will be the name of the label.
Slug: enter here the text that will appear in the URL of the tag (it can contain letters, numbers and hyphens, but not spaces or capital letters).
Description: you can add a short description, it will be shown according to the theme.
After you’ve filled in the fields, click Add New Tag to create the tag.
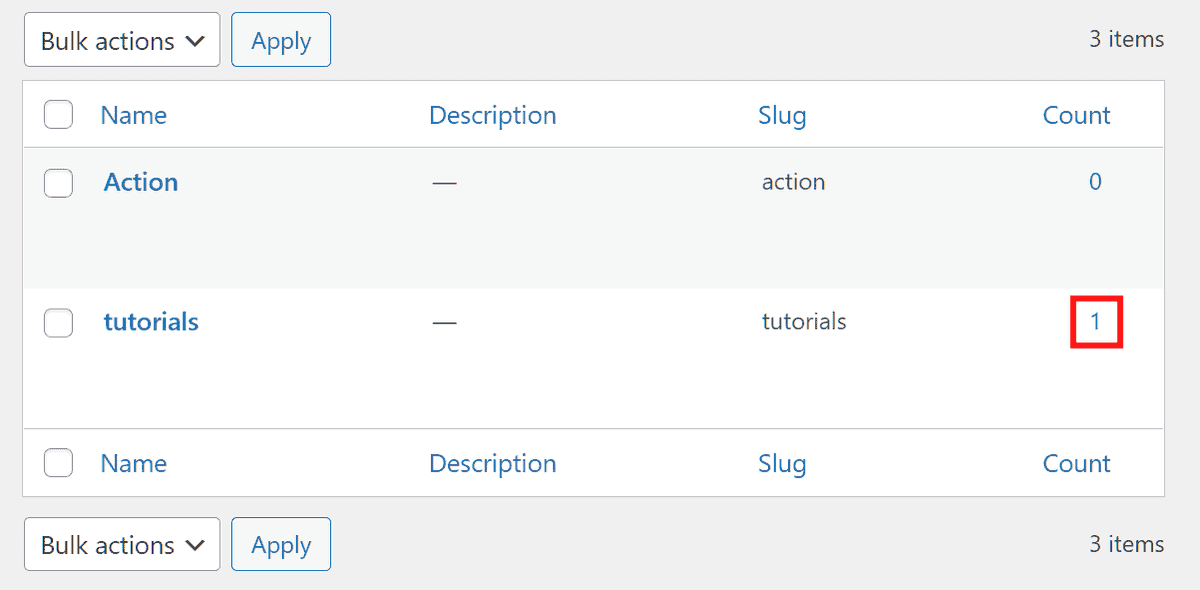
As soon as you have created a new tag you will see it appear in the box next to it. In this section you will also see a Count column that tells you the number of articles in which the tag appears. By clicking on the number you can see a list of all the articles with that specific tag.
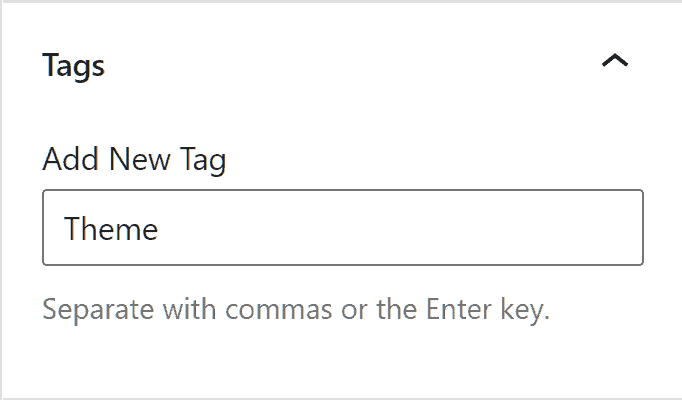
Another method to add a new tag is to do it directly during the creation of an article. In the right side menu you’ll see the section Tags and you’ll just have to insert one or more tags, separating them with commas and press enter.
If the tag is already present, it will appear as you see in this image, otherwise you can create a new one.
If you create a new tag directly from the article the slug will be created automatically. In any case you can always modify the created tags, let’s see how.
Edit a tag
From the section Articles → Tags we can edit the tags we have created.
To edit a single tag we simply hover the mouse over the tag name and we’ll see a list of actions appear, including Edit and Quick Edit.

Quick edit allows us to change the name and slug of the tag. After making the changes we simply click on Update Tag.

Clicking on Edit, on the other hand, we can also edit the description of the tag.

After making the changes click on Update. If, however, you do not want to confirm the changes go back to the previous page. Keep in mind that by clicking on Delete, you will delete the tag.
Delete a tag
The section Articles → Tags also allows us to delete tags. To do this, just move the cursor to the tag you want to delete and click on Delete.

You will be asked for confirmation to proceed with the deletion, click OK to proceed.
WordPress tutorial: articles
In this section of our WordPress tutorial; the complete guide, we are going to see how to create and manage WordPress articles.
We’ll see step by step how to create and publish an article, if, instead, you want to delve into content creation, keyword research and SEO optimization, check out the guide on how to write an article for a blog.
As I will explain in detail when we talk about the user roles, according to the role a user can create and edit his own content, publish it or edit other users’ content as well.
As an administrator you have all the permission, so you can edit your own content and content created by other users.
Create an article
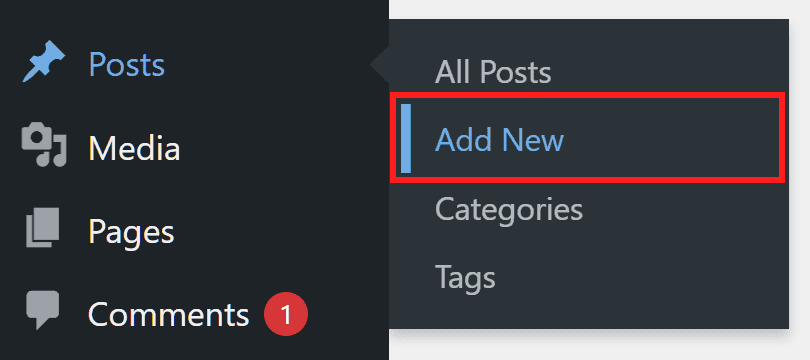
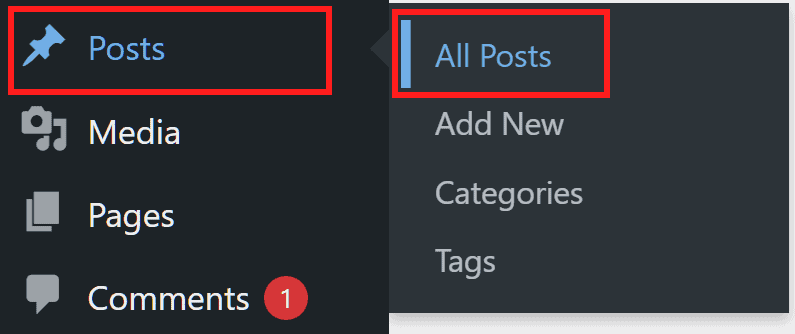
To create a new article, click on Articles → Add New.
WordPress allows us to create our articles with Gutenberg, the block editor.
This editor consists of three main elements: a top bar (1), a side bar (3) and a central block (2) which corresponds to the content of our article.

Keep in mind that the editor’s interface and the fonts used vary depending on the theme you’re using.
Let’s start with creating the content of our article by seeing how blocks work.
What are blocks
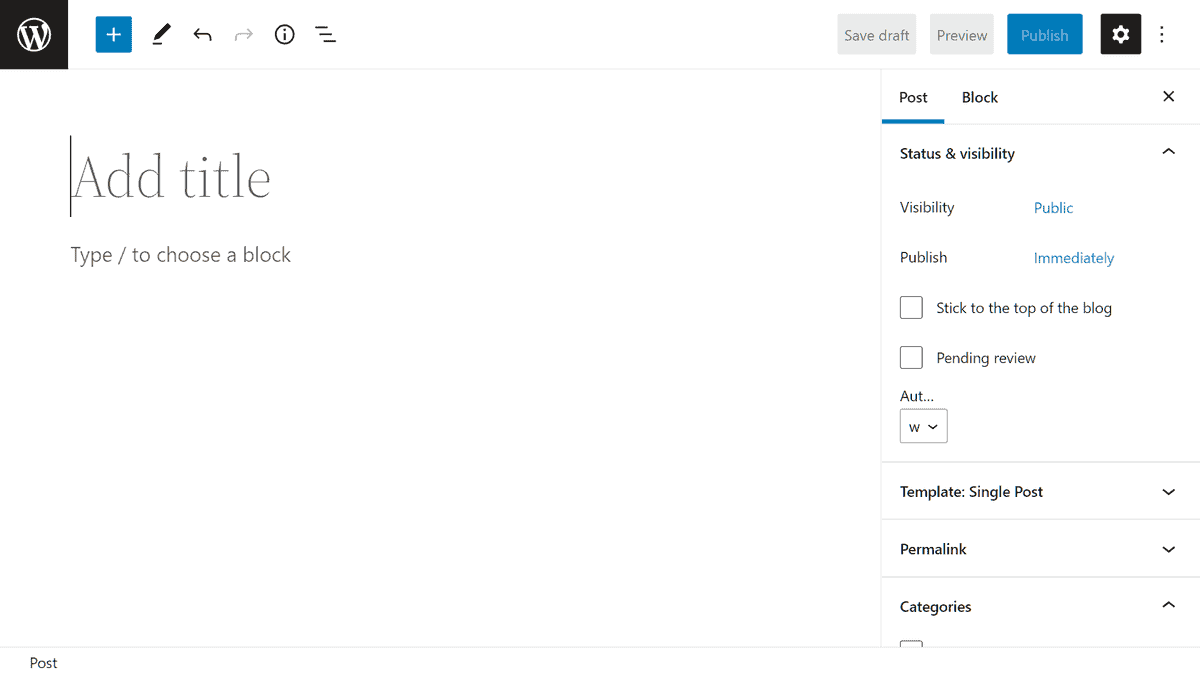
The first thing to do is to add the Title.
Then we can start creating the content of the article. To do this we just have to move the cursor to the Type / section to choose a block and start writing.
To insert a new type of block just click on the “+” button. You will be shown predefined blocks: paragraph, image, title, list and so on.
In this WordPress tutorial we will see how blocks work in general, for details on all types of blocks, check out the guide at Gutenberg.

You can use the search bar to find other blocks like quote, embed, shortcode and many more. To see all the available blocks click on Browse All.
You can also insert a new block directly from the keyboard. Just type “/” followed by the name of the block.
Each block can be moved, transformed into a different block or modified. Let’s see how to do this by examining the example paragraph.
The paragraph block
The default block is a paragraph and you can recognize it by the symbol shown in this screenshot:
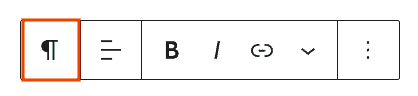
As you can see, in the top bar of a paragraph block there are several buttons, let’s see what they are for.
Starting from the left, the first function allows us to change the type of block. We can turn a paragraph into a title, list, quote and so on.
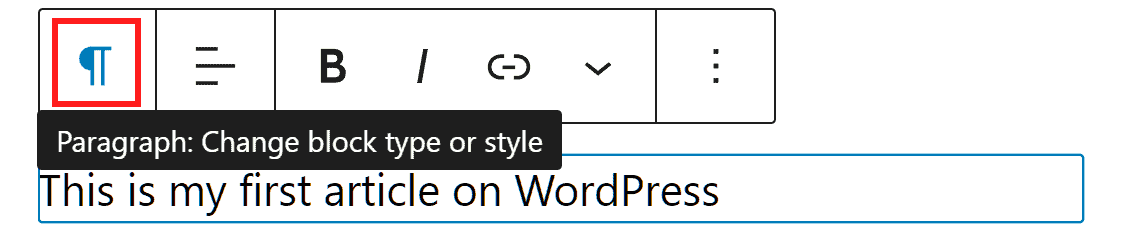
Hovering over the different options we can see a preview of how the new block will look like.
Obviously these options will be different depending on the type of block. For example, an Image block can be transformed into a Gallery, File, Media and Text, but not into Paragraph or List.
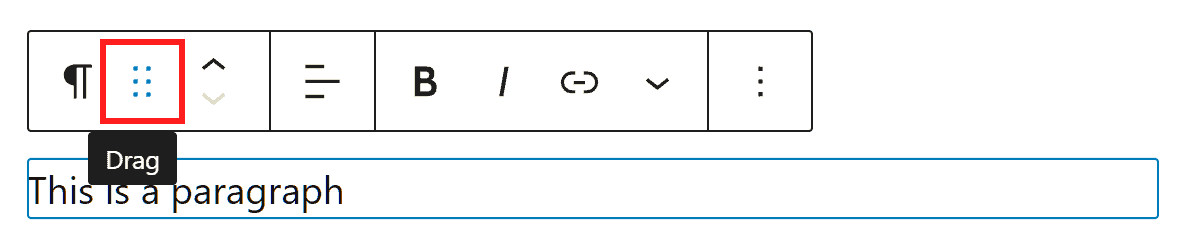
The second button, Drag, allows us to move this block by dragging it to another location within our article.
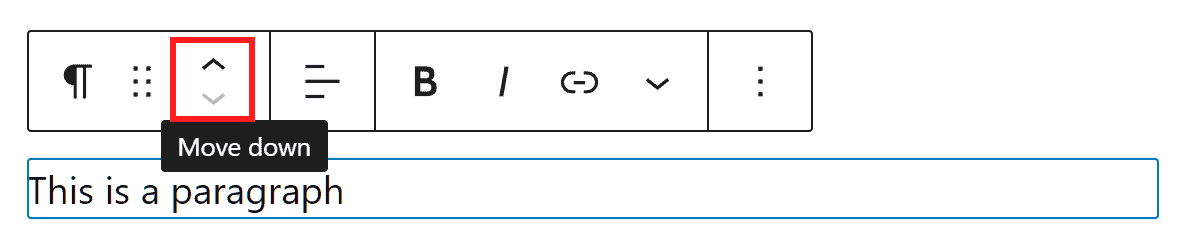
With the arrows we can move a block up or down.
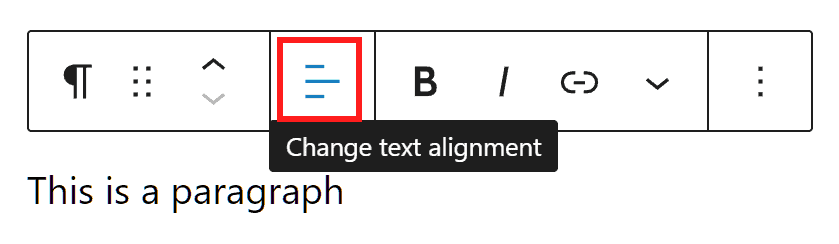
The next button allows us to change the alignment of the text. By default paragraphs are created with the alignment on the left.
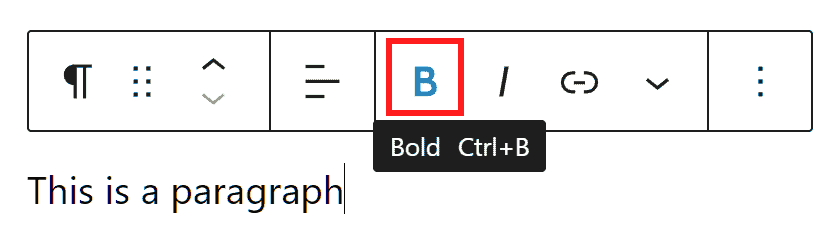
By clicking on the “B” we can activate bold, while “I” allows us to activate italics.
The next button allows us to insert a link into the text.
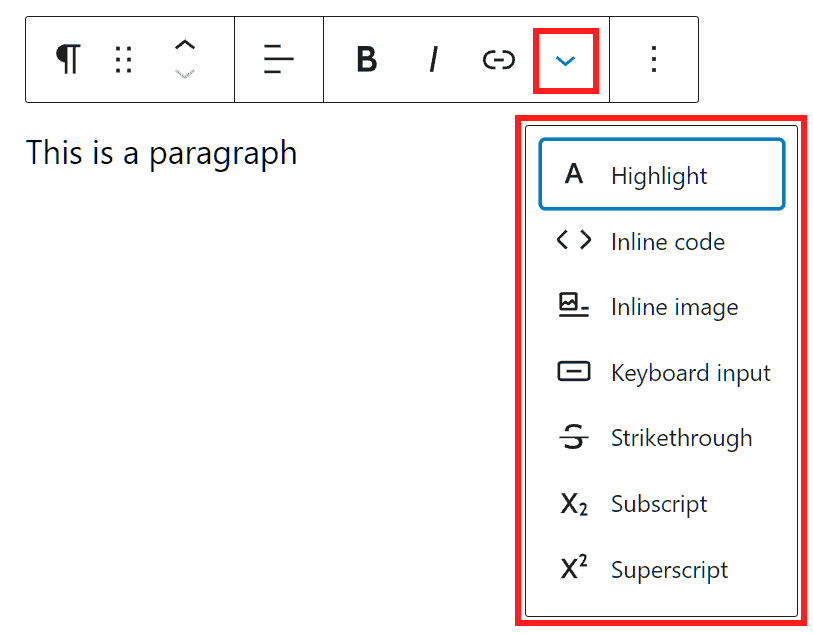
By clicking on the down arrow we can see other functions that allow us to format the text, changing the colors or inserting superscript and subscript and so on.
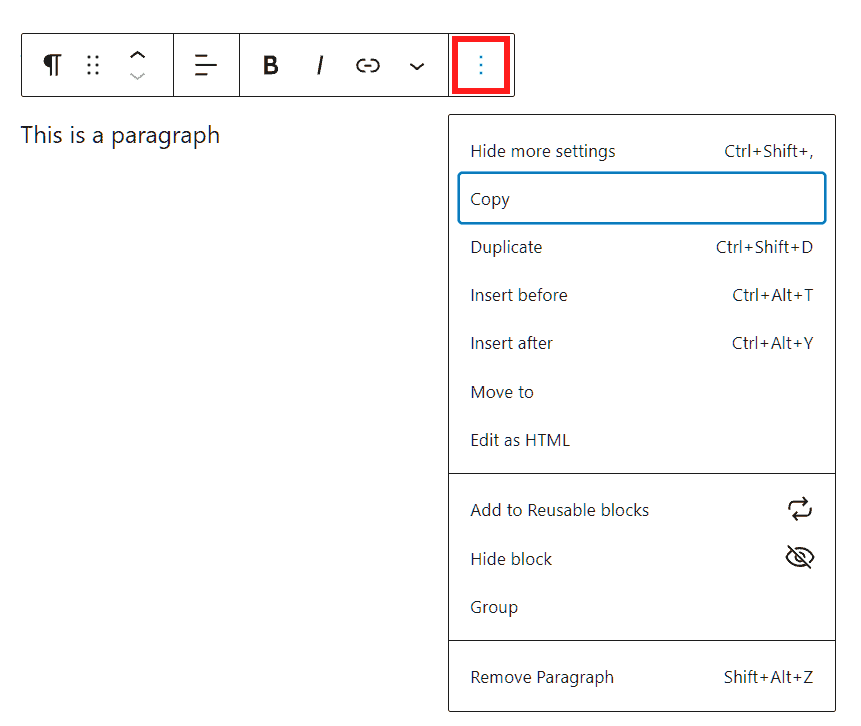
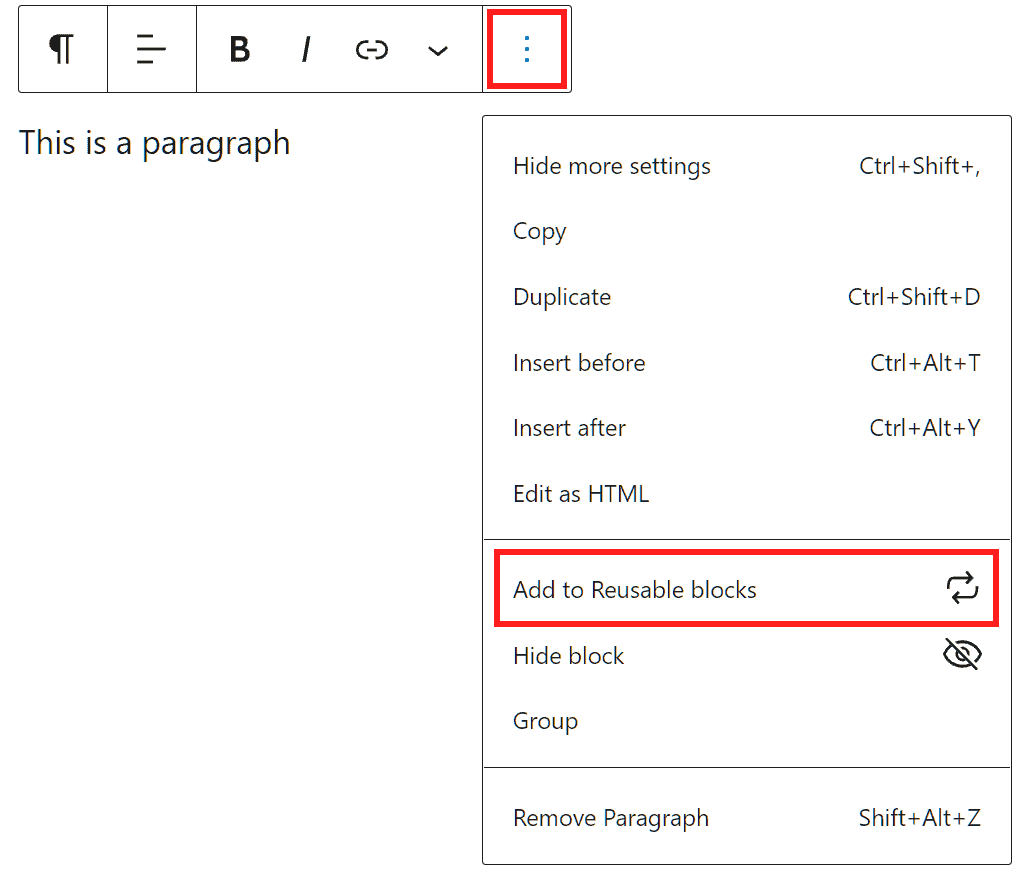
To finish, the three dots let us see all the options, from here we can copy the block, duplicate it, edit it as HTML, but also delete the block or add it to the reusable blocks.
You can access more options for blocks from the side menu of the editor, in the block section. In this section you will find different options depending on the type of block, let’s see what the settings are in the case of paragraph.
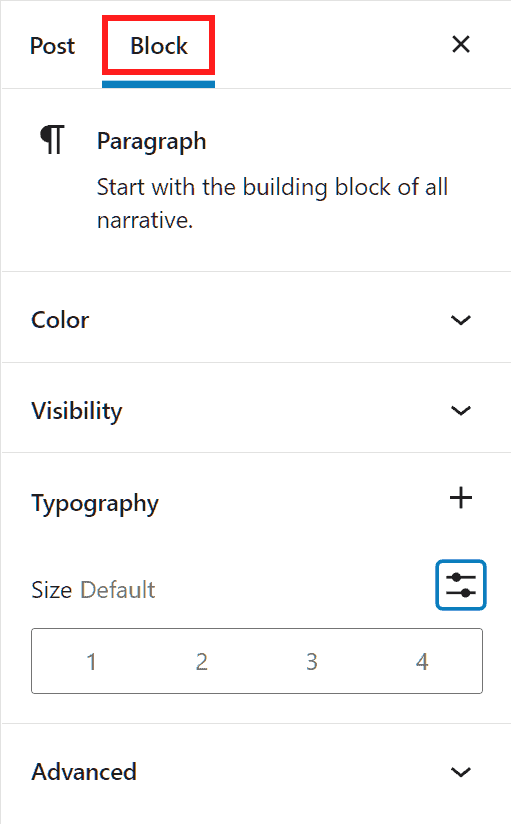
From the Typography section you can change the font size and line spacing (line height).
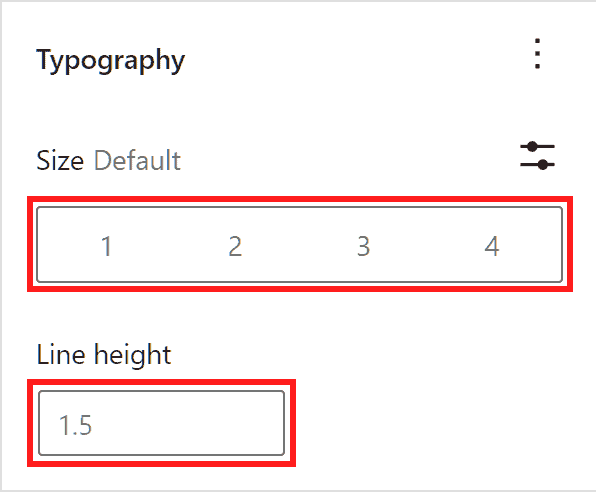
You can also return to the default options by clicking Reset.
The Color section allows us to change the color of the text, background and links. Keep in mind that the colors vary depending on the theme, in any case you can also choose a different color by clicking on Custom color.

From the Text Settings we can choose whether to show the initial letter of the paragraph as a paragraph marker like this.

To finish, the Advanced options allow us to create an HTML anchor or add a CSS class to the block.
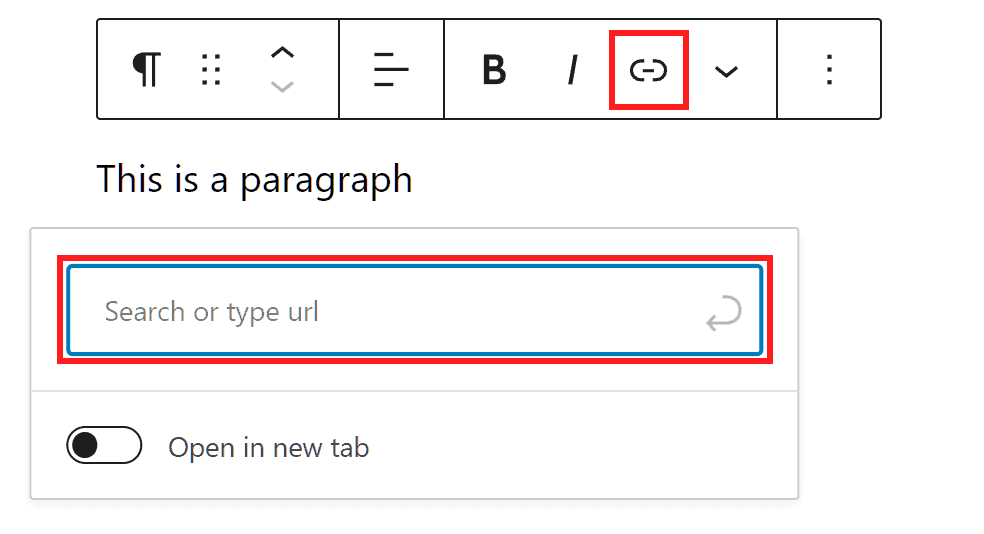
Links in the text
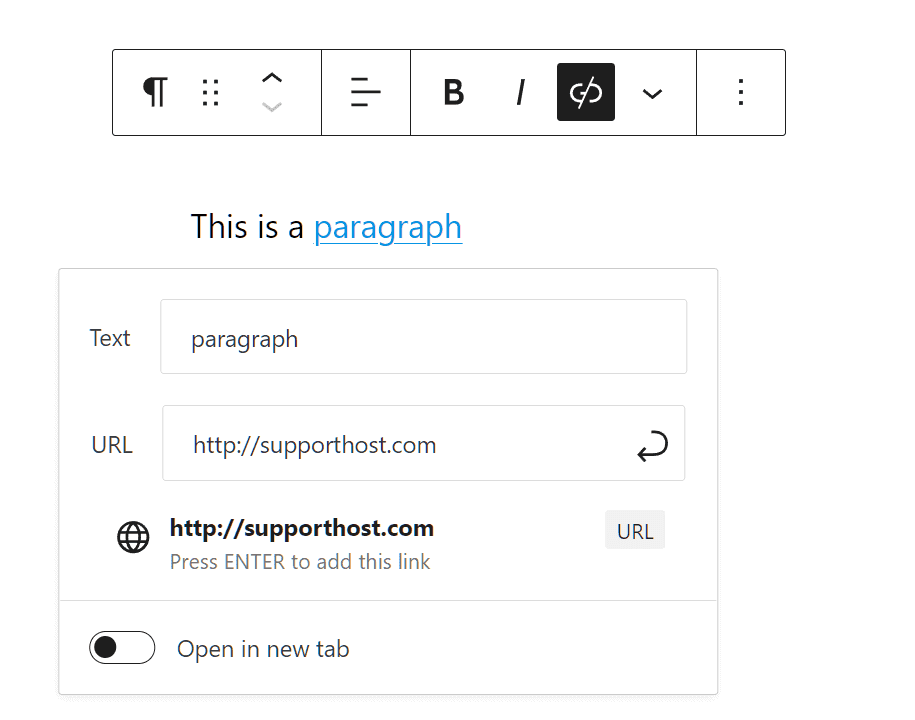
To insert a link within our article, we just have to select the portion of text (anchor text) and click on the Link icon or use the key combination Ctrl+K.
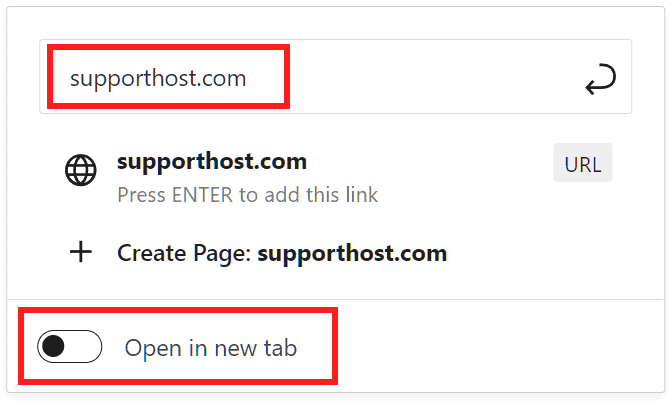
Type in the address and press enter to add the link. We can also choose to set the link to open in a new tab.
To edit a link click on the anchor text and then on Edit.
After editing, press Enter again.
To remove a link, click on the anchor text and then the Unlink button.

Insert an image
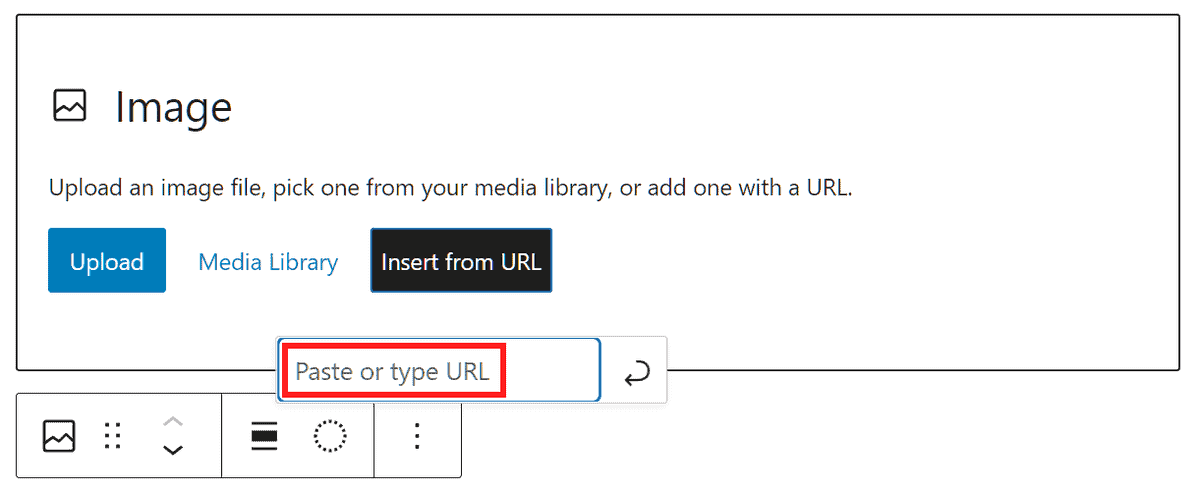
To insert an image, you must add an “Image” block. You can choose to insert an image by uploading it from your computer, by clicking on Upload.
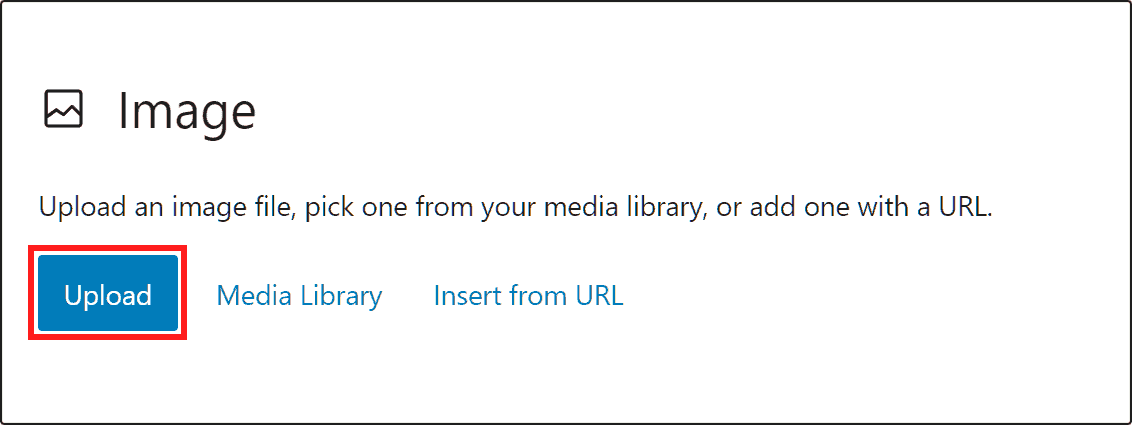
You can also choose it from the WordPress media library, which is the library that contains all the media files you have already uploaded to your site. In this case click on Media Library.
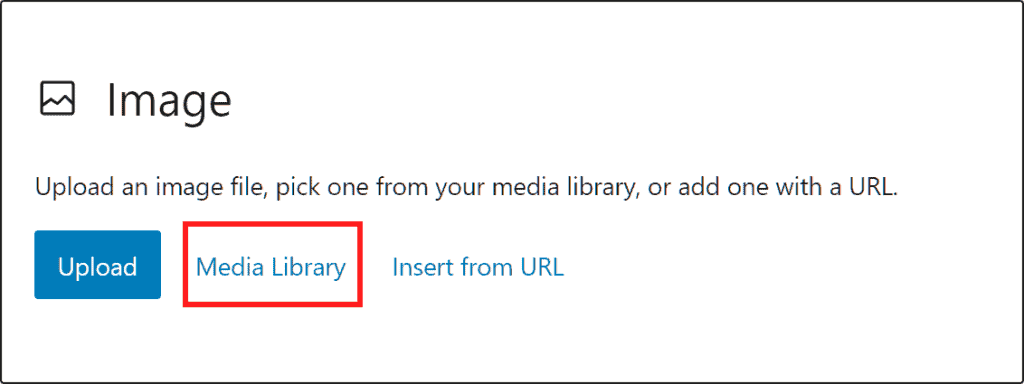
Then select an image and click on Select.

Another option is to insert an image directly from the URL.
Organize blocks
In addition to being able to move blocks with the drag, move up and down buttons, as we saw earlier, we can also group multiple blocks together or create reusable blocks.
Groups and columns
The Gutenberg block editor, in fact, allows us to group blocks into groups or columns.

Columns allow us to arrange blocks side by side, while creating a group we can define the style, background color or spacing, but also add a CSS class not for individual blocks, but for the whole group.
Reusable blocks
We can also add a block, or a group, to the reusable blocks. These are favorite blocks that we can save to reuse in multiple articles or pages.
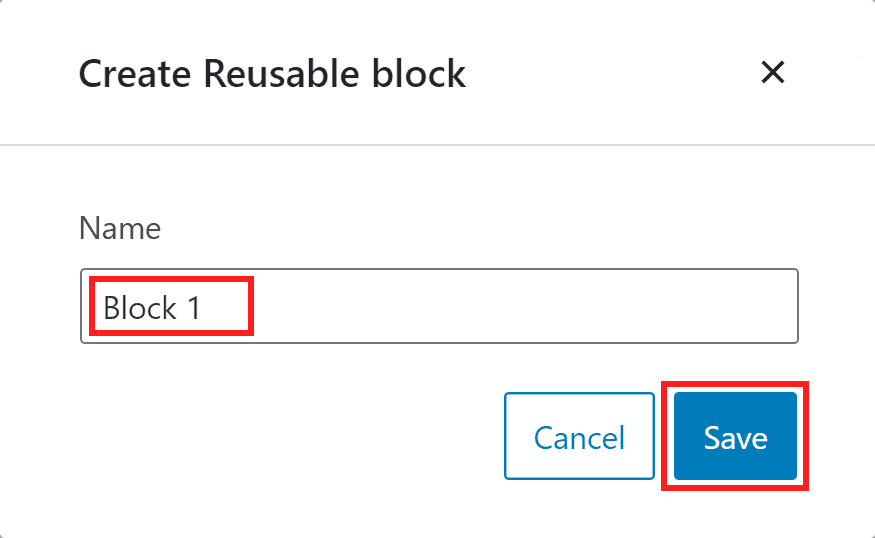
To do this click on the three dots (⁝) and then on Add to Reusable Blocks.
Then name the block and click Save.
To insert a reusable block into our article simply type / followed by the name of the block, as you see in this example.

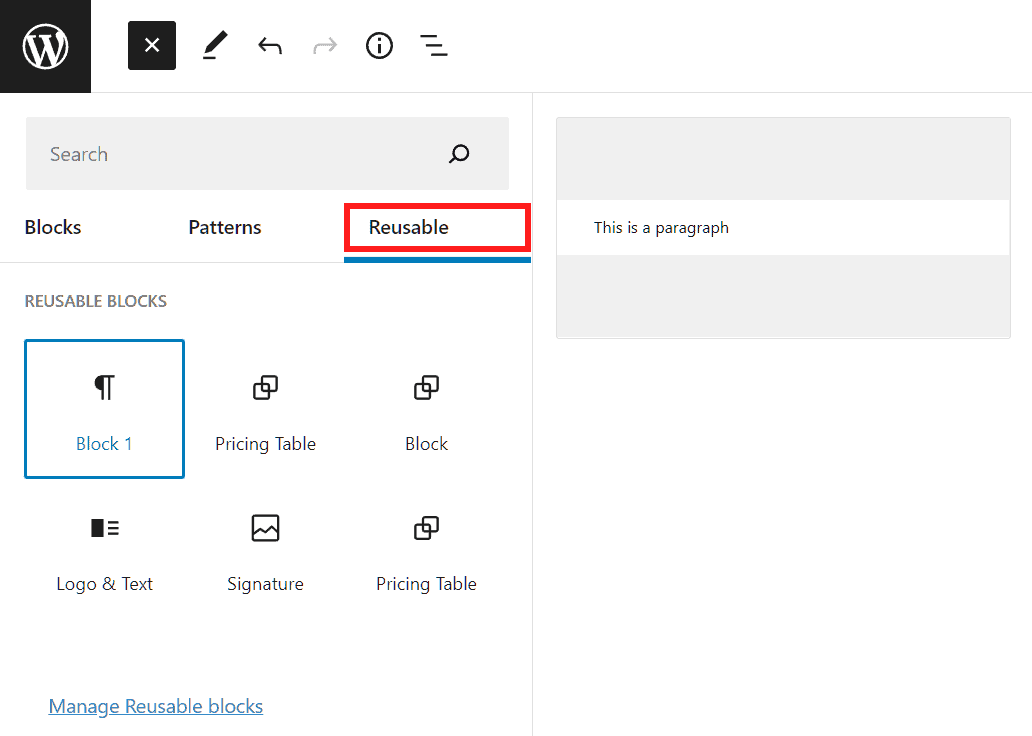
If you want to see a list of all the reusable blocks you have created, click on the “+” button on the top bar.

Let’s then click on the Reusable tab to see all the blocks present.
Publication options
Before publishing an article, we can see the document settings in the sidebar of the WordPress editor.
Remember that while writing, the sidebar can be shown or hidden by clicking on the gear icon.
In the document settings we can find the options for publishing and we can set categories, tags and featured image, let’s see all the options one by one.
Status and visibility
From the Status and Visibility section we can set the visibility of the article after it is published.
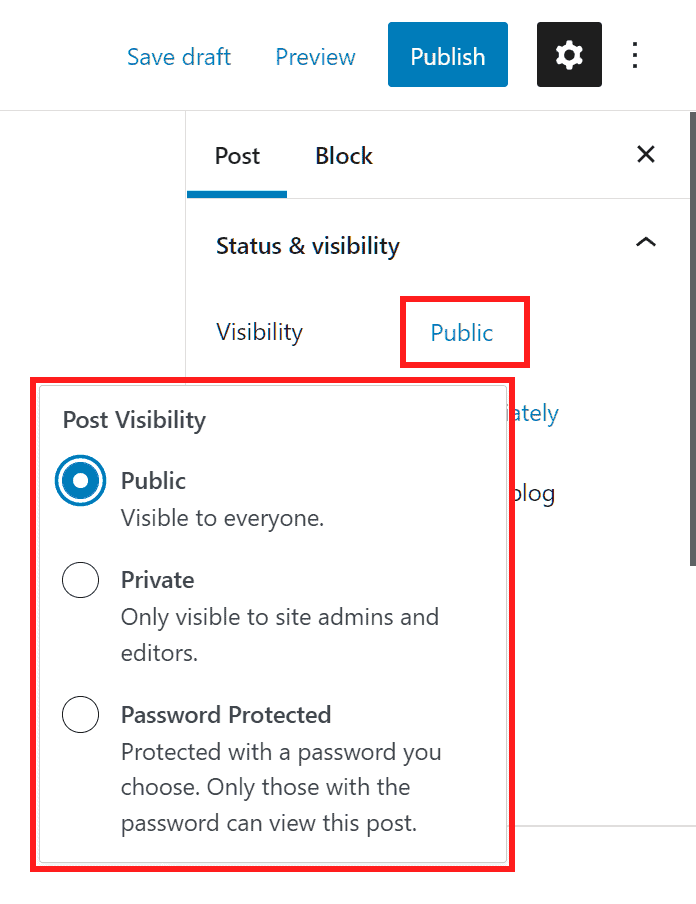
Available options are:
- Public: the article will be visible to anyone who visits the site.
- Private: visible only to administrators and editors of the site.
- Password protected: visible only to those who have the password.
Next to Publish, you will see the Immediately option by default. If you leave the default option, when you click Publish, the article will be published immediately.
By clicking on Immediately you can open the calendar and choose the date on which to publish the article. This allows you to schedule the publication of articles, by choosing a later date you will see that the Publish button will become Schedule.

Keep in mind that you can also choose an earlier date to backdate a post.
If you want the article to always be shown at the top of your blog, you can check the Stick to the top of the blog option.
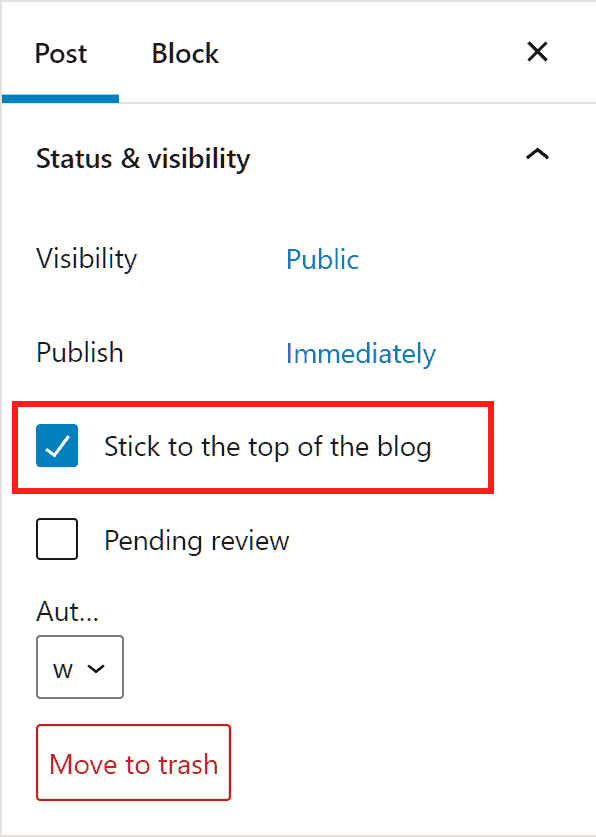
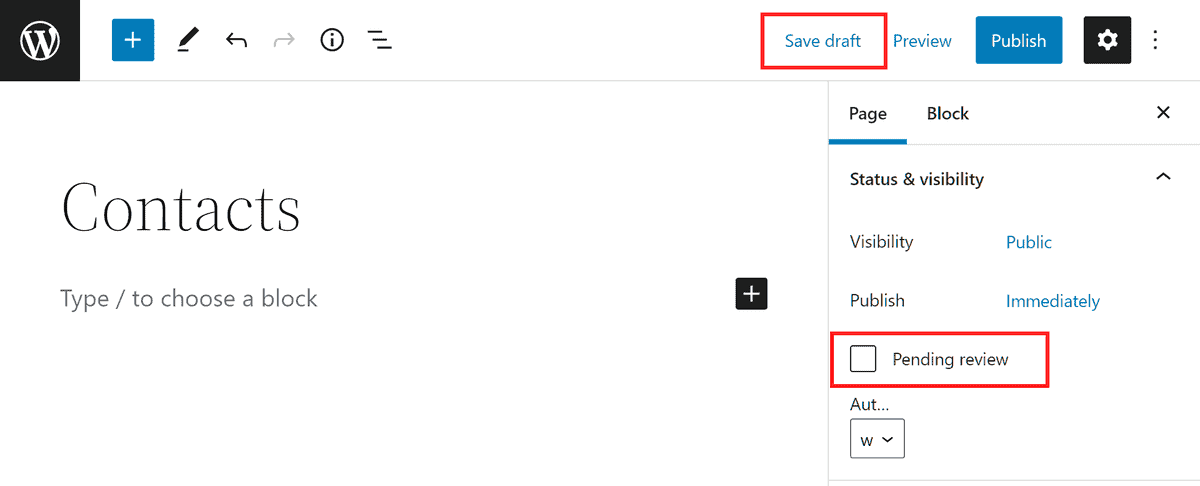
Instead, if you need the item to be reviewed, you can label it as Pending Review with the corresponding option.

By checking this option, you’ll see the button at the top change from Save Draft to Save as Pending. In the next sections of our WordPress tutorial, we’ll see how to quickly access the list of all articles awaiting review.
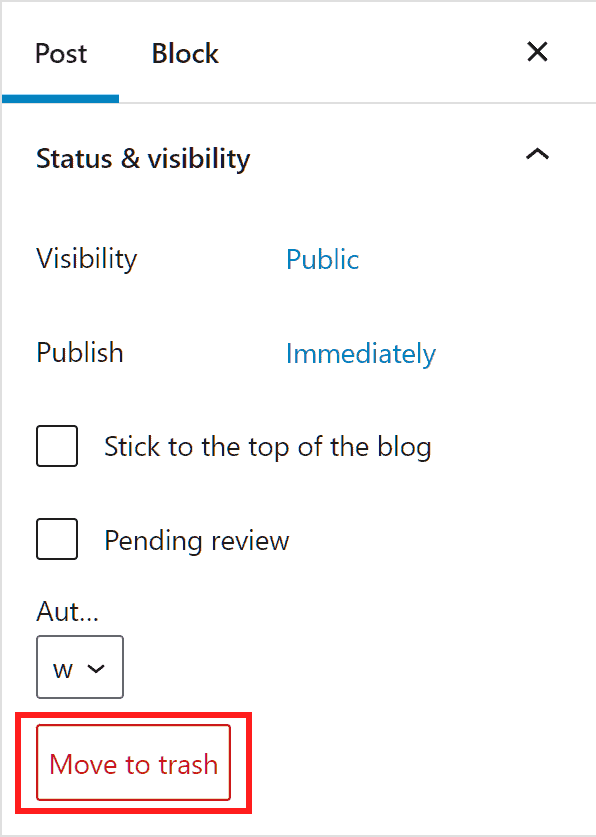
The Move to Trash button allows us, instead, to delete the draft we were creating.
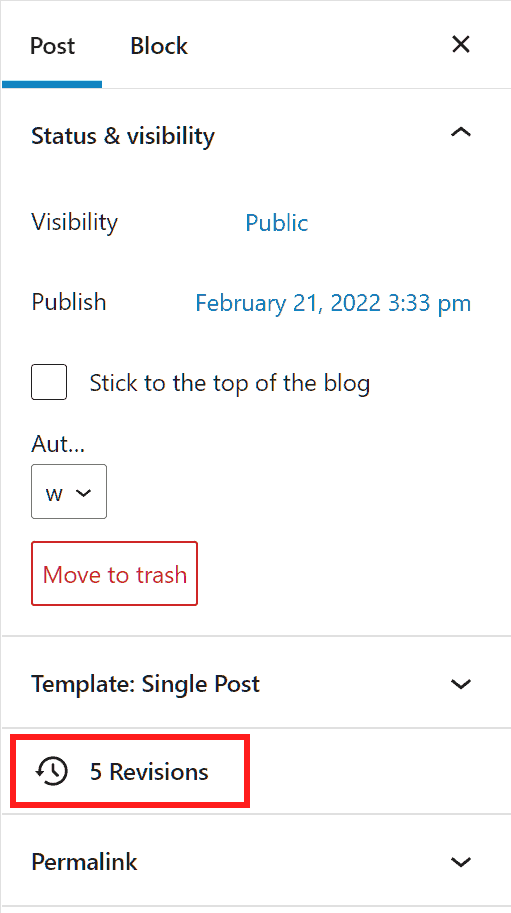
Audits
By default WordPress allows you to save an unlimited number of revisions. The revisions are nothing more than previous versions of an article that allow you to view the changes made and wanting to restore a previous version of our article.
To see the revisions of an article just click on Revisions from the sidebar of the WordPress editor.
By clicking on Previous and Next we can see the various revisions, or we can switch between them using the center slider (highlighted in the screenshot below). To restore a revision simply click on Restore This Revision.

At the top we are also shown the name of the user who made the changes, along with the date and time. In order to return to the editor, click Go to Editor.

Permalink
When we create a new article, WordPress automatically generates the URL slug for that article using the title.

Before publishing, we can always edit the slug from this section.
Remember that you can change the slug even after publishing an article. In this case, however, it is useful to copy the previous slug in case you then decide to set a 301 redirect.
Categories and tags
As we saw when we talked about creating categories and tags, when we create a new article on WordPress we can choose a category and tags.
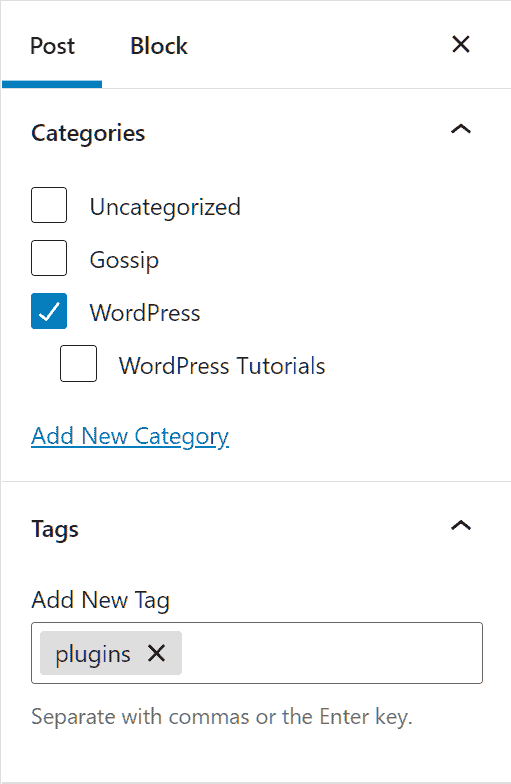
Remember that the choice of the category is compulsory, if you don’t set a category, the new article will be assigned directly to the default category.
Featured Image
The featured image is the one that will be shown as the featured image associated with the article on the archive, search or blog section pages of your site.

To set it up, just click on Set featured image from the sidebar of our article editor.
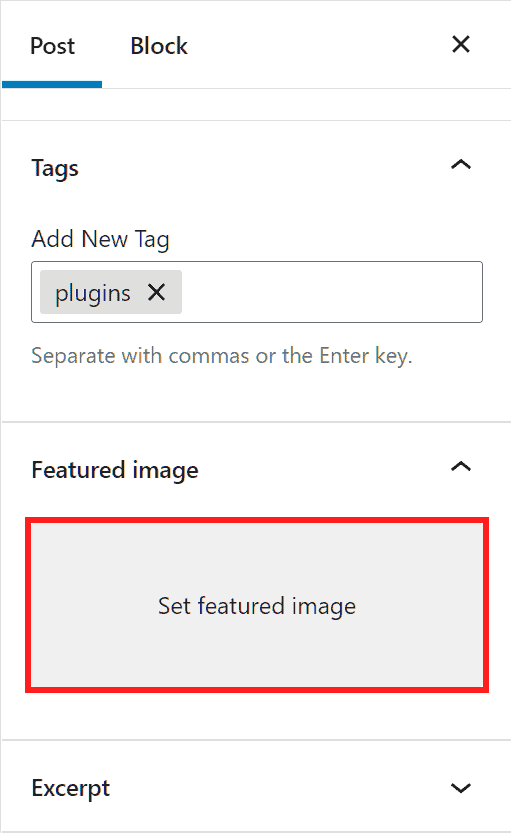
The media library will open and we can choose an image we already have or upload a new one and then click on Set Featured Image.

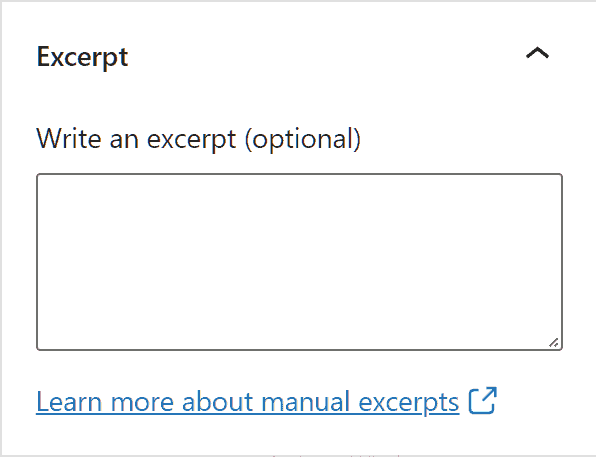
Summary
This is an optional section available only for articles and not for pages. In this field you can insert a short summary of the article. Depending on the theme, the summary may appear on the home page or on the article archive page.
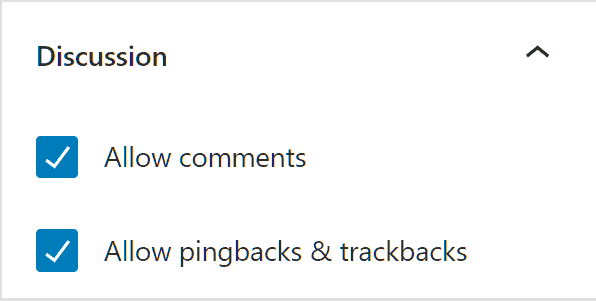
Discussion
In this section you can choose to enable comments and allow pingbacks and trackbacks.
Draft, Preview and Publish
In the previous sections of our WordPress tutorial we have seen all the options before publishing. At this point we just need to see three basic functions: Save Draft, Preview and Publish.
Save draft: allows us to save the changes made to the article to be able to revise or publish it later.

Remember that if you have checked the Pending Review option, the button you will see is Save as Pending.
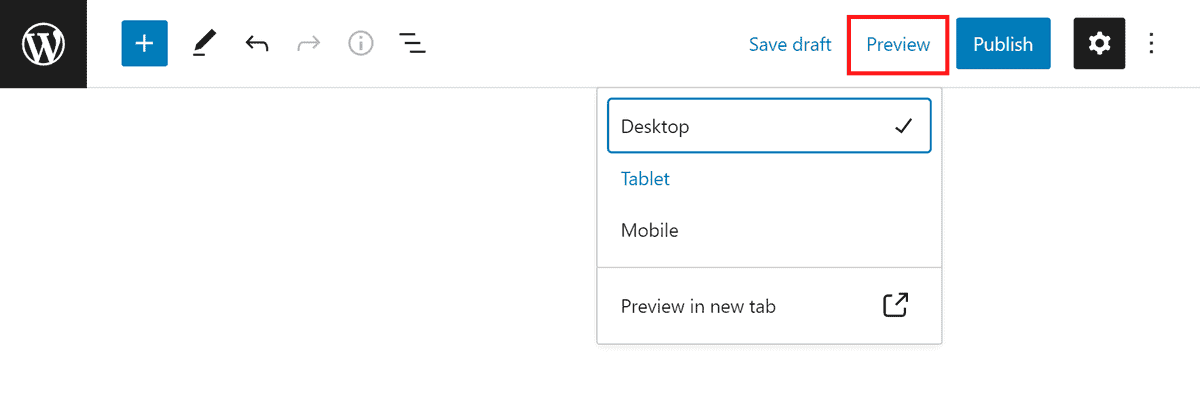
Preview: allows us to see the preview of the article, that is, how it will be displayed once published. You can see how the article will appear on different devices: desktop, tablet or mobile, or even open the preview in a new tab.
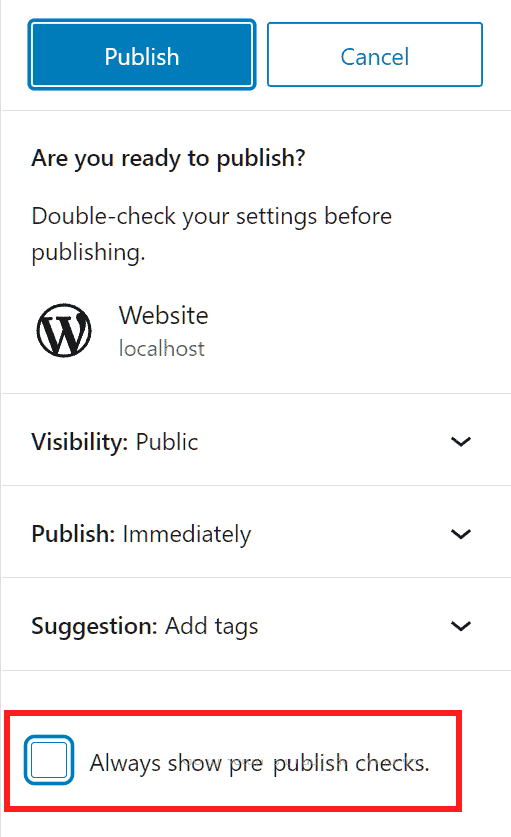
Publish: allows us to see the pre-publication options, i.e. review the visibility of the post and the publication date. Clicking on Publish again will publish our post.
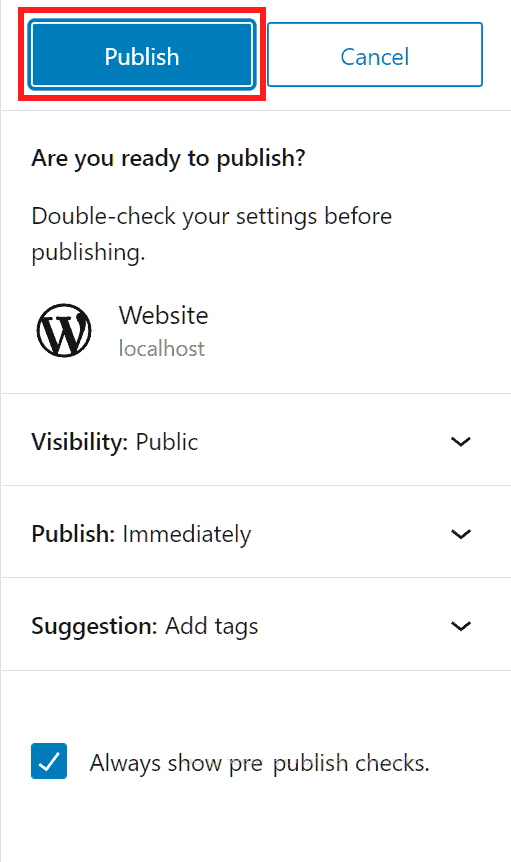
Keep in mind that you can also turn off pre-publication checks by unchecking them this way:
Manage articles
By clicking on Articles → All Articles we can access the management of the articles of the site.
In this section, in fact, we can see the list of all the articles in order from the most recent to the least recent.
We can choose to see only the list of published articles, drafts, pending articles, or trashed articles by clicking on the various sections, as seen in this screenshot.

The article list shows us this information by default: Title, Author, Categories, Tags, Comments, and Date.

We can search for an item using the search bar in the upper right hand corner.

Or we can change the order of the articles, for example sorting them by title, number of comments or by date.

We can also filter the results by date, by clicking on All Dates, or by category (All Categories).

To see the articles of a single author we just need to click on the author’s name, the same goes for categories and tags.

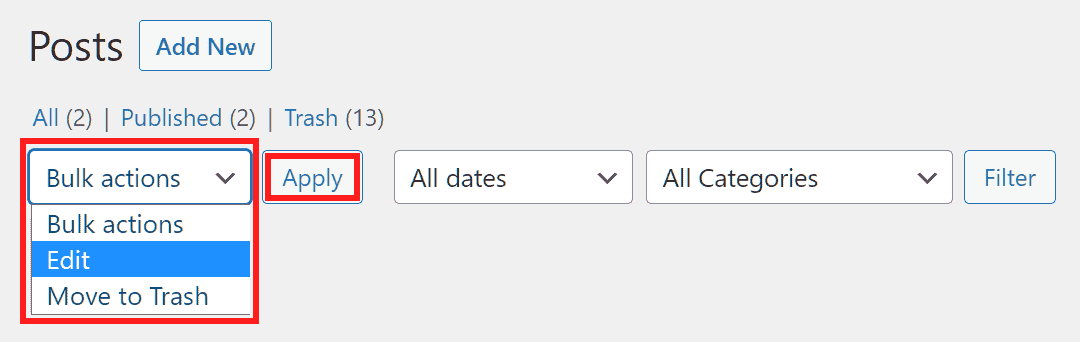
Bulk Actions
If we select more than one item, we can choose what to do from the Bulk Actions drop-down menu.
Group editing
Choose Edit from the drop-down menu and click Apply. Group editing WordPress articles gives us access to quick editing.
From here we can set the category, tags, change the author, status and format of articles, enable or disable comments and pingbacks, and finally choose whether to highlight posts.

To save the changes we click on the Update button.
Move multiple items to the recycle bin
The other option we have is to move multiple items to the recycle bin at once.

Single item management
From the list of all articles we can manage individual articles. To do this hover the mouse over the article we want to edit and these actions will appear: Edit, Quick Edit, Trash and Preview / View.
By clicking on Preview we can see the preview, in the case of drafts.

If the article has already been published we will see the View function that allows us to open the article.

The Edit button allows us to open the editor and edit the article.

The Quick Edit allows us to modify: the title, date, visibility, slug, category, tags, enable/disable comments, change the status (draft, pending, published). By clicking on Update we can validate the changes.

The Trash button allows us to move the article to the trash can.

WordPress tutorial: pages
In this section of our WordPress tutorial we’re going to look at how to create pages for our site.
Creating a new page on WordPress is very similar to creating an article, so we’ll just focus on the options that differentiate these two elements of the site.
After that we’ll see how to publish the newly created page and how to edit the pages of the site or delete them.
Create a page
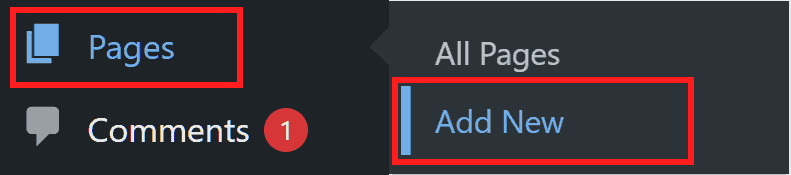
To create a new page with WordPress click on Pages → Add Page.
We will then be redirected to the block editor that works exactly like the one for creating articles. From here we can enter the title of our page and create the content.
In the sidebar, instead of the “Article” tab, we’ll see the “Page” tab, let’s see what options it gives us.
Note that you can duplicate a page in WordPress using a plugin.
Status and visibility
In the Status and Visibility section we can find the same options as for the articles, so choose the visibility of the page (published, private or password protected) and decide whether to publish immediately or schedule the publication.
As with articles, in the case of pages we can save the draft, or put the page on hold for review.
In this case though, since it’s not an article, we won’t see the Stick to the top of the blog option.
Permalink
The permalink section works exactly like the one for articles. After entering the title of the page, for example “About us”, the slug will be created automatically, and from here we can edit it.
Featured Image
Pages can also have a featured image.
Discussion
From this section we can enable comments, by default comments for pages are disabled.
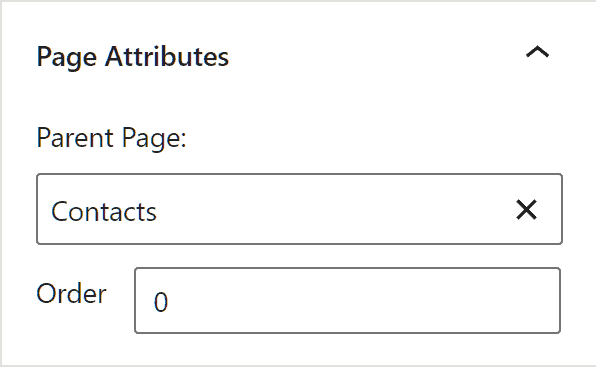
Page attributes
This section is only present in Pages and allows us to create a hierarchy between the pages of our site.
For example, you could create a “Our Story” page as a child page of the “About Us” page.
Manage pages
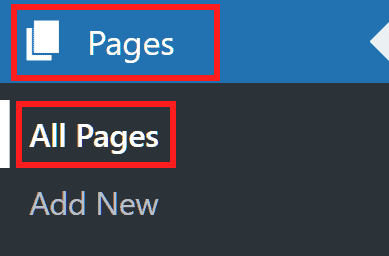
By clicking on Pages → All Pages we can access the list of all the pages on our site.
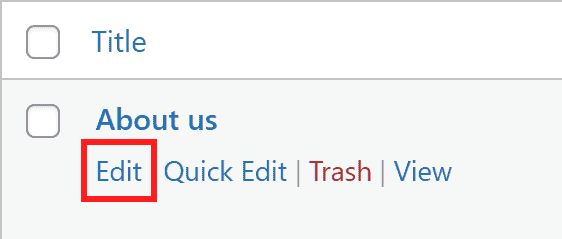
For each page we will see these options: edit, quick edit, trash, view/preview. Published pages will show the View option that takes us to the published page. Draft pages, on the other hand, will show Preview which allows us to open the preview.

To edit an already published page or a page in draft click on Edit, we will then be redirected to the editor and we can edit the content or attributes of the page.
The Quick Edit option allows us to edit: title, slug, publish date and change the page status to private or password protected. From here we can also edit the hierarchy, change the sorting and allow comments.
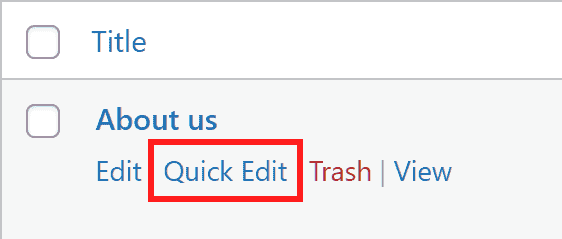
After making the changes click on Update.

By clicking on Trash we can move the page to the Trash.
Bulk Actions
By selecting multiple pages we can edit pages as a group or move multiple pages to the trash.

Group editing of pages
By choosing from the Bulk Actions drop-down menu, the Edit option, and clicking Apply, we can enable group editing.
This option allows us to quickly change the author, page hierarchy, enable or disable comments and change the status of the pages (published, private, pending review or draft).

To apply the changes, click on Update.
Move multiple pages to the trash
If we want to delete multiple pages, just select them, choose from the Bulk Actions menu, the Move to Trash item, and click Apply.

WordPress tutorial: media
Every image that is uploaded within your pages or articles is saved within the WordPress Media Library. In this section of our WordPress tutorial we will see just how to manage media.
Keep in mind that we’ll generally refer to images, because they are the most commonly used file type, although media also includes video, audio or document files.
Media Library
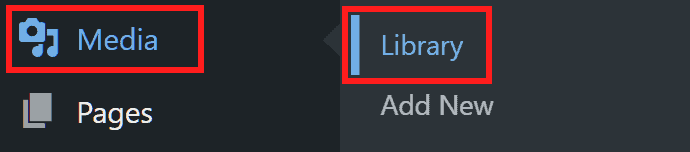
To access the Media Library, click on Media → Library.
We will then see, the list of media in the library. To search for a particular image we can use the search bar on the right.

The default view is Grid, which allows us to see thumbnails of the files on the site.

We can switch from Grid mode to List mode by clicking on the icon shown in the following screenshot.

Search filters
We can filter the content shown in the library by clicking on All Media Items and decide whether to show only a certain type of file.

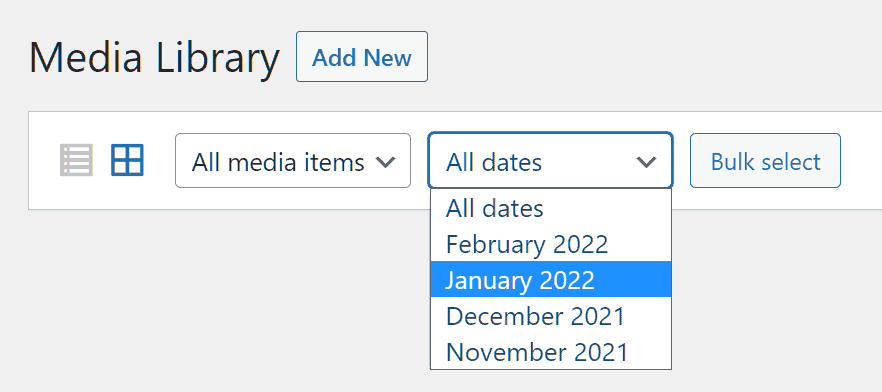
We also have the ability to filter media by date by clicking on All Dates and then choosing the time range we are interested in.
Adding Media to the Library
You can add media to the library, or add it directly when you create a new article or page.
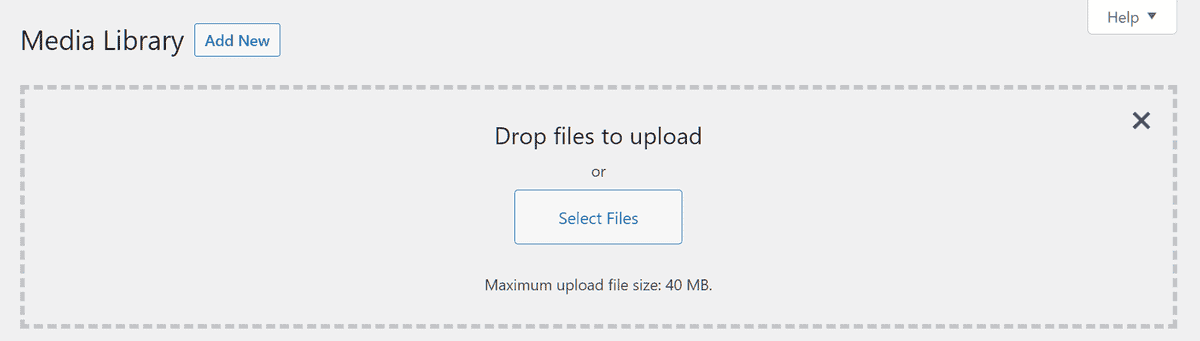
To add a new media directly from the library, click Media → Library and then click Add New.

Then drag the file to be uploaded to the dotted area or click select files to search for the file from the computer. We can also upload multiple files at once.
If you have encountered an error when uploading a file, check our guide on how to increase the upload size in WordPress.
Keep in mind that if you upload two or more files with the same name, WordPress will automatically rename the files by adding a number.

Edit an image from the library
In this section of our WordPress tutorial we will see how to edit image attributes, to learn more check out our article on how to optimize images for SEO.
By clicking on an image in the Media Library, we can view and edit its details.

Alt text: we can insert the alt text of the image.
Title: the title of the image, this field is automatically populated with the name of the file, but can always be changed later.
Caption: in this field you can enter the text that will be shown below the image.
Description: you can add more details to describe the image.
File URL: you are shown the address of the file. By clicking on Copy URL to clipboard you can copy it.
We can also click on Edit Additional Details to change the image attributes.

By doing so, we’ll access the Edit Media panel that allows us to edit alternative text, caption, description and modify the image itself.

By clicking on Edit Image we can scale the image, crop it, reflect it or rotate it.

If, after making the changes, we want to restore the image, click on Restore Image.

Delete images from the library
Remember that WordPress does not use the recycle bin for images by default. This means that if you delete an image, as we will see in this section of the WordPress tutorial:the complete guide, it will be permanently deleted. If you want to enable the Trash feature check out our article on how to delete unused images.
To delete a single image, click on the image from the media library and then click on Delete permanently. Then click on OK to confirm.

To delete multiple images open the media library and click on Bulk select.

Select the images you want to delete and then click on Delete permanently.

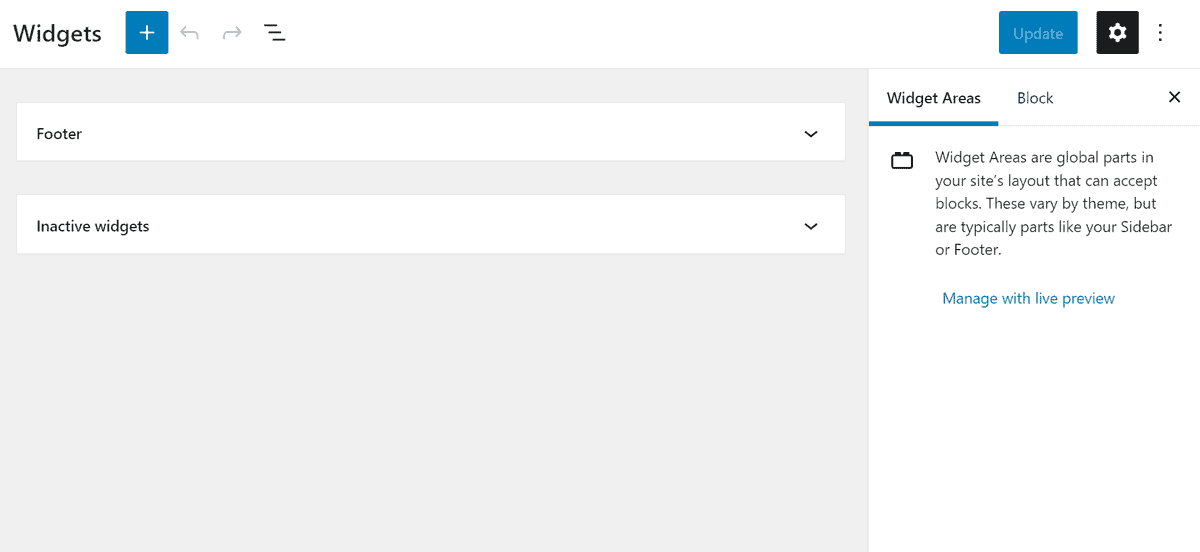
WordPress tutorial: widgets
In this section of our WordPress tutorial we will see how to manage widgets. Widgets are blocks that allow us to display content or add functionality in the sidebar, footer or other areas of the site.
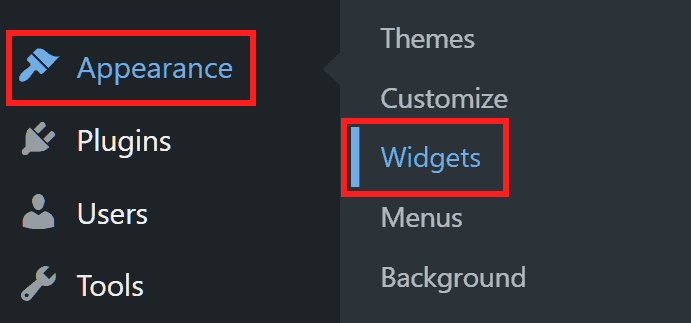
To access the Widget management we have to click on Appearance → Widgets.
In the Widgets section you will see a number of areas, for example left sidebar, right sidebar and footer. Keep in mind that the available areas change depending on the theme you are using.
By clicking on any of the areas to expand them, you’ll be able to see the widgets in use or edit them. To move a widget click on the Move to widget area button and then choose the area to move it to.

In our example we have two widgets for the search function. To delete a widget we click on the three dots (⁝) and then on Remove Block.
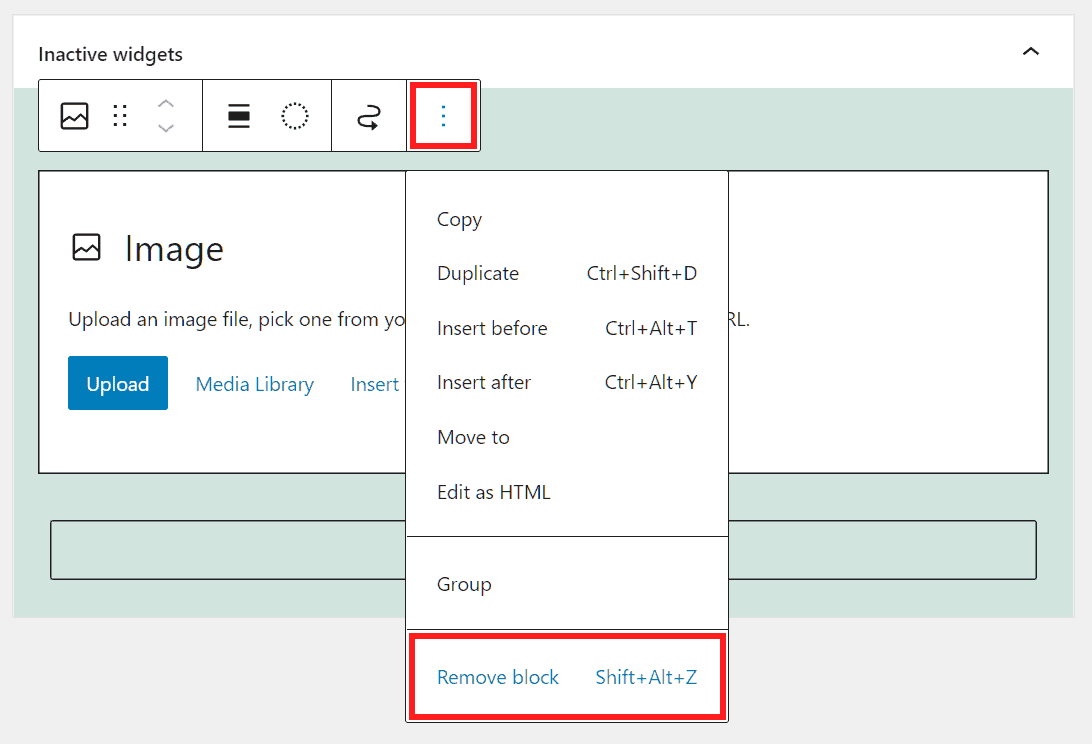
To add a new block we click on the plus (+), then choose the element we are interested in from the Widget section and drag it to the right area.

From the Widget Area tab we can click on Manage with live preview.

By doing so, we can preview the changes we are making.

WordPress tutorial: comments
Let’s open a new section of our WordPress tutorial to see how to manage comments on our site.
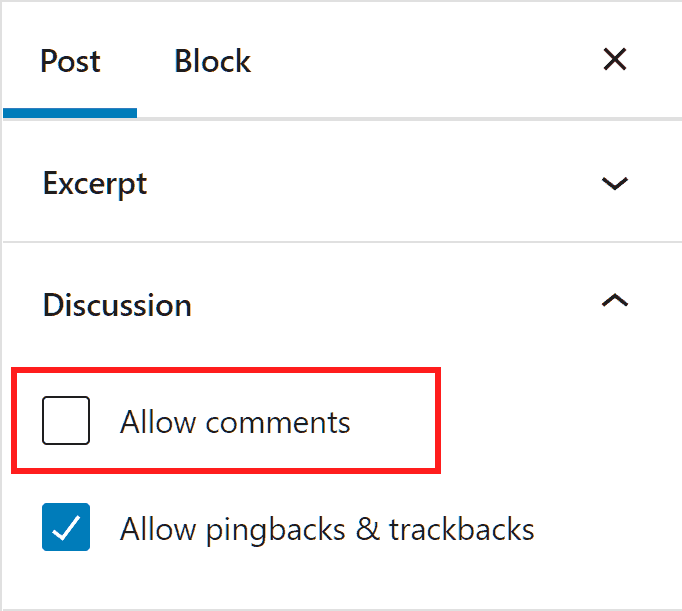
As we saw in the Settings chapter on this guide, we can change the global options for comments on new articles from Settings-> Thread.
If from the settings we have enabled the comments, we can then also disable them from the single articles. To do this open the article we are interested in and from the Thread section of the sidebar we remove the tick next to Allow comments.
Moderate comments
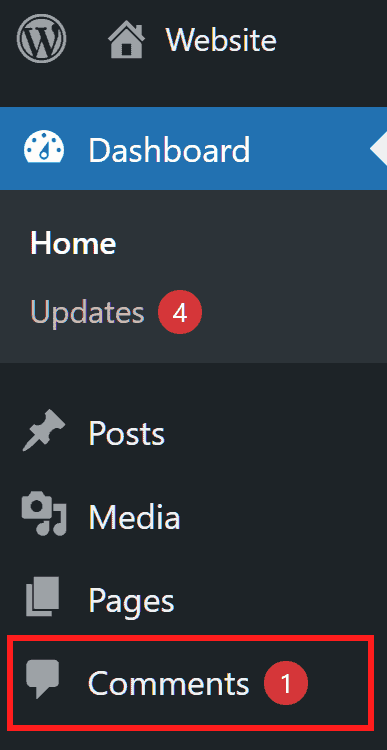
From the WordPress dashboard, by clicking on Comments we can view all the comments on the site and manage them.
By default all comments will be displayed, by clicking on the other options you can view only pending, approved, spam or trashed comments.

Depending on the settings, new comments will be approved automatically or put on hold. New comments in this section appear highlighted.
When a comment is pending we have several options:
Approve: the comment is approved and will be shown on the post in the comments section.
Reply: we can reply to the comment and then click on Approve and Reply to approve the comment and post our reply as well.

If you have nested comments enabled, comments in response will appear like this.
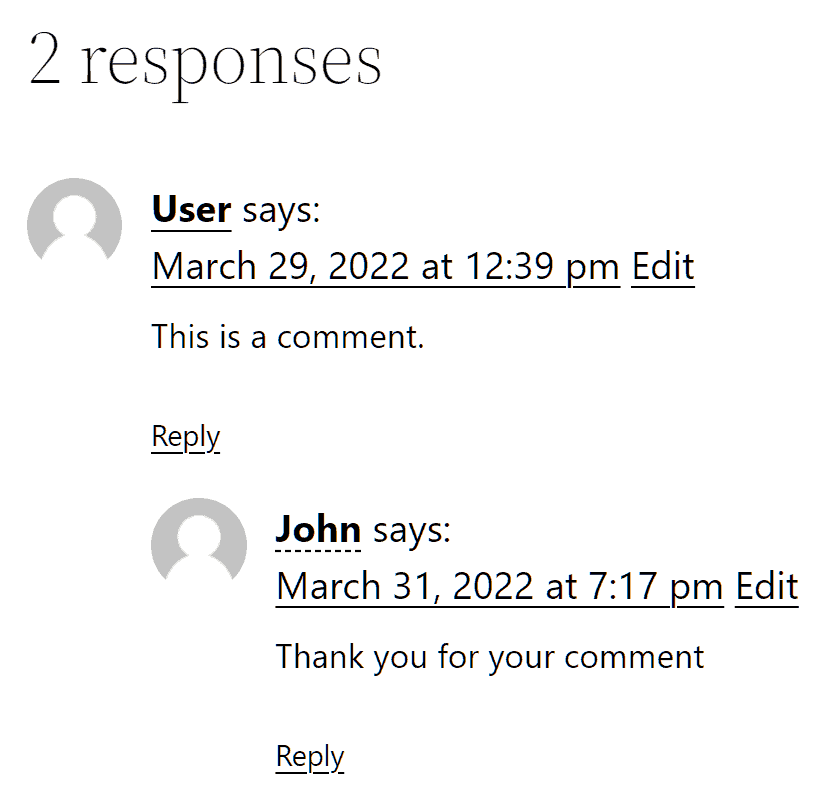
Edit or Quick Edit: allows us to edit a comment, for example to remove a link.

Spam: allows us to report the comment as Spam.

Trash: is used to move the comment to the trash.
For comments already approved, on the other hand, in addition to the options we’ve just seen we also have:
Unapprove: this allows us to revoke approval of the comment, the comment will then go back to pending moderation again.

Bulk Actions
From the Comments section we can select multiple comments and then by clicking on Bulk Actions we can choose whether to: approve, not approve, mark as spam or move to trash.

Click Apply to perform the action on the selected comments.
WordPress tutorial: users
In this section of our WordPress tutorial: the complete guide let’s see how to manage users on our site. First you need to know that by default on WordPress there are six default user roles, let’s see what they are.
Super Admin: available only on WordPress multisite installations, this corresponds to the network administration.

Administrator: has all permission needed and can add or remove users, install themes and plugins or change site settings.

Editor: can edit or delete articles and pages created by any user, moderate comments and add new categories. The editor can’t install themes or plugins.

Author: can only edit his own articles.

Contributor: can create articles, but cannot publish them independently.

Subscriber: Can manage his profile and read the articles but cannot create or modify them.

Advanced Tip: In addition to the default roles, you can also create custom roles with specific capabilities. Check out our article on WP-CLI to see how to do that.
Add a user
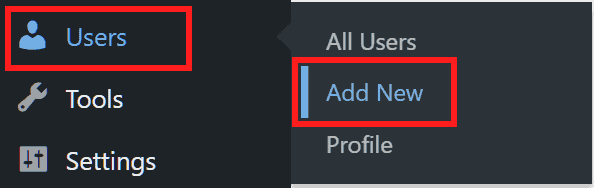
As an administrator you can add new users to the site, to do that click on Users → Add New.
Username: enter your username. Please note that the username cannot be changed later.
Email: enter the email of the new user.
First Name, Last Name, Website: enter optional information or leave blank.
Language: Choose the default site language for the new user.
Password: set a password for the user, you can use Generate Password to generate a random one.
Send notification to user: choose whether to send an email notifying the user that the account has been created.
Role: choose the user’s role.
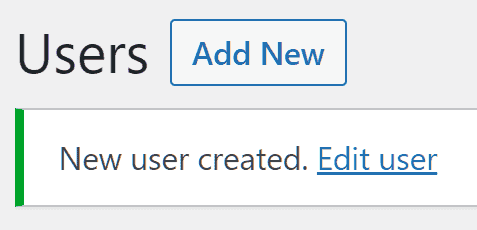
After filling out all fields click on Add New User.

You will then see an alert notifying you that the operation was successful.
Edit a user
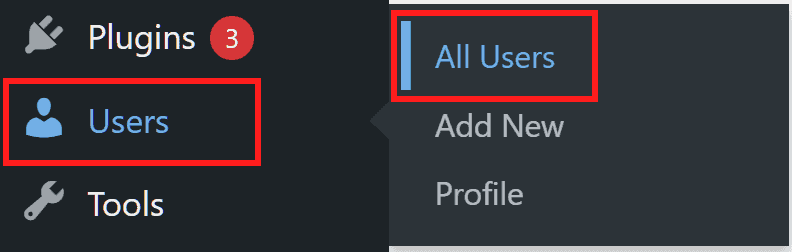
To edit a user click on Users → All Users. Here we will find a list of all users on our site.
To edit a user click on Edit.

From here we can edit the role, information, nickname or email.

We can also set a new password or send a link via email to allow the password to be reset.

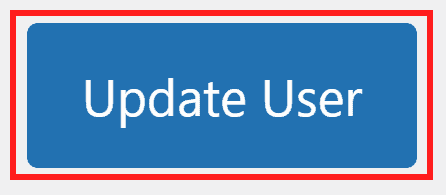
After making the changes click the Update User button at the bottom of the page.
We can also change the user role directly from the Users screen. To do so, select the user we want to change and choose the role from the drop-down menu and then click Edit.

By doing this we can also change the role of multiple users at once.
The Bulk Actions option also allows us to send the password reset link to multiple users.

Delete a user
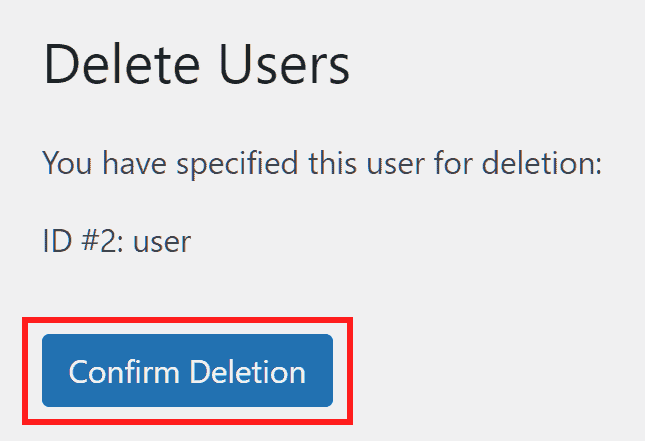
To delete a user, open the list of users (Users → All Users) and then click Delete.

We will then be asked to confirm before deleting, click Confirm Deletion to proceed.
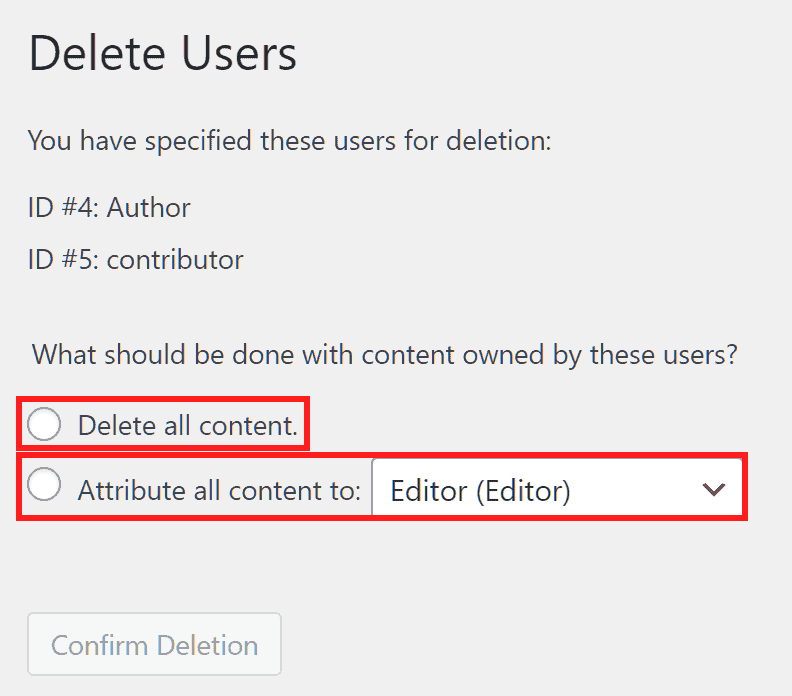
We can also delete multiple users, to do this we select the users, then choose Delete from the Bulk Actions menu and click Apply.

If we are deleting a user who had produced content we can choose to delete the content or assign it to another user.
Personal Profile
By clicking on Users → Profile we can manage our personal profile. From here we can change the language, color scheme, email or profile picture.
This section also allows us to reset the password. To do this click on Set new password.

Enter the new password and then click Update Profile at the bottom of the page.

Another useful option is the one that allows us to close all open sessions.

WordPress tutorial: menu
In this section of our WordPress tutorial:the complete guide, we are going to see how to create and edit site menus.
Create a menu
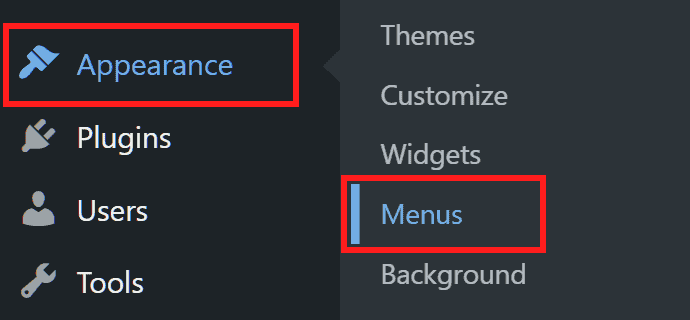
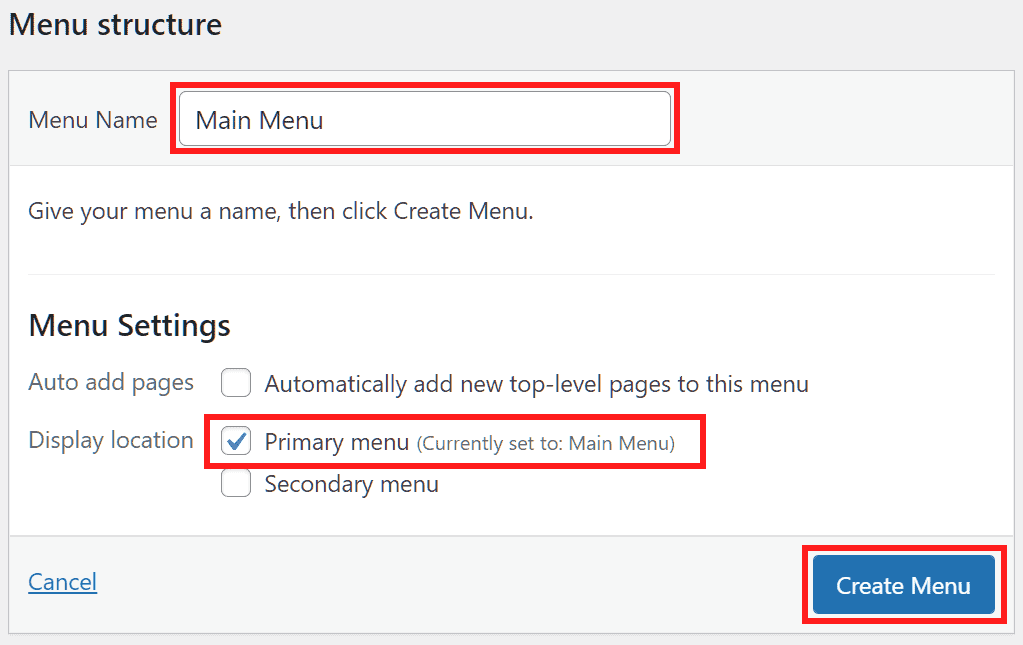
To create a new menu click on Appearance → Menu.
If a menu already exists you can edit it, if you want to create one just click on Create a new menu.

Enter the name in the Menu Name field and then choose whether to set it as Main or Secondary Menu, to continue click Create Menu.
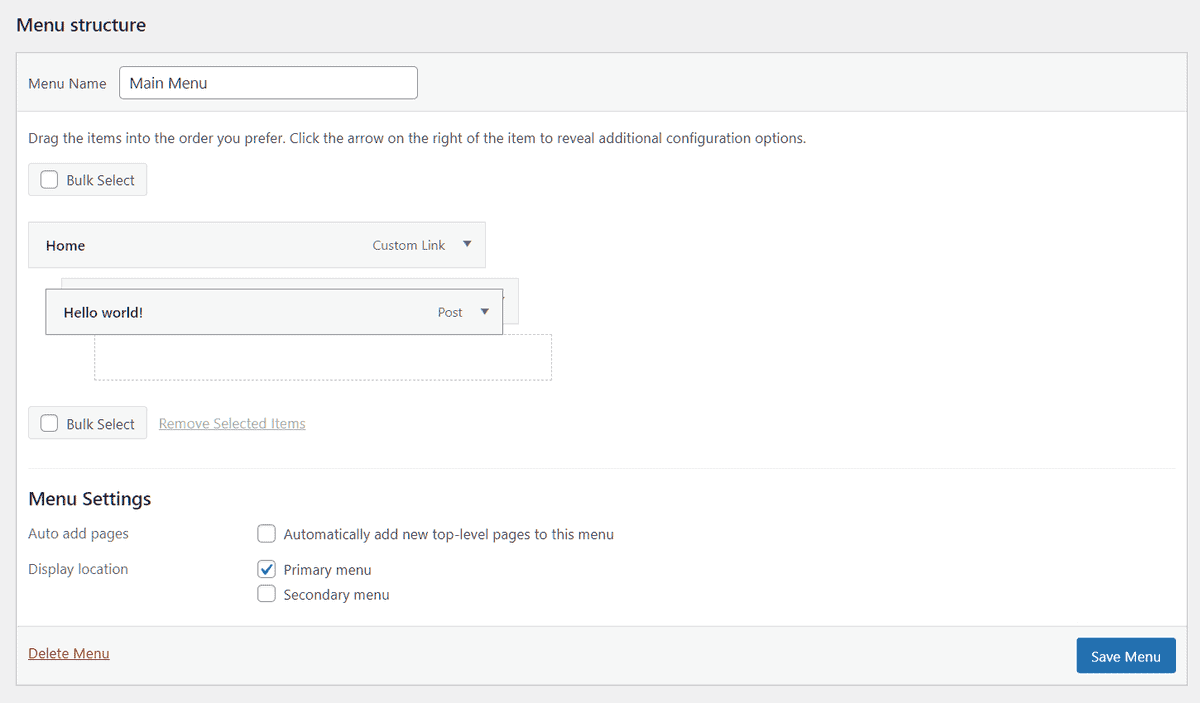
After creating our menu, we can add items by selecting items such as pages, articles or categories from the Add menu items section.

In the Menu Structure section we can see the items that will be shown and customize them. For example we can modify the label that will be shown in the menu.

We can also change the order of the items in the menu by simply dragging them.
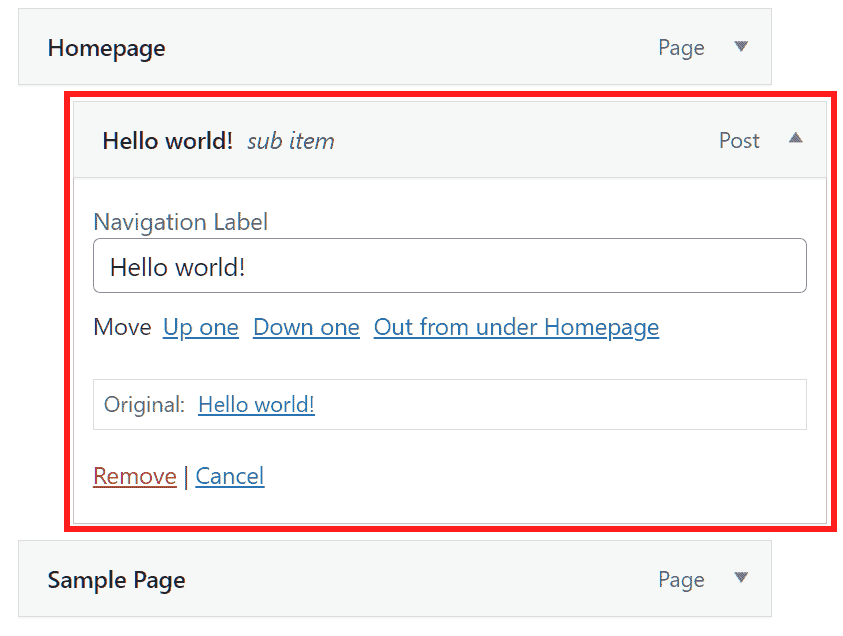
Menu elements can also be arranged in a hierarchical manner, let’s see in this example on how to create “Sample Page” as a sub-element of “Homepage”.
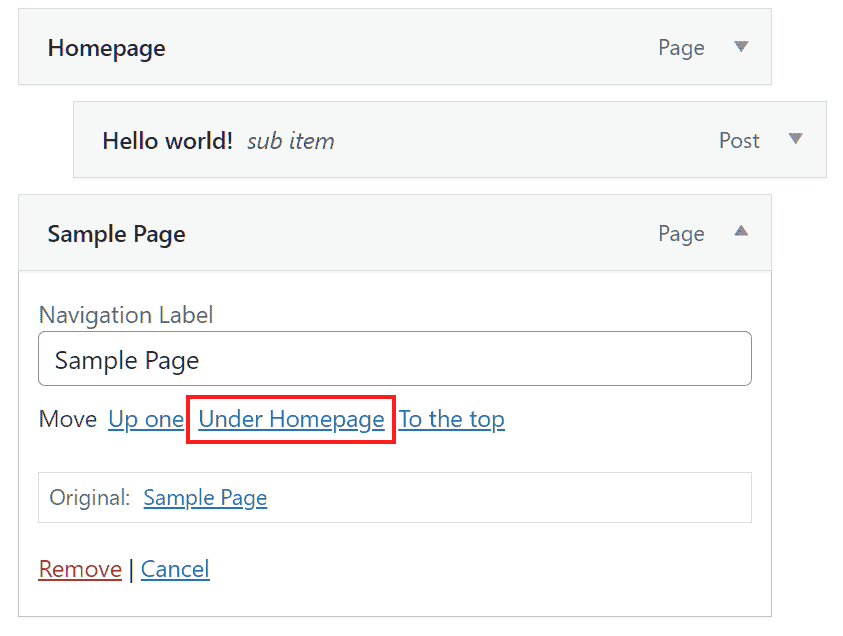
Sub-elements will appear like this.
To delete an item from the menu click on Bulk Select, select the item (or more than one) to be deleted and then click on Remove Selected Items.

Edit a menu
To edit a menu, click on Appearance → Menu, choose the menu you want to edit and click on Select.

Delete a menu
To delete a menu, select it from the drop-down menu at the top, click Select, and then click Delete Menu.

WordPress tutorial: plugins
In this section of our WordPress tutorial we will see how to manage plugins: from installation to activation.
For more in-depth reading and considerations on plugins and performance, check out our article dedicated to the WordPress plugin.
Install a plugin
We can install a WordPress plugin in different ways, in this section we are going to see how to install and activate a plugin from the WordPress dashboard. This allows us to install all the plugins present in the official directory.
If you have downloaded a premium plugin as a zip file you can always install it from the dashboard. You can follow the step-by-step procedure in the section Install WordPress plugins from a zip file on our dedicated article.
You can also install plugins manually with an FTP client like FileZilla (Install WordPress plugins manually through FTP), or from the command line (Install WordPress plugin with WP-CLI).
Install a plugin from the dashboard
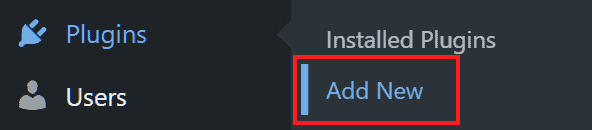
To add a new plugin click on Plugin → Add New.
We can use the search bar to find the plugin we are interested in. After that click on Install Now.

After installation we can activate the plugin by clicking on Activate.

Remember that some plugins will add items in the WordPress navigation menu. For example after activating Contact Form 7 you will see the Contact item.

Manage plugins
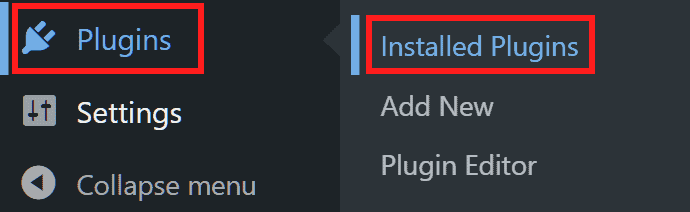
By clicking on Plugins → Installed plugins we can see the list of all plugins present on the site.
By default you will be shown all plugins, but you can also show only active, inactive, recently active, available updates and so on.
Updating a plugin
To update a plugin you can click on Available Updates, in this way you will only see plugins for which there is an update.

After that you just need to click on Update Now to update the plugin.

To enable automatic updates, just click on Enable automatic updates.

Activate/deactivate a plugin
To activate a deactivated plugin click on Activate.

If the plugin is active, you can disable it by clicking on Disable.

Delete a plugin
If the plugin has already been deactivated, you can delete it by clicking on Delete.

Bulk Actions
The Bulk Actions drop-down menu allows us to manage multiple plugins.
First, select the plugins, checking them one by one from the list. Then choose the action from the Bulk Actions menu and finally click on Apply.

This way we can enable multiple plugins, disable them, update them, delete them and enable/disable automatic updates.
WordPress tutorial: themes
In this section of our WordPress tutorial: the complete guide, we will see how to install and manage themes. If you want tips on how to choose them and where to find them check out the article on WordPress themes.
Install a theme from the dashboard
To install a theme on our WordPress site click on Appearance → Themes.
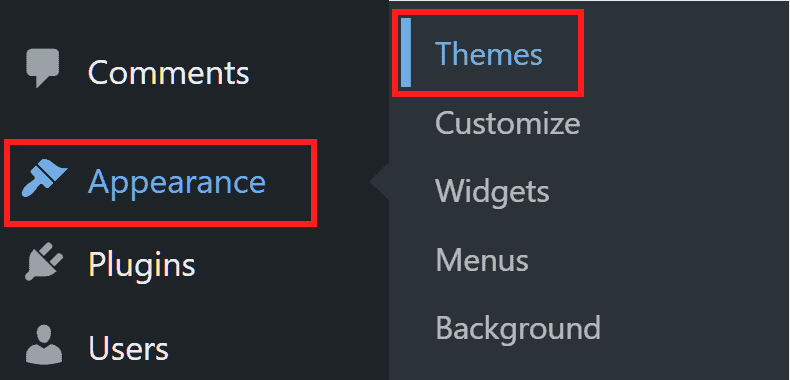
Here we will see the list of installed themes, to add a new theme click on Add New.

We can search for the theme by name by typing it into the search bar. Or we can see the most recent themes, favorites or filter the theme by functionality.

The functionality filter allows us to select themes based on subject (e.g. blog or ecommerce), functionality (custom logo, custom colors) and by layout.

Before installing a theme, we can preview it.

To install the theme, however, we just need to click on Install.

Activate a theme
To activate a theme click on Appearance → Themes. In this section you will see the active theme and you can activate another theme among the installed ones, as shown in this screenshot.

Delete a theme
From the section Appearance → Themes we can delete the installed themes. To do that click on the theme to show the details.

Then click on the Delete button in the lower right corner.

Install a theme from a zip file
Generally when buying a paid theme you are given a zip file with the files necessary to the functioning of the theme. For the installation you can proceed directly from the dashboard, let’s see how to do it.
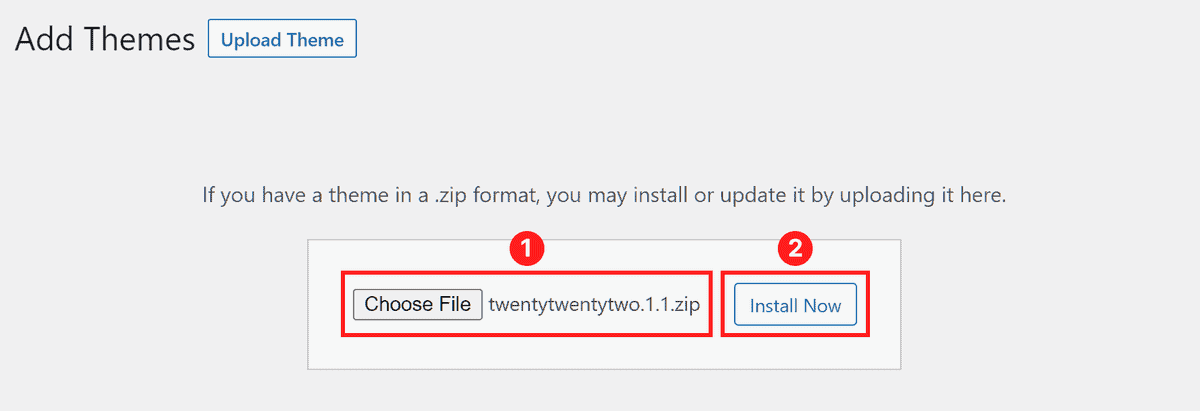
First click on Appearance → Themes and then on Add New.

Then click on Upload Theme.

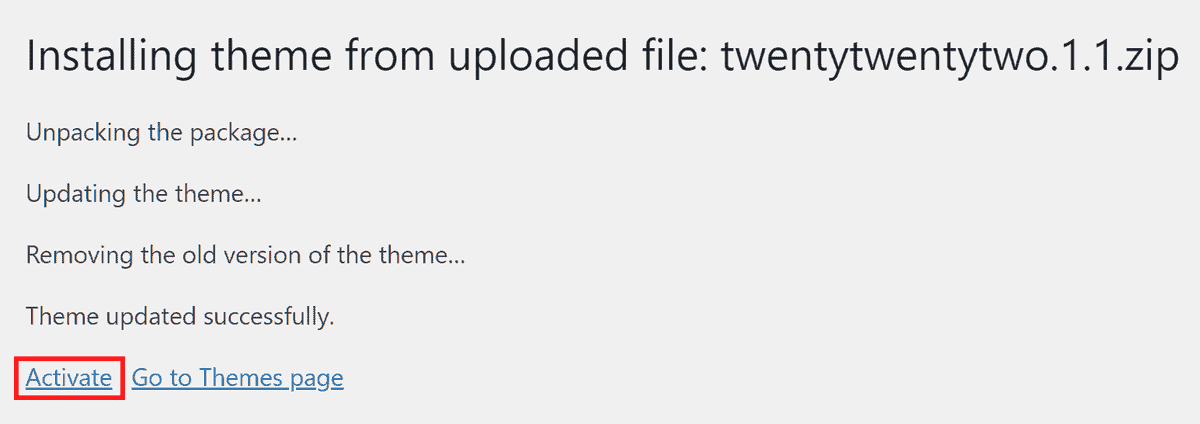
Drag and drop the file and then click on Install Now.
An alert like this will appear, this means that the installation is complete.

At this point you can return to the themes page or activate the new theme.
WordPress tutorial: tools
In this section of our WordPress tutorial, let’s see what functions the Tools section of WordPress has made available.
Available tools
The Available Tools section of WordPress simply redirects us to the Import section where the Category and Tag Converter is available.

Import
From this section we can install one of the tools to import articles or comments from another platform.
For example if we want to migrate from Blogger to WordPress we can use the Blogger tool found in this section.

If, however, we wanted to switch from WordPress.com to WordPress.org, we could use the WordPress tool.

As this we’ve seen how to transfer the site from Wix to WordPress in this guide, we can also use the RSS feed to import articles.

Export
The Export section allows us to export the data of our WordPress site. Specifically, we can choose to export all the content in an XML file, or to export only certain types of content (Articles, Pages or Media).
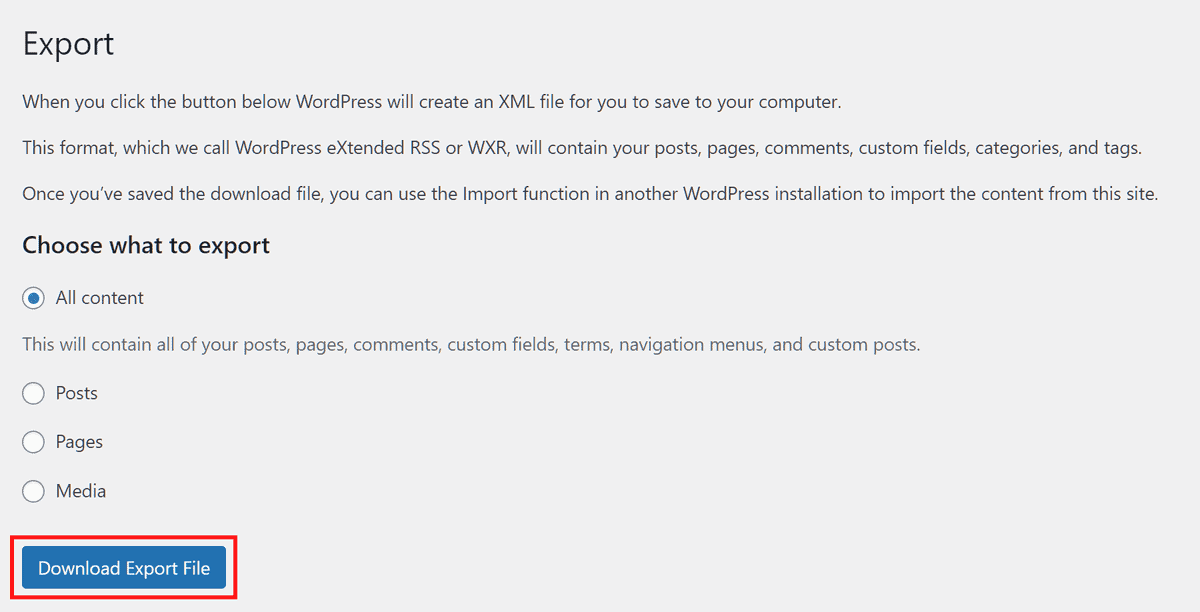
After choosing what content to include, to download the XML file we simply have to click on Download Export File.
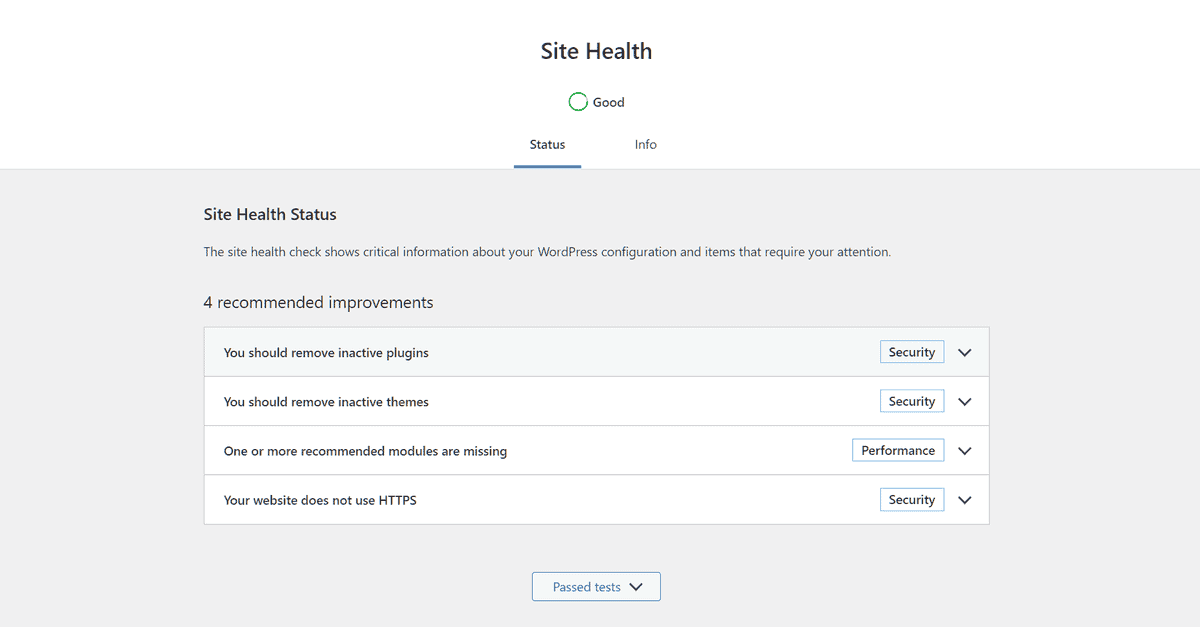
Site Health
The WordPress Site Health tool allows us to get recommendations on improvements we can make to the site to improve WordPress safety or performance.
Export personal data
The General Data Protection Regulation (GDPR) requires that users can request the data you hold. To provide this data, WordPress offers us a built-in tool: Export Personal Data.
To use it, all we need to do is enter the username or email address and submit the request.

We will then have to wait for confirmation from the user.

After the user confirms, the status will become Confirmed and we can click on Send Export Link to email the data.

Under Next Steps we will then read “Email Sent”.

Delete personal data
To delete the personal data of a user click on Tools → Delete Personal Data. Then enter the username or email address and click on Send Request.

The request will be put on hold and then the status will change to Confirmed after confirmation by the user. We will then be able to click on Delete Personal Data and delete the data.

WordPress tutorial: useful resources and conclusion
We have reached the conclusion of this WordPress tutorial: the complete guide. You now have the basics to start creating your site and delve into all the features as you go and installing the plugins you need based on the site you want to create.
As much as this guide is by no means short, it’s not possible to cover everything you need to know and what you can do with WordPress in one guide. There is still so much to discover and so many useful resources that can help you do so.
So, where to start? Surely you can rely on official resources, such as the WordPress Codex. Most of the documentation is in English.
Also, if you liked this article check out the others on our blog, especially the WordPress category. There you will find many useful guides on how to speed up WordPress and manage your site.
Were any steps in our WordPress tutorial: the complete guide unclear to you? Would you like me to elaborate on any particular features? Let me know in the comments below.
Ready to build your WordPress site?
Try our service free for 14 days. No obligation, no credit card required.


