
WordPress is one of the most widely used CMS (Content Management System). You simply have to think that about 39% of all websites use it.
That’s why in this guide, How to install WordPress: the definitive guide we’ve decided to explain the different ways to install WordPress step by step.
Let’s see what you need to know before proceeding with the installation and how to install it in different ways. We’ll start with a manual installation and then look at how to quickly install WordPress in just a few clicks.
However, let’s start with a brief introduction first.
Table of Contents
Install WordPress: basic information
Before we get into the core of How to install WordPress: the definitive guide there are a few things you need to know.
However, if you want to delve into the topic straight away check out our article on what is WordPress works.
In order to install WordPress, just like any other CMS, and use it to create your own website to upload to the web you need to have a server. If, on the other hand, you need to develop your WordPress site locally you can check out our guide on how to install WordPress locally.
As far as hosting services are concerned, there are several options to choose from. In this specific scenario, you can for example directly choose a WordPress hosting plan.
In this case, your site will already have the MySQL database required for the CMS to work and you won’t have to do anything but enter some simple data to complete the installation.
In addition to the language, you will have to decide on the username and password of the site administrator. You’ll also be able to choose a subfolder for the WordPress installation, in case you don’t wish to leave the default folder.
How to install WordPress

If you want to install WordPress you have several alternatives. The fastest and easiest method is to take advantage of an automatic installer such as Softaculous that allows you among other functions to install PrestaShop and more than 400 different applications. With our shared hosting, semi-dedicated hosting and reseller hosting you can use this tool to install WordPress in just two clicks and start using your site right away.
Automatic installers, however, are not the only option.
Alternatively, you can choose to install WordPress manually. Let’s start by seeing how to proceed with the manual installation and then how to do it using Softaculous.
Another method you can use is command-line installation, you’ll find the whole procedure to follow in our WP-CLI guide.
Install WordPress manually
Firstly, you‘ll need to download WordPress from the official site.

This will give us a compressed file and we can proceed in two ways.
In the first case we can upload the compressed file via FTP or with the file manager, as we’ll see in a moment. In this case we’ll have to use the file manager to unzip the archive.
In the second case, instead, we’ll unzip the files before uploading them. In this case, you just have to extract the files with a program such as WinZip or 7Zip.
Uploading files
We can upload the files needed for WordPress installation in several ways. The first option is by using the control panel file manager (in our case we’ll show how to do it with cPanel).
The second option is to use the FTP protocol for file transfer, to do this we’ll use Filezilla.
Using the cPanel file manager
To install WordPress manually, we can directly use the cPanel file manager that allows us to upload files to the server.
To access the file manager just click on File Manager, as shown in this screenshot:

The folder where we will need to upload our files is public_html as seen in this screenshot:

With the file manager, we can also upload the compressed file directly and then extract it from the file manager. To do this we simply click on Upload and then choose the file to upload and wait for the upload to complete.
At the end click on Back to …
Then select the file you just uploaded by simply clicking on it and then click on Extract. It will open a window that allows us to choose where to extract the files, we select /public_html
By doing so, the files extracted from our compressed file will be placed in a subfolder of the public_html called wordpress.
What we need to do is move them to the main folder.
To do this just open the wordpress folder, click on Select All and then Move.
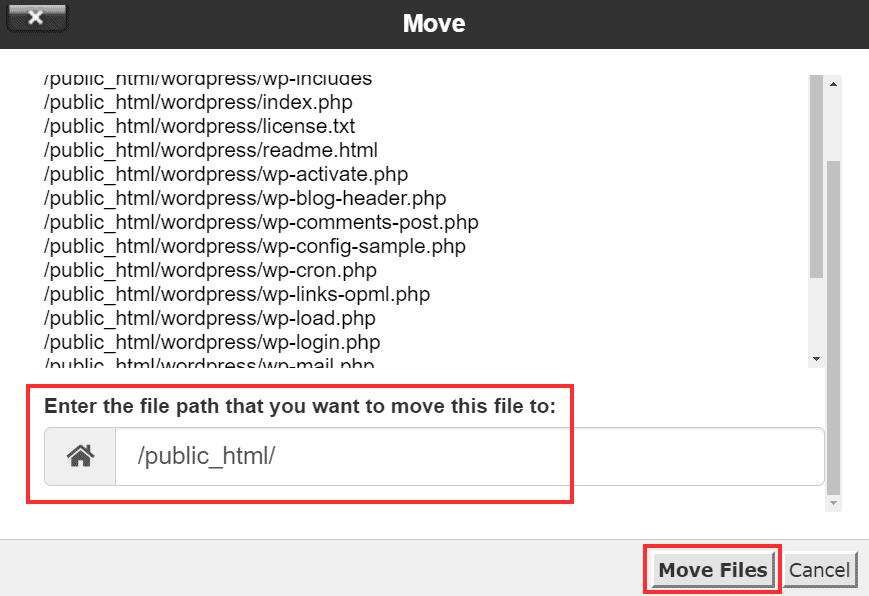
We will then be asked for the destination path of the files to which we should always enter /public_html and confirm by clicking on Move File(s) as seen above.
Using Filezilla
Another way to upload the files needed for the WordPress installation is to use the FTP protocol. To connect to the server through FTP, we can use a client like Filezilla. You can follow the detailed procedure in our guide to using FileZilla.
After connecting you just need to open the public_html folder.

This is where you have to upload the files in the wordpress folder that you extracted from the archive you downloaded.

Create Database
From cPanel to create your database just click on MySQL Database Wizard.

All you have to do is follow the various steps that will allow you to choose the name of your database, and create a user.
After choosing a username and password, you will need to grant permissions to the user you just created. For installation it is better to directly select All privileges as you see in this screenshot:

If you have any doubts you can follow the step by step procedure in our tutorial on how to create a MySQL database.
Set up wp-config.php
After creating your database you can create the wp-config.php file which is the file that will allow WordPress to connect to the database.
You can also choose to ignore this step.
By doing so the file will be created directly when you start the installation as we will see in the next paragraph.
In any case, let’s see how to create the configuration file.
Among the files extracted from the WordPress archive that we saw how to download at the beginning of this guide, there is also one that is called wp-config-sample.php
The first thing you need to do is rename the file to wp-config.php and then open it with any text editor, even the simple notepad with Windows is fine.
The information you need to enter is the information that allows you to connect WordPress to your database.
You have to then follow this:
// ** MySQL Settings – You can get this information from your hosting provider ** //.
Here, you’ll have to enter the access data for the database you created following the steps described in the previous paragraph section by section.
DB_NAME: instead of ‘database_name_here’ you must enter the name of the database
DB_USER: instead of ‘user_name_here’ enter the name of the database user
DB_PASSWORD: instead of ‘password_here’ enter the password you have set for the user
DB_HOST: in most cases, you can leave localhost
In the absence of specific cases, you can leave the other options DB_CHARSET and DB_COLLATE unchanged.
At this point in the Authentication and Locking Unique Keys section you have to insert the secret keys you generated with the WordPress online generator that you can find here.
After you’ve completed this step you just need to save the file and then upload it together with the others as we’ve seen in the paragraphs on how to do it using the cPanel file manager or via FTP with Filezilla.
Start WordPress installation
At this point when you connect to your site from your browser, you will find the setup procedure.
If you uploaded the WordPress files in a folder inside /public_html you don’t have to link on the home page of your site but to the correct address. For example, if you uploaded the files in a folder called myblog you will need to link to http://yourwebsite.com/myblog/
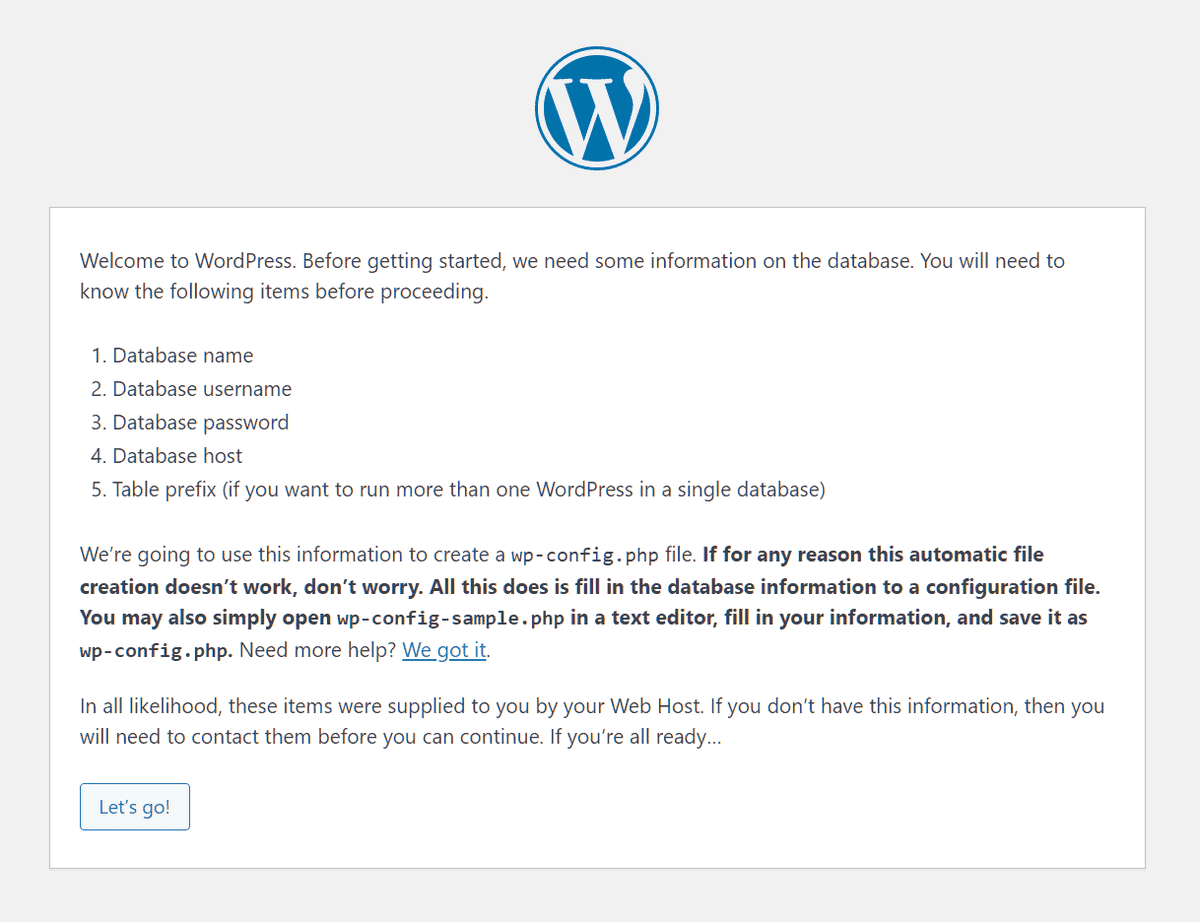
As you see in the screenshot above to proceed you will need to have some data, namely those related to the database that we have seen before on how to create.
This information will be necessary to create the wp-config.php file.
To begin the configuration of WordPress we must first click on Start!
In the new window, you will have to enter the data that will allow the connection to the database. Therefore, the name of the database that you entered earlier in the creation phase of the MySQL database is required along with the name and password of the user we created earlier.

Remember that the name of the database will be formed by the user name you use to access cPanel and the name chosen for the database separated by an underscore in this format: username_nomedatabase
After entering them, a new window like the one you see below will open and you can start the installation by clicking on Run the installation.

In the new window, you must enter the basic information to start configuring WordPress, all the information you enter can also be changed later.
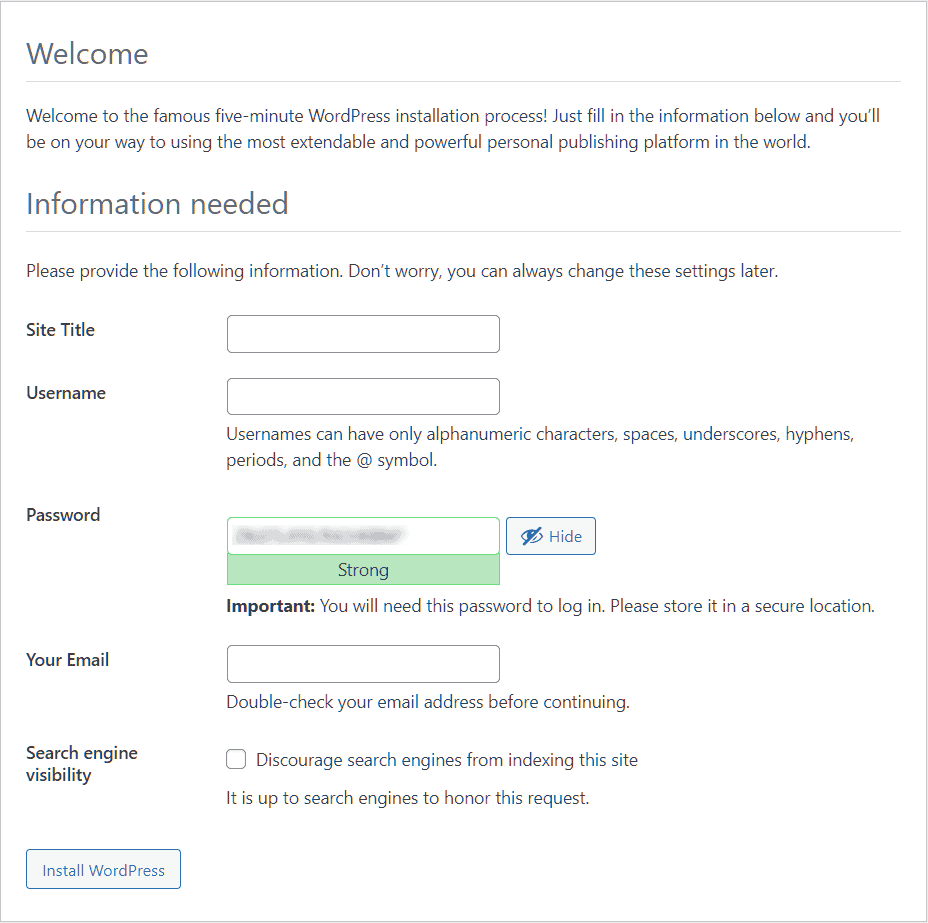
In addition to entering the title of the site, you’ll need to create a user with a password. You’ll also need to enter a valid email, so check that you’ve written it correctly before proceeding.
From here you can also choose whether to allow search engines to index your site or not, through the option Search Engine Visibility.
When you have completed the procedure click on Install WordPress to proceed.
At this point, you’ll be faced with a screen that tells you that WordPress has been successfully installed.

Here you will also have a summary of the username you chose and you can click on Login to access the WordPress login page. After completing the installation you will also receive a summary email with the same data.
Install WordPress with Softaculous
Another way to install WordPress quickly and easily is to use what is called an auto-installer. One of the most widely used ones is Softaculous.
If you’re one of our customers, you only need to access the cPanel control panel and use Softaculous to install WordPress.
An increasing number of hosting services allow you to use this service, for example, one of the easiest ways to install WordPress on Aruba is to use Softaculous. Let’s see, then, how to use it.
You just need to access the cPanel, or in general the control panel, with the login details provided by your hosting. From the cPanel, you have to look at the software section and click on the application called Softaculous Apps Installer.

In the side menu on the left, you will see a number of categories, the one we are interested in is Blog. If you click on it a drop-down menu will open with a number of platforms including WordPress.
At this point clicking on WordPress will open the CMS tab with a series of information including the version, release date and space required.

To proceed with the installation just click on the Install button that you see in the screenshot above.
After clicking, you will see a window where you have two choices: the first is to click directly on Quick Install and start the installation immediately.

In the second case, however, you can choose the settings before actually installing WordPress, let’s see them one by one.
Software Settings
Firstly you can choose which version to install in the Software Settings section.
By default, the most recent stable version is selected, which is currently 5.8 (released on July 20, 2021). But you can also choose to install one of the previous versions.
As for the protocol, in all cases where it is possible, that is, when your site has an SSL certificate,it is better to use the https protocol by choosing the option https://.
If you want to know more I recommend you to read our guide on how to switch from http to https with WordPress.
In the In Folder field you can specify a subfolder in which to install WordPress, for example, if you want to use WordPress to manage only a section of your site. In this case just name the folder where you want it installed, for example, blog.

If you leave the field blank, WordPress will be installed directly in the root.

Site Settings
The Site Settings section allows you to choose the name and a brief description of your site. From here you can also choose to check the box next to Enable Multisite (WPMU).

The WordPress multisite feature is designed to allow you to manage multiple sites through a single WordPress installation. So, in most cases, if you only need to manage one site or blog, you don’t need it.
Account admin
This is the section that allows you to choose your username, email and password for the administrator. We recommend that you always change the username and don’t leave the default admin username.

When you set your password, you will see the security level that warns you if the password you entered is too short, invalid or strong. Make sure you choose a complex enough password.
Choose Language
Here you can simply set the language of WordPress by choosing from those available in the list.

Select plugins
This section allows you to choose whether to install and activate Loginizer which is a plugin that will protect your site from bruteforce attacks. The plugin works by limiting the number of attempts available during the login phase.

From here you can also choose to install the classic WordPress editor by checking the box next to Classic Editor.
Advanced options
From the advanced options, you can also choose a different name for your database and table prefix than those set by default.
By default every time a new version of WordPress is available you will receive a notification, but you can also choose to disable these notifications. All you need to do is check the box next to Disable Update Notifications.
From the Automatic Update item, you can choose whether to enable WordPress updates automatically whenever a new version is available. If you leave the default option Do not Auto Upgrade selected, you can proceed with the update when you think it’s appropriate.
From here you can also enable automatic updates related to WordPress plugins and themes already installed. If you enable them, a check will be made every 24 hours to check for updates and they will be installed automatically.
Through this section, you can also set the frequency of automatic backups and choose the number of backups to keep (by default 4 are saved).

Choosing the number of backups to keep, of course, also depends on the space you have available on the server. There are several ways to make WordPress backups automatic, if you want to learn more you can take a look at how to make a backup using UpdraftPlus.
Select theme
Before proceeding with the installation you can also choose to directly install one of the available WordPress themes.

If you want to see what one of these themes looks like, just click on it and then click on Demo to get an idea of what your site will look like using this theme. If you like it then just click on Select Theme to choose it and return to the previous screen.

If you do not choose one of those available will be installed automatically default and you can change it later through the bulletin board of WordPress.
Complete the installation
Once you have completed all the steps, all you have to do is click on Install and wait for the installation procedure to complete. Upon successful completion you will receive the following message on your screen: Congratulations, the software was installed successfully.
Conclusion
In this guide,How to install WordPress: the definitive guide we have reviewed the different ways in which you can install WordPress. We’ve seen how to perform the installation manually and how to proceed more quickly through the help of an auto-installer.
Were you able to complete the installation or are there any steps that you do not understand? Let me know in the comments below.
Ready to build your WordPress site?
Try our service free for 14 days. No obligation, no credit card required.


