WordPress backups are essential to ensure that you can recover site content should something go wrong.
Updates gone wrong, hacker attacks, but even programming errors can require a restore of a backup.
For this it is important to know how to backup WordPress and always keep copies of the site up to date and functional.
In this guide we will see what options we have to create a site backup, both manually and automatically with a plugin.
Table of Contents
WordPress backup: what it’s for and why it’s important
Backing up a site allows us to avoid losing data and changes made, as well as keeping us safe from possible problems.
What can go wrong with a WordPress site?
Everything.
On the one hand there are accidental events that we cannot predict such as a hacker attack, programming errors or incompatibility with plugins that can cause problems for the site. Think for example of the dreaded WordPress critical error.

On the other hand, there are all sorts of situations that require a backup. Some examples of cases in which it is good to make a backup of WordPress:
- before making changes to the site;
- before upgrading WordPress.
In any case, if you are relying on a reliable hosting service, you should already be able to count on automatic backups. All SupportHost customers can rely on daily backups and can autonomously restore the last 30 backups from cPanel.
The presence of automatic backups does not exclude the need and the importance of performing manual backups with a certain regularity.
How to do a complete backup of WordPress
To make a complete backup of a WordPress site you need to make a copy of:
- all site files, i.e. those contained in the WordPress site directory;
- the WordPress database.

In our guide to phpMyAdmin for WordPress we have seen how the database is organized.
In short, the tables of the database are those in which all the contents of the site are stored. In fact, the following are saved in the database: comments, articles, pages, site menus and so on.
The files contained in the root directory, usually called root, public_html or with the name of your site, are the files that the CMS needs to work. Among them are the plugins, themes and media files that you upload to your WordPress site.
How many ways can you backup your WordPress site?
Now that we’ve seen why it’s important to save a backup copy of your site and what files should be included in the backup, let’s see how to proceed.
Basically there are two alternatives:
- create a manual WordPress backup;
- use a plugin.
In this guide we will focus on manual backups and we will see how to create a copy of your files and database step by step. We will also see how to make sure that our backup can be restored.
In closing we will also see which plugins to use for the backup.
How to make a manual WordPress backup
To make a WordPress backup without using plugins, we need to make a copy of the files and a backup of the database.
There are several methods to back up your WordPress site files and make a copy of the database.

In the following sections we see:
- how to back up your files (5 methods explained step by step);
- how to dump the database (2 methods);
- what to do after backup;
- how to restore a WordPress backup.
Make a backup of your WordPress site files
First let’s see how to create a copy of all WordPress site files.
We’re going to see how:
- use cPanel’s backup function;
- use the file manager;
- download a backup with an FTP client;
- create a backup via SSH.
Keep in mind that these different methods do the same thing, so you can choose which method you prefer to use.
Download a backup of your WordPress files with cPanel’s native feature
Through cPanel’s backup function, we can create a copy of the site’s files. This function allows us to create a compressed tar.gz file and save it on the server.
By doing so we will be able to download the archive to our computer to keep the backup of the files.
Let’s see how to do it step by step.
First we log in to cPanel, then click on Backup from the File section.
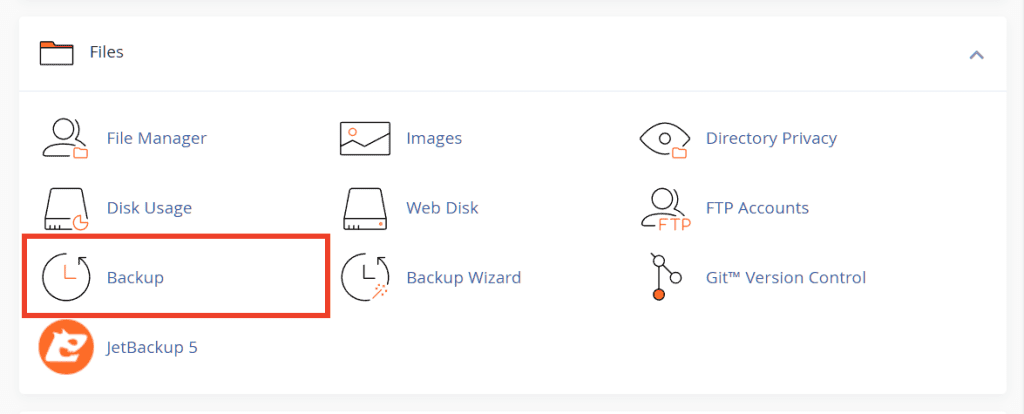
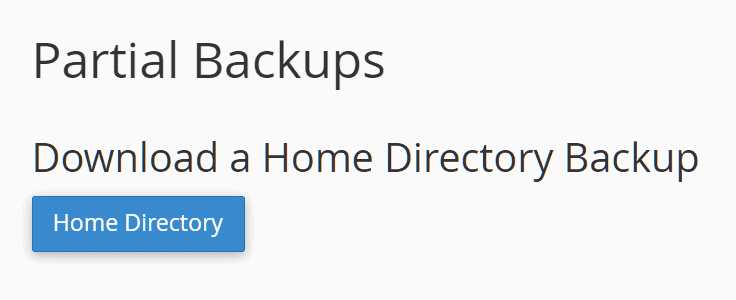
From here we can create a partial backup of the site and download a copy of the files. Specifically we can create a backup of the home directory, to create a copy of all files in a tar.gz archive.
To do this we must click on the Home directory button under “Download a backup of home directory“. Then we just need to choose the folder in which to save the archive.
Download a backup of your WordPress files with the file manager
The second method that we can use to download a file backup is to use the cPanel file manager.
We access cPanel and click on File Management from the File section.
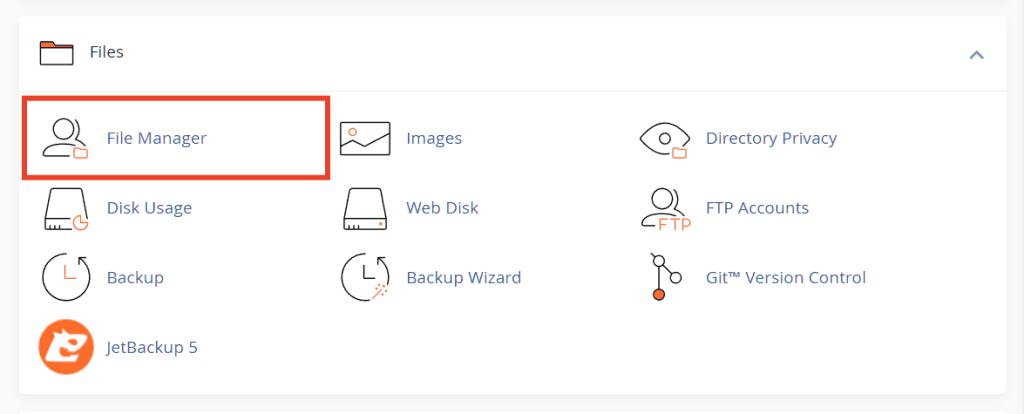
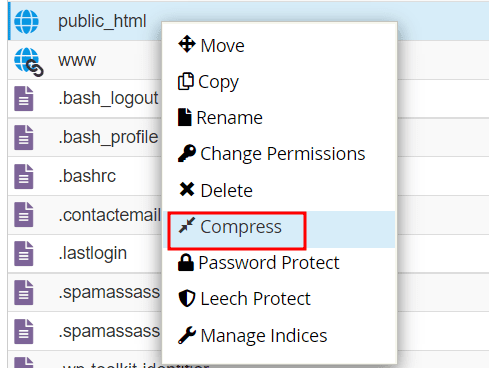
From the left section we can navigate through the site folders and locate the root directory. Note that it could be called public, public_html, root or have the name of the website.
We right click on it and then click on Compress as you see indicated in this screenshot.
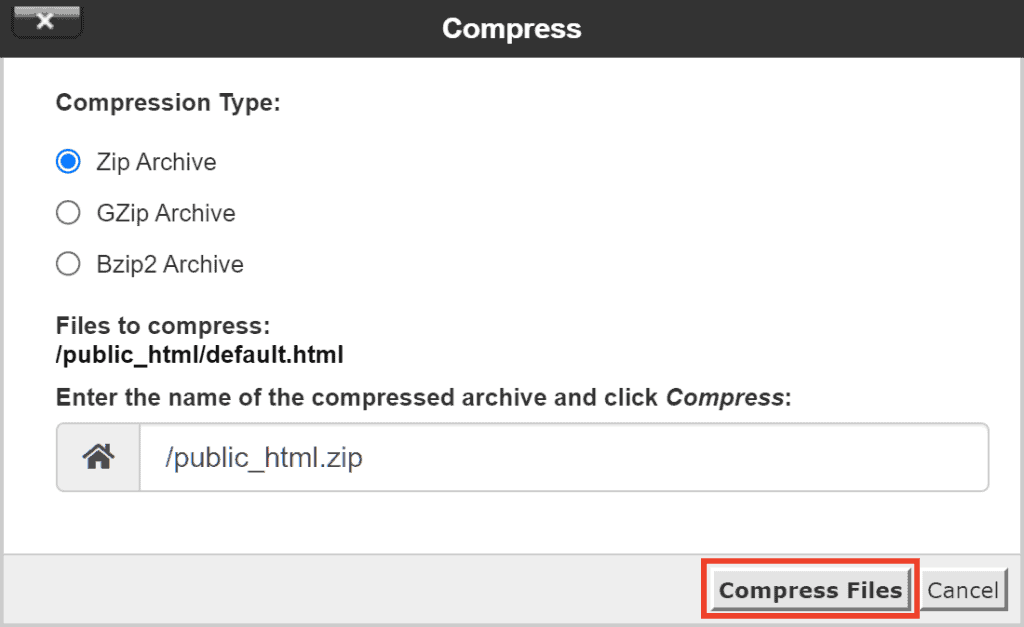
We will be asked for the type of compression, we can choose Zip Archive and click on Compress Files to create the archive.
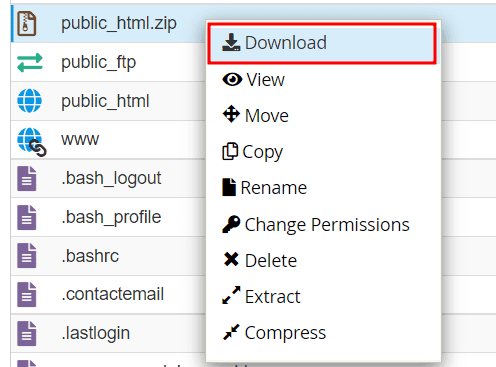
This will create the zip archive of the site files that we can download to our computer.
To download the archive, right-click on it and click on Download.
Please note that for security reasons it is recommended to delete the zip file from the server after downloading it.
Make a copy of your WordPress files with the file manager
Instead of creating a compressed archive and downloading it, we can also create a copy of the WordPress site files in a folder on the server.
Remember that to ensure that you have a backup copy of your WordPress site, it is not recommended to keep it on the same server as your live site.
One of the fundamental points of a disaster recovery strategy is to keep multiple backup copies of files and use different servers. For example, you could keep one copy of the site files on your computer and another copy on a cloud storage service.
However, to create a copy of the WordPress site files, we can create a folder on the server and name it “backup”.
From the cPanel file manager click on “+folder”, enter the name and click on Create New Folder.

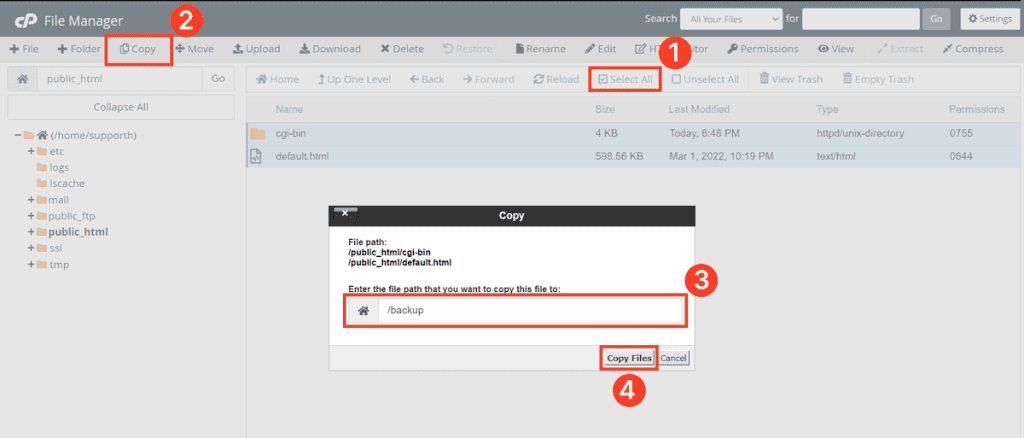
At this point we can select all the files inside the root directory, for example public_html, and copy them inside the new folder.
To do this with the cPanel file manager we follow these steps:
- open the public_html folder
- click on Select All
- click on Copy
- we enter the path of the backup folder that we have created and click on Copy files.
On this screenshot you see the listed steps summarized.
#Download a backup of your WordPress files via FTP
The fourth method we can use to download a copy of our WordPress site files is to use an FTP client to connect to the server.
To install the FTP client on your computer and establish the connection to the server, check out our guides on two of the most popular programs: FileZilla and Cyberduck.
The information needed to connect to the server via FTP will be provided to you by your provider.
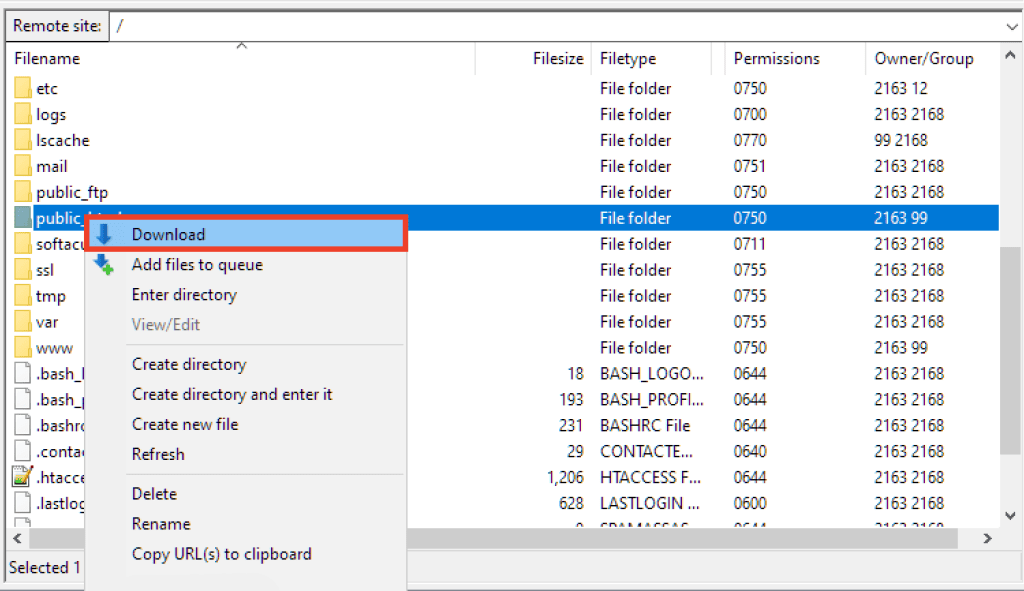
After connecting to the server, you will need to navigate through the folders and find the root directory of the WordPress site. This folder can be named public_html, root, public or have the name of your website.
Once you find it, you can download it to your computer. The procedure varies according to the FTP client you are using, in this example we see how to do it using FileZilla.
Download a backup of your WordPress files via SSH
Another method you can use to back up your WordPress files is to connect to the server via SSH and create an archive of the files to download locally or a copy of the files in a new folder on the server.
First we need to establish an SSH connection with the server.
Then using SSH commands we can create a tar or zip archive of the files to be able to download them as a backup.
To create a tar archive with site files we can use this command:
tar -zvcf backup-name.tar.gz public_htmlThis command is used to create a tar.gz archive of the “public_html” folder. The archive name will be “backup-name.tar.gz”. To change the folder to be compressed and the name of the backup, just replace the name with the elements I have indicated.
If, on the other hand, we want to copy the files to another folder, we can create a “backup” folder like this:
mkdir backupThen we can copy all the contents of the “public_html” folder into the backup folder, like this:
cp -r public_html/* backup/In this way the contents of the public_html folder (and not the folder itself) will be copied to the “backup” folder that we have created.
If instead you want to copy the entire public_html folder inside the backup folder you created you can use this command:
cp -r public_html backup/In this way you will have the backup folder on the server with the public_html folder inside.
Make a backup of the WordPress site database
Now that we have seen 5 different methods to create WordPress file backup, let’s see how to create a database backup copy.
In this case we need to create what is referred to as a database dump, i.e. export a complete copy.
There are several ways to do this:
- create a dump with phpMyAdmin;
- create a dump with other database management systems such as adminer, sequel pro or sequel ace;
- export a copy of the database with the WP Migrate DB plugin.
Let’s see how to do it in detail.
Remember that you just need to make a copy of the database with one of the methods we will see. You can choose one of the methods to use among those proposed.
Download a database dump with phpMyAdmin
One of the most used database management systems is phpMyAdmin.
We can access phpMyAdmin directly from cPanel, from the Database section.

Once the interface is open we will see the different databases present on the site. From the left sidebar we can select the database of our WordPress site. Doing so will open a list of database tables in the central section.
Then click on the Export tab from the top bar. From this section it is possible to dump the database.
First we are asked to choose the export method. We can select Quick because we need to make a complete copy of all the tables.
In the Format section we select SQL and then click on the Run button.
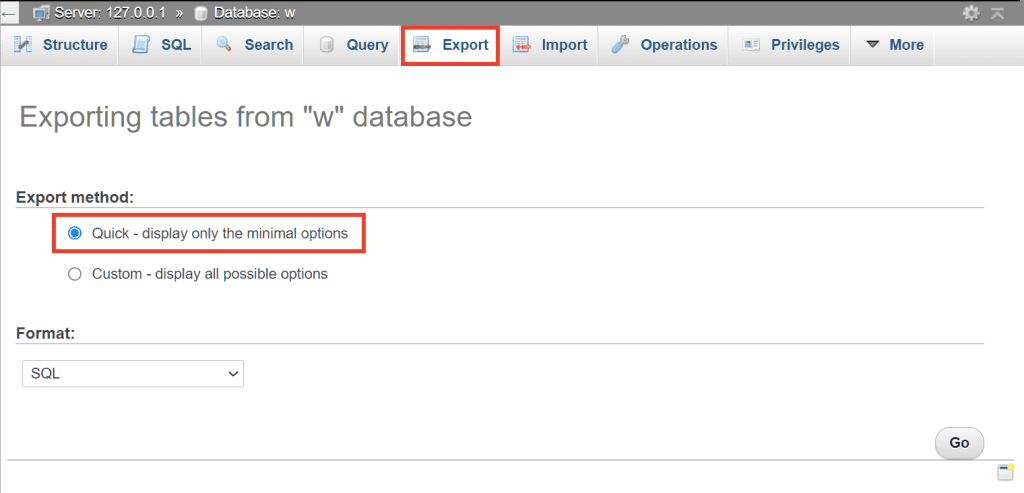
We then choose the folder on our computer in which to save the copy of the database.
Download a copy of the database with WP Migrate DB
Another method that can be used to make a copy of the WordPress database and download it to our computer is to use a plugin.
WP Migrate DB is a plugin that can be used if we want to transfer a WordPress site from one server to another.
In addition to migrations, this plugin can also be used to export a copy of your WordPress database. Let’s see how to use it.
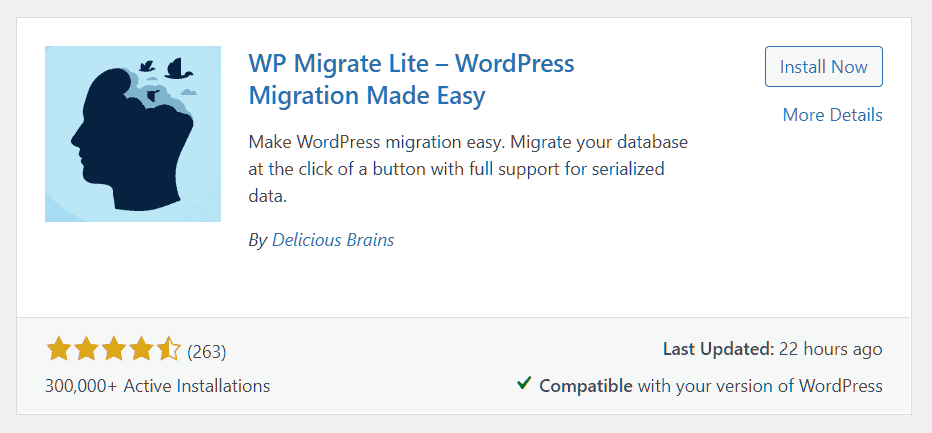
First you need to install and activate WP Migrate (previously called WP Migrate DB) by Delicious Brains on your WordPress site.
Then click on Tools > WP Migrate to access the plugin settings.
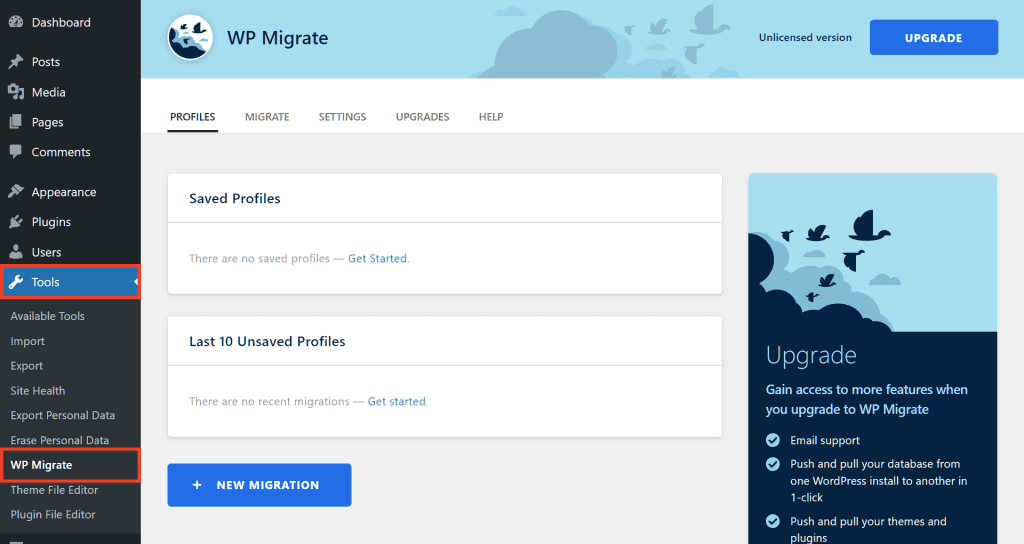
Open the WP Migrate tab and click on Export database. We leave the default settings and click on the Export Database button at the bottom of the page.
Keep in mind that in this case we don’t need to make replacements inside the database and therefore we don’t have to use the Find & Replace function of the plugin.
For this, eliminate the contents of the automatically generated columns that you see in the Find list and proceed to export the database.
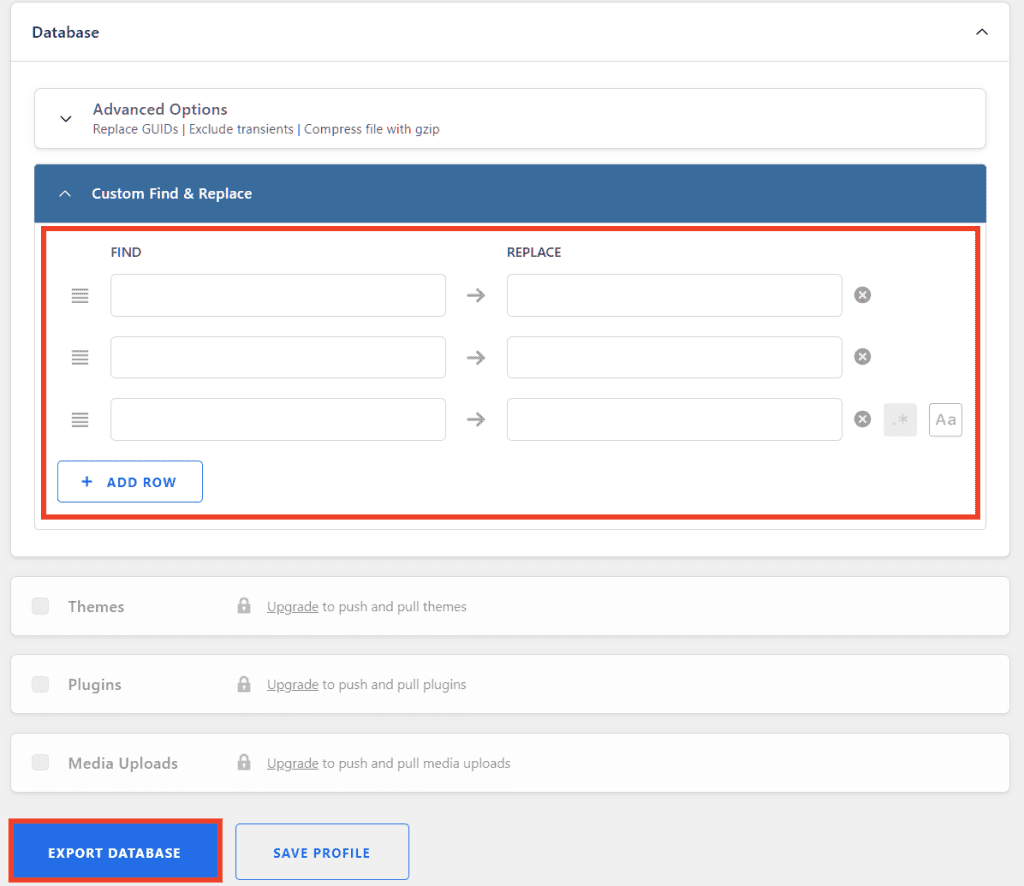
The plugin will generate a sql.gz file and we can then save the WordPress database backup to our computer.
What to do after WordPress backup
After creating the WordPress site backup it is important to verify that the backup is working.
To do this we can create a site staging environment and try to restore the backup. In this way we can be sure that the copy of the files and the database has taken place correctly and that the backup can in all respects be restored.
All of our plans from shared hosting to WordPress hosting to dedicated solutions allow you to stage your site for testing and development purposes.
Restore a WordPress backup
To restore a manual WordPress backup we need to upload site files and import the database. Let’s see how to do it now.
Upload site files
We just need to connect to the server via FTP, using one of the clients we have seen before such as FileZilla or use the cPanel file manager.
We then need to upload the root directory of the site to the server. Note that it can be named public, public_html, root, or your site name.
Before doing so, it is advisable to rename the folder, for example to “public_html_new” and upload it to the server in the same position as the current one.
At this point we can eliminate the old directory (eg “public_html”) and rename the backup folder again with the previous name.
Import the database
To restore the WordPress site backup we need to import the database backup.
To do this, access phpMyAdmin and select the WordPress database from the left sidebar.
Click on the Import tab and then click on Choose file.
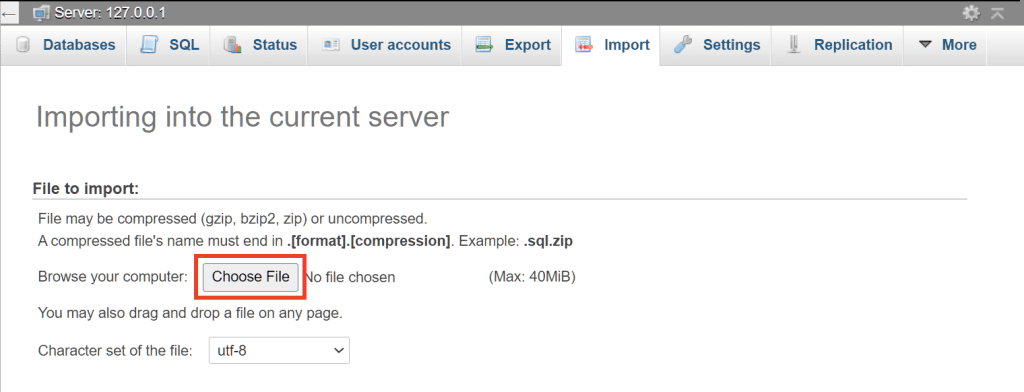
Let’s load the database backup and make sure that the selected format is SQL. Then click Go at the bottom of the page to import the database.
WordPress backup: the plugins to use
In addition to manually backing up your WordPress site, you can rely on a plugin.
There are several WordPress plugins that allow us to schedule site backups at regular intervals.
Generally they are almost all available in a free version and a premium one with additional functions. For example, in most cases the plugins that allow you to create incremental backups are paid.
Let’s see some of the most used.
Updraft Plus
UpdraftPlus is a plugin used on over 3 million sites and has a free and a premium version.
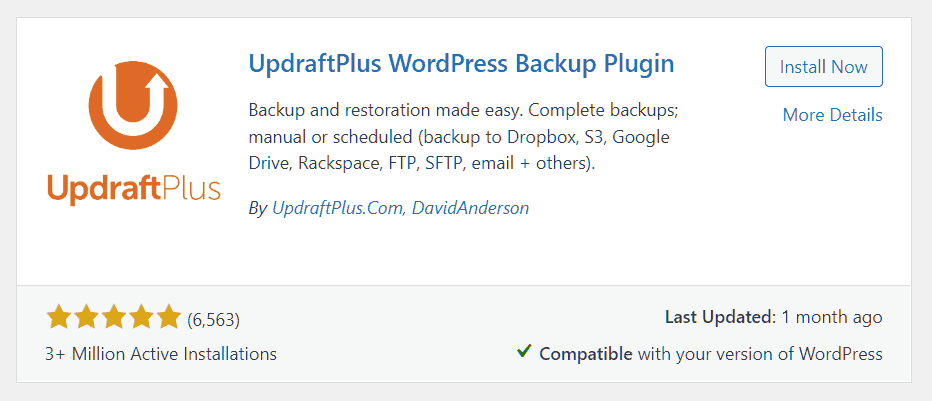
Among the functions we mention the possibility of scheduling backups and saving them directly in the cloud.
There are some differences between the free and premium version of the plugin, for example, incremental backups of WordPress are only possible with the premium version.
If you want to dig deeper into the differences between the two versions of the plugin and see how to use it to create backups, check out our UpdraftPlus guide.
Duplicator
Another WordPress backup plugin is Duplicator which is used on over 1 million active sites.
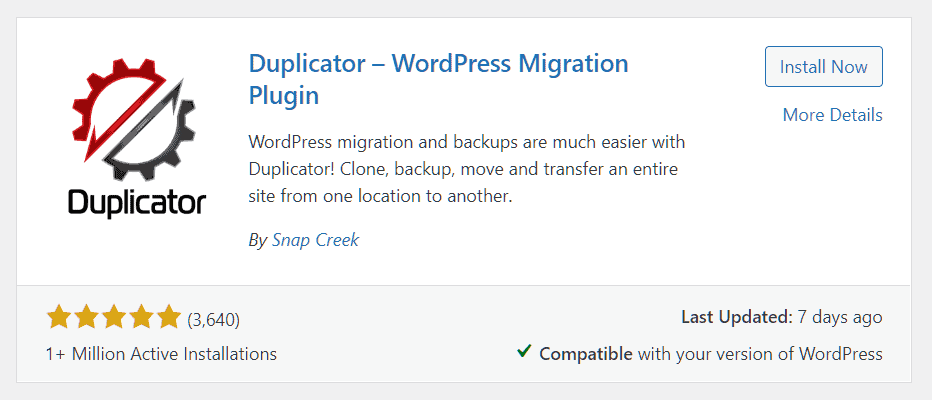
This plugin comes in a free version and a paid Pro version. In the free version, you can create a backup of your WordPress files and database and use the plugin to transfer your site from one server to another.
The pro version includes other features such as the ability to schedule backups and save files to the cloud.
With our guide you can learn how to use Duplicator to transfer the site or even just to create a backup.
Jetpacks
Jetpack, with over 5 million active installations, is one of the most used backup plugins.
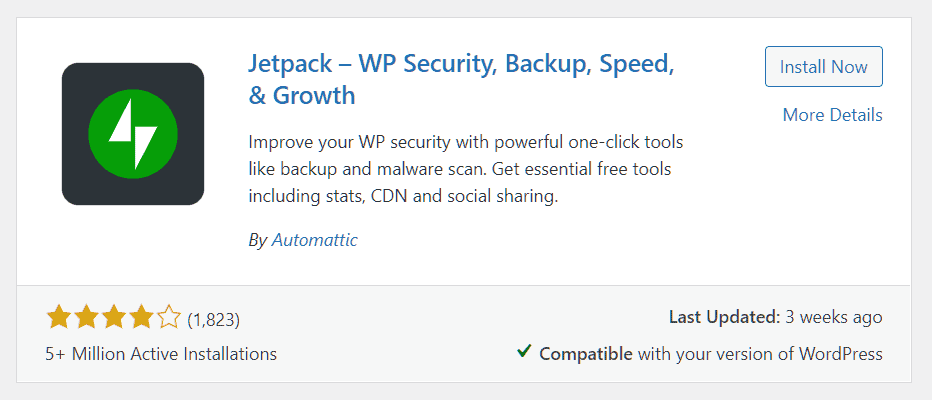
Like the other plugins we’ve seen, Jetpack also has a free version and several paid plans.
The backup feature as well as other features including site scanning are only available with the paid plans.
WP Time Capsule
WP Time Capsule is a premium plugin used in over 20k active WordPress installations. A 30-day free trial is also available by registering on the site.
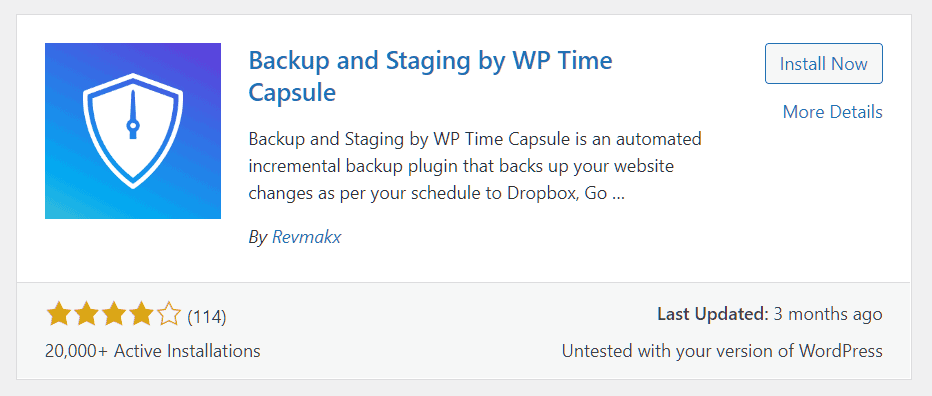
The plugin has different plans starting at $49/year in the Business version limited to 2 websites. Among the functions of this plan are real-time backups and keeping copies for 30 days.
Conclusion
We have seen why it is important to back up WordPress on a regular basis. Then there are particular situations in which it is always recommended to make a new backup, for example before each update.
Even if you can count on automatic backups, whether they are those made through a plugin or included in the hosting service, don’t forget to also make a manual backup from time to time. As also recommended by the WordPress Codex.
In this guide we have seen how to create a complete backup of WordPress (files and database) using different methods.
Which method do you prefer to create manual backups of your WordPress site? Let us know with a comment.


Leave a Reply