
Cyberduck is an FTP client that allows us to access files on the server, transfer files to and from the server, or edit files. It is a free program available for macOS and Windows. It is also possible to use Cyberduck on Linux because of the command-line interface.
In this article, Cyberduck: the definitive guide, we will see how Cyberduck works and how to use it to connect to the server. We will then see how to transfer files and synchronize them with files locally. We will also find out how to edit files and change permissions using Cyberduck. Let’s start with the installation of this FTP client.
Table of Contents

How to install Cyberduck
In order to use Cyberduck to access our account, we must first download the FTP client to our computer.
The program is free, but you can make a donation of at least $10 and receive a registration key. This way you support the developers and turn off notifications inviting you to donate.
We then download the program from the website.
To use Cyberduck on Windows we simply download the installer as shown on this screenshot.
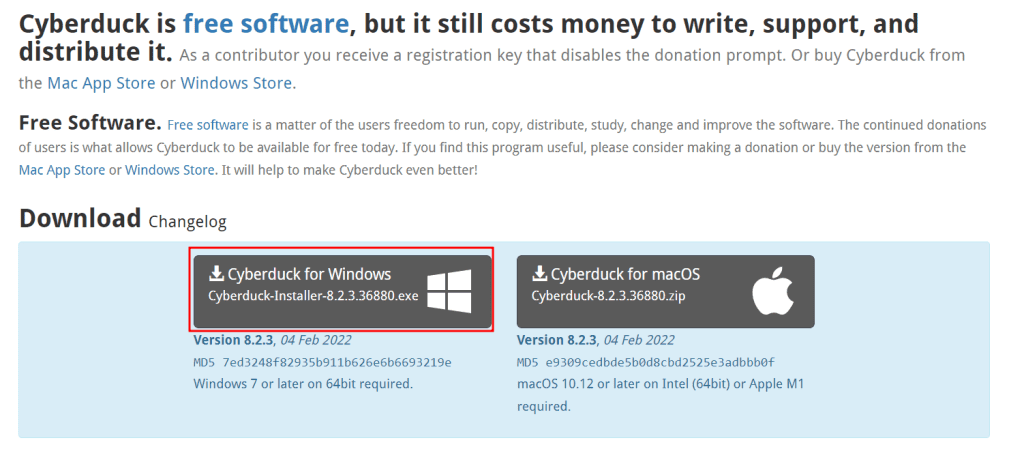
Please note that the latest version of the FTP client is compatible with Windows 7 or later 64-bit operating systems. To download an earlier version we simply click on Changelog and download the version compatible with our operating system.
For example, Cyberduck version 4.8 is compatible with Windows Vista.

If, on the other hand, we want to download Cyberduck for macOS we just click on the button shown in this screenshot. The current version (8.2.3.36880) is compatible with macOS 10.12 and later versions.

If we are interested in using Cyberduck on Linux we can install and use the command line ftp client (duck).
Depending on the distribution we are using, we can install the tool with the following commands.
RedHat:
sudo yum install duckDebian:
sudo apt-get install duckFor Arch you can refer to the repository.
For more details, you can follow the indications of the page dedicated to the tool, and you can also use Cyberduck from a terminal from macOS and Windows.
In this article, Cyberduck: the definitive guide, we will refer to the Windows version.

Cyberduck: how it works
Cyberduck is an FTP client that allows us to connect to files on the server using the FTP or SFTP protocol. To use the SFTP protocol you must have a plan with SSH access, in our case it is included in all our plans, including semidedicated hosting, WordPress hosting, VPS cloud hosting and dedicated servers.
Cyberduck is also compatible with cloud storage services including Google Drive and Amazon S3, which is part of the Amazon AWS services.
With an FTP client such as Cyberduck or FileZilla, we can perform several operations. The most common ones are:
- download a file from the server to our computer
- upload a file from our computer to the server
- Create a new file on the server or edit an existing file or folder
- Change file and folder permissions.
Some practical situations where we may need to use an FTP client are:
- transfer a WordPress site;
- install WordPress with a manual installation;
- install WordPress local and then upload the site to the server;
- update WordPress.
Cyberduck’s interface
After installing Cyberduck, we can start it and we will have a screen like this.
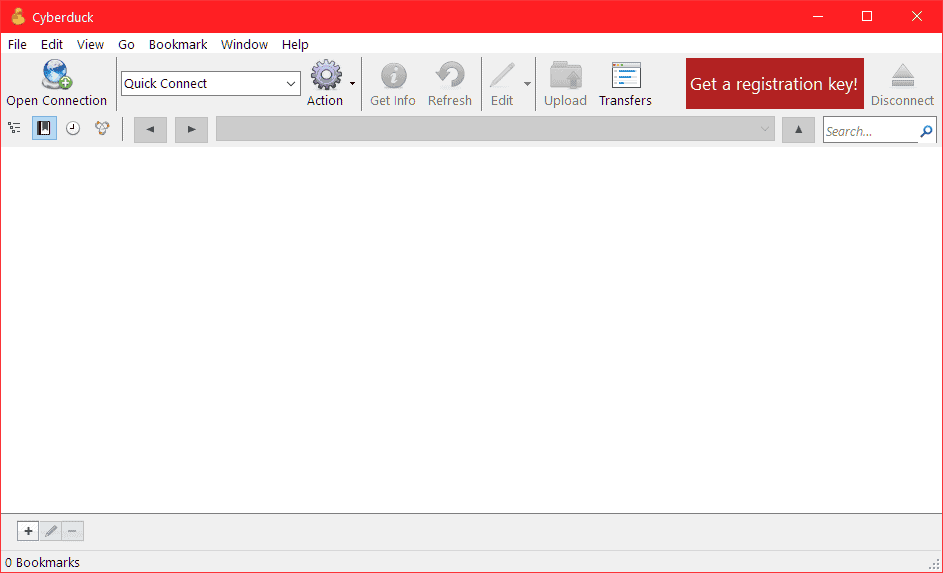
The toolbar has some items that give us access to quick operations.
New connection: allows us to start a new connection with the server.
Quick connection: the drop-down menu allows us to choose from a list of servers available for quick connection.
Actions: gives us access to the list of common actions such as adding a new folder, a new file, or renaming a file.
Information: provides information about the selected files, for example, it allows us to see and change file permissions.
Refresh: reconnects back to the server.
Edit: allows us to edit files.
Upload: allows us to upload local files to the server.
Transfers: shows us the download and upload history.
Browser, History, Favorites and Bonjour: The icons we see below New Connection give us quick access to various items such as favorites and history.
Disconnect: allows us to disconnect from the server.
Connect to the server with Cyberduck
To connect to your account with Cyberduck, you must have login information. If you have a plan with SupportHost, just check your plan activation email.
Alternatively, if you have created an FTP account, you can use the data chosen during creation.
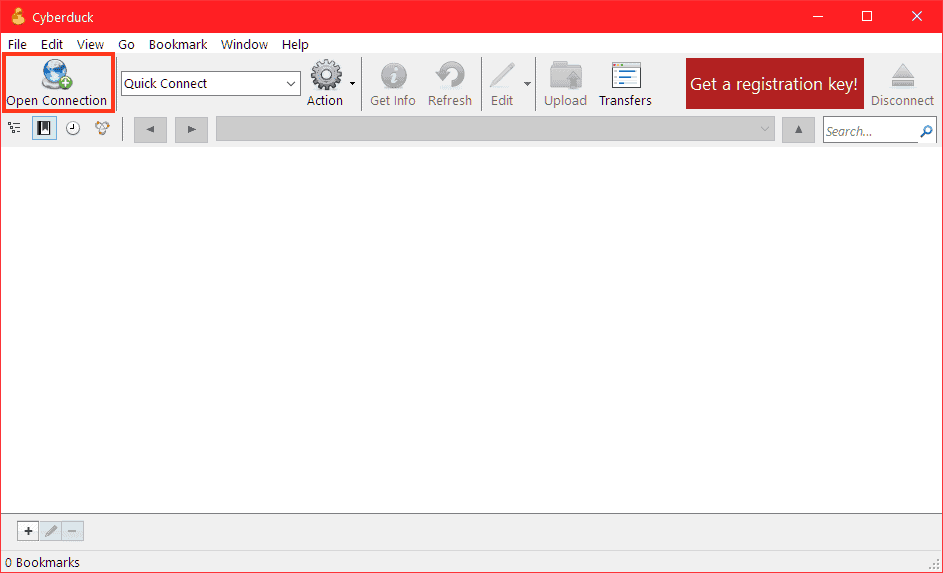
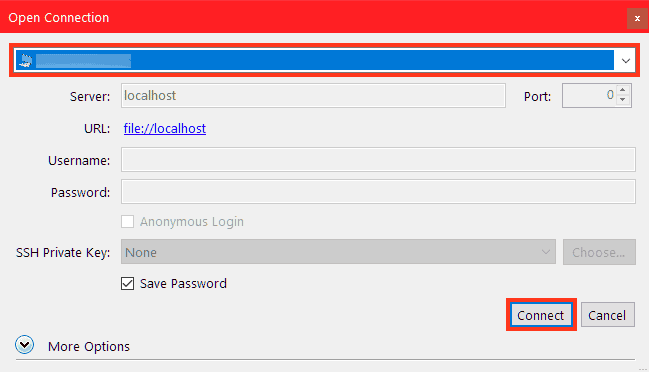
If this is your first time using Cyberduck to connect to the server, after opening the program you simply have to click on New Connection as shown in this screenshot.
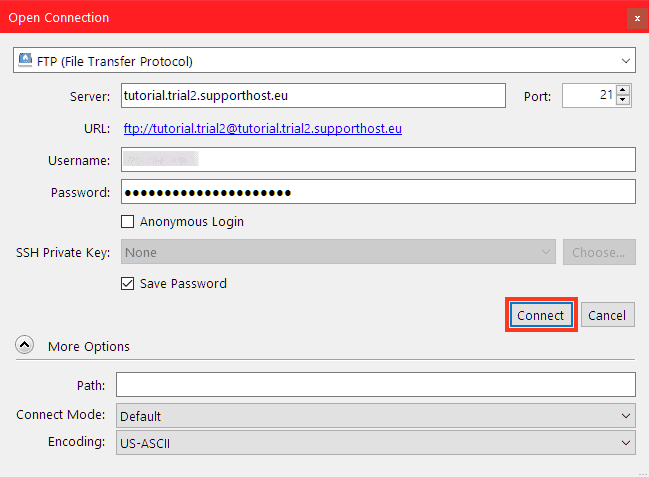
You will then need to enter the required information.

From the drop-down menu you can choose the protocol to use, for example, FTP.
Server: enter the name of the server. In the email it is the address you find next to FTP hostname.
Port: by default you use port 21, except in specific cases you can leave it as it is.
User: enter user name.
Password: enter your password.
You can choose whether to store the password for future logins by checking the option Save password.
By clicking on More options you can access additional options and choose for example the encoding type, generally the default option is to use UTF-8 encoding.
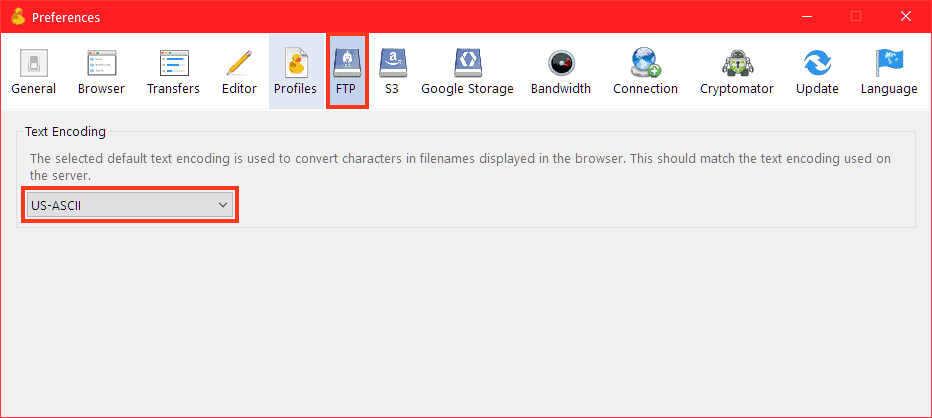
Remember that you can change the text encoding for file transfer later as well. You just open the preferences (Edit → Preferences) and then open the FTP tab and select from the drop-down menu the text encoding to use, for example ASCII as in this screenshot.
After entering the required information, you simply click on the Link button and wait for the connection to the server to complete.
Add server to favorites
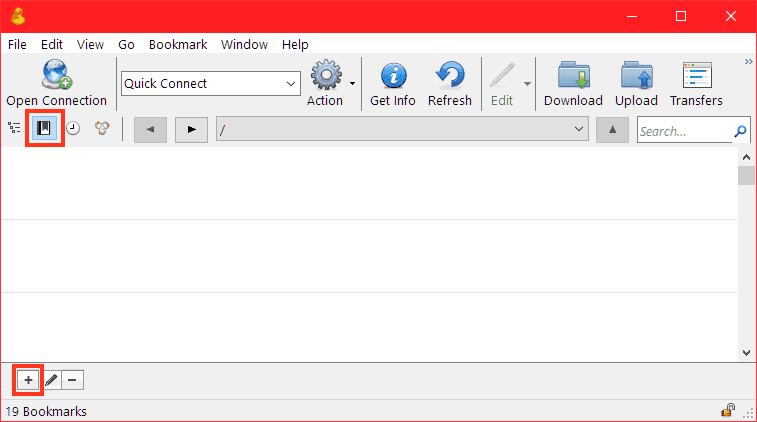
If you want to store the information to connect to the server without having to re-enter it each time, you can bookmark the server.
After connecting to the server, as we saw in the previous section, you simply click on the Favorites icon and then on the “+” in the lower left corner of the program.
The next time you want to connect, just open bookmarks and double-click on the bookmark. Or select the server name from the quick connect menu.
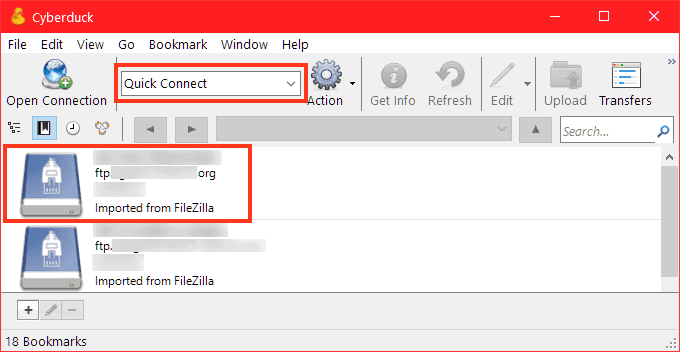
The option is very useful when you need to connect to multiple servers.
Cyberduck connection errors
There are cases when the connection to the server fails, for example, if you enter incorrect credentials. In this case Cyberduck will alert you with a message informing you that the authentication has failed.

If you come across such an error, just check the data and make sure you have entered it correctly.
There are also cases where the connection error may be due to a network problem, in which cases you may see an error message like this one telling you that the connection failed.

If so, check the connection and try again.
Transferring files
After connecting to the server, you can access files in your account, download files from the server to your computer, or upload files from your computer to the server. Let’s see how to manage transfers.
Upload files from pc to server
To upload a file to the server we have several options, first we need to establish the connection to the server as we saw earlier.
Uploading files with the Upload function
Click on Browser to access the list of files on the server and open the folder where we want to upload the files.

Then we can click on Upload from the toolbar and select the files on our computer to upload and then click on Choose.
If you don’t see the option in the toolbar, just click on File → Upload.
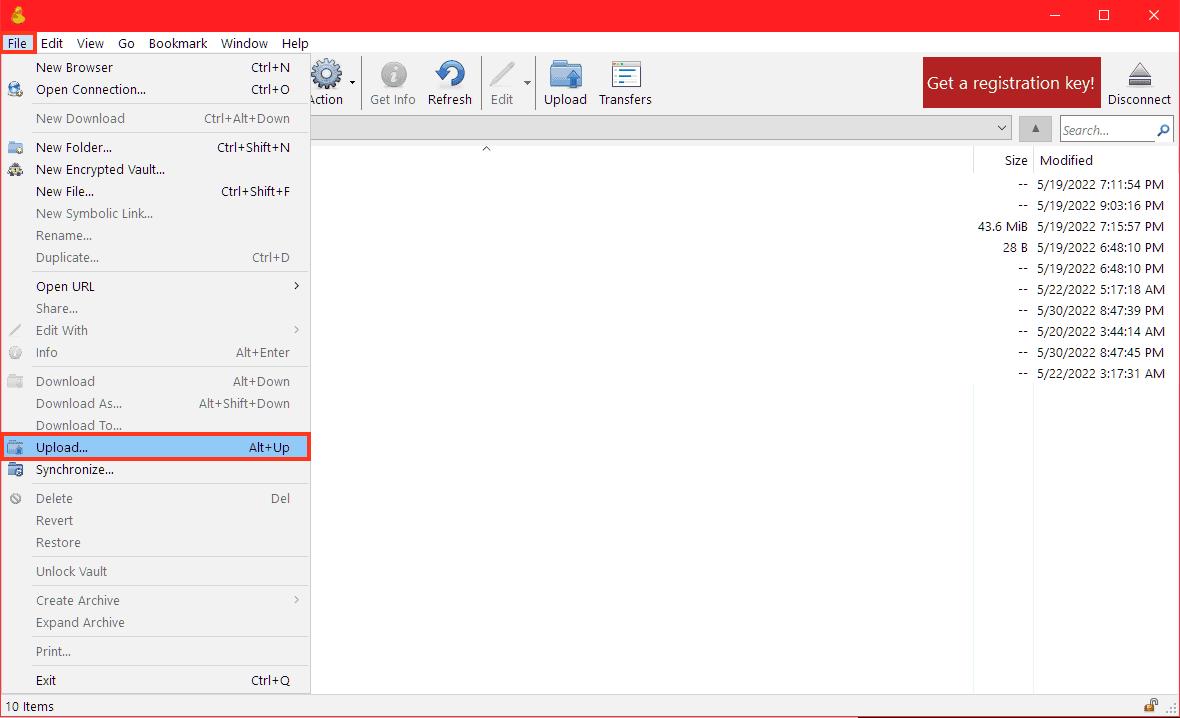
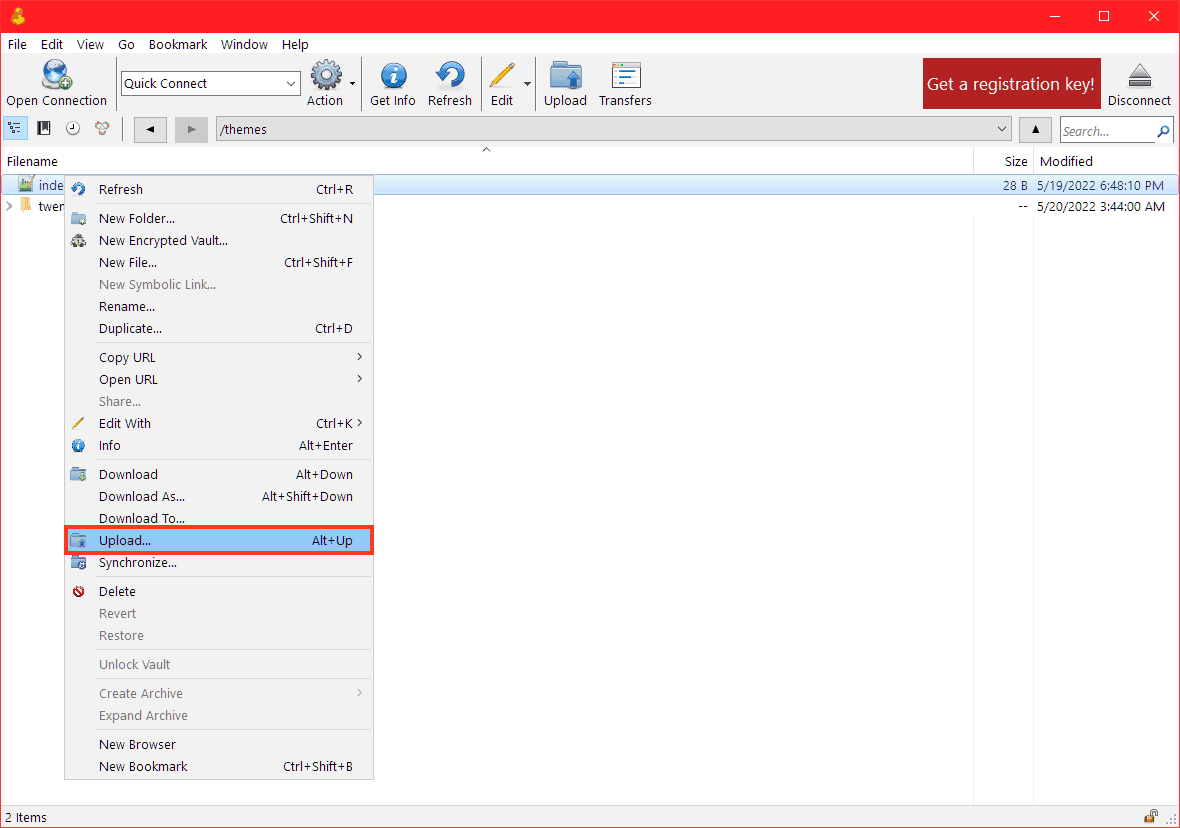
Alternatively, you can also right-click on the destination folder and choose Upload, as you see in this example.
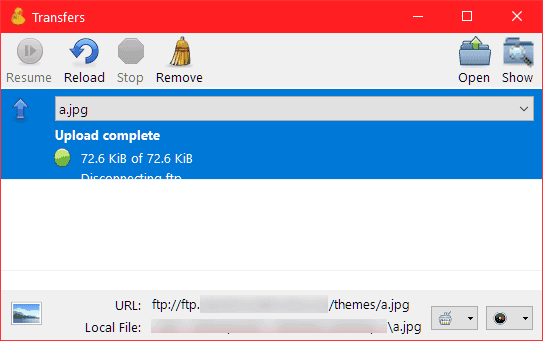
The transfer window will open from which we can follow the progress of the upload.
Uploading files using drag & drop
Alternatively, you can also directly drag the file or folder to be uploaded to the server into the destination folder.
If you want to search for files stored locally using Cyberduck directly, you can open a new window (File -> New Window).
Then click on New Connection, choose from the drop-down menu for protocol selection the name of the computer being used, and then click on Connect.
Now all you have to do is browse through the folders, locate the files you want to upload to the server, and drag them from the local window (localhost) to the server window.

Download files from server to pc
There are several methods to download files from the server to our pc, let’s see how to do it.
Download files with double click
After connecting to the server we simply double-click on a file to download it. In this case the file will be saved in the folder set by default.
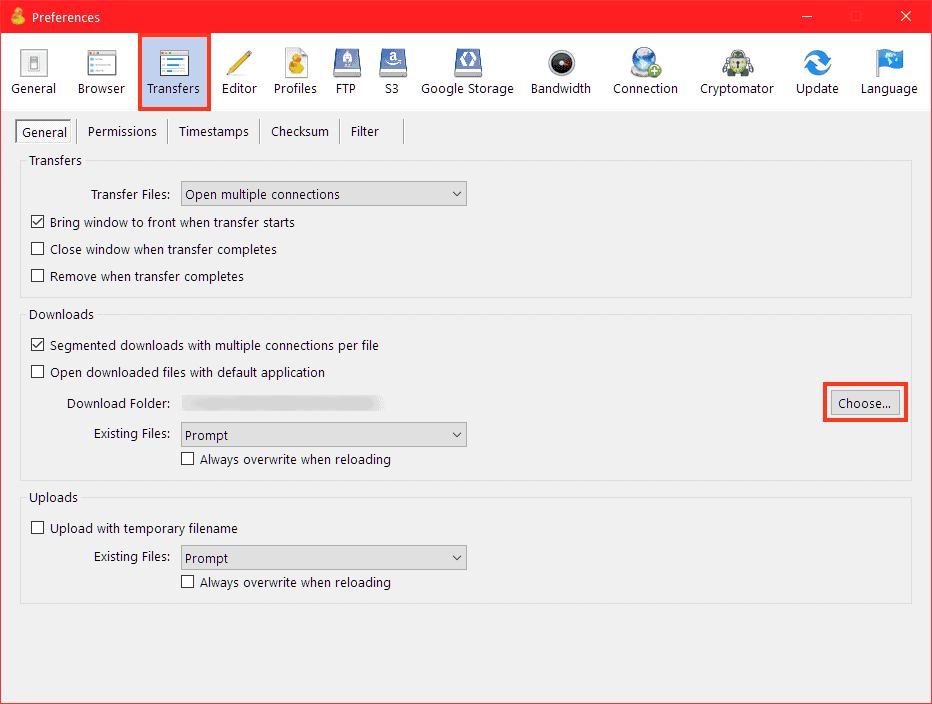
We can change the location where the files will be saved from the preferences, we just click on Edit -> Preferences. We open the Transfer tab and then click on the Choose button at “download folder,” as you can see in this screenshot.
Other methods for downloading files
We can use drag & drop not only to move files from the computer to the server, as we have seen for uploading, but we can also do the opposite operation to download files. We then simply drag and drop the files to the destination folder.
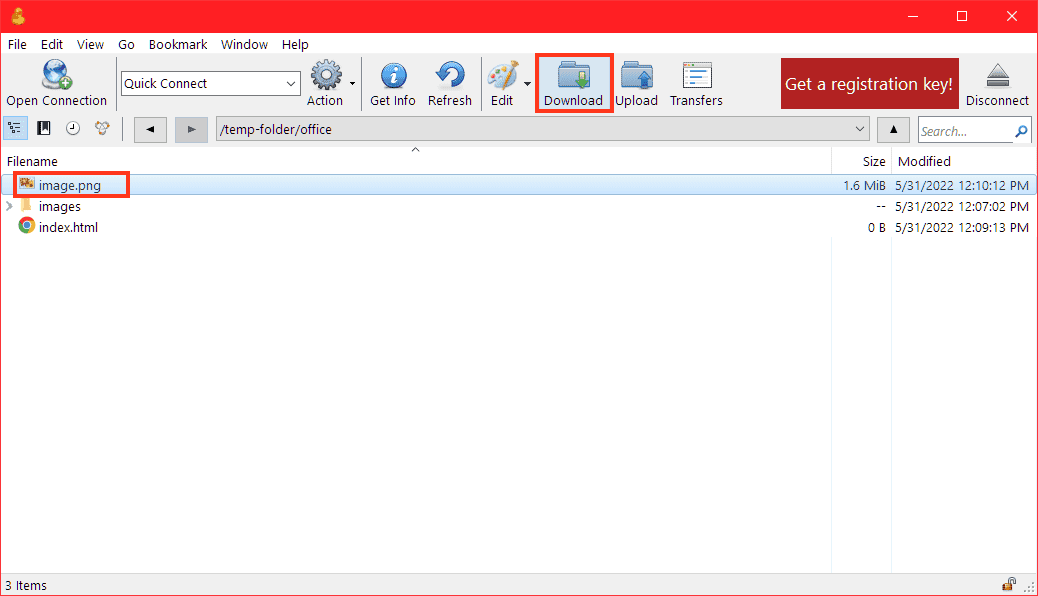
Alternatively, we can also right-click on the file or folder to be downloaded and select the download option from the menu.
Specifically, by selecting Download we will be able to download the file directly to the default folder. If, on the other hand, we wanted to choose the location where we would download the files, we would simply click on Download to.

After selecting one or more files we can also click on the menu File → Download or Download in to download the files we are interested in.
Add Download button to the toolbar
We can also decide to add the Download button to the toolbar.
To do this, click on View → Customize Toolbar and then check the Download item.

After selecting one or more files we can click on the Download button to download them.
Managing transfers
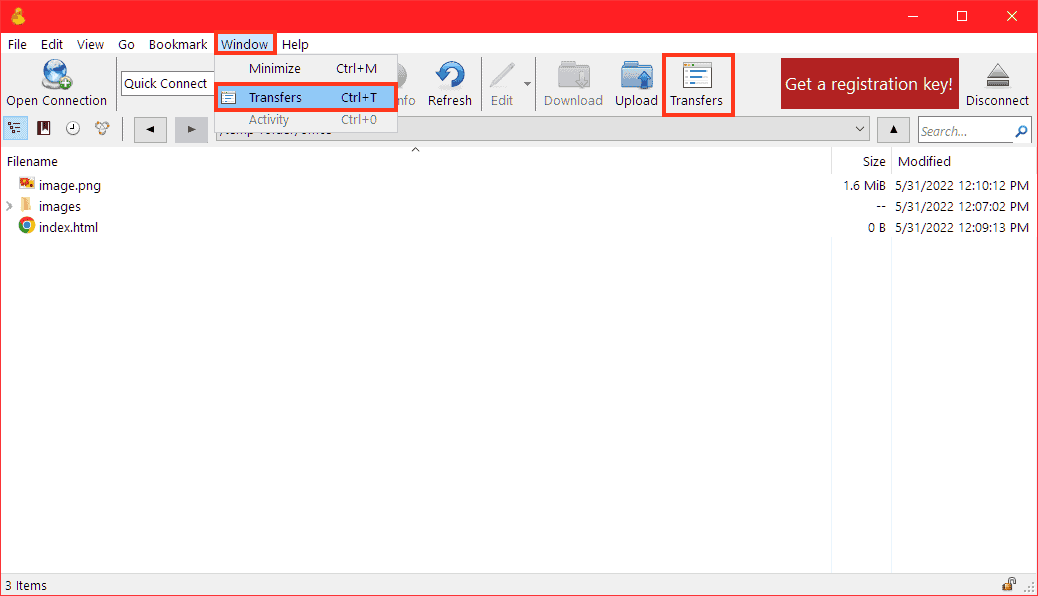
Each time we perform an upload or download operation with Cyberduck, the Transfers window will open, allowing us to track the progress of the transfers and see the history.
We can access it by clicking on the Transfers icon on the toolbar. Alternatively we can click on Window → Transfers as you can see in this screenshot, or use the key combination Ctrl + T.
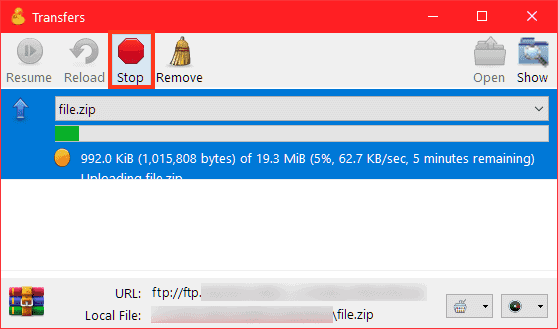
While a transfer is in progress, we can stop it by clicking Stop.
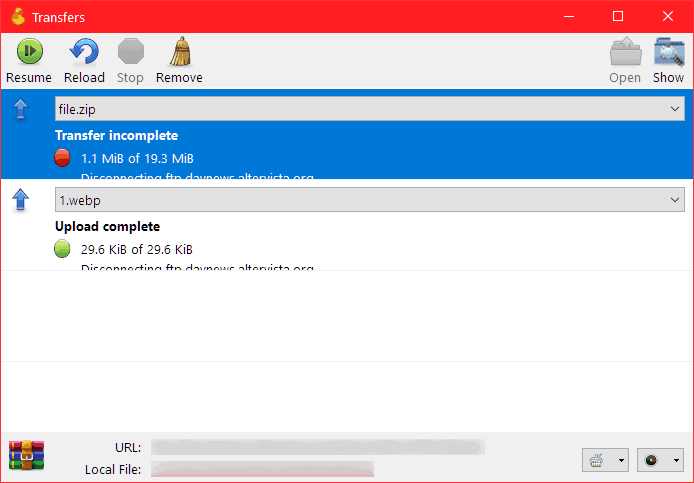
The Transfers window also allows us to keep track of files downloaded from and uploaded to the server. A green light will mark completed uploads and downloads, while if the transfer is incomplete we will see a red light, as in this example.
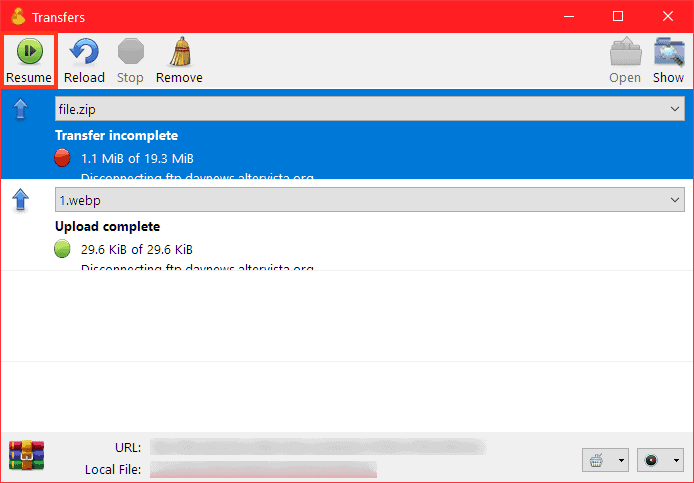
To restart an incomplete transfer we simply select it from the list and click Resume.
Managing files
In addition to allowing us to transfer files, Cyberduck also allows us to perform various actions on files such as creating new files, renaming them, or opening them with a text editor and editing them.
View hidden files
You may want to view or edit the .htaccess file, in which case since it is a hidden file, to view it you will first have to turn on the option to view hidden files.
From the View menu, check the option Show hidden files as I show you in this screenshot.

You will then see the hidden files in the list, including the .htaccess file.
Edit a file
To edit a file we simply select it and then choose the editor to use for the changes. For example, for a text file we can use Windows Notepad.
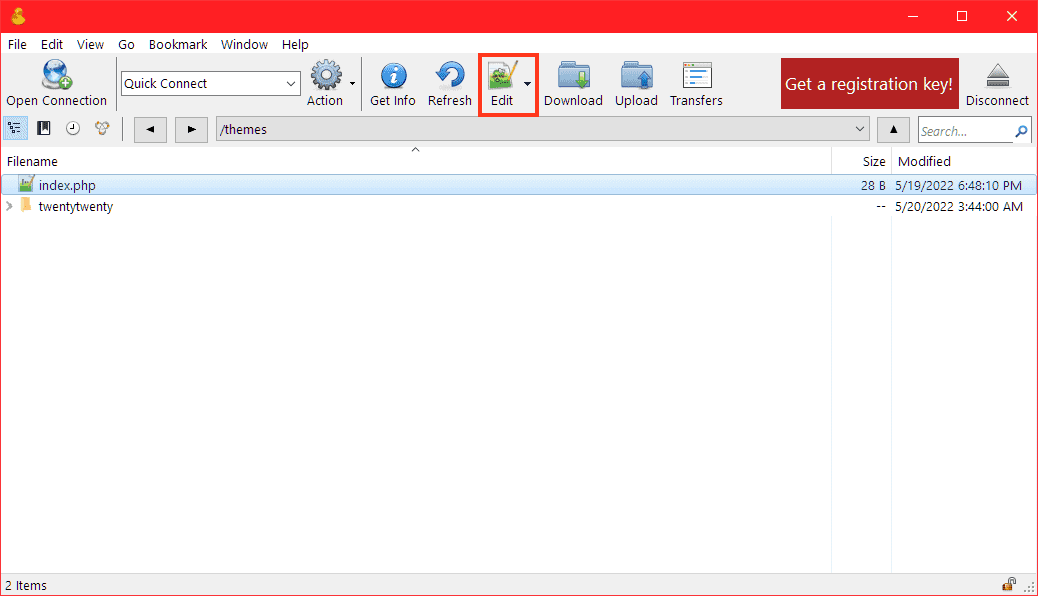
We can choose to use the default program by clicking on Edit from the toolbar.
Alternatively, if we want to choose another program, we simply click on the down arrow and choose the program from the list.
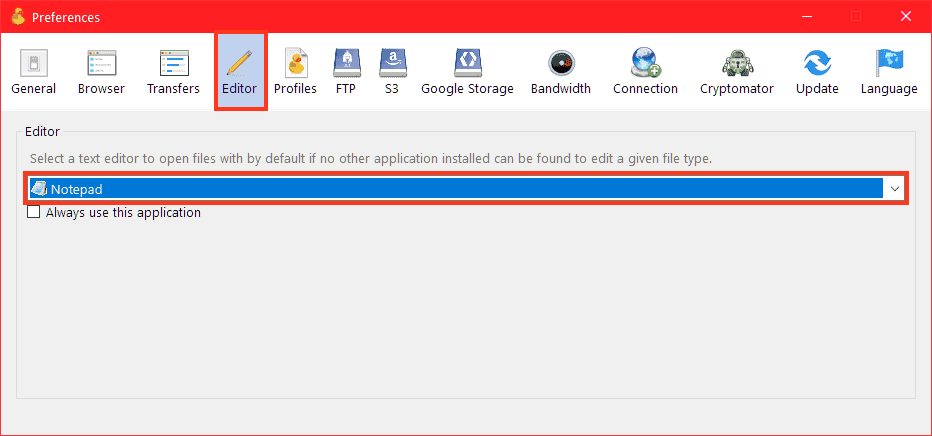
Change the default editor
If we want to set another text editor as the default we just go to edit preferences (Edit → Preferences).
We open the Editor tab and select which text editor to use to edit the files.
Change file and folder permissions with Cyberduck
FTP clients such as FileZilla or Cyberduck, or the file manager of cPanel, also allow us to change file and folder permissions.
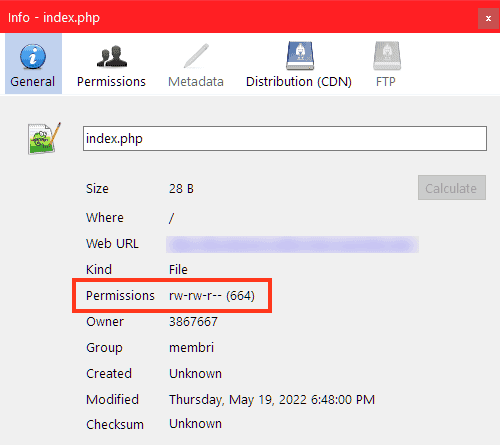
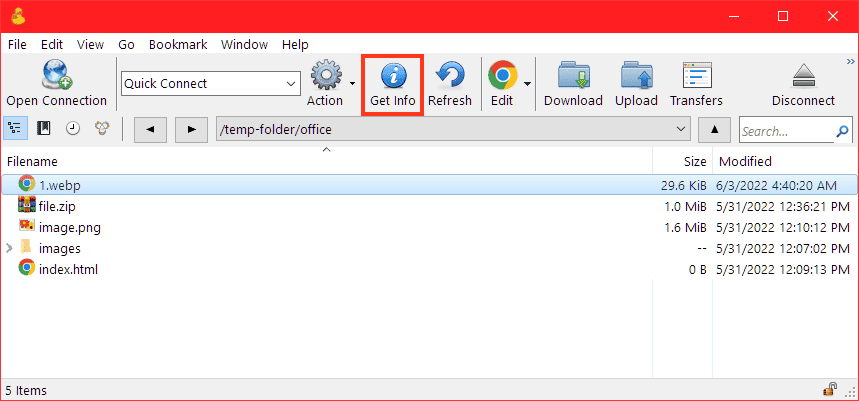
To do this we simply select a file or folder and then click on Get Info from the toolbar.
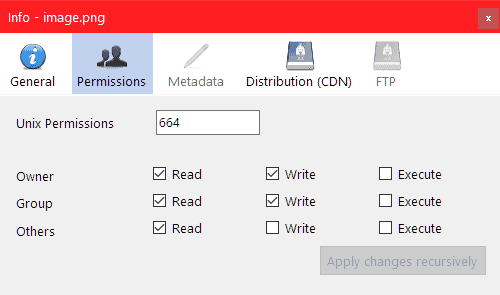
We then open the Permissions tab and can change the file’s read, write and execute permissions.
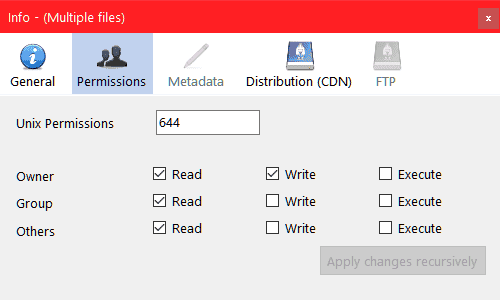
We can also change the permissions of multiple files at once, we just select multiple files and then repeat the same steps. As you can see in this screenshot, the changes will be applied to multiple files.
When we change the permissions of a folder, we can choose to apply the permissions to all files and folders within it, we just have to change the permissions and then click Apply Changes Recursively.
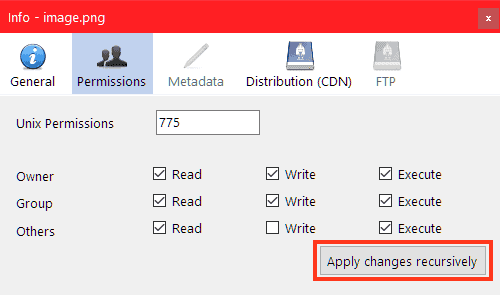
As a general guideline, WordPress files should be set to 644 and folders to 755. There may be exceptions for specific files such as the .htaccess file and the wp-config.php file.
Synchronize files and folders
With Cyberduck we can synchronize files and folders so that changes made to server files are reflected in local files or vice versa.
First we locate the folder to synchronize, in our example we have the Backup folder on the server. By right-clicking on the folder we can select Synchronize.

We will then be prompted to select a folder on the computer with which to synchronize the files. After that, the Synchronize window will open from which we can choose from several options:
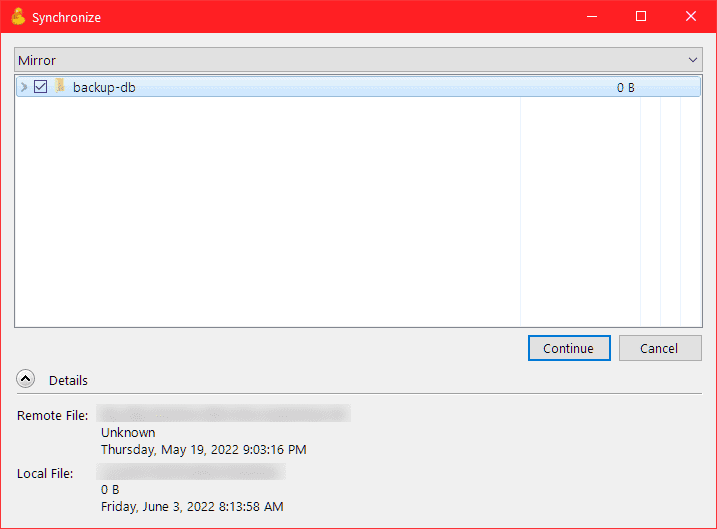
Mirror: allows us to synchronize files bidirectionally. For example, if we synchronize two folders “Backup” on the server and “Local Backup” on the computer, and create a new file on the server, the same file will be created locally and will then be downloaded. Similarly, if we make a change to the file locally, the corresponding file on the server will be replaced when the program synchronizes.
Upload: non-existing or modified files will be uploaded to the server. In this case no new files on the server will be downloaded locally.
Download: non-existing or updated files will be downloaded to the computer. With this option, new files created in the local folder will not be uploaded to the server.
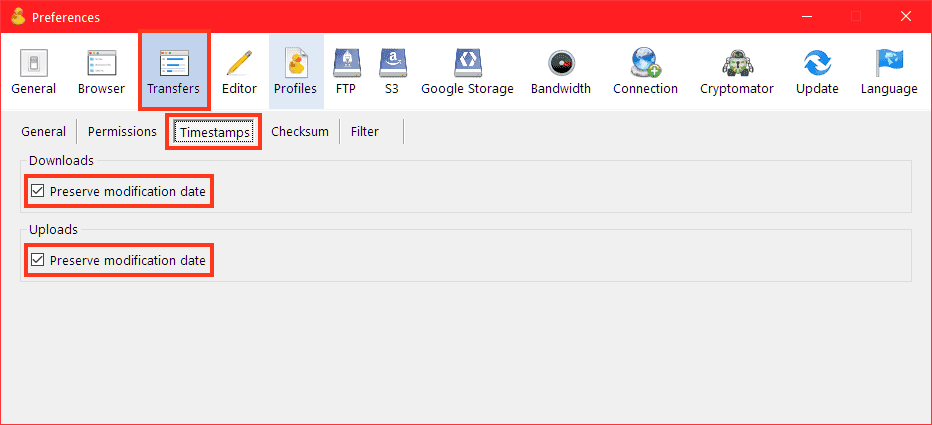
In order to use the synchronization feature, it is important that the date and time options are enabled. Let’s open the Preferences (Edit → Preferences) and then click on the Transfer tab, from the Date/Time section we can enable the “preserve date change” options for download and upload.
Conclusion
In this article, Cyberduck: the definitive guide, we have seen how to use Cyberduck to connect to the server and access our files. With this FTP client we can upload files to the server, download them from the server to our computer, and edit the files with an editor.
Cyberduck also allows us to synchronize files, store connections for faster access, and keep track of transfer history. Similar to FileZilla, Cyberduck also allows us to transfer files easily with the drag-and-drop feature.
Have you ever used Cyberduck as an FTP client? Do you have other questions about it? Let us know in the comments below.
Ready to build your WordPress site?
Try our service free for 14 days. No obligation, no credit card required.


