
When you try to access your WordPress website, have you ever come across an error page that says “There has been a critical error on your website?”
In this article, How to fix the “There Has Been a Critical Error on Your Website” error, we will see how to quickly understand what is causing this critical error in WordPress.
In this way, you’ll be able to get your site back up and running as soon as possible.
Let’s get started!”
Table of Contents

“There has been a critical error on your website”- what is this error?
This error message is an error notification that appears on WordPress websites.
When we try to access the back-end of our site or even just visit it, all we see is a screen with this message, as shown here:
In some cases, the error may only appear after certain actions.
However, when it does happen, it interrupts website navigation and also prevents us from accessing the admin area.
The alert message may vary slightly, and the text could be as follows:
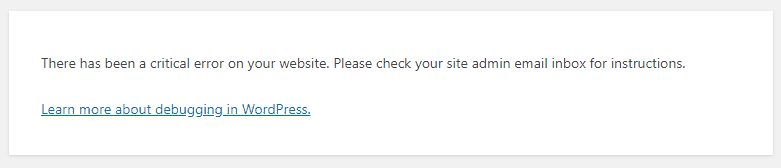
There has been a critical error on your website. Please check your site admin email inbox for instructions.The message includes a link that directs you to WordPress FAQs about some of the most common errors, including the WordPress white screen (also known as the white screen of death).
What causes the WordPress critical error?
The issue ‘There has been a critical error on your website’ is also referred to as the ‘WordPress critical error’ because it prevents access to the site and the admin area.
The error can occur due to an issue with a plugin or theme and generally has its root in a problem with a PHP script that gets interrupted.

Since this is one of the most common errors in WordPress, developers have introduced a feature that sends an email to help identify the cause of the error.
The email is sent to the administrator’s address of the WordPress site and contains error details such as:
- the type of error – for example, a parse error (a type of PHP error).
- the location of the error – it specifies the file and the line of code where the error was encountered.
- the error message – it helps us understand the type of error, for example, a syntax error in the code.
The problem is that this alert isn’t always sent via email
Fortunately, however, you can identify the error quite easily. Let’s see how.
How to identify and fix the error
To identify and resolve the error, you need to understand what caused the error. To find the exact cause of the error, you can proceed as follows:
- Method 1: Check the administrator’s email address to see if the email has arrived. Be sure to also check the spam folder.
- Method 2: Activate WordPress debug mode to view errors or check the server error log.
Both methods allow us to determine the exact cause of the WordPress critical error. The second method is the one that allows us to resolve the critical error of WordPress even if we haven’t received the email.
Let’s see how to activate debug mode and where to find the error log.
After identifying the error, don’t forget to deactivate the debug mode. You can simply reset the values of the lines we’ve seen earlier to “false”.
In a production website (meaning it’s live and accessible to visitors), it’s advisable to disable error display and debug mode.
Activating WordPress debug mode
Even if we can’t access the back-end of our site, WordPress allows us to activate debug mode very easily.
All we need to do is modify the WordPress configuration file, which is the wp-config.php file located in the main directory of your site. The directory may be named as public_html or have the name corresponding to your domain.
If you have an active plan with SupportHost, such as a WordPress hosting plan you can access your site’s files directly from cPanel.
From the file manager, you can search for and locate the wp-config.php file:

If you have multiple WordPress installations on the same web space, for example, in subdirectories or subdomains, make sure to edit the correct file.
With the file manager, we can directly edit the file using the built-in editor.
Open the wp-config.php file and locate the following lines:
define( 'WP_DEBUG', false );
define( 'WP_DEBUG_LOG', false );
We need to change the value to ‘true,’ as shown here:
define( 'WP_DEBUG', true );
define( 'WP_DEBUG_LOG', true );
If they are not present, we just need to add them before the final line of the file, which contains this text
/* That's all, stop editing! Happy blogging. */Here’s what the result should look like:

By doing this, we will have activated debug mode and will record the errors that are encountered.
The first line (WP_DEBUG) allows us to activate debug mode.
The second (WP_DEBUG_LOG) creates a new debug.log file where errors are logged and preserved.
You can also enable the display of errors on the screen by adding this line:
define( 'WP_DEBUG_DISPLAY', true );After making the changes, be sure to save them.
Now that debug mode is active, you can also check the debug.log file inside the wp-content folder to see the error log.
Let’s see the errors in both cases.
Identifying the error (on-screen display)
If you have enabled the on-screen display of errors (using the WP_DEBUG_DISPLAY variable), you just need to visit the website’s homepage, and you will see the error, as shown in the example below:
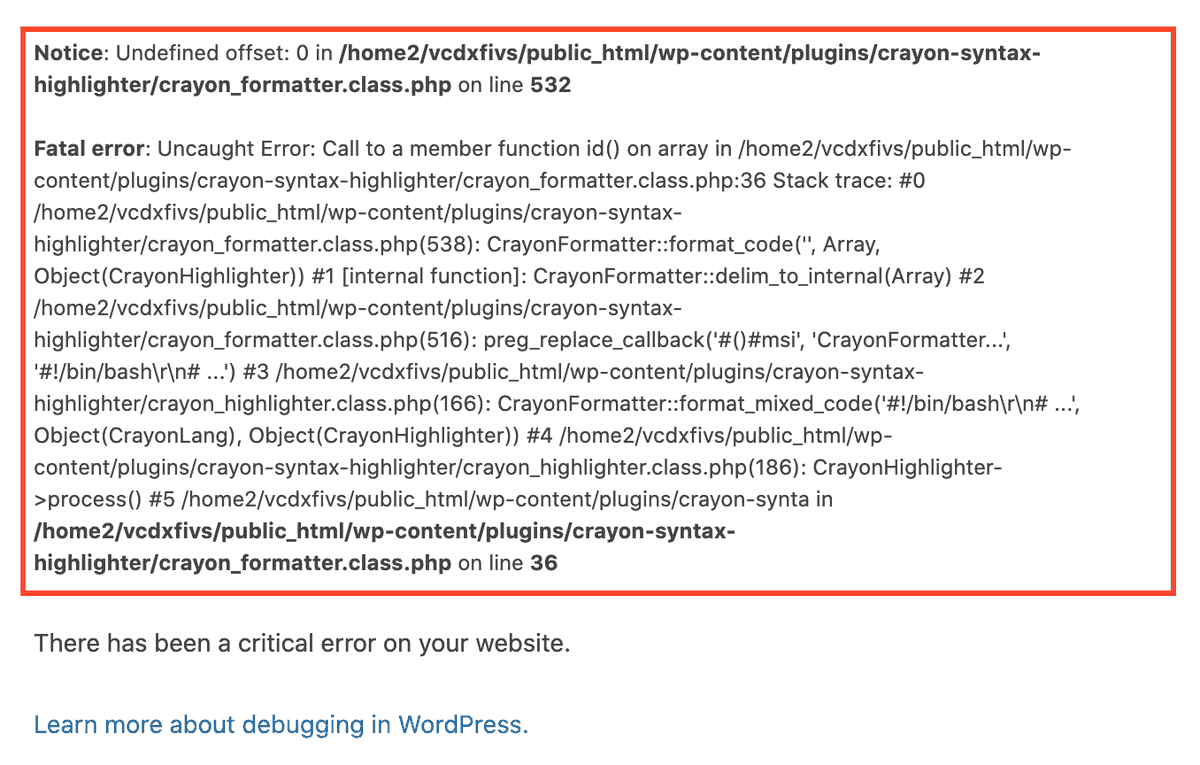
Now, all that’s left is to interpret the error. Let’s see how to do that with our example.
In the alert, we are provided with:
- The type of error, in our case, it’s a parse error.
- The affected file and its path, in our example, ‘post.php’.
- The line where the error is present is line 72.
Remember that there can be multiple errors, as in our case where there are two ‘notice‘ errors. In this specific situation, however, the issue causing the WordPress critical error was only the first one: a syntax error in the file.
Consulting the debug.log file to identify the error
If you haven’t activated the WP_DEBUG_DISPLAY function, you can check the error directly by consulting the ‘debug.log‘ file.
The file is located inside the wp-content folder, as shown here:

In our case, the error we just saw has been recorded, and the ‘debug.log‘ file will have this content:

Just as we saw before, it specifies the type of error, the file where it occurred, and the corresponding line of code.
Checking the error_log file
Generally, enabling WordPress debug mode is usually sufficient to identify the error and resolve the issue of the WordPress critical error.
However, to check for any PHP errors, you can also examine the ‘error_log’ file.
If you have a hosting plan with SupportHost, this file is automatically generated, and you can find it in the error directory.
All you need to do is check the ‘public_html’ folder of your site and open the file to read the errors.
You can also perform a simple file search using the cPanel file manager, as shown here:

WordPress Critical Error: Solutions to Common Causes
To identify what triggered the appearance of the errors message: “There has been a critical error on your website”, the best solution is to follow the two methods we’ve just mentioned.
By doing this, we can pinpoint the error precisely and resolve it.
Below, we’ve listed some of the most common causes that could have generated the problem and see what the solutions are:
It causes | Solution |
|---|---|
Conflict with plugins | Deactivate plugins |
Problem with the theme in use | Reset the theme to default |
Outdated PHP version | Change the PHP version |
Insufficient PHP memory limit | Increase the PHP memory limit |
Can’t determine the cause | Restore a WordPress backup |
Let’s take a closer look at each of the possible solutions to the error problem.
Disabling Plugins
One of the causes of the WordPress critical error is problems with plugins. In this case, deactivating all installed plugins and reactivating them one by one can solve the problem.
Since the error doesn’t allow us to access the back-end, we need to disable the plugins manually.
To do this, follow these steps:
- Access your site’s files through the file manager or an FTP client like FileZilla or Cyberduck
- Rename the “plugins” folder to “plugins-disabled“.
Then, create a new folder called “plugins” and move the individual plugin folders one by one to determine which one is causing the error.
Alternatively, you can deactivate plugins from the database, following the procedure we’ve explained here: Deactivate Plugins with phpMyAdmin.
Restoring the Default Theme
Sometimes, WordPress themes can also cause conflicts that result in the critical error message. We can change the WordPress theme in use even without access to the dashboard.
To do this, we need to access the database using phpMyAdmin and modify these values in the wp_options table:
templates;
stylesheet.
In the option_value column, enter the name of the theme you want to use, as shown here:

If you’re not familiar with the database, check out the step-by-step procedure in our guide on how to use phpMyAdmin for WordPress to perform database operations.
Changing the PHP Version
In some cases, if you encounter the message “There has been a critical error on your website”, the cause could be the PHP version in use.
If you’re using an outdated PHP version, you should switch to a more updated version and see if this resolves the issue.
With SupportHost, you can independently set the version you prefer to use. Just follow our tutorial on how to change the PHP version from cPanel or our guide on how to check and update PHP version in WordPress.
Increasing the PHP Memory Limit
What if the problem is a memory limit issue? A memory that’s too low can interrupt the execution of a PHP script.
There are several ways to modify this threshold.
SupportHost allows you to adjust the memory limit directly from the PHP Selector tool in cPanel:
- Open the “Options” tab.
- Edit the value next to “memory_limit“.
I’ve highlighted the value to be modified in this screenshot:

Alternatively, you can increase the memory limit by adding this line to the wp-config.php file:
define( 'WP_MEMORY_LIMIT', '128M' );Restoring a WordPress Backup
In our WordPress backup guide, we’ve discussed the importance of always having an up-to-date copy of your site files in case of errors. When all previous solutions haven’t worked, and your site is still inaccessible due to the critical message error, you can still take action. Simply restore a recent backup.
In the guide linked above, we’ve explained how to do this step by step.
If you haven’t been able to pinpoint the causes of the error, it’s also suggested to perform a site scan to rule out the presence of malware that may have compromised the files.
SupportHost provides you with two tools for site antivirus scanning: ClamAV and Imunify360.
Conclusion
The error message: “There has been a critical error on your website” can be alarming for WordPress site administrators who suddenly find themselves unable to access their site.
Fortunately, WordPress has a debug mode designed to help users identify errors and resolve them. You just need to know where to look.
We’ve seen how to identify the issue causing the WordPress critical error and listed some of the most common causes and solutions.
Have you been able to determine what was causing the error on your site? Let us know in the comments below.
Ready to build your WordPress site?
Try our service free for 14 days. No obligation, no credit card required.


