
Thinking about moving from Joomla to WordPress? You’re not alone. While Joomla might have met your website needs in the beginning, WordPress offers a level of flexibility and ease of use that’s hard to match.
The good news is that migrating doesn’t mean starting over from scratch. Your content, images, and categories can all come with you. The process takes some planning, but it’s completely doable even if you’re not particularly technical.
Below, you’ll learn how to migrate Joomla to WordPress step by step. This includes the actual content transfer, plus the important stuff that comes afterward, like setting up redirects and getting your new site ready for visitors.
Table of Contents
Why Switch From Joomla to WordPress?
Joomla is a solid content management system. It has over 5,900 extensions available, handles multilingual sites well, and offers decent user management features.
But, many Joomla users find themselves fighting against the admin interface more than working with it. The dashboard is cluttered with menus and settings panels that make simple tasks feel complicated. Publishing a blog post shouldn’t require a treasure map.
WordPress takes a different approach. The dashboard is clean and intuitive. Common tasks are straightforward, even for complete beginners. That’s a big reason why WordPress now powers over 43% of all websites online.
The plugin ecosystem is another major factor. WordPress offers more than 60,000 plugins covering virtually every feature you could want. Need a contact form? There are dozens of options. Want to add an online store? WooCommerce has you covered. Joomla’s extension library is decent, but it doesn’t come close to matching this variety.
If you run a blog, WordPress is the obvious choice. Joomla wasn’t designed with blogging in mind and doesn’t have a dedicated post type for blog content. WordPress started as a blogging platform and still excels at content publishing.
Ownership matters too. With WordPress, you control your files completely and can host your site anywhere you want. Switch hosting providers whenever you like, and everything comes with you. The massive WordPress community also means help is always easy to find.
What You Need Before Starting
Before diving into the migration, make sure you have a few things in place.
First, you need somewhere for WordPress to live. The easiest option is WordPress hosting with WordPress pre-installed. SupportHost’s WordPress hosting plans come ready to go, so you can start immediately without messing around with manual installation. The support team can also help with migration if you’d rather hand off the technical work.
If you already have hosting, you can install WordPress in a subfolder or subdomain using Softaculous. The process is straightforward, and there are guides available if you need help.
Second, you need access to your Joomla admin area. The migration process connects directly to your Joomla database, so you’ll need to grab some specific credentials from your Joomla backend.
Third, back up your Joomla site before doing anything else. This is your safety net if something goes sideways during migration.
Backing Up Your Joomla Site
Even though the migration shouldn’t touch your original Joomla installation, having a backup means you won’t lose anything if problems pop up.
The Akeeba Backup extension is popular in the Joomla community and works well for this. Install the extension, then access it from your Joomla dashboard. Run the configuration wizard first. Akeeba will test your server and figure out the best backup settings automatically. Then, you can run the backup directly from your dashboard.

Once that’s done, you can move forward knowing your original content is protected.
Setting Up Your WordPress Site
With hosting active, access your new WordPress installation. If you’re using SupportHost’s WordPress hosting, everything is already installed and waiting. For other hosts, you can usually install WordPress with one click through Softaculous in your hosting control panel.
Log into WordPress by visiting yoursite.com/wp-admin and entering your credentials. Take a few minutes to look around, but don’t worry about picking themes or installing plugins yet. Right now, the focus is on getting your content moved over.

One helpful tip is to set up WordPress on a temporary domain or subdomain while you work on the migration. This keeps your Joomla site live for visitors while you get the new version ready. Once everything looks good, you can point your main domain to WordPress.
Install the FG Joomla to WordPress Plugin
WordPress can’t import Joomla content on its own, so you’ll need a plugin to make it happen. FG Joomla to WordPress is a reliable free option that handles the heavy lifting.
Go to Plugins > Add Plugin in your WordPress dashboard. Search for FG Joomla to WordPress and click Install Now when you find it, then Activate.

This plugin imports your Joomla articles, categories, tags, and media files. It brings over the content and all the associated metadata, so the transfer is thorough.
One thing to know before you start is that Joomla handles content differently than WordPress. In Joomla, everything is an article. There’s no distinction between pages and posts like WordPress has. When you run the import, you’ll choose whether to bring content in as WordPress posts or pages. If you choose pages, categories won’t come along since WordPress pages don’t support categories.
For most sites, importing everything as posts first makes the most sense. You can always use a plugin like Post Type Switcher to convert certain posts to pages after the migration is done.
Find Your Joomla Database Credentials
The migration plugin needs to connect directly to your Joomla database. This means grabbing a few pieces of information from your Joomla admin area.
Log into your Joomla backend at yoursite.com/administrator. Then, click System in the main menu, then select Global Configuration and click on the Server tab.

Scroll down until you find the Database section. You’ll see the Host, Database Username, Database Name, and Database Tables Prefix listed here. Write these down or keep this browser tab open.

The database password isn’t shown on this page. If you don’t remember it, you’ll need to find it in the configuration.php file in your Joomla root folder. Connect to your server with an FTP client like FileZilla or use file manager in your hosting account. Open configuration.php in a text editor and look for the password among the database settings.
Import Your Joomla Content
Now that you have the plugin installed and your database credentials ready, it’s time to run the import.
In WordPress, go to Tools > Import. Find Joomla (FG) in the list and click Run Importer.

The importer screen shows information about your current WordPress database, including how many posts, pages, and media items exist. On a fresh installation, you’ll see some default content that WordPress creates automatically.

Empty the Default WordPress Content
Starting with a clean slate is best. Click Empty WordPress Content to remove the default posts, pages, and sample content from WordPress. This prevents duplicates and keeps things tidy.

You’ll see a confirmation message when everything is cleared. Post, page, and media counts should show zero. Categories will show one since WordPress always keeps an Uncategorized category.
This step is also useful if you need to run the import again after a failed attempt. Clearing out partial imports prevents duplicate content.
Enter Your Joomla Site Details
Then, scroll to the Joomla website parameters section. Enter your Joomla site’s full URL, including http:// or https://.
For media transfer, you have three choices. HTTP is the default and works in most cases. FTP transfers files through your FTP credentials. The file system is the fastest, but it only works when both sites live on the same server.

Click Test the media connection to make sure WordPress can reach your Joomla site. A success message means you’re good to go.
Enter Your Database Details
Next, scroll to Joomla database parameters and enter the credentials you grabbed earlier. This includes the hostname, database name, username, password, and table prefix.

Leave the port field alone unless your host specifically requires something different.
Then, click Test the database connection to verify everything works. A success message means WordPress can talk to your Joomla database.
Configure How Content Gets Imported
The Behavior section lets you customize the import.

The introtext setting handles Joomla’s article previews. In Joomla, introtext is the short snippet shown in article listings. You can bring this in as a WordPress excerpt, merge it with the full content, or do both.
For archived posts, you can skip them, import them as drafts, or import them as published content.
Media settings control which files come over. Import everything, just featured images, or include externally hosted images too. If your site has large media files, bumping up the timeout value can prevent the import from timing out partway through.
Finally, Joomla meta keywords can be imported as WordPress tags if you want them.

Set your preferences, click Save settings, then click Start / Resume the import to begin the import. Once you’re finished you’ll get an IMPORT COMPLETED message and you’ll see a summary of the import.
Fix Internal Links
After importing, internal links in your posts and pages probably still point to old Joomla URLs. Broken links frustrate visitors and hurt your search rankings.
The FG plugin includes a tool for this. At the bottom of the importer, scroll to After the migration and click Modify internal links.
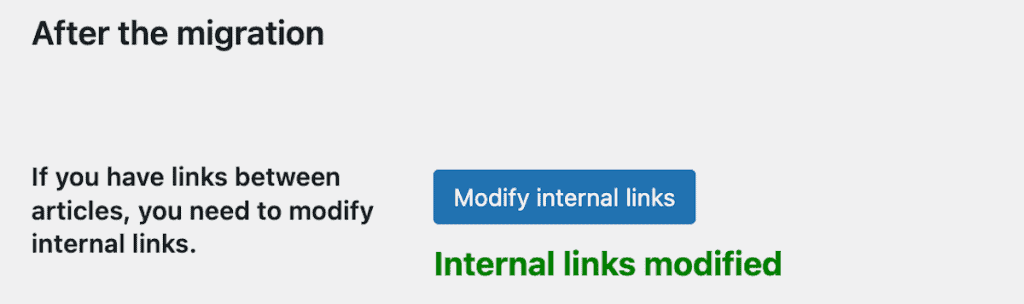
The plugin scans your imported content, finds links pointing to your Joomla site, and updates them to the correct WordPress URLs. Make sure you check a few posts and pages afterward to make sure links work properly.
Finish Setting Up Your WordPress Site
Getting content imported is just the beginning. Joomla and WordPress handle things differently, so there’s a bit more work before your new site is visitor-ready.
Set Up Your URL Structure
Your Joomla site probably had URLs like yoursite.com/category-name/article-name. WordPress uses a different system.
Go to Settings > Permalinks and you’ll see several URL structures. Post name is popular because it creates clean URLs like yoursite.com/article-name that work well for visitors and search engines.

Pick your structure and click Save Changes. Getting this right now matters because changing permalinks later breaks existing links and hurts SEO.
Set Up Redirects
If your old Joomla URLs differ from your new WordPress URLs, visitors following old links will hit with 404 errors. Setting up 301 redirects sends everyone to the right place.
One of the best plugins for this is the Redirection plugin. All you need to do is Install and Activate the plugin, just like you did with the plugin above. Then, go to Tools > Redirection. Add redirect rules that map old URLs to new ones.

The plugin also logs 404 errors, which helps you spot pages that still need redirects. Check the logs periodically after launch to catch any you missed.
Pick and Customize a Theme
Joomla and WordPress use completely different design systems, so your Joomla template won’t work in WordPress. You’ll need to find a WordPress theme that fits your needs and recreate your site’s appearance.
Go to Appearance > Themes to browse the available theme selection. This will show you the themes are are currently installed. Click Add Theme to explore the library of 7,000 plus free WordPress themes.

Once your theme is installed and active, you may have some built-in customization options. You can also customize your theme by going to Appearance > Customize to adjust colors, fonts, navigation, and more.

Alternatively, if you’re using a block-based theme like Twenty Twenty-Five, then you can use the visual editing tools that makes this process straightforward.

Replace Your Joomla Extensions
Unlike Joomla, where many features come from extensions, WordPress uses plugins to add functionality. There are thousands of WordPress plugins that can add basically any feature you need.
Make a list of what your Joomla site does, like contact forms, galleries, SEO tools, caching, or security features. Then find WordPress plugins that do the same things.
For example, there are SEO plugins like Yoast SEO and Rank Math that can help improve your search engine rankings. Form plugins like WPForms and Contact Form 7 let you create contact forms and collect leads. Security plugins like Wordfence can protect your site from threats. And backup plugins like UpdraftPlus keep your content safe.
The WordPress plugin library is massive, so you’ll almost certainly find solutions for everything your Joomla site did. Often with more features and better interfaces.
One thing to keep in mind is that you should only install the plugins you actually need. Installing too many can slow down your site.
Go Live With Your WordPress Site
Once your WordPress site is set up, links work correctly, and all content is imported properly, it’s time to make the switch. How this works depends on your server setup.
Sites on Different Servers
If Joomla lives on one server and WordPress on another, you need to update your domain’s DNS settings.
To do this, log into your domain registrar and find the nameserver settings. Change them to point to your WordPress host. Your hosting provider will give you the specific nameserver addresses to use, usually they’ll look something like the image below.

After updating DNS, allow 12 to 48 hours for the changes to spread across the internet. During this window, some visitors might see your old Joomla site while others see WordPress. This is normal and sorts itself out.
Sites on the Same Server
If WordPress is in a subfolder or subdomain on the same server as Joomla, you need to move the WordPress files to your main directory.
Note: Before this step you’ll want to backup both websites, just in case you need to restore.
Moving WordPress from a subfolder to the root takes two steps. First, physically move files from the subfolder (like /wordpress/) to your root directory (public_html). You can do this inside File Manager, or by connecting to your site via FTP. Second, update URLs in your WordPress database since they still reference the subfolder location.
You can use a plugin like All-in-One WP Migration to not only assist with the migration, but you can use the Search and Replace feature to handle database updates. Simply enter your old URL (yoursite.com/wordpress/) and new URL (yoursite.com/) and let it update all references. To learn more, check out our guide on how to use All-in-One WP Migration.
FAQs: Migrate Joomla to WordPress
Will I lose my Google rankings during migration?
Not if you handle things correctly. Setting up 301 redirects from old Joomla URLs to new WordPress URLs passes most of your SEO value. After migration, submit your new sitemap to Google Search Console so Google can find and index your updated site.
How long does migration take?
The content import itself usually takes anywhere from a few minutes to an hour, depending on how much content you have. The full migration, including theme setup, plugin configuration, and testing, typically takes a few hours to a full day. DNS propagation can take up to 48 hours after that.
Can I migrate a Joomla e-commerce site?
Yes, but product data needs extra handling. The FG plugin focuses on content. For e-commerce stuff like VirtueMart, you might need the premium plugin version or a separate process to export products and import them into WooCommerce.
Should I keep Joomla running during migration?
Yes. Keep your Joomla site live until you’ve tested WordPress thoroughly and confirmed everything works. Only shut down Joomla after you’re confident the migration is complete, and visitors are reaching your new site successfully.
What if some content doesn’t import?
The free FG plugin handles most standard content. Specialized content types or custom fields might need the premium version or manual recreation. Review your content carefully after import and address any gaps manually.
What if I don’t want to do this myself?
SupportHost offers migration assistance for customers. The support team can handle the technical work while you focus on other things.
Closing Thoughts: How to Migrate Joomla to WordPress
Moving from Joomla to WordPress takes some effort, but the payoff is worth it. WordPress offers a cleaner interface, a much larger plugin ecosystem, and more flexibility to truly customize and scale your site.
Above we covered the prep work, importing content with the FG Joomla to WordPress plugin, and the post-import steps that get your site ready for visitors. Many migration guides skip that last part, but setting up proper URL structures, redirects, themes, and plugins matters just as much as the content transfer itself.
If you’re looking for WordPress hosting that makes the process easier, SupportHost offers plans with WordPress pre-installed and migration support available.
Have questions about migrating from Joomla? Run into any issues with the steps above? Please share your experience in the comments below.
Ready to build your WordPress site?
Try our service free for 14 days. No obligation, no credit card required.


