
In this guide, I will show you all the steps to follow to create a WordPress site.
Just follow all the steps to understand how:
- change basic settings;
- give your site a look;
- create structure and pages;
- add functions using plugins.
To follow the whole procedure, the best way is to start working on your site right away.
If you already have clear ideas, the easiest system is to choose a WordPress hosting. So you won’t have to worry about the installation because you will have the platform ready to use.
Still not clear what we’re talking about?
Don’t worry. Let’s see right away what you need to start building your WordPress site.
Table of Contents

What you need to create a WordPress site
Keep in mind that in this guide, when we talk about WordPress, we are referring to the self-hosted version, also known as WordPress.org.
Why use WordPress and not another platform?
WordPress is a free and open-source content management system (CMS). Thanks to the presence of plugins, ready-to-use themes and builders to change the look of the site with ease, WordPress is flexible and easy to use.
How do you create a website with WordPress?
We need two essential elements:
- a hosting plan suitable for WordPress that allows you to create at least one database;
- a domain will be the address that will allow users to reach your site.
Choosing a WordPress hosting
Keep in mind that you can also create your WordPress site locally and then purchase a hosting service later.
For the purpose of this guide, to explain all the steps to create a site from scratch and bring it online, I will also show you how to choose a hosting service.
The first step in creating a WordPress site is to choose a hosting suitable for this platform.

What does a WordPress site need to function?
WordPress is software and, as such, needs minimal server requirements to function.
- PHP version: 7.4 or higher.
- MySQL database (version 5.7) or MariaDB (version 10.3).
- Web servers like Apache or Nginx.
- HTTPS protocol support.
This is the indispensable foundation for your site.
You will find many providers offering hosting packages for WordPress. How to orient yourself? Don’t just look at the price of the plan and don’t aim for savings: quality hosting can make a difference.
The best way to tell if a service is right for you is to try it.
How to try WordPress hosting for free
With SupportHost, you can immediately activate a free trial of the hosting plan, which will last for 14 days.
This way, you have plenty of time to decide. If the service lives up to your expectations, you can order a paid plan. Otherwise, you just let the trial service expire.
Activating a free plan with WordPress already installed is super easy.
- Connect to the free hosting page and click on Try now.
- Choose plan features (server location, web server and plan) and select “WordPress” as script.

On the next page, you will be able to enter the name of the subdomain you want to use.
Note that this is a free plan that you can use to evaluate the quality of the service. At the end of the trial period, the data will be deleted.
If you want, you can use the free plan to start creating your WordPress site. In this case, remember to export a backup before the end of the trial so that you can import it to the new account later.
Choose a domain
To build a WordPress site, it is important to choose a domain. A domain is the address associated with your site, i.e. the name that you will need to type to visit your website.
For example, to visit “Google,” you just need to connect to the “google.com” domain.

If you have a business, the domain name could be your company name.
Are you building a personal site? Then you could use your first and last name to create a domain that can be traced back to you.
When you order a hosting service, you can choose whether to:
- register the domain with the same provider that sells you the hosting service;
- transfer the domain you registered elsewhere;
- associate the domain to your hosting plan (if you have registered it elsewhere and don’t want to transfer it).
If it’s your first time creating a site, the easiest solution is to register the domain directly with the hosting provider.
That also allows you to obtain advantages. For example, with SupportHost, if you register or transfer the domain, you will never have to pay for it. Your domain will be included in the cost of the plan for all renewals.
You can choose from some of the most popular extensions, including .com, .eu, and .it.
Installing WordPress
Depending on the hosting service you choose, the ways you install WordPress change.
With SupportHost, you just order a WordPress or WooCommerce hosting plan to have WordPress pre-installed.
If you choose a VPS cloud hosting plan or one of our dedicated servers, you can add Softaculous to your order: an auto-installer that will allow you to install WordPress and hundreds of other scripts with one click.
Getting started with WordPress: an overview of the back end
You activated a plan and installed WordPress (or let your hosting install it for you).
Now the first thing to do is log in to the WordPress admin panel.
To reach it, just connect to:
www.domain.com/wp-admin/You will need to replace “domain.com” with the name of your choice.
You will find yourself in front of the login screen and to proceed just enter your username and password.
The admin panel is also referred to as the dashboard or site backend. In short, it is the section where you can change the settings, manage the appearance and create pages for your WordPress site.
As soon as you log in, you will find yourself on the dashboard home page. A welcome message with notes about the current WordPress release will appear on that page, and default tiles will be shown below.
Each item on the bulletin board is self-explanatory. However, even if getting familiar with the panel is not difficult, you can always call up a guide by clicking on “Help” in the upper right corner.

On the left, you can see the navigation menu. This menu allows you to access different sections, which I will explain briefly.
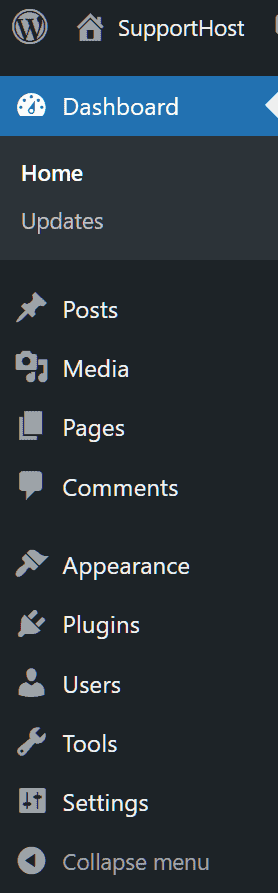
- Posts: Create new articles and manage existing ones. You can create and edit categories and tags.
- Media: You can view your media gallery (images, videos, documents, etc.), and upload new files.
- Pages: Manage and create new site pages.
- Comments: To activate, deactivate and moderate comments.
- Appearance: access theme management.
- Plugins: You can install new plugins or manage existing ones (update, activate, deactivate, etc.).
- Users: You can add other users or access your profile settings.
- Tools: Access pre-built tools such as imports from other platforms or privacy tools.
- Settings: change the site configuration.
At the top, you can see the toolbar.

From here, you can take quick actions.
View the site: hover over the name of the site, in our example above “Tutorial SupportHost,” then click on Visit Site.

Go to the comments section: Clicking on the message icon takes you quickly to the comments section. If there are comments to moderate, you will see the number.
Create a new post, media, page or user: hover over “New” and you will see a drop-down menu appear.

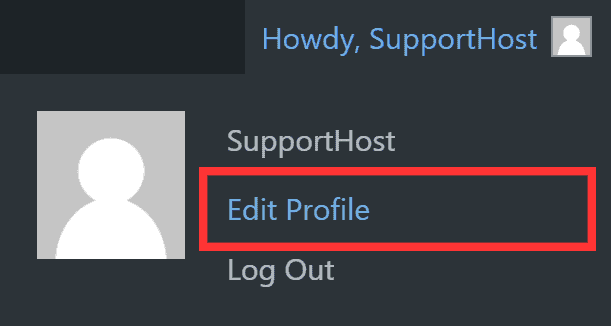
Edit profile: Hover over your username in the top right and you will see a drop down menu. From here you can edit your user profile or log out by clicking on “Logout”.

Modifying basic site settings
When creating a website with WordPress, one of the first things to do is make sure the basic site settings are correct.
During installation, you set the site name, chose the language to use, and so on. However, it is important to know how to edit a WordPress site and go about changing these preferences.
Set WordPress site title and motto
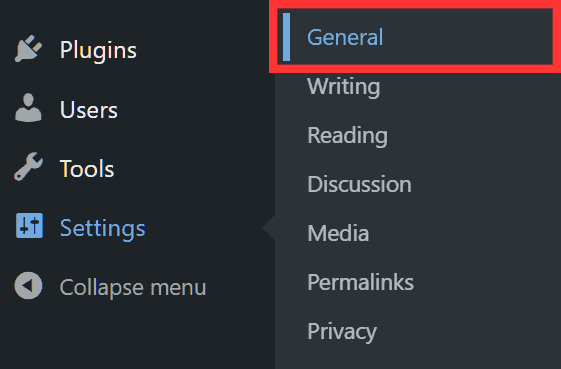
To change these settings go to Settings > General.
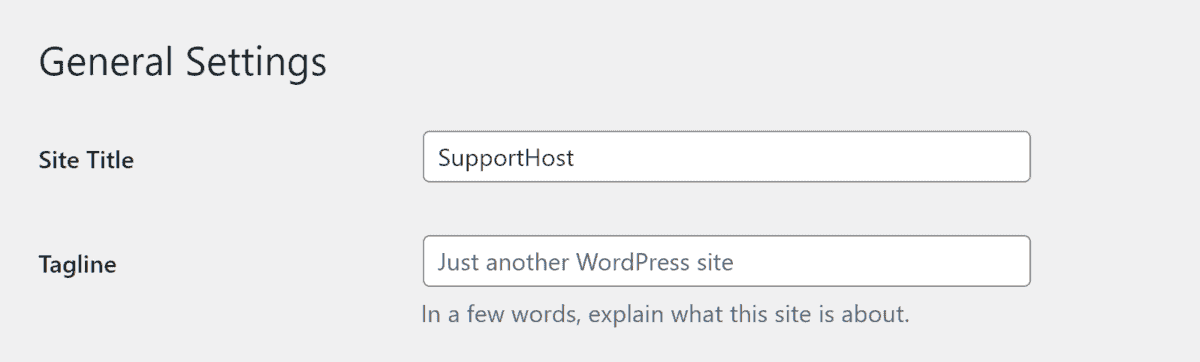
From here, you will be able to change the Site Title and Tagline, note that the motto may or may not be shown depending on the theme. The most important thing is to choose the title, which will always be shown instead.
Changing the language on WordPress
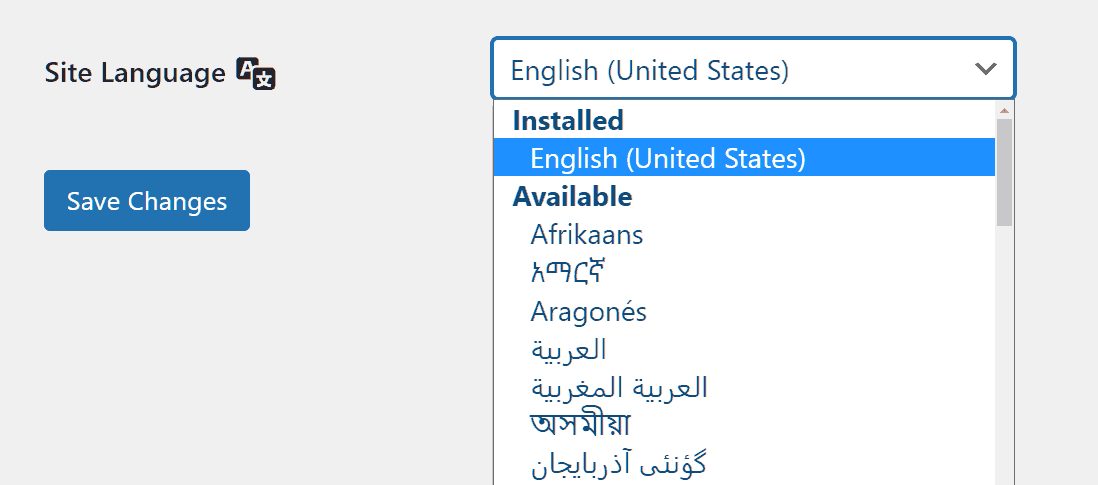
If you want to change the language of the site, just go to Settings > General.
Here you will find the Site language option and you can select the language you want to use from the drop-down menu.

Please note that from these settings, you change the global language options.
Individual users registered on the platform can change the language in which the bulletin board will be displayed. In this case you have to follow another procedure that I will explain to you now.
Change the language settings for individual site users
Hover over the user’s name in the top right of the toolbar and click Edit profile.
Under Language, you will usually see the “Site default language” option selected. If you want to use a different language than just set it from here and then click on the button at the bottom of the “Update profile” page.
As you can see, the languages you can choose are only those installed. If you want users to be able to set a language you will need to install it first as we have seen before.
For example, if you want to use Italian as the main language on the site, but you also want to make Spanish available to users, you will have to follow these steps:
Go to Settings > General and set the language to Spanish. This is to install the new language pack.
Click Save Changes.
Reset the language to Italian and save the changes again.
At this point, Spanish will be among the languages installed and selectable by users, as I show you here.

Setting up the URL structure of a WordPress site
One of the first things to do when creating a website with WordPress is to choose the URL structure.
Each page, post, category, and tag you create on your WordPress site will be associated with a unique URL.
It is important to establish the structure of these URLs at the beginning rather than change it later.
I’ll tell you why right away.
If you already know the use of redirects, you can skip this paragraph and move on to the next one where I explain how to modify permalinks.
Brief parenthesis on the importance of permalinks and redirects
Let’s take an example with an article.
When you create a new post in WordPress, the structure that is used is this:
website.com/2023/05/01/post-title/As you can see, between the title of the article and the domain (the name of your site), the publication date is inserted.
You can think of the URL as a real address: after you publish the article, the URL you saw will be the way to reach that article.
If you later decide to change the URL structure you will need to link the old address to the new one. It’s as if you decide to move and need to tell those who know you your new address.
In the case of links there is a faster way called redirection. This function, also called redirect, allows you to divert one address to another, in this way whoever knew the old address can reach the article even if its new address has changed.
Changing permalink settings for articles
To change the URL structure in WordPress, go to Settings > Permalinks.
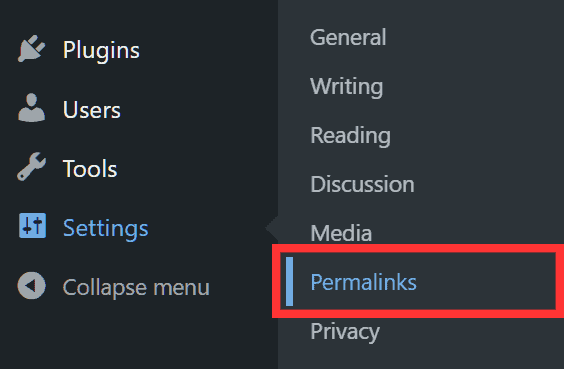
In this section we will see the different structures available.
As I explained before, the structure used by default is the Date and name. The most recommended structure, however, is the Post Name.
This way we can maintain a leaner structure and shorten the length of the address. This type of setting also allows us to create readable addresses, in which the title of the article or page is shown, which is always preferable to other options such as using a numeric ID.
To set it, just select it, as I show you below and then click on the blue button at the bottom of the “Save changes” page.

Keep in mind that when you create pages and articles you can choose the final portion (called slug) of the URL of the single pages.
This is a very useful function especially when you use very long page titles and want to shorten the slug so that it is shorter and more readable.
WordPress site creation: choosing and installing a theme
It’s time to start shaping our website. To do this, let’s start with the appearance.
Themes are used to manage the look and feel of a WordPress site.
So let’s start by understanding what it is.
What are WordPress themes?
Themes allow us to define the look and layout of the site. Keep in mind that when choosing a theme, many aspects such as colors and fonts can be changed to your liking.
Another important thing to know is that you can change the theme as many times as you want without risking losing the contents (intended as texts, images and so on).
In summary: the theme modifies the way in which the contents of the site are shown, but does not modify the contents themselves.
How many themes are there?
You must know that there are different types of themes.
The first difference is in the cost:
- there are free themes that you can install directly from the bulletin board or search the official repository;
- there are premium themes that you can purchase from the developer site or third-party marketplaces.
WordPress has recently introduced a new type of themes, so we can make a distinction between:
- block themes (or block themes)
- classic themes.
A block theme is a theme in which all elements are made up of one block, this means that you can also build the navigation menus and site footer as if they were blocks.
If you don’t understand this definition at the moment, because you are not yet familiar with WordPress blocks, don’t worry, it will become easier to understand as I show you how to use them.
With a classic theme, however, you will be able to manage the theme settings, but to create navigation menus, sidebars and footers you will need to use other tools (always integrated into WordPress). Later we will see better what are the differences in customization using these two types of themes.
How to choose a theme
The most practical way to choose the theme is to connect to the WordPress.org directory and search using the filters.
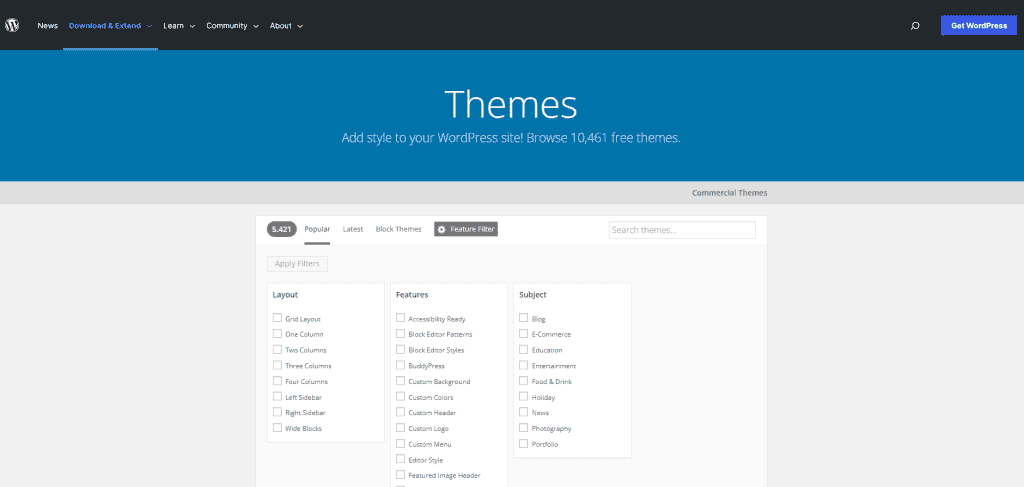
In this way we can identify the theme based on the layout, the characteristics or based on the theme of the site, for example by looking for a theme suitable for a news site.
Other elements that can help us in this task can be found in the tabs of the individual themes:
- the date of the last update;
- the number of active installations;
- the evaluation by other users.
These are not absolute criteria, but they help us to get an idea and eliminate the least reliable themes from our list.
Tip: when you open a theme’s tab, as I show you below, you can click the Preview button to immediately see a preview. This helps you get a better idea of the layout you can create with that theme.

What if you want to choose a premium theme instead?
You can also use the search filters to find the most suitable theme on different marketplaces such as Themeforest.

Now let’s move on to the actual installation.
In the next two sections, I’ll explain how to install a free theme and a premium one.
How to install a free theme
Once we have found the theme we want to try, we can install it directly from the WordPress dashboard.
Go to Appearance > Themes and then click on the top button “Add New“.

From here, we can use the bar at the top right to search for the theme we have chosen.
Let’s see an example with the Hello Elementor theme.
We just need to select the theme with the mouse and we will see the “Install” button appear.

After the installation is complete, we can click on the “Activate” button.

Note: You can have multiple themes installed, but only one theme active at a time.
How to install a premium theme
If you have purchased a premium theme, in most cases you will have been provided with a .zip file with all the theme files inside.
In this case to install it we have to follow a slightly different procedure than the one I just showed you.
Go to Appearance > Themes and click on “Add New“.
At this point click on the “Upload theme” button that you see at the top.

After that you will need to drag the zip file to the highlighted area and then click on the Install Now button.

After installing the theme, you can activate it directly by clicking on the “Activate” link, as I show you here.

Or you can activate it from the themes page (Appearance > Themes).
How to customize a classic theme
As I explained before, there are mainly two types of themes. Depending on the type of theme you have installed, you will need to follow different steps to change the look of your WordPress site.
If the theme you have installed is one of the classic ones, you will be able to change the look this way.
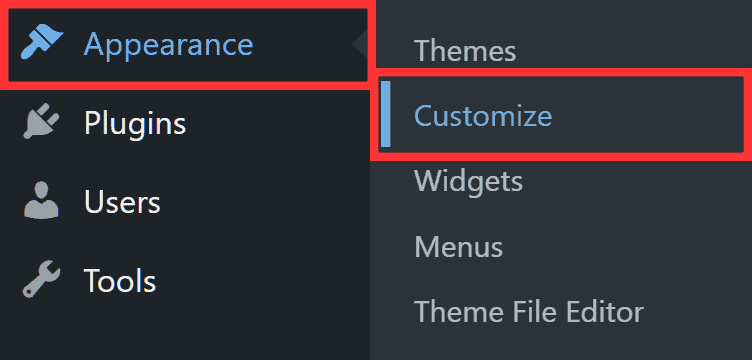
Click on Appearance > Customize.
This will allow you to change the theme settings.
Note that the settings depend on the theme you have chosen. For example by choosing the Astra theme you will be able to modify many elements, I will show you some examples.
You can select the layout of the page.

From the global settings you can change the main colors of the theme.

You can change the typography options by choosing the fonts for both the headers and the content.

How to customize a block theme
If you have chosen to use a block theme to create your WordPress site, then to change the look of the site you will need to use a different method than the one we have just seen.
Let’s see a practical example with the default WordPress theme, Twenty Twenty-Three.
After activating the theme, we will see that the options in the Appearance section change. In this case, in fact, we only find the “Editor” item.
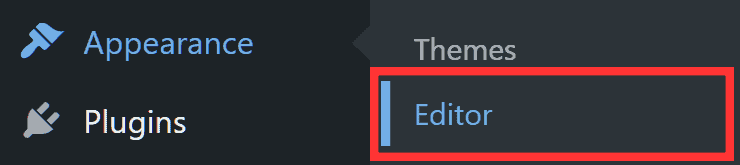
All the options that we found in different sections for a classic theme have been integrated into the editor: menus, widgets and customization.
Through the editor we can modify the site, individual templates or parts of the template.
We can use the template sections menu to customize the header, footer, and comments section.

By clicking on Template, however, we can modify the templates of articles, pages, site error pages and so on.

When we go to modify the site or the template, for example as I show you below that of the home page, we can go and modify every single element of the page as if it were a block.

In this example above the elements I’ve highlighted are actually these types of blocks:
- Site title;
- Navigation;
- H1;
- Media and text.
By selecting each individual block you can change the settings from the right side section, just open the “Block” tab, as I show you in this example for the “Navigation” block, i.e. a menu.
Create the site structure and home page
In this chapter, I’ll show you how to:
- set a page as home page;
- create the structure of a WordPress site: header and footer;
- create your first home page;
- insert a sidebar in the pages or articles.
Steps Note: We will be using the Block Editor for this guide, you need to choose a block theme to follow these steps.
Set a page as the site’s home page
Now that we’ve chosen the theme, it’s time to choose how to set up the home page.
WordPress presents us with two alternatives. By default, the most recent articles will be shown on the home page, if you are creating a site and not a blog, you may want to use a static page as the home page of your website.
In this second case, the first thing to do is create a new page and then set it as home.
Go to Pages > Add Page.

At this point we just need to enter the title of the page, for example “Home” and publish it.
After that we need to set the newly created page as the main page of the site.
To do that go to Settings > Reading.
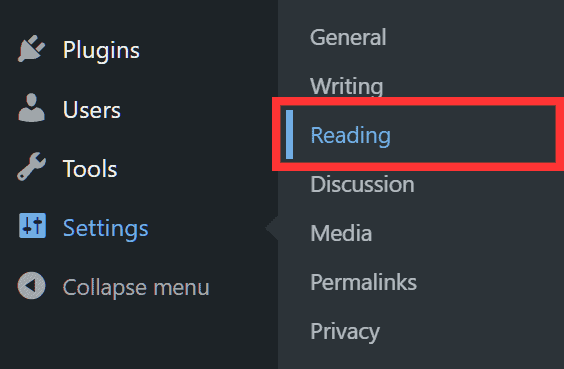
From here you will have to select the options that I show you here:
- Your homepage displays > a static page.
- Choose the page you want to show from the drop-down menu next to “Homepage”.
Finally we save.

In doing so we have selected the page to be used as the Home of the site.
Note: From these same settings, we can set the blog page. We just need to select the page from the list next to “Articles page”.
For the purpose of this guide we will focus only on the creation of the site, you can also read our guide on creating a WordPress blog in which we will show you all the steps to follow.
Then we go to the page list again (Pages > All Pages). In the list we will see that the page that we have set as home will have the wording “Home page” next to it.

Before creating our home page proper, we need to create the basis of our site. We therefore need two fundamental elements: the header and the footer.
Notes on using block themes and patterns
In this guide we’re going to see how to create them using a block theme, in our case we chose the default Twenty Twenty-Three.
Consider that the procedure to follow is the same even if you choose a different block theme than this one.
Why a block theme and not a classic one?
Using a block theme you will be able to create site pages with Gutenberg: the block editor integrated with WordPress.
One of the easiest ways to build a WordPress website this way is to use patterns. These are ready-made elements that we can use on our site.
We can use them to create the structure of our site, so let’s see how to do it.
Keep in mind that there are also other methods to create the pages and structure of the site for example you could use a page builder like Elementor or a site builder like Oxygen Builder. Inside our blog you will find two guides on how to use these tools.
Create the header
Go to Appearance > Editor.
First, click on the “ + ” icon in the upper left to open the block inserter.

Switch to the “Pattern” tab and choose “Header” from the drop-down menu.
We will be shown a series of elements that we can use as headers: these are combinations of site title and menu or header with a hero image.
To insert a pattern, just click on it.

After entering the block, we can change the various settings of that block through the right-hand menu. For example, from the section I’ve highlighted below, you’ll be able to change the background, text and link color.

Create the footer
Now we can edit the footer. We just need to follow the procedure similar to the one I just showed you.
We can open the editor and then modify the page or individual parts of the template.
If we want we can remove the already present group and insert a new footer using a pattern. To do this, click on the button with the three lines to show list mode. So let’s remove the group inside the Footer section, as I show you here:

Through the block inserter as I showed you before, we insert a pattern. In this case we set the “Footer” from the drop-down menu and choose the one we prefer. Here I have chosen one with social icons.

Also, in this case we can make the changes we want, for example changing the background color of the footer or adding other social icons.
Tip: if you insert social icons like in this case, remember to insert the link that refers to the relative pages for each icon you have inserted. Otherwise you will only have inserted icons that are not clickable if you do not include the link.
Now that we have created the elements of our template we can save the page by clicking on the “Save” button at the top right.
Create the home page content
Now let’s go create the actual content of the pages of our WordPress site, starting right from the home page.
Go to Pages > All Pages and change the page you set as home.

Patterns can help us here too. Since the patterns you can access directly from within WordPress are limited, you can also go to the WordPress pattern directory and copy the elements directly into your editor.
After that you can customize the block, you added by modifying the texts and images used.

When you add other elements, especially if you use patterns, you’ll need to customize them to keep the same style throughout the page. For example, you can copy the text color used in one block to use it in the next as well, as I show you in this case.
First we copy the text color:

And then we apply that to the next paragraph:

Tip: You can add a “Blank Space” block to create spacing between different blocks on the page.

The list mode helps us to navigate through the elements that we have inserted in the page and to duplicate an already created element.

For example, we may want to duplicate a button to insert it several times on the page and keep the same style without changing the individual elements several times. Or we may want to insert the “Blank Space” block multiple times without having to change the size and thus maintain the same spacing throughout the page.
By selecting one of the blocks from the list we can then click on the icon with the three dots to copy it, duplicate it or even delete it.

Modify the page templates
After creating the home page, we can modify the template of the pages even further.
For example, we may want to remove the post or page title, so that the “Home” title does not appear on our home page.
In this case we just go to Appearance > Editor, open the view in list mode and remove the “Article Title” block as the screenshot shows.

Create a sidebar
The sidebar is another element that with block themes we can create directly from the site editor.
As we have seen before for header and footer, let’s see how to create a sidebar to be used on all pages of our WordPress site.
First access the editor by always going to Appearance > Editor.
Now you have to choose the template you want to modify.
In this case, if we want to add the sidebar to all pages, we will modify the “Page” template. If, on the other hand, we wanted to add it only to posts, we just need to modify the “Single” template that applies to the articles.
You can also create a new template to apply it only to pages where you want to use the sidebar.

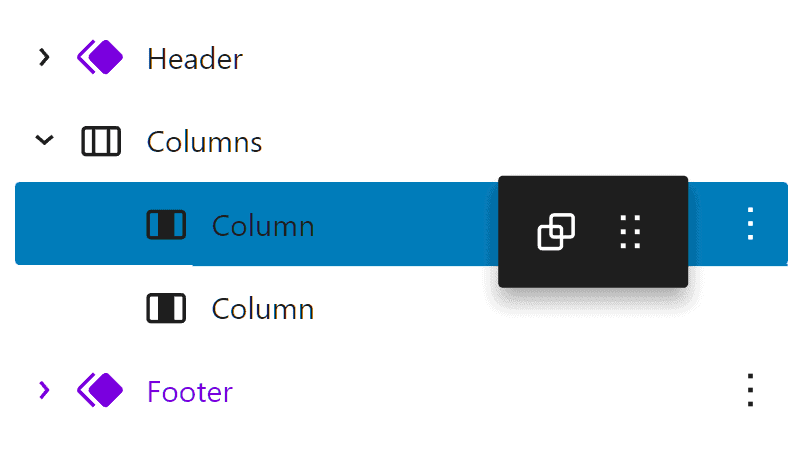
After selecting the template, let’s insert a new “columns” block between the header and the group (the block that contains all the content of our pages), as I show you here.

We can create a sidebar on the right side, in this case we choose a layout like 66 / 33 to divide into two areas. If we want to create it on the left side, just choose the 33 / 66 layout.
We must therefore move the group containing the page content to the largest column, in our case the one on the left. We just drag it under the desired column using the list mode view, as you see here:
Now let’s use the right column to create our sidebar. For example, we can insert a search bar using the “search” block, or insert an invitation to subscribe to our newsletter, as in this case with a header and a button.
Here too, as we have seen before, we can insert other blocks such as “Blank Space” to create spacing between the elements.

How to install plugins on WordPress
This step can actually be done at the same time as what we have just seen: the creation of the site pages.
Depending on the website you want to create with WordPress, you may need one or more plugins.
In WordPress, plugins are extensions that allow you to add new functions.
To give you some examples:
- you can use a plugin like “Under Construction” to create a courtesy page and notify users that your site will be available soon;
- you can use “Contact Form 7” to create a contact form in just a few steps to allow site visitors to contact you;
- you can install “MemberPress” if you want to create a members area on your WordPress site.
These are just a few simple examples. There are plugins for each function, just think that while I’m writing on the official directory you can find 60,241 plugins.
Just as we have seen for themes, there are mainly two types of plugins:
- free, which you can install directly from the dashboard as I’ll show you shortly;
- premium, which you can purchase from the developer site or third-party sites.
How do you install a plugin from the dashboard
With WordPress you can install plugins easily.
Go to Plugins > Add New.
Use the search bar at the top right to find the plugin you need. If you don’t know the exact name of the plugin you can search by function, for example “contact form”.

Note that the search is done in the plugin directory. Some of the plugins you will see are freemium i.e. they are available in a free version, but they also have a paid version which will allow you to unlock more advanced features.
Once you have found the plugin you are interested in, do this.
Click on the “Install now” button and wait for the installation to complete.

Click on “Activate” to enable the plugin.

At this point, depending on the plugin you have installed, you will be able to access the configuration page or immediately start using it in your pages.
Tip: You can duplicate a page in WordPress using a plugin or a custom function.
How to install a plugin from zip file
The process I just showed you shows you how to install a WordPress plugin from your dashboard. If, on the other hand, you purchased a plugin from a third-party marketplace and were provided with the zip file, you will need to follow a slightly different procedure in order to install it.
I’ll tell you how right now.
- Go to Plugins > Add New.
- Click on the “Upload Plugin” button above.
- Drag the file into the highlighted area.
- Then click on the “Install Now” button.
In this screenshot I have highlighted all the steps just described.

After installing the plugin, you will need to activate it in order to use it.
Conclusion
In this guide, I explained how to create a WordPress site.
We started from the base by going to see how to start becoming familiar with the platform. To then enter the most important settings of the site gradually such as the language and the structure of the URLs.
After that, we got to the heart of choosing the theme and its customization: we started giving our site an appearance. The next step is the creation of the actual pages, so I’ve shown you with practical examples how to create the entire structure.
Is your job done? No! Now that you know how to make a site with WordPress, all you need is time and patience to create all the content and get the look you want.
Was this guide helpful to you? Have you started building your site yet? Comment to let us know.
Ready to build your WordPress site?
Try our service free for 14 days. No obligation, no credit card required.


