
If you want to know how to install Drupal on the server or locally, in this detailed guide you will find everything you are looking for.
We will see how to install the CMS on the server with an auto-installer, how to do it manually and locally and how to solve any problems.
First let’s see what alternatives we have and what the requirements are.
Table of Contents

How to install Drupal
If you want to create a site with Drupal, there are several alternatives.
Some hosting sites provide an auto-installer to allow you to install scripts and CMS with one click or have hosting plans for this CMS.
In our case you can install Drupal with Softaculous or order a Drupal hosting plan with the CMS already installed.
Keep in mind that with SupportHost you can order any hosting plan and indicate the CMS you want pre-installed when ordering.
Do you want to test before subscribing to a plan? Take advantage of our free hosting and you can try the service without obligation for 14 days.
In this guide we will see different methods to install Drupal:
- how to install with Softaculous;
- how to do manual installation;
- how to install locally with XAMMP.
Before starting, let’s see what the requirements of this CMS are.
Drupal requirements
As we have also seen in the guide to what Drupal is, to install the CMS we must meet the following requirements.
Free Space: Approximately 100 MB.
PHP version: PHP 7.3 or higher.
Web server: Apache 2.4.7 or higher / Nginx 0.7 or higher / Microsoft IIS 5, 6, 7, 8 or 10.
Databases: MySQL 5.7.8, PostgreSQL 10.0 or SQLite 3.26.
Install Drupal with Softaculous
Softaculous is software that we ship with all of our plans from shared hosting to dedicated VPS cloud hosting plans and dedicated servers.
With this auto-installer you can easily install hundreds of scripts.
Let’s see how to use it to install Drupal.
To open Softaculous we just need to access cPanel and click on Softaculous Apps Installer from the Software section.
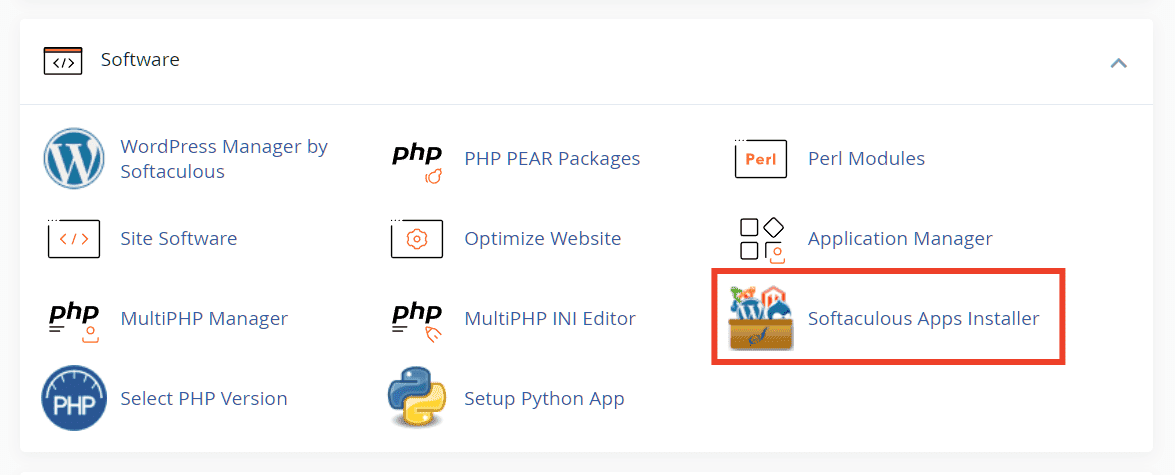
We use the search bar to find Drupal and then click on the blue Install button.

We will be prompted to enter the information necessary for the installation.
Software Settings
From this section we can choose the URL where Drupal will be installed.

Choose protocol: if available choose https. Note that you must have an SSL certificate installed on your site in order to use this protocol.
Choose the domain: from the drop-down menu we can select the domain or subdomain in which to install the CMS.
In the folder: if we want to install the CMS in the root of the domain we leave the field empty.
Choose the version you want to install: from the drop-down menu we select the version, for example 9.3.13.
CRON task: From here we can define the time frame for the cron job. If you don’t know how to change the values, it is recommended to use the default values.
Site settings and admin account
From these two sections we can set the site name and create the administrator account.

Username Admin: enter the username of the administrator.
Admin Password: Enter the admin password. These data, username and password, will be required to access the Drupal administration panel.
Email admin: insert the email address.
Advanced options
From the advanced options section we can change the name of the database associated with our Drupal installation.
We can also turn off update notifications, but it’s not recommended. For site security it is always best to upgrade Drupal when a new update is released.
From here we can also change the prefix of the database tables and set up automatic backups with Softaculous.
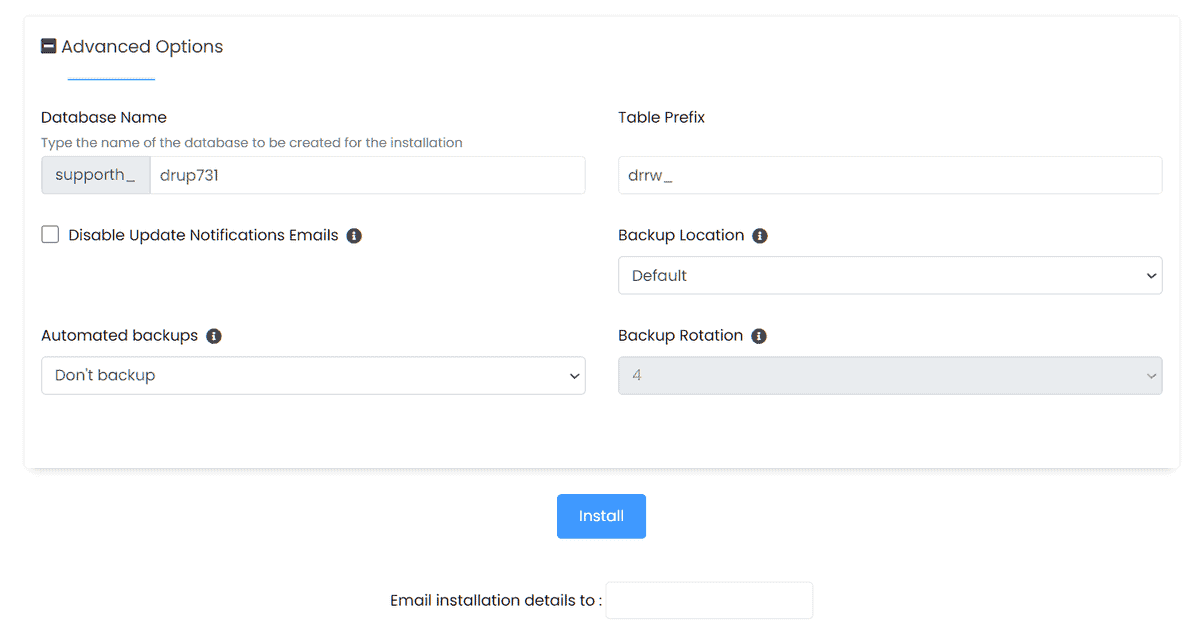
We can usually leave the default settings for the advanced options.
Start the installation
After entering all the data we can start the installation by clicking on the Install button at the bottom of the page.
After the process is completed, we will see a notice like this that brings us the links to access the site and the administration panel.
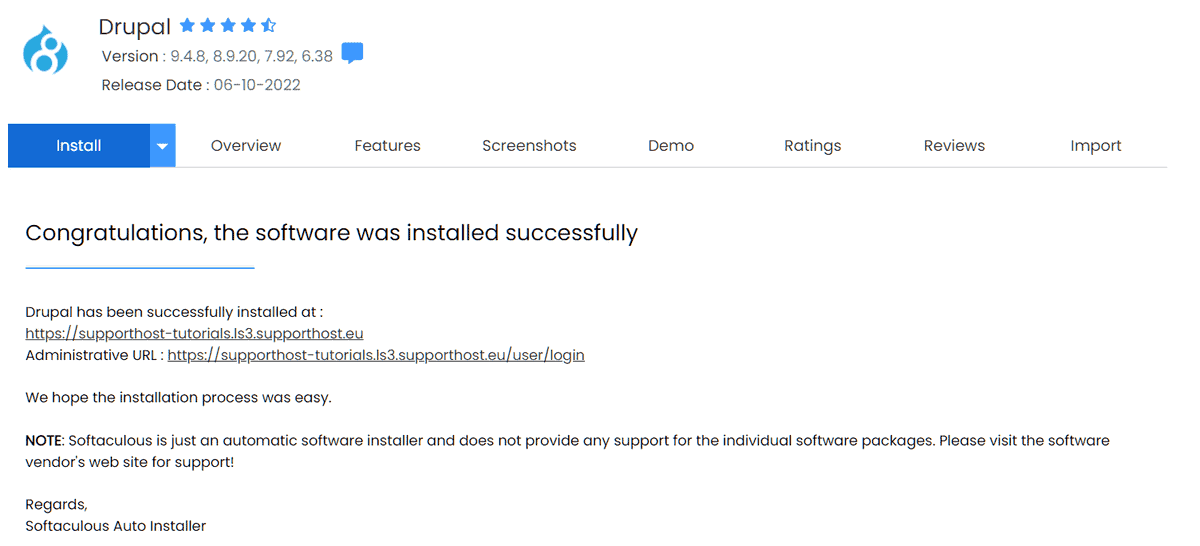
By clicking on the address next to admin URL we will be redirected to the login page to access the back-end.

Install Drupal manually
Installing Drupal manually involves the following steps:
- download CMS files;
- upload files to the server;
- create the database;
- start the installation.
Let’s see how to proceed one step at a time.
Download the CMS files
To download Drupal, just connect to the Download section of the site. From here we can download the .zip or tar.gz archive with the CMS files.
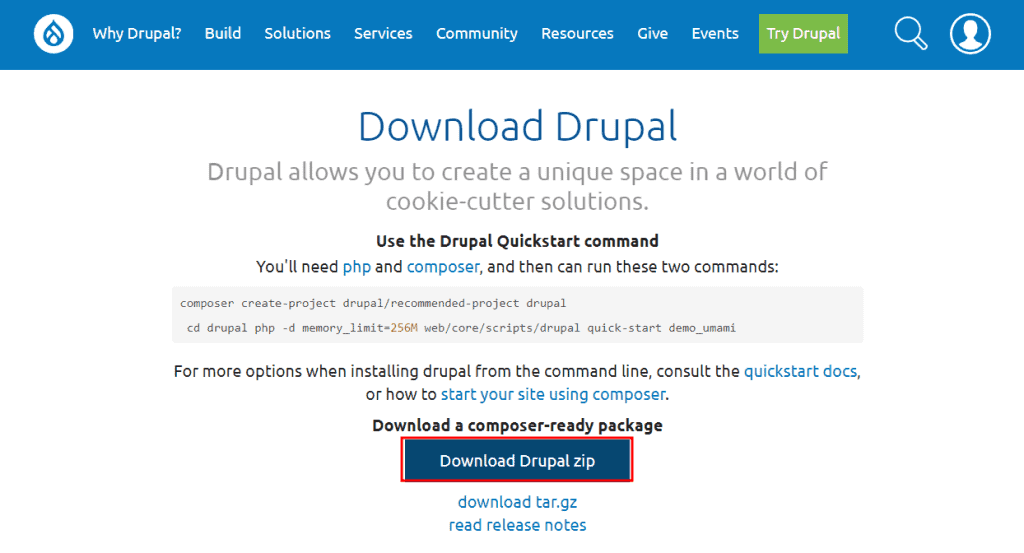
By clicking on Download Drupal zip or Download tar.gz we will download the latest version of the software which is currently 9.3.13.
If, on the other hand, we wanted to download a previous version, just click on Read release note and then click on Releases.
From here we will be able to access previous versions and download the one we want.

Upload files to the server
After downloading Drupal, we can upload the files to the server.
The files must be uploaded to the directory where we want to install Drupal, for example in the root of the domain (public_html).
To upload files we can use different methods:
- the file manager, for example the cPanel file manager;
- an FTP client like FileZilla or Cyberduck.
In any case we can upload the .zip (or tar.gz) file and then extract the archive on the server.
For the purpose of this guide we will see how to do it with the cPanel file manager.
We access the file manager and open the folder where we want to install Drupal. In our case we will use a subdomain.
Load the compressed file that we have downloaded into this folder: click on Upload and then select the file or drag it to the indicated area.
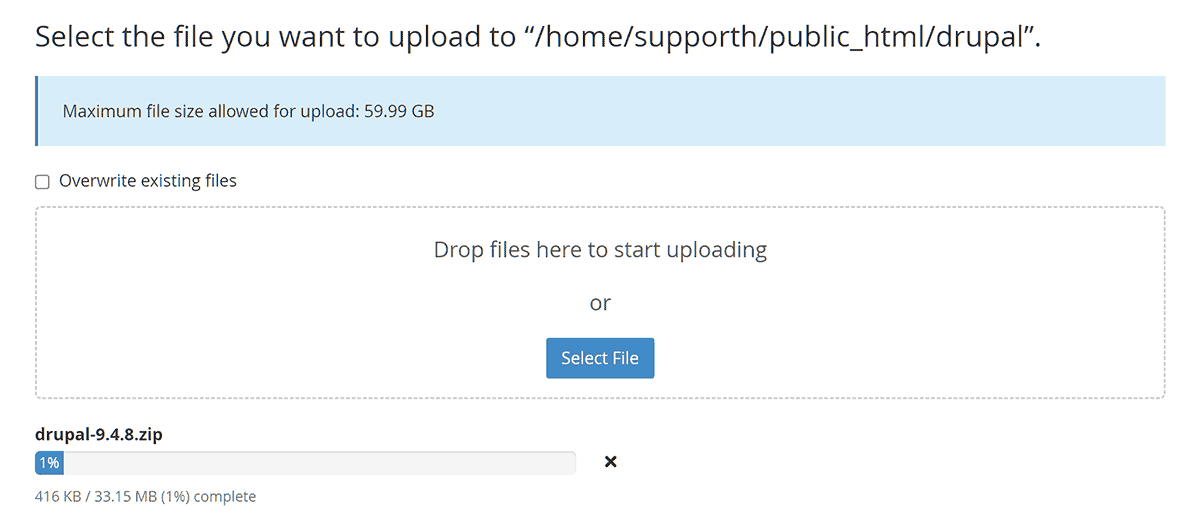
We wait for the upload to be completed and go back by clicking on the link below Return to “…”.
Now we have to extract the archive, right click on the file and then click on Extract.

The extracted files will be placed in a new folder called “drupal-x.x.xx“. We then need to move the contents of the folder so that the files are in the directory we want to use for the site.

To do this, follow the steps shown in the screenshot above:
- open the folder and select all the files by clicking on Select all;
- click on Move;
- we enter the path where we want to move the files;
- click on Move files.
We can then delete the zip file and empty folder (drupal-x.x.xx).
Create the database
At this point, before installing Drupal, we need to create a database.
If you’re using cPanel, you can follow the step-by-step process in our tutorial on how to create a database.

You will need to create a database and user and associate the user with the database.
Remember to memorize the access data to the database, because you will need them during installation.
Start Drupal installation
To start installing Drupal we just need to connect to the address where we extracted the archive.
Choose language
First we will be asked to choose the language. Select it from the drop-down menu and click on Save and continue.

Choosing a profile
The next step will be to choose the type of installation.

Standard: it is the basic type of installation that also includes some features already configured, suitable for those who are starting to use Drupal. (Recommended option)
Minimal: it is an installation more suitable for expert users that allows us to define the functions we need later.
Demo: allows us to install an example site.
Click on Save and continue to proceed, in the next step the requirements will be automatically verified.
If you get an error message while checking the requirements, check the troubleshooting during installation section.
Database configuration
In this step we have to select the type of database and enter the required data.

Database name: we enter the name of the database we have created.
Database username: enter the username associated with the database.
Database password: we enter the password we have chosen.
In this screen we will also see the advanced options. From here you can specify the hostname (typically localhost), the port number and the table name prefix.
We can generally leave the default options, unless the provider has given you specific instructions.
Click on Save and continue and the installation of the site will start.

Site configuration
In this step we can configure some basic information of the site.

Site information
Enter the site name and associated email address.
Site maintenance profile
From this section we can create the site administrator profile by entering username, password and email address.

Regional settings
Default country: we choose the country from the drop-down menu.
Default time zone: we select the city to set the time zone.
Update notifications
We can choose whether to activate notifications for updates and receive notifications by email.
Finishing the installation
Click on Save and continue and the installation will be completed.
We will then be sent back to the front end of the site and will see a notice like this letting us know that we have installed Drupal correctly.

Install Drupal locally with XAMPP
To install Drupal locally we can use a stack like XAMPP or MAMP.
In this case we will use XAMPP which is compatible with Windows, Linux and macOS.
In order to install Drupal locally we will have to:
- install XAMPP
- download Drupal files from the site
- create a database
- start the installation.
Here’s how to proceed.
Install XAMPP
To install XAMPP we must connect to the Apache Friends site and download the version of the program compatible with our operating system.

After that we just need to follow the wizard to complete the installation.
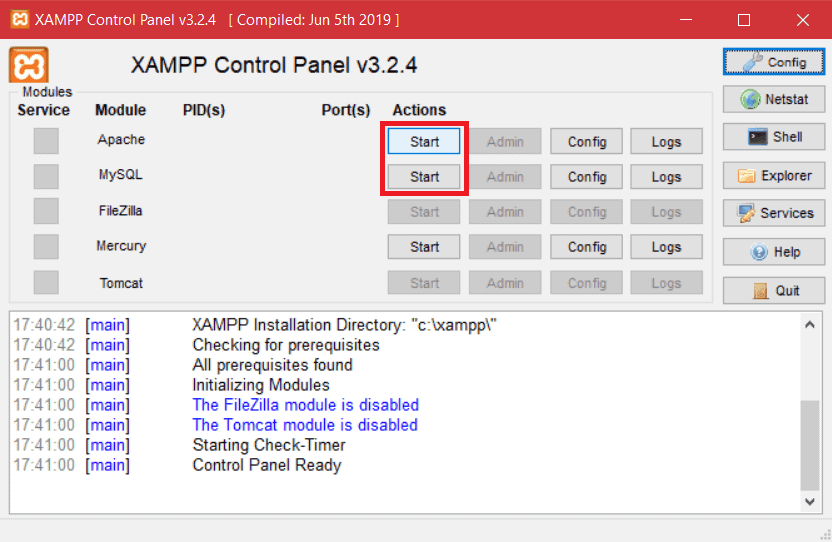
After opening XAMPP, the first thing to do is activate the Apache and MySQL modules by clicking on Start next to the respective items.
Download Drupal
By connecting to the download section of drupal.org we can download the CMS files.
We then need to extract the files inside the htdocs folder.
The path to this folder on Windows is usually:
C:\xampp\htdocs
Inside the htdocs folder let’s create a new one and call it “drupal”. We then move the contents of the .zip file into this new folder.
Before starting the installation, we need to create a database.
Create a database
To create a database for the site we can use phpMyAdmin, just open the browser and connect to localhost/phpmyadmin/.
Remember that you must have activated the Apache and MySQL modules from XAMPP.
From phpMyAdmin click on New to create a new database.
We enter the name of the database, for example drupal, and then click on Create.

Start Drupal installation locally
To start the installation, just connect to the localhost/drupal/ address.
Note that “drupal” in this case is the folder name we used.
If you used a different name you will need to change the address to match the folder name: localhost/folder-name/.
We can then follow the installation wizard. For all the details you can follow the steps indicated in the Starting the Drupal installation section of the manual installation chapter of this guide.
When we get to the requirement check step there may be alerts like the one in this example.

In this case we can resolve the warnings and click on Retry or continue by clicking on Continue anyway.
Database configuration
At this step we can enter the data for the connection to the database.

Database name: we enter the name of the database we have created, in our case “drupal”.
Database username: we can use the name of the user logged into the database, usually root.
Database password: in this case we can leave the field blank.
At this point we just have to complete the installation and enter the requested information in the Site configuration section.
At the end of the installation we will be redirected to the front-end of our new site created with Drupal.

Errors installing Drupal locally
If you encounter warnings while installing Drupal locally, you need to make sure your system settings are correct.
If necessary you can change the settings of the php.ini file. With XAMPP you will find the file at this path: C:\xampp\php\php.ini.
The recommended values for local installation are as follows:
- max_execution_time = 600
- max_input_time = 600
- memory_limit = 512M
- post_max_size = 64M
- upload_max_filesize = 64M
- mysql.connect_timeout = 600.
Problems installing Drupal
In the previous section we saw which configuration to use to avoid problems with installing Drupal locally.
In this section, however, we will see how to resolve errors during installation on the server.
Problems with the PHP version
If you get a warning that the PHP version of the server is not compatible with the Drupal version, you will need to change the version.
With SupportHost you can change the PHP version directly from cPanel. In other cases if you cannot do it directly, you will have to contact your provider.
Unable to connect to database
If you come across the error stating “Failed to connect to your MySQL database server” there are problems connecting to the database.
In this case, make sure that the information entered (username, password and database name) is correct.
Conclusion
We have seen the different methods that we can follow to install Drupal on the server or locally.
The installation process can be simplified with an auto-installer, but in some cases we may need to install the CMS manually.
In conclusion we have also seen how to solve some of the problems that can occur during the installation.
And you, were you able to install Drupal by following this guide? What method did you follow? Let us know in the comments.
Ready to build your WordPress site?
Try our service free for 14 days. No obligation, no credit card required.


