
In this guide we are going to see how to install and configure MAMP on your Mac or windows computer.
MAMP allows us to create a local development environment. This allows us to run php (but also Perl or Phyton) and MySQL on our local computer.
The advantage over using a remote server is speed. For example, if we work locally, we will just have to save the file and reload the page to see the changes. In the case of a remote server after each modification we will have to load the file on the server before we can reload the page.
Table of Contents
What is MAMP?
MAMP is an application that allows us to create a local server in a few simple steps. We will be able to run php files without the need to upload them to a remote server.
In this way we can develop our web applications locally, and then and once they are tested and working upload them to the server.
Although we provide tools on our WordPress hosting that allow us to manage WordPress easily, it is a convenience to be able to have WordPress locally to speed up development tasks.
If you simply want to install WordPress locally check out the article where we talk about Local. This is a dedicated WordPress solution that makes all the operations very easy.
MAMP which an acronym that stands for:
- Mac OSX (although now also available for Windows)
- Apache, the web server (although you can choose Nginx as the webserver)
- MySQL, the database usually used on the web.
- PHP, but can also sater for Perl or Python
MAMP is available in two versions, one free and one paid. The free version is complete, obviously it has some features less than the paid version, but it is still a complete software.
In most cases there will be no need for the paid version.

Download MAMP
To download MAMP we have to go to the official website at the download page, choose the version according to our operating system and then download the application.
It doesn’t get any easier than that.
Install MAMP on Mac
Let’s open the file we just downloaded, and the installer will open. All we have to do is follow the wizard, which is like any other application for the Mac.

We will be asked to accept the license and enter the administrator password to continue.
We’ll then have to confirm that we want to occupy the disk space, and possibly choose on which disk.

At this point, the installer will perform his operations.

When the installation is complete, we will see a success message on the screen, and the installer itself will ask us if we want to move the installation files to the recycle bin.
We can move these files to the recycle bin since we have now finished the installation.

Install MAMP on Windows
As soon as the installation file has been downloaded, open it by double-clicking on it to start the installation.
If you receive an alert, it indicates that you want to make changes to your computer to continue.

Choose your preferred language for the installation.

Be sure to uncheck MAMP PRO and Bonjour from the list, unless you intend to install them.

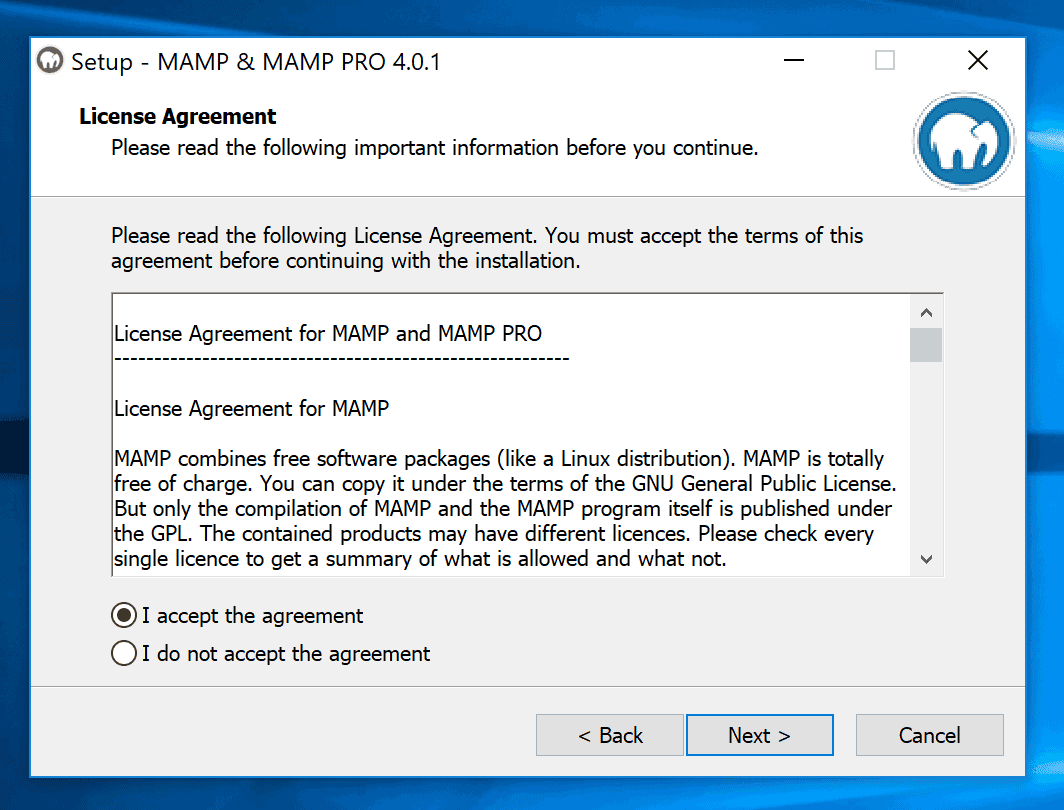
Accept terms and conditions.
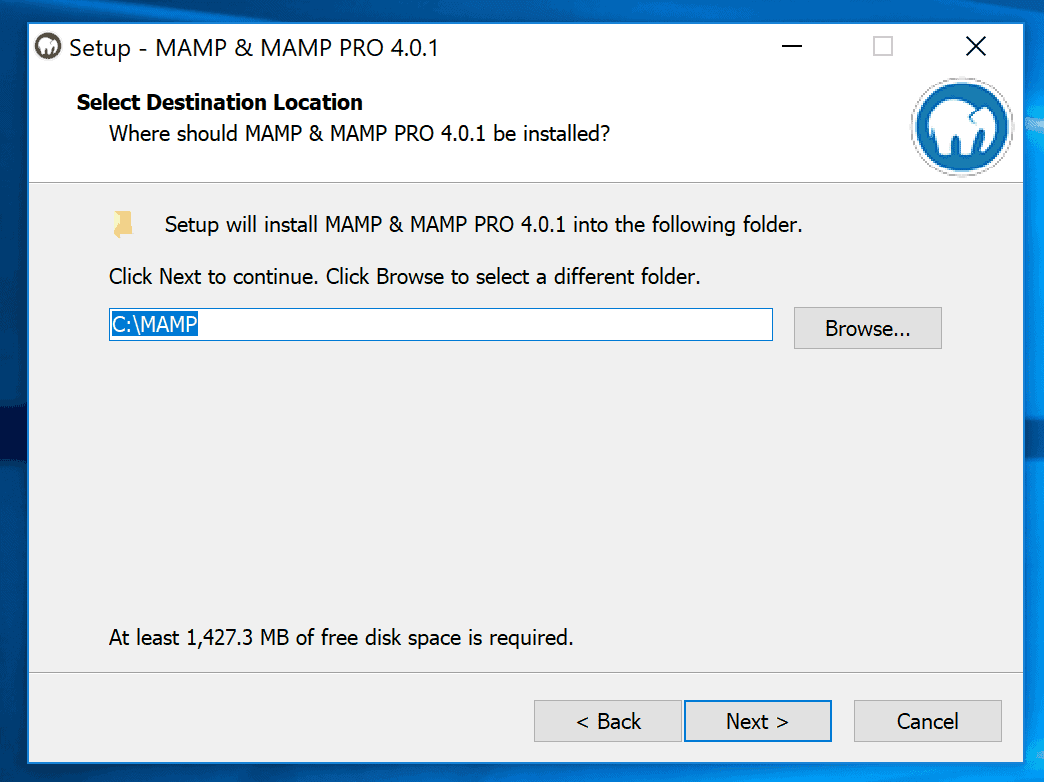
Choose where to install MAMP, my advice is to leave the default folder.
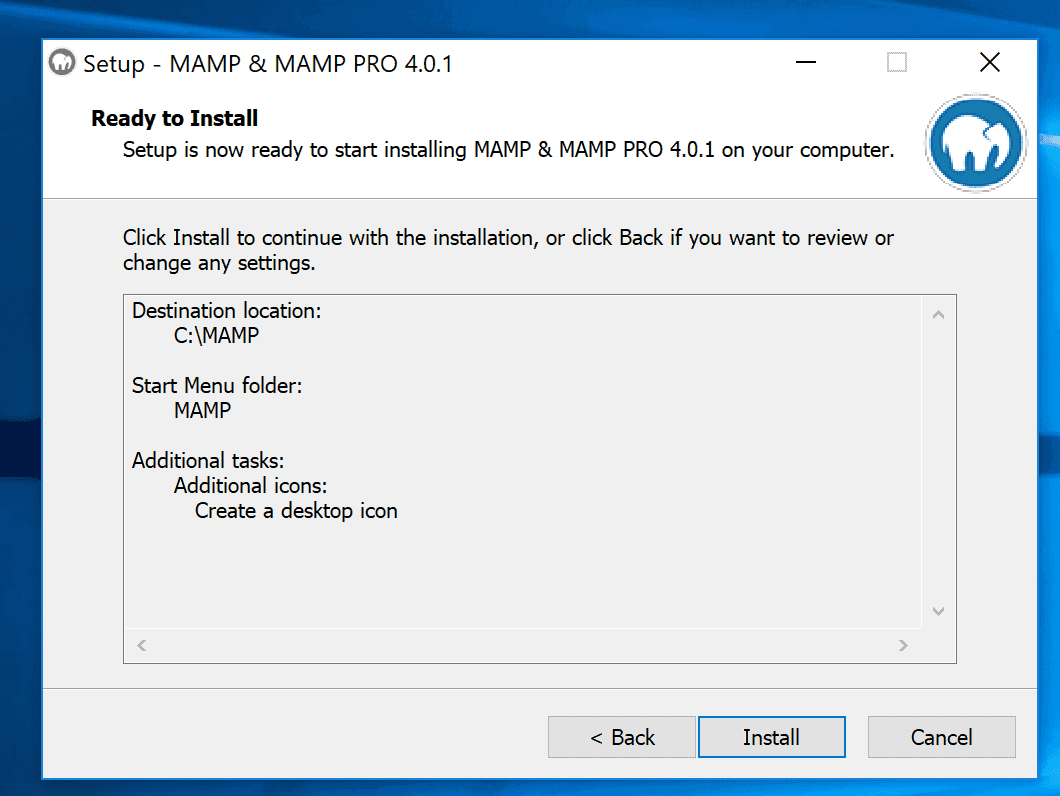
In the next steps you will be asked to choose in which Start Menu folder to install the application and whether or not you want to create a desktop icon. Make your choices and proceed.
Now you will see a summary screen if everything is correct proceed with the installation.
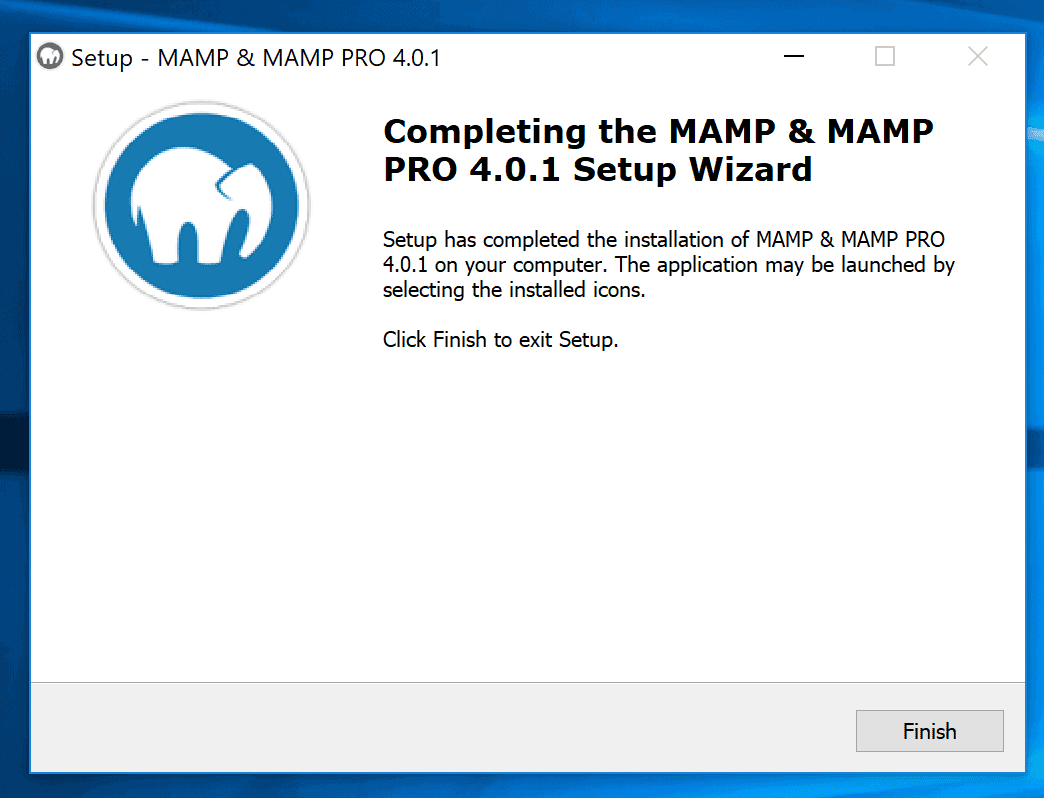
Wait for the installation to complete and the confirmation message to appear.
Configuring MAMP
Let’s now go over how to configure MAMP correctly. For simplicity’s sake, all the screenshots are for the Mac, which is the operating system I’m using as I write this article.
In any case the settings are the same on windows as on Mac, so it shouldn’t be a problem to follow this guide. If you have any problems let me know in the comments so I can update this guide.
Let’s enter the preferences from the top menu.
In the first screen we see the general settings, from where we can decide what operations to perform when we start the application and what operations to perform when we close it.
I recommend setting it as below so that it starts the server automatically when you open the application and stops the server when you are done and decide to close the application.

You can check the status of the Web Server and MySQL from the main window.
If the services are running properly, you will see a green light to their right.
By clicking on the power icon below you can stop and restart the Web Server and MySQL Server at your convenience. This feature is useful when you make changes to the web server and need to restart it to have them applied.

In the second tab we can choose the ports we want to use on our web server.
By default, MAMP uses the following ports:
- Apache : 8888
- Nginx : 7888
- MySQL : 8889
Here the choice is personal. You can click here buttons below to set the standard 80 and 3306 ports or to return to the default ports.
Note that if you want to use a domain instead of localhost, as I will explain in a later section, you need to set the ports to 80 and 3306.

From here you can choose the phpversion you prefer and decide whether or not to activate the cache and if so which one to activate.
As you can see, we only have the choice between two different PHP versions. Only the last two versions are shown.

PHP versions are contained within:
Applications/MAMP/bin/php
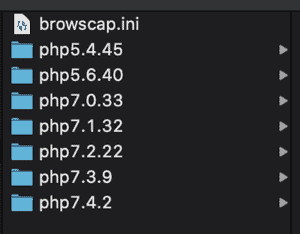
So how do we do that if we want to use an old version?
In this case we have to close MAMP and rename the versions that we are not interested in, for example by adding an underscore in front of the folder name.
Next time you open the PHP preferences, you will see two different versions of PHP than before.
From the “Web Server” tab in the settings you can choose whether to use Apache or Nginx on your local server.
You can also choose a folder that will be the root of your files. In this folder you will add your files and folders.

Finally in the MySQL tab you see the version of Mysql used locally.

How to use MAMP
Once we have everything installed and configured, it is time to start using it.
In the settings section we saw how we can choose in which folder to upload the files. If you haven’t made any changes this will be the htdocs folder.
Of course, you can create subfolders for different projects.
You will be able to visit your projects using the local url:
https://localhost:8888/
As for database management, phpMyAdmin is provided by default, which you can find at the url: https://localhost:8888/phpMyAdmin/?lang=it
It will probably not be the latest version of PhpMyAdmin, so let’s see how to use the latest version.
Update PhpMyAdmin
You can download the latest version of PhpMyAdmin here.
You can find the PhpMyAdmin files here:
Applications/MAMP/bin/phpMyAdmin
Replace the folder with the files you just downloaded.
You must not change the name of the folder, so it must remain “PhpMyAdmin”. Also, inside the folder must have a file called “config.inc.php”.
For this reason, my advice to update PhpMyAdmin is to delete all the files inside the folder except the configuration file, then copy all the files you just downloaded in their place.
You can eventually upload PhpMyAdmin files inside the htdocs folder, but in this case, you’ll have to login every time, so it’s better to use the tools that MAMP provides.
Check php configurations
A very useful tool in php is phpinfo.
Also, in this case we can simply load a file inside the htdocs folder and then display it with the browser.
Also, in this case MAMP comes to our aid by providing us with phpinfo in one click:
https://localhost:8888/MAMP/index.php?language=Italian&page=phpinfo
Install WordPress on MAMP
If we want to install WordPress locally the process is very simple.
First, you need to download the latest version of WordPress in the language you prefer.
Then unzip the archive and upload it to the htdocs folder.
Let’s access PhpMyadmin now:
https://localhost:8888/phpMyAdmin/?lang=it
We can click on the “Database” tab at the top or the “New” link in the sidebar:

We must then enter a name for our database and click on create

At this point all we have to do is visit the folder where we inserted the WordPress files and follow the steps of the wizard to install WordPress.
https://localhost:8888/wordpress
View your local site with other devices
In some cases, you may need to view your site from another device.
This can be useful if you want to check that your site displays properly on mobile, or if you want to check that it is compatible with other browsers.
If we are connected on the same network, you can view the site we have on our local server from another device.
First, we need to know the IP of our computer. On the Mac we click on the top of the wifi icon and in the dropdown that opens at the bottom we see a link to open the network preferences. From this screen we can then see our ip address, which in this case is 192.168.8.101

If you are using Windows 10 you can find the IP of your computer in the network settings. Click on the name of the network to which you are connected until you find the properties section and among the information you will find the local IP of your computer, right next to the words IPv4 address.
Now that you have the local IP of your computer, you can visit the MAMP url with another device:
192.168.8.101:8888
Keep in mind that this only works if the two devices are connected to the same network.
If in MAMP settings, you chose to use port 80 you have to omit “:8888” from the url.
MAMP with domain name
First, we create a folder called SupportHost.it inside htdocs, then we modify the hostfile by adding the line:
127.0.0.1 supporthost.it
At this point when we go to visit SupportHost.it we will see the contents of the folder htdocs that in our case is:
Now we need to make some changes so that when I type in the domain name, the contents of the folder with the same domain name are shown.
As first thing we open the file.
/Applications/MAMP/conf/apache/httpd.conf
with a text editor such as textwrangler or bbedit.
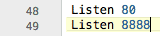
- Let’s make sure that the line “Listen:80” is not commented out. If you only find the line “Listen:8888” add “Listen:80” above it.
- Let’s look for this line and delete the hash to make it effective.
#Include /Applications/MAMP/conf/apache/extra/httpd-vhosts.conf

We save the file and close it.
Now let’s go to enable virtual hosts in apache by editing the file:
/Applications/MAMP/conf/apache/extra/httpd-vhosts.conf
At the end of the page, you will see code similar to this:
<VirtualHost *:80>
ServerAdmin webmaster@dummy-host.example.com
DocumentRoot "/Applications/MAMP/Library/docs/dummy-host.example.com"
ServerName dummy-host.example.com
ServerAlias www.dummy-host.example.com
ErrorLog "logs/dummy-host.example.com-error_log"
CustomLog "logs/dummy-host.example.com-access_log" common
</VirtualHost>

<VirtualHost *:80>
ServerAdmin webmaster@dummy-host2.example.com
DocumentRoot "/Applications/MAMP/Library/docs/dummy-host2.example.com"
ServerName dummy-host2.example.com
ErrorLog "logs/dummy-host2.example.com-error_log"
CustomLog "logs/dummy-host2.example.com-access_log" common
</VirtualHost>
We delete it and add our own:
<VirtualHost *:80>
	UseCanonicalName Off
	VirtualDocumentRoot /Applications/MAMP/htdocs/%0
</VirtualHost>
At this point we save the file, and restart MAMP (we just click on stop server and then restart the server) to apply the changes.
From now on we can simply add our domains in the host local file by pointing them to localhost then create the folder with the domain name to make it all work.
Installing ioncube loader
Ioncube loader is a php extension that allows you to decode and execute encoded files.
Some paid software uses ioncube loader to hide the code. In some cases, this is used to encode only license files while in other cases all proprietary files are encoded.
Regardless of what the case may be, if this extension is not installed your application will not work and you will receive an error.
First of all, we have to download the loader from the ioncube page, choosing the most suitable version for our operating system.
Inside the downloaded folder there is a file called loader-wizard.php
Upload the file inside htdocs then visit it:
https://localhost:8888/loader-wizard.php
You will be given instructions on what changes to make to install ioncube and then to test that it works properly.
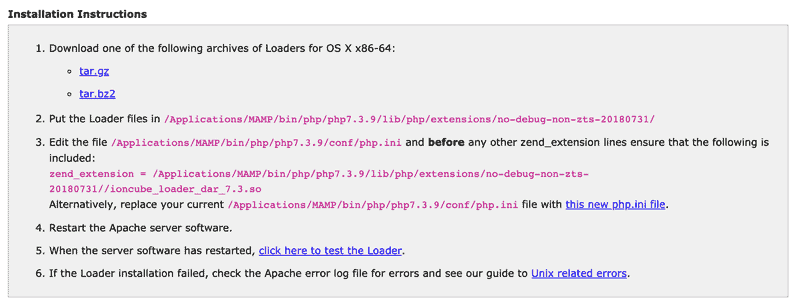
Inside the archive we have downloaded we find the files to move where we are indicated, then we follow the instructions, restart the Web Server and test the correct functioning by clicking on the link at point 5.
Usually, the latest version of PHP does not have the possibility to use ioncube. In fact, Ioncube is released with a certain delay compared to PHP.
Also, the script you use is coded for a specific version of PHP, so check with the vendor what php version you need for your script, set the correct php version on MAMP and then install ioncube for that version.

How to uninstall MAMP on Mac
If you’re not happy with MAMP, or you’ve decided you no longer need it, you can uninstall it.
On Mac we can proceed in two different ways for uninstallation:
- Using the uninstaller that is provided by the application manufacturer.
- Using App Cleaner
Using the uninstaller
MAMP PRO offers a function to uninstall MAMP from your computer.
NOTE: If you are using the free version, you can install the PRO version on a trial basis, then follow the steps below.
Open MAMP PRO and from the menu go to MAMP PRO > Uninstall to start the uninstallation.
A confirmation window will open before everything is deleted.

Then go to enter your password.
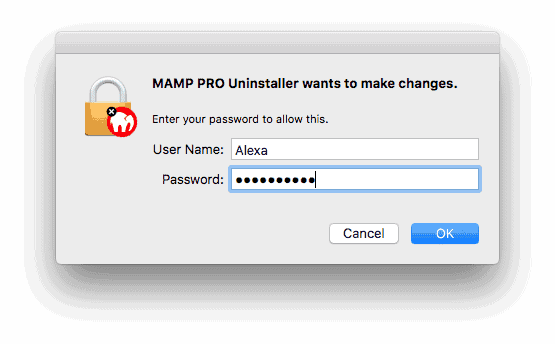
You will receive a confirmation of the transaction.

Now you have to delete the files from the application folder of your computer and that’s it.

Uninstall using App Cleaner
AppCleaner is a handy app for Mac that allows us to completely uninstall any application.
The moment you launch the application, it will scan all applications on your Mac.
As soon as it is done, select the two versions of MAMP and proceed to remove them.

NOTE: If you use the free version of app cleaner, you’ll have to delete the files in your Mac’s application folder by hand. The Pro version deletes them automatically.
How to uninstall MAMP on Windows
If you were using MAMP on Windows, the uninstall process is slightly different. This is due to the differences between the two operating systems.
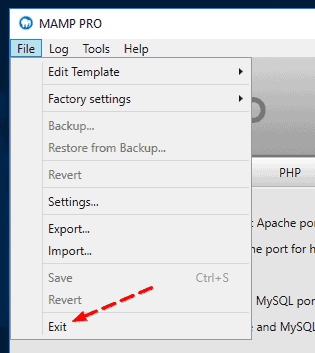
First, you need to exit the application.
Uninstall the application from the settings. If you are using the pro version or if it shows it as installed, it is advisable to delete this version first.

As soon as you’re done, you’ll have to manually delete the C:\MAMP and C:\MAMP PRO folders from your computer.
NOTE: Do not delete the two folders from your computer until you have performed the other steps for uninstallation.
Conclusions
In this article we have seen how to install MAMP, both on Mac and Windows.
We then saw how to best configure it for our needs, and how to use a domain name instead of localhost.
Finally, we have seen how to delete it from our computer correctly, so as to delete all the files and not leave a trace.
What do you use to develop locally and why? Let me know in the comments.
Ready to build your WordPress site?
Try our service free for 14 days. No obligation, no credit card required.


