
Is it time for you to upgrade PrestaShop and you have no idea how to do it? In this article, How to Upgrade PrestaShop, we will see what are the necessary steps to follow and what to avoid.
To begin with, let’s look at why it is important to keep the shop up-to-date and why this is not something to be left to chance.
Let’s get started!
Table of Contents

Why is it necessary to upgrade PrestaShop?
Before we move on to the operation section and see how to upgrade PrestaShop, let’s do a little background research.
Why should you keep your site updated?
Content Management Systems (CMS) like PrestaShop are constantly evolving. The development team adds new features and improves the platforms to optimize performance and address security issues or bugs.
The release of a new version of PrestaShop is always accompanied by a release note. You can find the one for the current version, 1.7.8.7, released in July 2022, here.
In this specific case, it’s a version released to address a vulnerability that exposed the site to risks.
We’ve established that updates/upgrades are important, but what impact can they have on the site? What happens when we update?
Upgrading PrestaShop or performing a migration?
The transition from one version of PrestaShop to another can either involve a simple upgrade or a full-fledged migration.
As we will see later on in this article, there’s also a module that allows us to simplify the process. It works somewhat like updating WordPress with the one-click function.
However, even using the automatic update module doesn’t completely shield you from errors. So proceed very carefully and always remember to make a backup.

What happens during the PrestaShop update?
We refer to a PrestaShop update when we are moving from one version to the next while staying within the same major version. For example, transitioning from 1.7.1 to 1.7.2.
In this case, the modules and themes we have installed on our PrestaShop site generally remain compatible.
In some cases, the update may involve changes at the database level, but even when this happens, there is no data loss during the process, as long as you stay within the same major version of the CMS.
However, please note that this doesn’t mean that the update in this case always proceeds without any issues. Here’s an example from a discussion on the PrestaShop Italia Facebook group

When do we talk about migration?
If you need to move from one major version to another, for example from 1.6.X to 1.7.X, an actual migration is often required.
Migrating a PrestaShop site means transferring the contents of the online store from one PrestaShop installation to another.
The transition from one major version to another can involve:
- Themes are no longer compatible: you’ll need to replace the theme with a different one.
- Modules are no longer compatible: you’ll have to find replacement extensions, ensuring that they are compatible with the new version of PrestaShop. Afterward, you’ll need to reconfigure the modules and ensure they work.

For the migration, you will need to:
- Set up a new shop: install PrestaShop by choosing the latest version.
- Export the data from the previous installation and import it into the new one.
- Solve compatibility issues by replacing themes or modules if necessary.
For a detailed procedure, you can follow our guide on how to migrate PrestaShop.
PrestaShop upgrade: what to know before you get started
Before you start upgrading PrestaShop you need to make sure you have an up-to-date backup of your online store.
Having a backup is crucial: if something goes wrong during the upgrade, you can restore the site and go back to the previous state.
If you have a PrestaShop hosting plan, you can always rely on the automatic backups we offer with all plans.
Before an upgrade, in any case, you should do a manual backup of the files and database.
With our hosting plans, it is as simple as that:
- You can download a copy of the files from file manager.
- You can use an FTP client such as FileZilla or Cyberduck.
- You can access the server using the SSH connection.
Is your current hosting service making things difficult or not offering SSH access? Perhaps it’s time to switch to SupportHost!
How to upgrade PrestaShop: possible methods
Upgrading PrestaShop is a delicate task. In some cases, in order to be able to update smoothly, you have to do a full-fledged migration, create a new installation and then transfer the data.
Before proceeding, remember:
- Don’t start unless you have a recent backup available.
- Upgrades from one major version to another (and not only those) often require a migration.
- If you’re not sure how to proceed, you might want to hire a professional to do the update.
That being said, let’s explore the methods to follow.
In this section, we will look at the two main methods:
- Manual updating.
- The 1-click upgrade module.
Manually Updating PrestaShop
There are several methods to complete the PrestaShop upgrade, and in this section, we will explore the manual method.
The process is divided into these phases:
- Download the latest version of PrestaShop.
- Extract the files from the compressed archive.
- Enable maintenance mode on the site.
- Disable the cache.
- Copy the files to the server.
- Update the database.
- Remove the ‘install’ folder.
- Update the modules.
- Final operations.
1: Download PrestaShop
To start, we need to go to the download section of PrestaShop and download the latest version of the CMS.
To proceed you may be asked to create an account. If you want to speed up the process, go directly to the versions section and choose the release you want to download.

As I am writing this guide, the most recent version is 1.7.8.7, released on July 25, 2022.
2: Extract files from the archive
After downloading PrestaShop, we need to extract the files from the zip archive. Before uploading the files to the server, we need to delete some folders.
Let’s extract the files from the archive, in our case, it’s ‘prestashop_1.7.8.7.zip’.
Inside, you will find another file, ‘prestashop.zip’. Let’s extract this archive as well.
Inside the zip file, you will find folders containing the default files. We need to delete them to avoid overwriting the existing ones when we upload them to the server. This prevents us from accidentally removing files we’ve already uploaded to our shop.
The folders to deleted are:
- img
- override

At this point, we also need to rename the ‘admin’ folder. The folder name must match the one in our installation.
It’s the name you chose when installing PrestaShop, which you can find by checking the folder name in the file manager.

3: Enable the maintenance mode
During the PrestaShop update, it is recommended to enable maintenance mode. This way, while overwriting files and making changes, visitors to the site won’t encounter issues.
To activate maintenance mode, go to Shop Parameters > General and open the Maintenance tab.
Here, you can set the ‘Enable shop‘ option to ‘No‘ in order to activate maintenance mode.
By clicking ‘Add my IP’, you can continue to access the site with your IP address during maintenance.

Be sure to click on Save to make the changes.
4: Disable the cache
Before proceeding with the upgrade, it is advisable to disable the cache. To do this, go to Advanced Parameters > Performance and set the Cache option to “No” as shown here.
Finally, click on Save to confirm the changes.”

5: Upload files to the server
The next step in upgrading PrestaShop is to upload the files to the server.
Before proceeding with overwriting the files, it is recommended to delete the “vendor” folder from the files already on the server. This is done to avoid conflicts during overwriting as explained here in the official PrestaShop documentation.
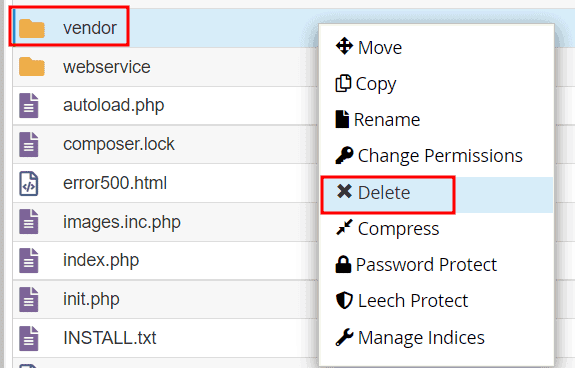
You can do this by connecting to the server via an FTP client or directly from the cPanel file manager.
6: Update the database
After uploading the files of the updated PrestaShop version, we need to update the database.
Inside the install/upgrade/ path, you’ll find a file named ‘upgrade.php’. This is a script that allows us to complete the update procedure.
To start the script, simply go to the following URL:
https://yourdomain.com/install/upgrade/upgrade.phpJust replace ‘yourdomain.com’ with the address of your PrestaShop site.
Running the script will display a log file. If there are no errors, the database update has been completed successfully.
Otherwise, you will need to check the error code and resolve it. For example, error code 28, as shown below, appears when attempting to update to the same version already installed.

7: Delete the “install” folder
After completing the database update, there’s one more step to regain access to PrestaShop’s back office.
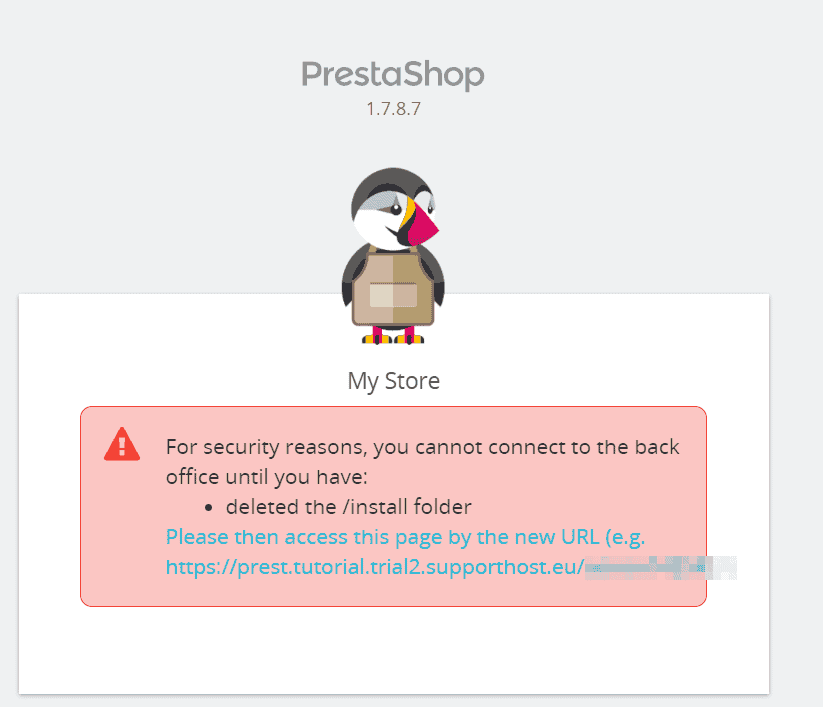
We need to remove the ‘install’ folder first.
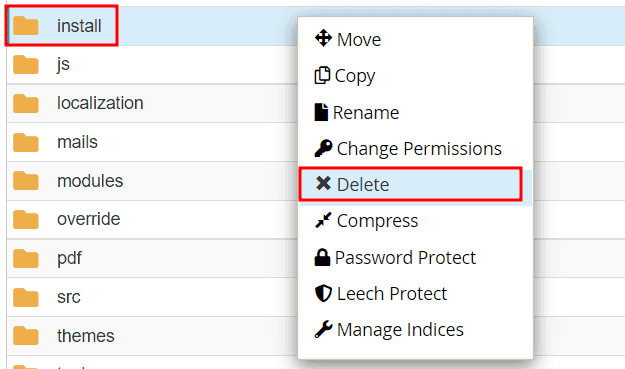
As long as we haven’t removed it, we will see a notice like this when attempting to access the back office.
8: Update modules
When updating PrestaShop from one version to another, we need to check if there are modules that require updating.
Access the back office of your PrestaShop site and go to Modules > Module Manager. If you open the ‘Updates‘ tab, you can see if there are modules that need updating.

9: Final Steps
At the end of the PrestaShop update, after confirming that there are no errors and everything is working correctly, you can disable maintenance mode and re-enable the cache.

1-click Upgrade: how “assisted” PrestaShop upgrade works
As mentioned earlier, there is another method for updating PrestaShop and moving to the latest released version.
Since the update process involves several steps, it’s possible to simplify the entire procedure with an automated system: by using a module.
The module is called ‘1-click upgrade’ or ‘Autoupgrade,’ and it allows you to automate the update process.
Before proceeding, you should know that the module currently works only for updating PrestaShop from version 1.6 to 1.7. You can find all the details about the module and the version currently available on GitHub.
Through the Module Catalog, we can install the 1-Click Upgrade module, as shown here:

Note that if the version of PrestaShop you are using is 1.6, the list of modules will look like this:

After installing it, we can access the module Configuration page. You’ll see a checklist of checks that are performed before updating the CMS.

For example, in our example above, the system warns us that we need to turn on maintenance mode before we can proceed and be able to update PrestaShop.
To proceed, we need to resolve all the checklist items, otherwise, the automated system won’t allow us to start the update.
Scrolling down to the “Start Upgrade” section, we will find a button that allows us to check if there are any new versions available.

If you don’t see any updates, click on ‘More Options (For Experts)’ and then select from the “major release” / “minor release” channel, depending on the version you are looking for. Then click on save.

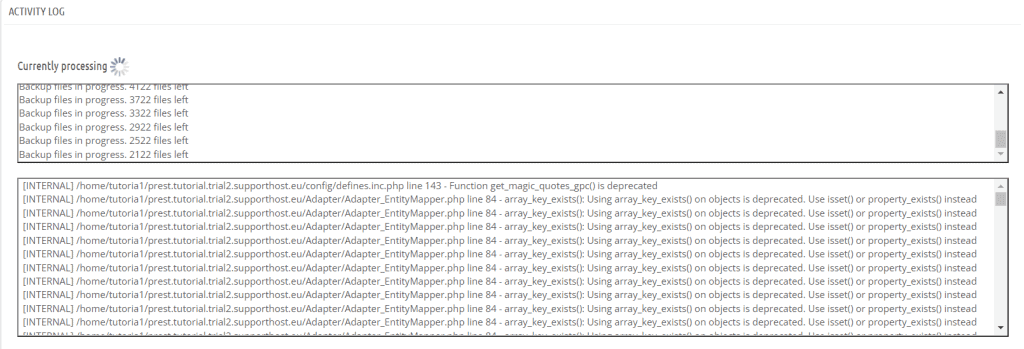
At this point, you can click Update PrestaShop Now to start the automatic update, as shown here:

We can then follow the update process from the Activity log box at the bottom of the same page.
Once finished we can reload the page and we will be redirected to the login page. By logging in again we will find ourselves in the PrestaShop back office and can make sure there are no errors.
If there are problems, we can restore with the rollback function, as we will see in the next paragraph.
Resolve problems with PrestaShop update
Updating PrestaShop is a delicate operation, and if an error occurs, you could risk having a non-functional shop. Additionally, without a backup, you may overwrite important data.
This is why we emphasized the importance of having a backup copy of both files and the database at the beginning.
In case something goes wrong during the update you might not even be able to access the back office, as in this case, when a user comes across the infamous 500 error.

If you used the 1-click Upgrade module, you can roll back to the previous version thanks to the rollback function included in the module, as we will see in the next section.
If, on the other hand, you used the manual method and can no longer access the site, you can:
- Consult the error log and try to fix it.
- Restore the backup you made before you started, remembering to restore both files and the database.
After that, if you cannot avoid the update, you will need to repeat the process.
Sometimes finding the error is not straightforward. You can try searching in the PrestaShop support forum or seek help in dedicated Facebook groups.
In some cases, you might want to entrust the update to PrestaShop’s support team, which offers the service (for a fee): Upgrade Pack.

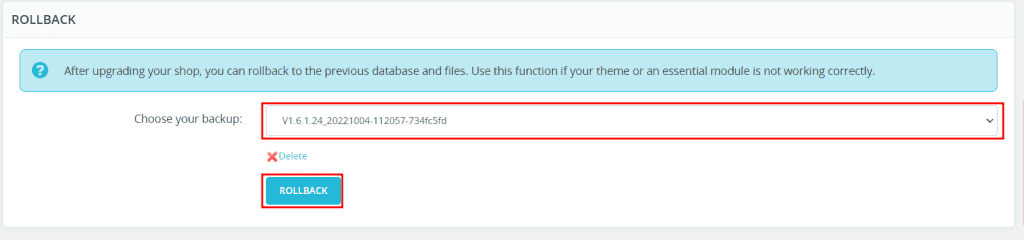
Reverting to a Previous Version with the 1-click Upgrade Module
If issues are to come up during the update, the 1-click Upgrade module also allows us to revert to a previous version, effectively restoring a backup of files and the database.
We can access the list of modules and click on Configure to open the module settings 1-click upgrade.

Scroll down to the ‘Rollback‘ section and select the backup you want to restore from the dropdown menu. Then click the ‘Rollback’ button to initiate the restoration.
Conclusion
Completing the PrestaShop update without errors is not easy. That’s why if you’re not sure how to proceed, we suggest you outsource the process to a professional.
In any case, in this article, How to Upgrade PrestaShop, we have seen the steps to manually update and how to use the 1-click upgrade module for the automatic update of PrestaShop.
Now it’s up to you to update your shop! If you have any doubts or need clarification let us know in the comments below and we’ll get in touch.
Ready to build your WordPress site?
Try our service free for 14 days. No obligation, no credit card required.


