
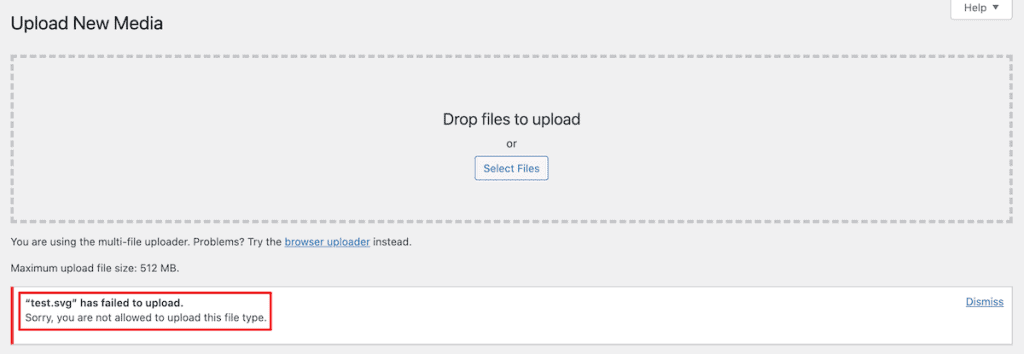
You found the perfect font file for your website. Or maybe you’re trying to upload an SVG logo that your designer sent over. You drag the file into WordPress, wait for the upload bar to finish, and then you see it: “Sorry, you are not allowed to upload this file type.”
It’s one of the most common WordPress errors, and it can stop your workflow dead in its tracks.
But this error has nothing to do with your user permissions or a broken website. WordPress is doing its job by blocking file types it doesn’t recognize as safe by default. And you can fix it in a few minutes using one of several methods.
This guide explains why WordPress blocks certain file uploads, which file types are allowed by default, and multiple ways to fix the issue so you can upload any files your site needs.
Table of Contents
Understanding the WordPress File Type Error
WordPress restricts file uploads to improve security. By limiting what can be uploaded to your Media Library, WordPress reduces the risk of malicious files being uploaded that could compromise your site.
When you try to upload a file that isn’t on the approved list, you’ll see one of two error messages:
“Sorry, you are not allowed to upload this file type.”
“Sorry, this file type is not permitted for security reasons.”
Both messages mean the same thing. The file extension you’re trying to upload isn’t included in the default list of allowed file types. Depending on your WordPress version and language settings, you might also see variations like “This file type is not allowed for security reasons” or a simple “[filename] has failed to upload” message.
This isn’t a bug or a permissions issue. It’s WordPress working as intended. The CMS protects your site from potentially harmful uploads by only accepting file types it considers safe.
The challenge is that WordPress’s default list doesn’t include every file type you might legitimately need. Custom fonts, SVG images, specialized document types, and many other files get blocked even when they’re perfectly safe for your specific use case.
Default File Types Allowed in WordPress
Before you start making changes, check what WordPress allows by default. If your file is on this list, the error might be caused by something else, like a corrupted file or a plugin conflict.
Images
WordPress accepts the most common image formats out of the box:
- .jpg and .jpeg
- .png
- .gif
- .bmp
- .tiff and .tif
- .ico
- .webp (added in WordPress 5.8)
- .avif (added in WordPress 6.5, requires server support)
- .heic and .heif (requires server support, automatically converts to JPEG)
AVIF and HEIC/HEIF are included in WordPress’s default MIME type list, but your server must have the necessary image processing libraries installed for these formats to work. If your hosting environment doesn’t support them, you may still see upload errors even though they’re technically allowed.
Documents
For documents, you can upload:
- .doc and .docx
- .ppt, .pptx, .pps, and .ppsx
- .odt
- .xls and .xlsx
- .psd
Audio Files
WordPress supports these audio formats:
- .mp3
- .m4a
- .ogg
- .wav
Video Files
For video content, you can upload:
- .mp4 and .m4v
- .mov
- .wmv
- .avi
- .mpg
- .ogv
- .webm
- .mkv
- .3gp and .3g2
If the file you’re trying to upload isn’t on one of these lists, that’s why you’re seeing the error. Common files that get blocked include SVG images, custom font files like .woff, .woff2, .ttf, and .otf, and specialized document types like .ai or .eps.
How to Fix the File Type Upload Error
There are several ways to fix this error, and the right choice depends on your situation. If you’re comfortable editing WordPress files, you can make changes directly to your site’s configuration. If you prefer a simpler approach, plugins can handle everything for you.
Let’s walk through each method.
1. Contact Your Hosting Provider
If you’re not comfortable making changes to your WordPress files, the easiest fix is to contact your hosting provider’s support team. Many hosts can adjust the allowed file types for you, and some may require specific security configurations to be updated on their end.
This is also a good first step if you’ve already tried other methods and the error persists. Some hosts have server-level restrictions on file uploads that WordPress settings alone can’t override.
At SupportHost, our support team can help you fix file upload issues quickly. Open a ticket and let us know what file types you need to upload.
2. Edit the wp-config.php File
WordPress includes a built-in option that allows unfiltered uploads. When enabled, this setting removes all file type restrictions, allowing you to upload any file format to your Media Library.
This method is quick and effective, but it does come with a trade-off since you’re removing all file type restrictions, not just the one you need. That’s fine for sites where only trusted administrators upload files, but it could be a security concern if multiple users have upload permissions.
Here’s how to enable unfiltered uploads:
Before making any changes, back up your WordPress site. Editing core files always carries some risk, and a backup ensures you can restore your site if something goes wrong.
Then, connect to your WordPress site using an FTP client like FileZilla or Cyberduck. You can also use the File Manager in your hosting control panel if your host provides one.
Then, navigate to your site’s root directory. This is typically the public_html folder or the folder containing your WordPress installation. You’ll know you’re in the right place when you see folders named wp-admin, wp-content, and wp-includes.

Locate the wp-config.php file and download it to your computer as a backup. Then open the file for editing and find the line that says:
/* That's all, stop editing! Happy blogging. */Just above that line, add the following code:
define('ALLOW_UNFILTERED_UPLOADS', true);After that, save the file and upload it back to your server, overwriting the existing version.
Then, log out of your WordPress dashboard completely, then log back in. This step is important because WordPress needs to recognize the configuration change.
After completing these steps, try uploading your file again. The error should be gone, and WordPress will accept the file type you were trying to upload.
Keep in mind that this setting allows all file types, so you’ll want to be careful about who has upload permissions on your site. If you only need to allow specific file types, one of the other methods might be a better fit.
3. Use the Upload Mimes Filter in functions.php
If you want more control over which file types are allowed, you can add a filter to your theme’s functions.php file. This method lets you specify exactly which additional file types to allow while keeping restrictions on everything else.
Important: Editing your theme’s functions.php file directly means your changes will be lost when the theme updates. To avoid this, create a child theme first and add the code to the child theme’s functions.php file instead.
Here’s how to add specific file types:
First, access your site files through FTP or your hosting control panel’s File Manager.
Then, navigate to wp-content/themes/your-theme-name/ and locate the functions.php file. If you’re using a child theme, navigate to the child theme’s folder instead.

After that, open functions.php and add the following code at the end of the file:
function add_custom_upload_mimes( $mimes ) {
    $mimes['svg'] = 'image/svg+xml';
    $mimes['woff'] = 'font/woff';
    $mimes['woff2'] = 'font/woff2';
    return $mimes;
}
add_filter( 'upload_mimes', 'add_custom_upload_mimes' );
Then, save the file and upload it back to your server.
In the example above, we’re adding support for SVG images and web font files. You can modify this code to include whatever file types you need by adding additional lines in the same format.
Here are some common MIME types you might want to add:
- SVG images:
$mimes['svg'] = 'image/svg+xml'; - WOFF fonts:
$mimes['woff'] = 'font/woff'; - WOFF2 fonts:
$mimes['woff2'] = 'font/woff2'; - TTF fonts:
$mimes['ttf'] = 'font/ttf'; - OTF fonts:
$mimes['otf'] = 'font/otf'; - JSON files:
$mimes['json'] = 'application/json'; - CSV files:
$mimes['csv'] = 'text/csv';
This approach gives you precise control. You only allow the specific file types your site needs, which keeps security tighter than enabling all file uploads.
4. Use a Plugin to Allow SVG File Types
If you specifically need to upload SVG files, the Safe SVG plugin is the best option. It’s actively maintained, tested up to WordPress 6.8, and has over 100,000 active installations.
What makes Safe SVG different from other file type plugins is that it doesn’t just allow SVG uploads. It sanitizes every SVG file during upload, stripping out any potentially malicious code. Since SVG files can contain JavaScript, this sanitization step is critical for security.
To set it up, go to Plugins > Add New in your WordPress dashboard. Search for Safe SVG and install the plugin by 10up. Activate it, and you’re done. SVG uploads are now enabled, and every file gets cleaned automatically.

The plugin also lets you restrict SVG uploads to specific user roles if you don’t want everyone on your site uploading vector files.
For other file types like fonts, JSON, or custom formats, the functions.php method described earlier is more reliable than most file type plugins. Many of the popular allow any file type plugins haven’t been updated in over a year and may have compatibility issues with recent WordPress versions.
5. Upload Files via FTP
If you only need to upload a specific file once or occasionally, you can bypass WordPress entirely and upload directly via FTP or your hosting control panel’s File Manager.
This method doesn’t require any changes to WordPress settings. You transfer the file directly to your server.
To do this, connect to your site via FTP or open up File Manager in your hosting control panel.
Then, navigate to wp-content/uploads/ and find the appropriate folder for your file. Media files are typically organized by year and month. Next, upload your file directly to the folder.

The file will now be on your server, though it won’t automatically appear in your WordPress Media Library. For files that need to be accessible through WordPress, like images you want to insert into posts, this method is less convenient. But for files that only need to exist on your server, like font files referenced in your CSS, it works perfectly.
6. Convert the File to an Allowed Format
Sometimes the simplest solution is to convert your file to a format WordPress already accepts. This approach doesn’t require any changes to your site and avoids any potential security concerns from enabling new file types.
For images, you can often convert to a supported format without significant loss of quality. If you have an image in an unsupported format, converting it to PNG or WebP might be a practical solution. Many free online tools and image editing applications can handle these conversions.
For fonts, the situation is trickier since you need specific font formats for web use. But for documents and other files, conversion is often a viable workaround.
This method won’t work for every situation. SVG files, for example, need to remain as SVGs to retain their scalable properties. But when conversion is an option, it’s the most straightforward fix.
7. Update WordPress (and Check Version)
In some cases, the file upload error might be caused by an outdated WordPress installation. WordPress occasionally updates its list of allowed file types, and running an older version could mean missing out on support for newer formats.
WebP support, for example, was added in WordPress 5.8. If you’re running an earlier version and trying to upload WebP images, updating WordPress would solve the problem without any additional configuration.
To check your WordPress version, go to your dashboard and navigate to Dashboard > Updates.

If an update is available, back up your site first, then click Update Now.
8. Adjust Settings for WordPress Multisite
If you’re running WordPress multisite, there’s a built-in setting that controls allowed file types across the entire network.
To access it, log in as a Network Administrator and go to Settings > Network Settings and scroll down to the Upload Settings section.

Next, find the field labeled Upload file types and add your desired extensions, separated by spaces. Then, save your changes.
Keep in mind, this setting has important limitations you need to understand.
First, the upload file types setting only works for file types that are already in WordPress’s default MIME type list. You cannot add completely new file types using this interface alone.
For example, if you want to allow TTF font uploads across your network, adding “ttf” to the Upload file types field won’t work because TTF isn’t in WordPress’s default MIME type list. You would still need to use Method 3 above to add the MIME type first. Only then would the Multisite setting recognize and allow that file type.
Think of the Multisite setting as a way to restrict or enable file types that WordPress already knows about, not as a way to add entirely new formats. For truly new file types, combine the upload_mimes filter with the Multisite setting for network-wide control.
Security Considerations to Keep in Mind
Before you enable additional file types, there can be security risks you’ll want to be aware of. WordPress restricts uploads for good reasons, and loosening those restrictions does carry some risk.
Only enable file types you actually need. If you only need to upload SVG files, don’t enable all file types. Use the functions.php filter method or a plugin to allow just SVGs. This keeps your attack surface small while giving you the functionality you need.
Be careful with SVG files. SVG files can contain JavaScript code, which makes them a potential vector for malicious scripts. If you’re enabling SVG uploads, consider using a plugin like Safe SVG, which sanitizes uploaded SVGs by removing potentially harmful code. The plugin automatically cleans SVG files during upload, stripping out dangerous elements while preserving the image.
Limit who can upload files. WordPress user roles determine who can upload files to the Media Library. By default, Authors, Editors, and Administrators can upload media. If you’ve enabled additional file types, make sure you trust everyone with upload permissions.
Consider your upload size limits. While you’re thinking about file security, it’s also a good time to review your maximum upload size. Allowing very large file uploads can be exploited for DDoS attacks or to fill up your server storage. Keep the limit reasonable for your actual needs.
Use hosting-level protections. A good hosting provider will have server-level security measures that go beyond what WordPress offers. This includes malware scanning, firewall rules, and intrusion detection.
If you’ve enabled unfiltered uploads using the wp-config.php method and no longer need that functionality, remember to remove the code. Leaving it enabled when you don’t need it creates unnecessary risk.
File Type Upload Error FAQs
Why does WordPress block certain file types by default?
WordPress blocks file types that could potentially contain malicious code or pose security risks. By maintaining a curated list of allowed file types, WordPress reduces the chances of someone uploading harmful files that could compromise your site. Sites with multiple users who have upload permissions face the highest risk here.
Is it safe to enable all file type uploads?
Enabling all file types with the ALLOW_UNFILTERED_UPLOADS setting is generally safe for sites where only trusted administrators upload files. However, it does increase risk on sites with multiple users or where you can’t control who has upload access. For most sites, using the functions.php filter or a plugin to allow only specific file types is a more secure approach.
Will my allowed file type settings survive a WordPress update?
Changes made to wp-config.php and the functions.php file in a child theme will persist through WordPress updates. Plugin settings will also remain intact. However, if you edited the functions.php file of your main theme without using a child theme, those changes will be lost when the theme updates.
Why do I still get the error after enabling a file type?
If you’re still seeing the error after enabling a file type, check for server-level restrictions imposed by your hosting provider, plugin conflicts from security plugins, or issues with the file itself. Some hosting environments have extra security rules that can override WordPress settings. For newer formats like AVIF, your server may also lack the required image processing libraries.
What’s the difference between the two error messages?
“Sorry, you are not allowed to upload this file type” and “Sorry, this file type is not permitted for security reasons” both mean the same thing. The file extension you’re trying to upload isn’t on WordPress’s approved list. The different wording depends on your WordPress version and language settings.
Can I add new file types through WordPress Multisite settings alone?
No. The Multisite Upload file types setting only works for file types already in WordPress’s default MIME type list. To add completely new file types (like custom font formats), you must first add them using the upload_mimes filter in your code. The Multisite setting primarily enables or restricts existing default file types across your network.
Closing Thoughts: Fixing the WordPress File Type Upload Error
The Sorry, you are not allowed to upload this file type error is one of the more straightforward WordPress issues to fix. Once you understand that WordPress is blocking file types it doesn’t recognize as safe by default, the solution becomes clear. You need to tell WordPress to allow the file type you need.
For SVG files specifically, the Safe SVG plugin is the best option since it sanitizes uploads for security. For other file types like fonts or custom formats, the functions.php filter method is the most reliable approach.
If you’re comfortable editing WordPress files, the wp-config.php method gives you a quick fix, while the functions.php filter approach offers more precise control over exactly which file types are allowed.
Whichever method you choose, keep security in mind. Only enable the file types you actually need, and make sure you trust anyone who has upload permissions on your site.
Now over to you. Which method did you use to fix the file upload error on your site? Please share your experience in the comments below.
Ready to build your WordPress site?
Try our service free for 14 days. No obligation, no credit card required.


