
Are you thinking of installing Joomla remotely or locally and have no idea how to proceed?
Let us help you. In this article, How to install Joomla! the Complete tutorial, we will take a took at how to proceed with a manual installation, how to use a self-installer, and how to do a local installation of the CMS.
Finally, we will see how to solve common problems that can occur during the installation phase. First, let’s see what alternatives we have.
Table of Contents

Installing Joomla: a premise
To create a website with Joomla we have two alternatives.
We can create our site locally by installing the CMS on our computer. Or we can activate a hosting plan and install Joomla remotely.
We will see how to do a local and remote installation.

In the latter case, however, there is another option: if you choose the Joomla hosting plan you will have the CMS already preinstalled.
Remember that our CMS hosting plans can be shared or semi-dedicated which include CMS is preinstalled in them. You can also choose a shared hosting or a semi-dedicated plan and decide at the time of ordering which script to pre-install.
Still don’t know how Joomla works and want to know if it’s right for you? Check out our article on what is Joomla and our comparison on WordPress vs Joomla.
If, on the other hand, you want to try out the CMS before you get started, you can use our free hosting plan for 14 days and do as many trials as you want.
Joomla requirements
Currently the latest version of Joomla is version 4, and to use it we must meet the following requirements.
- Database: MySQL 5.6+, PostgreSQL 11+
- PHP version: Minimum: 7.2.5 – Recommended: 8.0
- Web server: Apache 2.4+, Nginx 1.18+, Microsoft IIS 10+.
Install Joomla with Softaculous
One of the easiest ways to install a CMS is to use an auto-installer like Softaculous. With all of our hosting plans you can use Softaculous to install hundreds of different scripts.
Let’s see how you can install Joomla with Softaculous.
First we log in to cPanel and scroll down to the Software section where we will find the Softaculous Apps Installer.

After opening it we’ll be taken to the main page that contains the most popular scripts such as WordPress and Joomla.
Click on Install next to Joomla.

We will then access the configuration page from which we can select installation options.
Software settings

Firstly, we have to choose the URL of the installation:
- select the protocol (https when possible);
- choose the domain on which we want to install Joomla;
- leave the “In folder” field blank if we want to install the CMS in the root;
- select the version.
Site settings
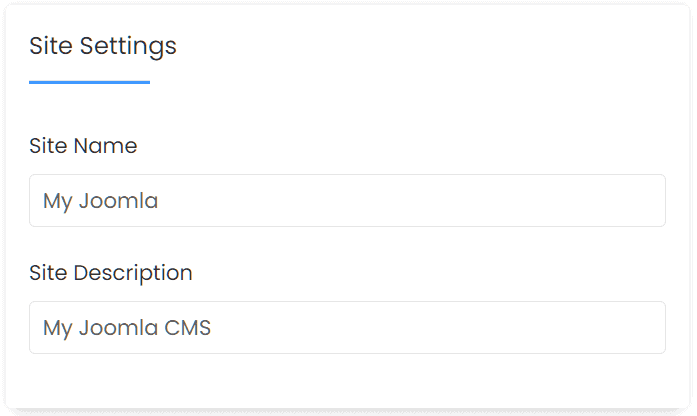
From the site settings we can change the name and description of the site.
Account admin
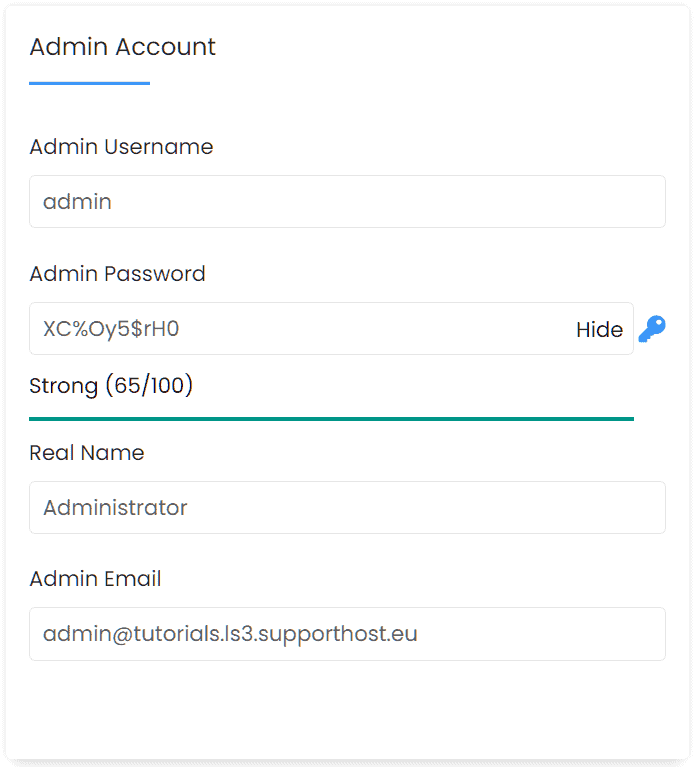
To install Joomla we need to create the administrator profile. From this section we can set the administrator user name, password, real name and email address.
Choose language
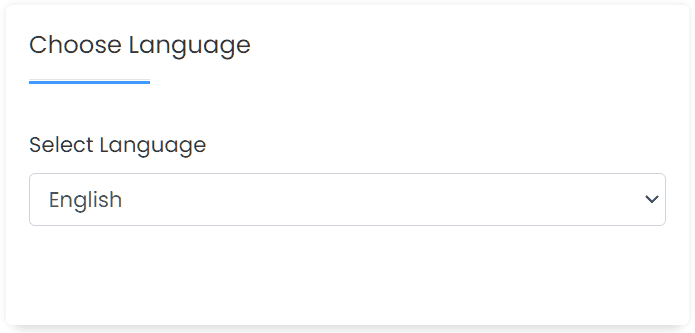
This section allows us to set the language.
Advanced options
In the advanced options section, we can change the database name and prefix of the database tables.
We can also choose whether to set automatic updates and automatic backups.
There are different types of Joomla updates, check our guide to see what to do and how to avoid mistakes.
We can usually leave the default settings as they are and click Install to start the installation.

When the process is complete, you will see a screen like the one below which states that the operation was successful.
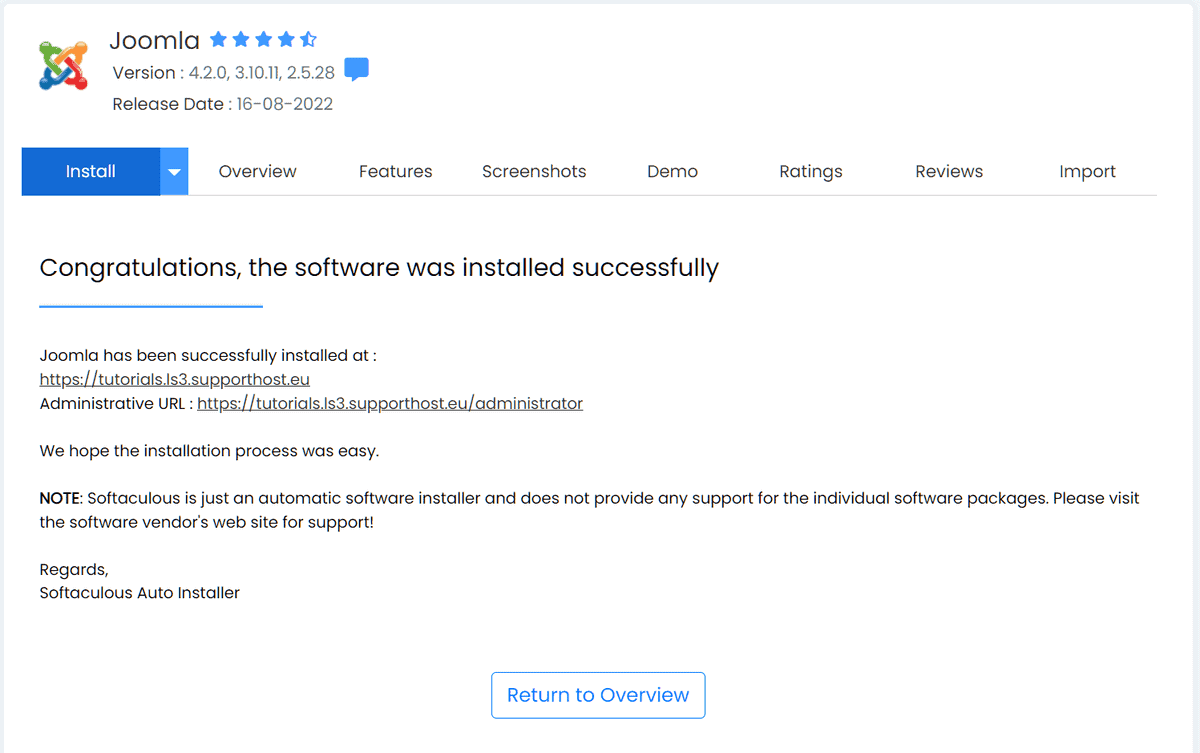
We can then use the address next to the admin URL to access the back end of our site.
Install Joomla manually
Additional steps are required to install Joomla manually compared to installing with an auto-installer such as Softaculous.
In this case, we will have to:
- Download CMS files;
- Upload files to the server;
- Create a MySQL database;
- start the installation.
Let’s see how to proceed.
Download Joomla files
The first thing we need to do is to connect to the Download section on the official website and download the latest version of the CMS.
Currently the latest version is Joomla 4.2.3 and it was released on September 27, 2022. It will be the version we will install for the purpose of this guide.
Click on Download now and download the installation .zip archive files.

Upload Joomla files to the server
The second step is to upload the newly downloaded archive to the server. The best option is to upload the entire .zip file and unzip it later directly on the server.
To do this we can use:
- an FTP client such as FileZilla or Cyberduck;
- the file manager of cPanel.
In this tutorial, How to install Joomla! The Complete tutorial, we will use the file manager.
First login to cPanel, then open the file manager and open the root directory, namely “public_html”.
Click Upload and select the .zip file to upload or drag it to the dotted area.

After the process is complete, click on “Back to…” to return to the file manager.
Now we can extract the files from the archive by right-clicking on it and then clicking Extract.

Let’s make sure the path is correct and click on Extract Files.
Create a MySQL database
Joomla needs a database to work, so before we proceed with the installation we need to create a database and a user associated with it.
You can follow our tutorial on how to create a database for the step-by-step procedure. Here’s a summary of the steps to follow:
From cPanel click on MySQL Database, enter the database name, and click on Create Database.

From this same section scroll down to MySQL Users and enter the username and password to create the database user, then click Create User.

To associate the user with the database, scroll down to the Add User to Database section and select the user and database and then click Add. Then set the permissions to all privileges.
Save this information because you will need it in the latter stages of installation:
- database name;
- name of the user associated with the database;
- the password of the user associated with the database.
Start the Joomla installation
After uploading the Joomla files to the server and creating the database, we are ready to install Joomla.
To start the installation we need to connect to the address where the files are located.
If you have uploaded the files in the root (public_html), you just need to connect to your main domain, e.g. https://mysite.com
Step 1
First, select the installation language and set the site name.

Keep in mind that you can also change the name of the site later.
Step 2
Create the login information.

Enter the real name of your Super User: to enter the name of the super user, we can simply enter our full name.
Set the username for your Super User account: enter the username of the super user.
Set the password for your Super User account: choose the password.
Enter the email address of the website Super User: enter an email address. We will need it to retrieve the password if needed.
Fill in all the fields and click on Setup Database Connection to move on to the next step.
Step 3
At this point we need to enter the information from the database we created.

Select the type of database.
Host name: enter “localhost,” unless the provider has given different directions.
Either a username you created or a username provided by your host: in this case, let’s enter the database username we created earlier.
Either password you created or a password provided by your host: enter the database user’s password.
Enter database name: enter the name of the database.
Enter a table prefix or use the randomly generated one: we can leave the prefix that is generated or change it.
Connection Encryption: we can leave the default option.
After completing all the fields, click Install Joomla to start the installation.
You will see a message like this when the operation has been successful and Joomla has been installed.

Final operations
At this point we can click on Open Administrator to access the site dashboard.
Clicking on Open Site instead will take us to the front end of our new site.
If we want to install more languages to create a multilingual site, we can click on Install Additional Languages.
After that we simply have to select from the list the language packages we want to install and click Next.

However, in our test this option did not work and prevented us from deleting the installation folder by returning the following error:
Unknown error deleting the installation folder.
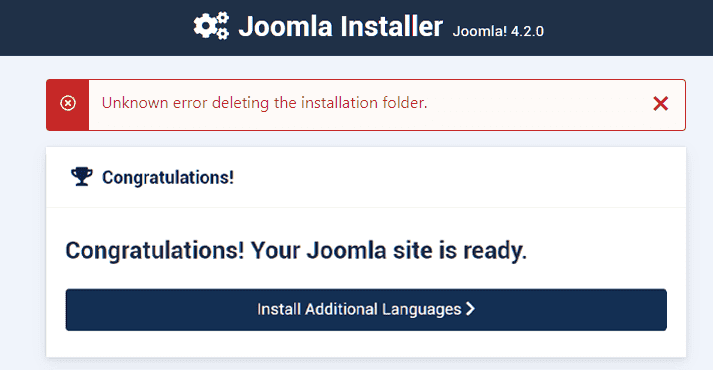
The error is also reported on GitHub in this discussion thread.
In our case we solved the error by reloading the page.
You will then be shown the following screen from which you can select the default language for the back end and the front end of your site.

After that click on Open Administrator to be redirected to the Joomla back end login page which will be at:
https://tuodominio.com/administrator/

To log in, simply enter the Username and Password we set in step 2.
Install Joomla locally with XAMPP
Let’s see how to install Joomla locally with XAMPP.
XAMPP is a program that mimics an Apache web server, you can also use LAMP on Linux, WAMP on Windows and MAMP on Windows and MacOS.
Let’s take a look at how to do this with XAMPP since it is compatible with Windows, Linux and MacOS.
Install XAMPP
First, we need to install XAMPP on our computers. To do this we just need to follow these simple steps.
Log on to the site apachefriends.org and click on the version compatible with your operating system to start the download.

After that, you only need to follow the wizard’s directions to install the program.
Start XAMPP
Open XAMPP and activate the two modules MySQL and Apache by clicking on the Start button next to them.
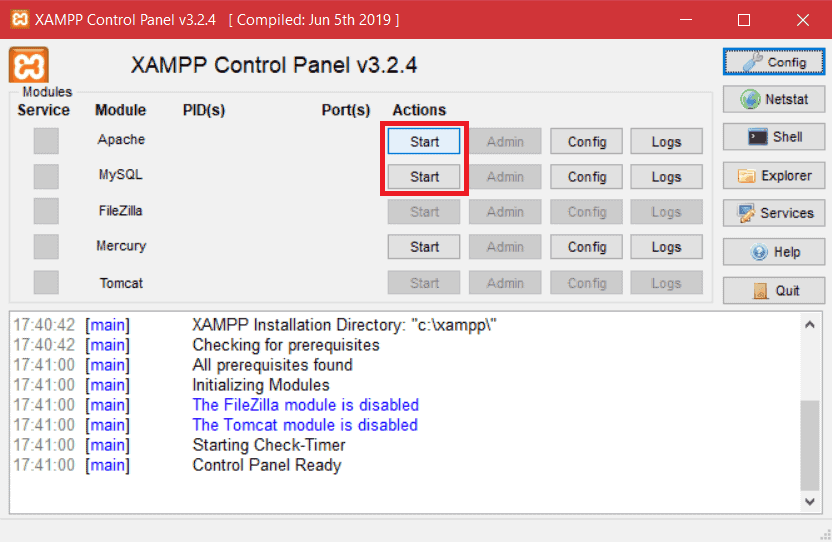
When the background of the modules turns green the modules will be active and in the Actions list the Start button will turn into a Stop button.
To stop running the web server, simply click on the Stop button.
Download and move the files
At this point, we can download the files to Joomla. Let’s connect to the CMS site and download the latest version available.
We must then extract the contents of the .zip file we downloaded and move it into the program’s htdocs folder, the path will typically be the following:
C:\xampp\htdocs
Then inside it, we create a folder called joomla and move the contents of the .zip file into it.
Create the database for Joomla
The next step is to create the database for our Joomla site. We can do this with phpMyAdmin.
After starting the MySQL and Apache modules from XAMPP, open the browser and connect to the following address:
localhost/phpmyadmin
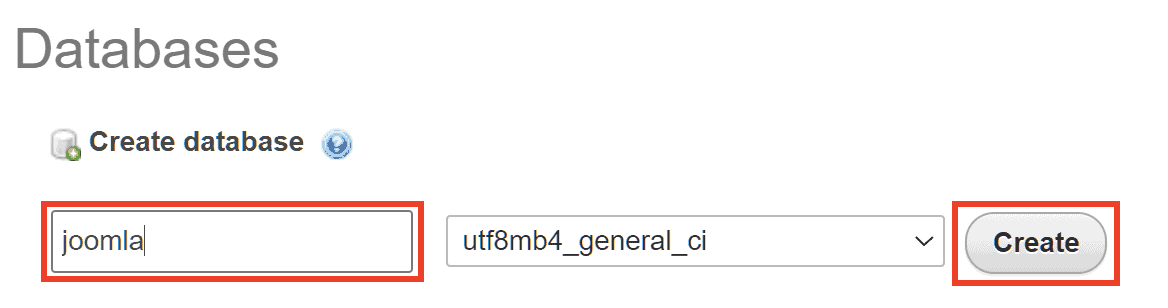
The phpMyAdmin interface will then open, and from here we can create a new database by following these steps.
Click on New.

Enter the name of the database, for example, joomla and then click Create.
By clicking on the privileges tab we can verify that there is at least one user who has privileges to edit the database.
For local installation, it is sufficient to be the root user; it is not necessary to create a new user and associate it with the database.
Start the Joomla configuration
After moving the files to the XAMPP folder and creating the database, we can start the CMS configuration.
To do this we need to link to this address:
localhost/joomla
Keep in mind that you must use the name of the folder in which you placed the CMS files. We will then get to the installation procedure of Joomla.
At this point you can follow the Step 1 and Step 2 sections in the manual installation.
You will need to choose a site name, enter login information that will allow you to access the back end of the site and configure the database.
When you get to the database configuration you will need to use this data:
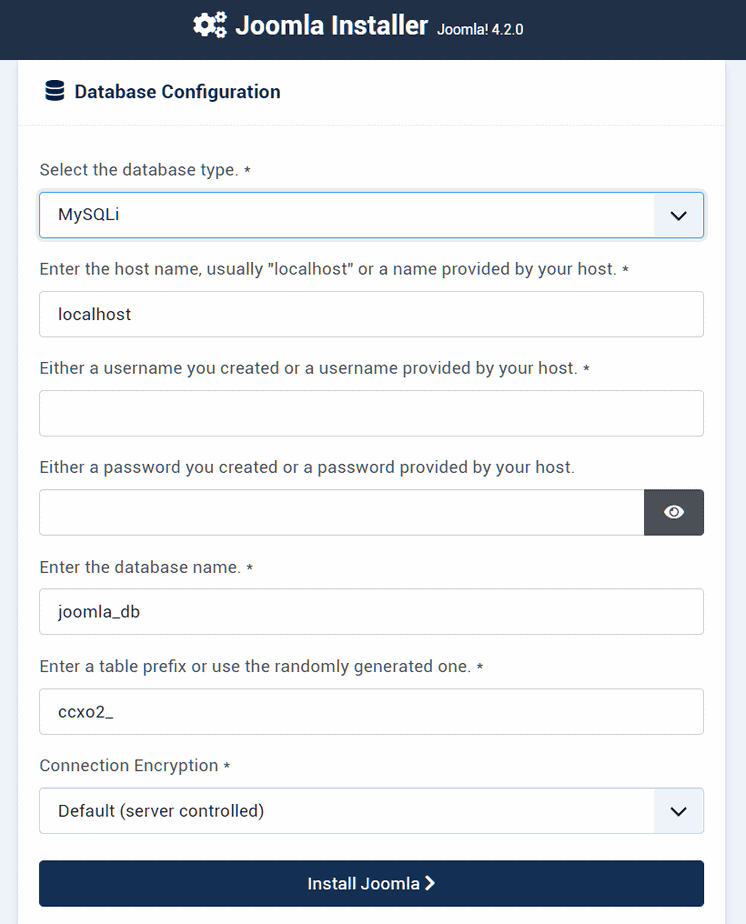
Enter the host name: leave it as “localhost” or “127.0.0.1.”
Username: enter “root.”
Password: leave the field blank.
Enter database name: enter the name of the database you created. In our case it’s joomla.
Enter a prefix: you can leave the default setting.
Finally, click on the Install Joomla button.
You will see a message like this of the installations has been successful.

At this point, we can click on Open Administrator to finalize the installation and access the Joomla back end.
To access the back end we simply visit the following address:
localhost/joomla/administrator/
When you see “joomla” as the name of the folder, that’s where the Joomla files will be.
Problems during Joomla installation.
Here are some of the most common errors you can come across while installing Joomla. Let’s see how to fix them from one case to another.
Base connection error
One of the common errors is that you are unable to establish a connection with the database. In such cases an error message appears which might be similar to this message:
"Could not connect to the database"When this error occurs we need to verify the database access data we have entered. We then need to make sure that the database, database username and password match the ones we entered when creating the database.
It’s probably better to also make sure that the host name is correct. In most cases we will have to enter the localhost because the database is on the same server as the site.
However, if the connection error continues to occur and the rest of the data is correct, contact your provider to ask what is the correct name to enter in the host name field.
Confirm site ownership
In some cases it is possible to run into an error similar to this one:
To confirm that you are the owner of this website please delete the file named "XXXX.txt" that has been created in the "installation" folder of your Joomla site.To verify that we have permission to access the site we need to go to the installation folder and delete the file that is shown to us in the message.
Non-compatible PHP version
If the PHP version of the server is not compatible with Joomla we might get an error like this:
Your host needs to use PHP 7.2.5 or higher to run this version of Joomla!In this case, we have to change the PHP version or turn to the provider’s support. With SupportHost you can change the PHP version from cPanel on your own.
Configuration issues
If you encounter other problems during a local or remote installation, you may need to change the settings in php.ini.
The values suggested by the Joomla documentation for version 4.x are as follows:
- upload_max_filesize: 30M
- post_max_size: 30M
- max_execution_time: 30
- memory_limit: 128M.
Conclusion
In this article, How to install Joomla! The Complete tutorial, we have seen the different methods we can follow to install Joomla. We started with installing using an auto-installer, in our example we used Softaculous. We then looked at how to install Joomla manually and how to go about installing the CMS locally with XAMPP.
Finally, we saw how to fix some of the most common errors that can occur during installation.
What about you, were you able to install Joomla or did you have problems? Which method did you follow? Let us know in the comments below.
Ready to build your WordPress site?
Try our service free for 14 days. No obligation, no credit card required.


