While surfing the web or working on your WordPress site, one of the errors you may encounter is this: DNS_PROBE_FINISHED_NXDOMAIN. Especially, if you use Chrome as your browser, you will most likely have run into this kind of error at least once.
That’s why in this article we’re going to see what this DNS error is caused by and what you can do to fix it.
In the article, I’ll explain the different paths you can take to fix this problem on Windows and Android, and we’ll also focus on how to fix it using Chrome.
Table of Contents
What does DNS_PROBE_FINISHED_NXDOMAIN mean?
The DNS_PROBE_FINISHED_NXDOMAIN error can occur while using any type of browser, but in reality the only one to give precise information about this type of problem is Google Chrome. The browser, in fact, will alert you with an error telling you that it is “impossible to reach the site” and specifying the cause of the error itself.
This is one of several errors that can happen to you when using Chrome, if you’re interested you can also check out my articles on how to fix Chrome’s Aw Snap or the 502 bad gateway error.
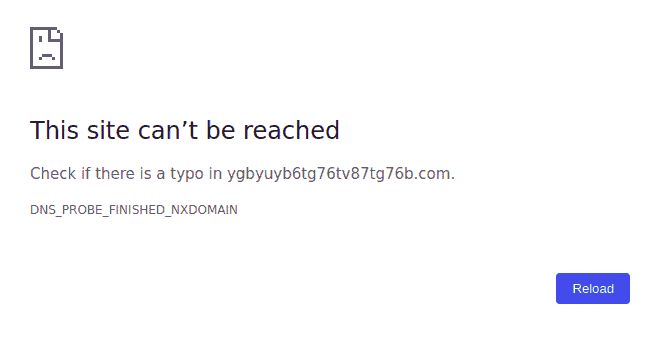
As for other networking programs, such as Firefox, or Microsoft Edge, this DNS issue will show up as a generic error. In particular, in the case of Edge, the error ‘Cannot reach this page‘ will be reported.
In any case, what causes this type of DNS error is the failure to resolve the domain name or its address. To understand the reason for this problem, it is necessary to open a small parenthesis on how DNS works.
The DNS, or Domain Name System, is used to link the domain names with the real address of the servers, in practice it works like a sort of telephone directory that matches a number (understandable by the machine language) to a name (easier and more practical to remember).
The error message DNS_PROBE_FINISHED_NXDOMAIN indicates, therefore, that the DNS is not able to reach the IP address connected to the domain you are trying to visit. This does not necessarily mean that the domain does not exist, but that there is a problem that prevents DNS from identifying it, e.g. the domain may not yet be visible because it is necessary to wait for DNS propagation times.
DNS_PROBE_FINISHED_NXDOMAIN how to solve the error
The DNS_PROBE_FINISHED_NXDOMAIN problem may be due to settings in the DNS, the browser or the device itself. In some cases, even third-party programs such as VPNs or firewalls can generate this error.
Let’s see, what are the possible methods to solve this error from the PC and mobile devices.
Solve the DNS_PROBE_FINISHED_NXDOMAIN error on Windows
Check that you have typed the correct address
It may seem obvious, but the first thing to do when you are faced with the DNS_PROBE_FINISHED_NXDOMAIN error is to first verify that you have not misspelled the address of the website you want to visit.
Unplug and reconnect the modem
A second method that can solve this DNS problem is to try restarting the computer or disconnecting the router and modem for a few minutes. Then you’ll have to reconnect and try to access the site again to see if the problem has been solved.
Otherwise you can contact your provider or continue with the other options to solve the DNS error yourself.
Renew your IP address
One of the options available for us to solve the DNS_PROBE_FINISHED_NXDOMAIN problem, since it is a client-side error, is to try to renew your IP address.
In order to know the IP address of your computer and renew it, you just have to access the Command Prompt. To do this, just type ‘Command Prompt‘ or ‘cmd‘ in the Windows 10 search bar.
Alternatively, you can open the Windows ‘Run‘ application using the Windows Logo + R key combination.
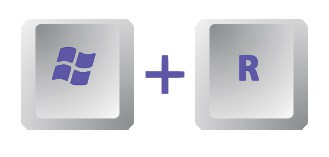
At this point you have to type ‘cmd‘ and press ‘OK‘.
In any case, once the command prompt is open, before being able to renew your IP address you must release the current one, to do this just type ipconfig /release
After that you will also have to empty the DNS cache through the command ipconfig /flushdns
After clearing the cache as well, the message ‘DNS resolver cache cleared.’ will confirm that the operation was successful.
Emptying the DNS cache can also help you resolve other errors that interfere with your browsing, such as err_connection_refused.
At this point you will need to type ipconfig /renew to renew your IP.
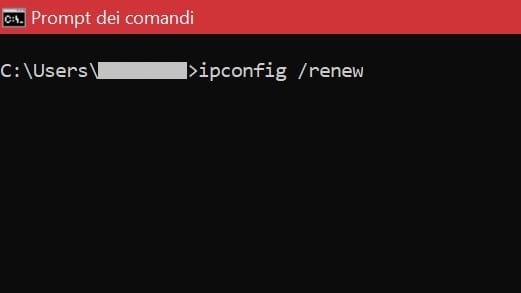
After a few moments our new local address will appear, also referred to as localhost, and other information about your network will be visible.
How to fix the DNS_PROBE_FINISHED_NXDOMAIN error on Chrome
Empty the DNS cache of Google Chrome.
In addition to the computer’s DNS cache, you can also empty Chrome’s cache exclusively. Google’s browser has, in fact, its own internal DNS cache.
Warning: do not confuse the DNS cache with the browser navigation cache. If you are interested you can read how to empty the browser cache on the main web browsers.
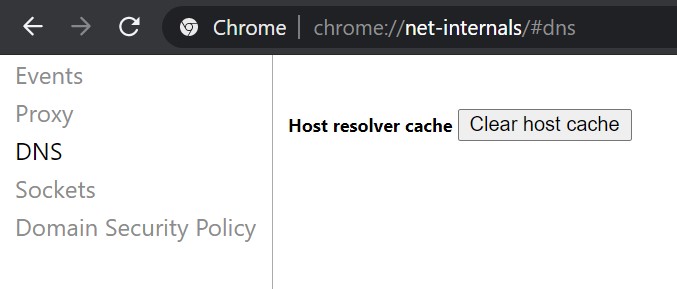
To do this just type in the address bar of your browser chrome://net-internals/#dns and then click on the ‘Clear host cache‘ button.
Reset Chrome flags to default values.
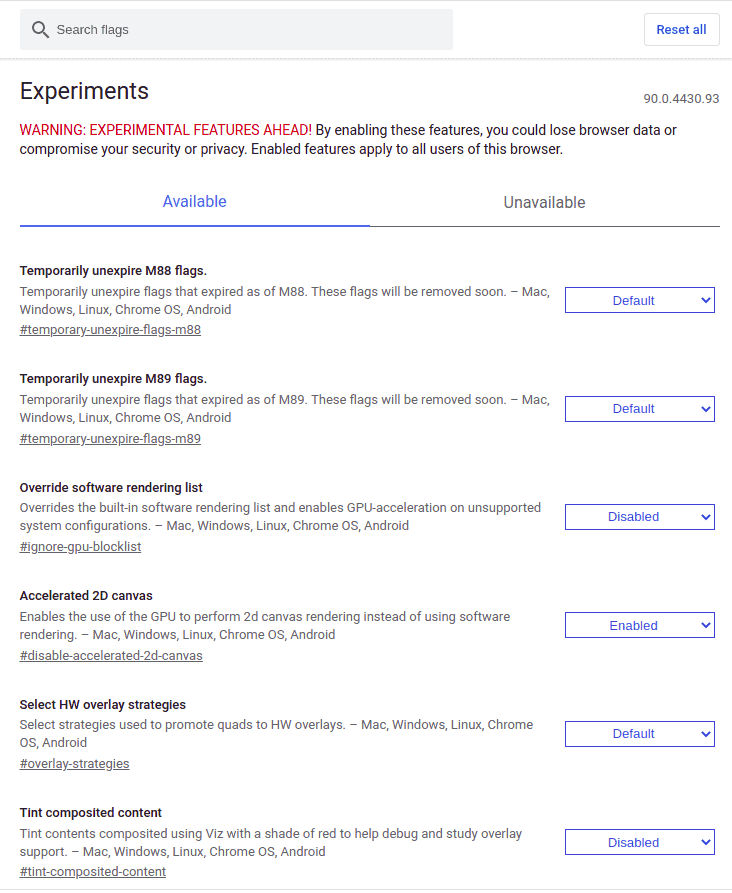
Another attempt you can make to solve the problem is to reset Chrome options to the default ones. We are talking specifically about the Chrome flags, that is, the additional and experimental options offered by the Google browser.
To deactivate them or restore them to the default conditions just type in the address bar of the browser chrome://flags and then click on ‘Reset all‘ and then ‘Relaunch‘ to restart Chrome and make the changes effective.
Restart the DNS client
When you encounter a DNS_PROBE_FINISHED_NXDOMAIN error, one of the things you can do to resolve it is to restart the DNS client.
These services may, in fact, not work after a sudden stop, therefore you could proceed by checking the status of the DNS services and then try to restart them.
To do this, you must first access Windows Services: these can be opened by typing ‘Services‘ in the search bar, or by typing ‘ Run‘ from the command services.msc and then confirming with OK.
In both cases a new window will open with the list of Services available on your PC. The one we are interested in is the one that appears under the name of ‘DNS Client’.
Trying to restart it directly, we will notice that not in all cases will it be possible to do so. In fact, restarting the DNS client will only be available if the ‘Manual‘ startup option has been set for this service.
If the startup type is set to ‘Automatic‘, as in the case below, it will not be possible to restart the service with this procedure, but you can restart the DNS client by turning the PC off and on.
Changing DNS Servers
If the problem persists after trying the previous solutions, you can set up different DNS servers from those assigned directly by the provider. This procedure can help you solve connection problems even in case the DNS server is not responding.
The DNS problem can be solved by temporarily changing DNS servers and switching to public ones, such as Google’s ones. The same goes for the opposite change from public ones to those of your provider. Let’s see, then, how to set up new DNS servers.
On Windows 10 you have to open the Control Panel, to do so you can search for it on the Start button or the search bar. From the Control Panel, you will then have to open up the ‘Network and Sharing Center‘.
At this point, on the left portion of the screen, there will be an option to access the card’s settings.
By clicking on it the network connections of your computer will open up and you will be able to access the properties of each network. Once you have located the network, simply right-click on it and select ‘Properties‘.
A new window will open in which the different elements pertaining to the connection will be shown, the one we are interested in is ‘Internet Protocol version 4 (TCP/IPv4)‘, so select it and then click on ‘Properties‘.
In the window, you’ll see you can configure the protocol and choose whether to set a specific IP address or to use the DNS servers of your choice instead of the automatic ones.
What we’re interested in is this second option, so click on ‘Use the following DNS servers‘ and you’ll be able to manually enter two servers: the preferred one and the alternative one.
DNS Google
Primary DNS Server: 8.8.8.8
Alternate DNS Server: 8.8.4.4
DNS Cloudflare
Primary DNS Server: 1.1.1.1
Alternate DNS Server: 1.0.0.1
This procedure can also help you resolve other types of errors such as 504 gateway time-out.
Check Local Hosts File
Every time you access a website, not only your PC but also your smartphone, checks the hosts file to see if there are any exceptions for that website.
The hosts file, in fact, is a text file on the PC that allows you to associate the ‘text’ addresses of certain websites to IP addresses.
This file can be modified in certain situations, in this context I suggest you read my article on how and why to edit the local hosts file.
In this specific case, you can open the hosts file to verify that the website you are trying to access is not present in the list and that it has not, therefore, been matched with an incorrect IP address.
The local hosts file on Windows 10, is located in the following path C:\Windows\System32\drivers\etc
Once you have found the ‘hosts‘ file, open it with any text editor, such as Windows notepad, to read its contents.
Since it is a file without extension when we try to open it, we will be asked to choose a program, among those present on the computer: we can choose a text editor if present in the list, or alternatively search for it through the button ‘Search for another app in this PC‘.
Alternatively, you can also open the text editor first, in our case the Windows Notepad, and from there open the file directly through the menu File > Open… and then manually search for the folder location of the file, or directly typing the path.
Another option is to open the text editor and then drag the ‘hosts’ file over it.
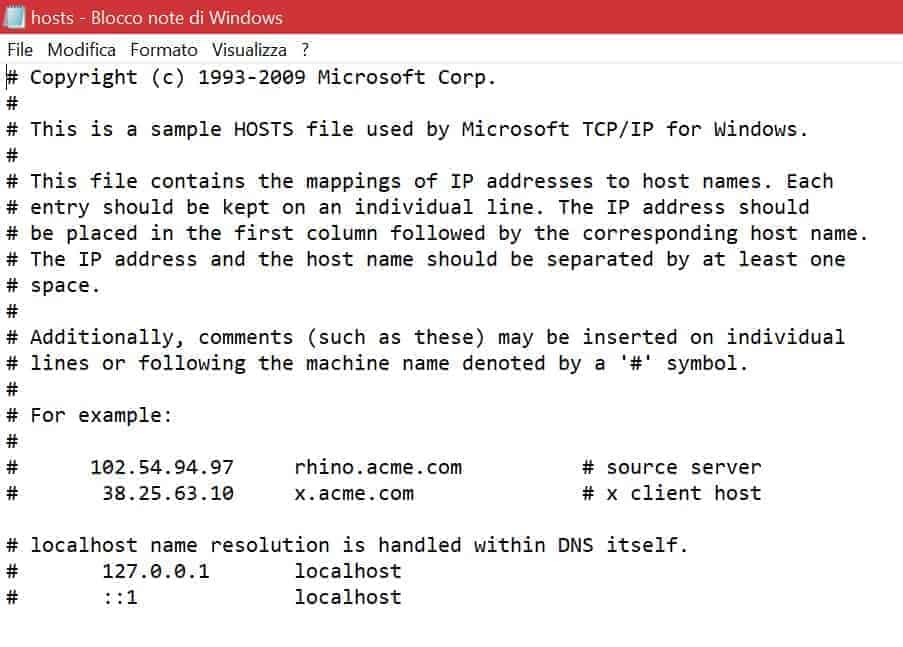
Once you have opened the file you have to check if the website you are trying to access is present in this file, in that case just delete the corresponding entry.
Remember that, in order to edit the hosts file, you must have run the text editor as ‘Administrator‘, otherwise the file will open as read-only and you won’t be able to overwrite the changes.
(Temporarily) Disable VPN and Antivirus
If the other options did not work, you can opt to disable VPNs, firewalls and Antivirus programs.
Particularly with regards to VPN programs, the DNS error can occur both in the case of browser extensions and when using external programs.
In some cases, in fact, these programs can interfere with DNS server settings, so trying to disable them temporarily can resolve the DNS_PROBE_FINISHED_NXDOMAIN error.
Of course, if the cause of the error is due to a block by the firewall or antivirus, there may be a valid reason why access to the site is hindered by one of these programs.
For this reason, before deactivating one of these softwares, make sure that the site you want to visit is safe.
To do this you can check that the site is not on a global blacklist: for example, you can use the service provided for free by Mxtoolbox. This will allow you to enter an address and check if it has been reported by other users as an unsafe site.
Solve the DNS_PROBE_FINISHED_NXDOMAIN error on Android
To fix the DNS_PROBE_FINISHED_NXDOMAIN error on Android, after verifying that the system or the browser itself does not require updates, you can try clearing the browser data. If this procedure does not work, you can also set the DNS servers manually, by using public ones, such as Google servers.
In this case, you have to access the settings of the WiFi network you are connected to and change the IP settings to ‘Static‘.
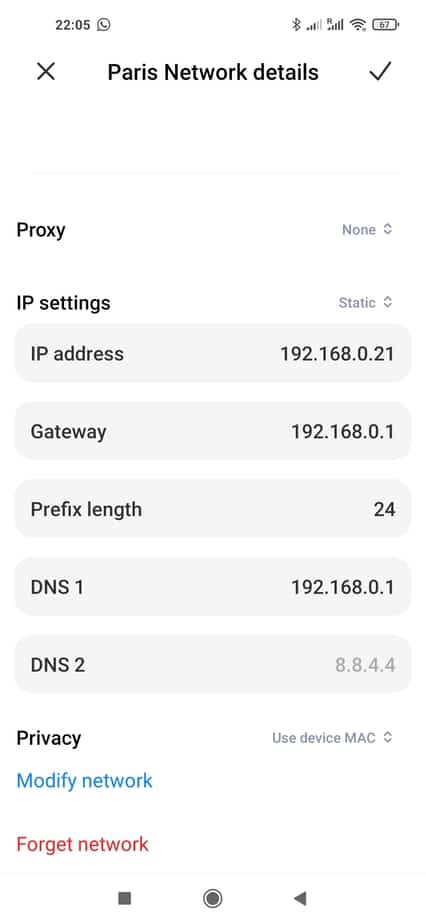
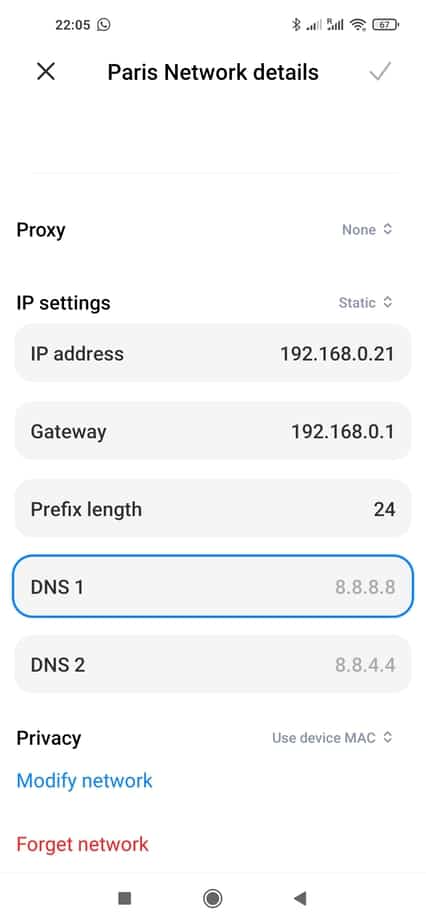
At this point you can change the DNS 1 and 2 entries by entering the Google DNS servers (8.8.8.8 and 8.8.4.4) as in the example below.
Conclusion
By following the steps outlined in this guide you should be able to resolve the DNS_PROBE_FINISHED_NXDOMAIN error. Which method did you use to solve it?
Is there some step you still haven’t figured out? Let me know how it turned out in the comments below.


Leave a Reply