
The rel attribute that we are going to insert in the links, allow us to indicate relationships with the link’s landing page. In this article we are going to see how to create a function that allows us to automatically apply the rel attribute or more attributes to all WordPress links.
Through this function we can automatically add rel attributes to all links or choose to set different attributes for external and internal links.
For example, we might want to use the attribute rel="nofollow" for all external links. In this case, instead of adding the attribute by hand on every single external link, we can use a function that automates the process.
The same is true for other attributes such as rel="sponsored". Here are all the attributes we can add using this function:
- rel = “nofollow”
- rel = “sponsored”
- rel = “noopener”
- target = ”_ blank”.
To do this we will use a fantastic WordPress feature: filters.
Let’s start immediately by looking at what they are.
Table of Contents

What is a filter in WordPress?
In the WordPress ecosystem there are different types of hooks that allow us to perform actions in response to a certain event. The two types of hooks we find are actions (action hooks) and filters (filter hooks).

The difference is that:
- filters allow us to make changes, essentially alter the output.
- actions allow us to perform a real action, for example an extra functionality that is performed after an event (eg after the publication of an article).
To create a function that adds a rel attribute of our choice to all links, we’re going to use WordPress filters.
Filters allow us to change the functionality of WordPress. In practice, it is PHP code that we can use in order to activate a function after a certain condition has occurred.
For a more technical explanation you can consult the WordPress codex documentation.
What is a rel?
Rel attributes are always used together with the href attribute and allow us to define links.
Each link is indicated using the <a> tag and has a structure like this:

The attribute href is followed by the link, the destination URL.
The attribute rel is optional and allows us to indicate what relationship there must be between the source page (the one containing the link) and the landing page (the one containing the URL).
The anchor text is the anchor text that is the text that will be shown and on which you can click to reach the URL.
Where do you add the function to change the rel attribute to automatic?
We have several methods for adding filters and hooks to our WordPress site:
- we can add the function in the file functions.php;
- we can use the code snippets plugin.
Let’s see how.
Add the function in the functions.php file
We can add the filter directly to the theme’s functions.php file, like so:
It is important to make sure that you are going to edit the child theme ‘s functions.php file and never make changes directly to the parent theme files.
If we made changes directly to the parent theme, these changes would be lost when we update the theme.
To edit the file, you can use the cPanel file manager or an FTP client such as FileZilla or Cyberduck.
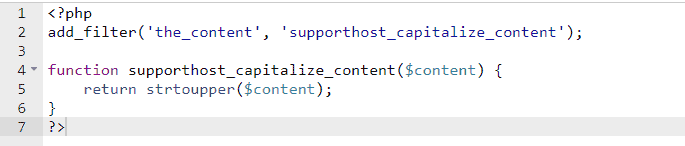
In the example above we have added a function to the functions.php file of the child theme that transforms all the content of the post to uppercase. We will return to that shortly when we talk about the filter the_content.
Use the code snippet plugin
We can add the function without directly editing the functions.php file, but doing it through a WordPress plugin.
The process is very simple.
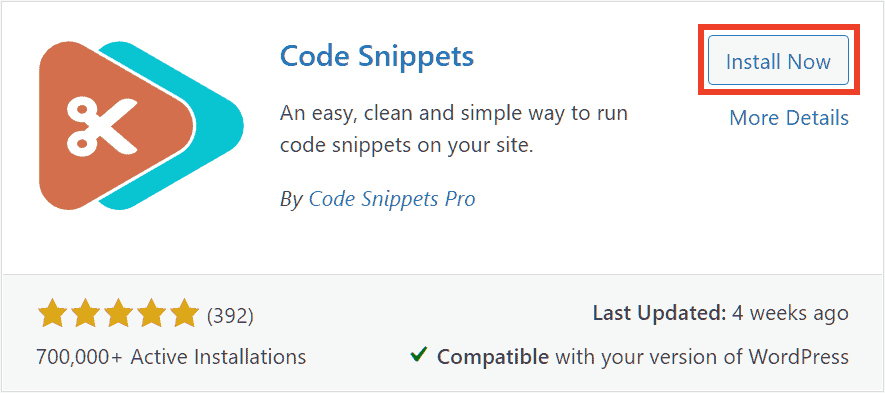
We install and activate the Code Snippets plugin.
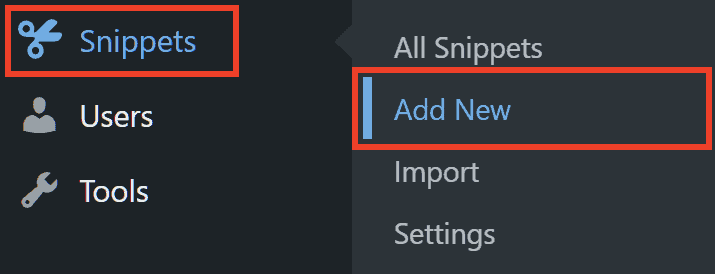
Let’s go to Snippets > Add New to be able to create a new filter.
At this point we just need to fill in the fields indicated:
- we enter a title for our filter;
- let’s add the code in the functions php field.
Finally, click on the Save changes and activate button.

In this case we used the same example filter as before, which we are now going to see in detail and which allows us to understand what the filter is for the_content.
The_content filter
Firstly, we need to understand how WordPress filters work.
The WordPress filter the_content allows us to make changes to the content of a post or page before showing it on the browser screen and then before it is visible to the user visiting the page.
Here is a simple example that helps us understand how we can use this filter:
add_filter('the_content', 'supporthost_capitalize_content');

function supporthost_capitalize_content($content) {
    return strtoupper($content);
}
In the code you see above:
the_contentis the name of the filtersupporthost_capitalize_contentis our function.
In practice, we hooked our function to the filter the_content to apply the function to the content of blog posts.
In this example, the function supporthost_capitalize_content transforms the content of the articles into capital letters only and returns it to us on the screen.
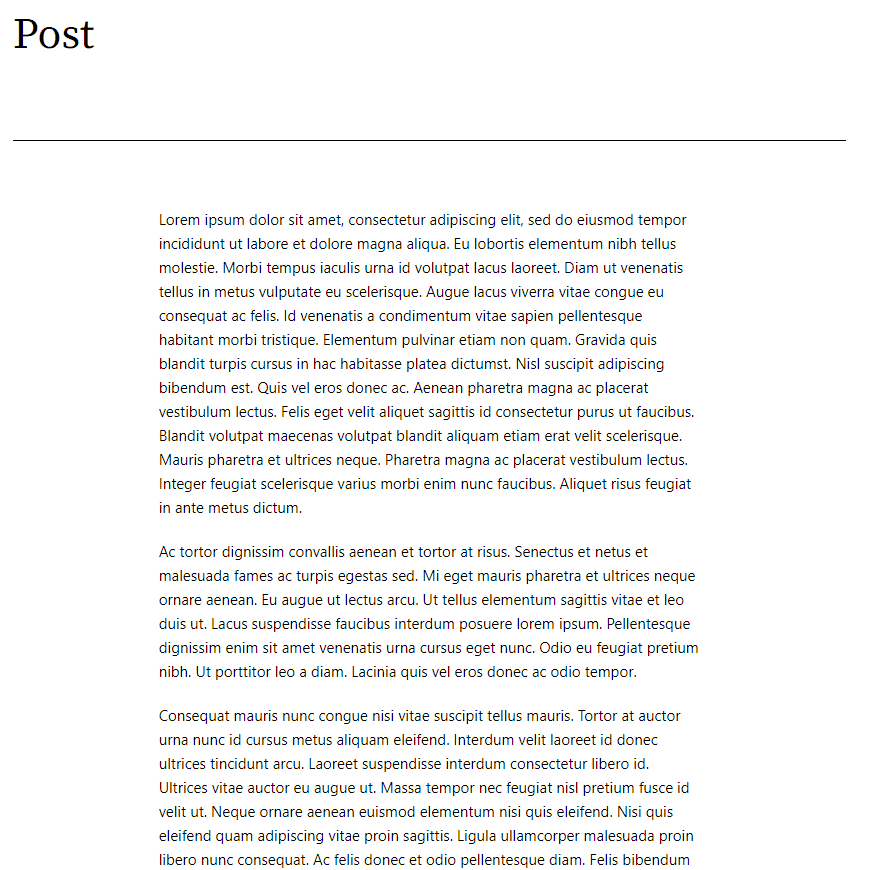
Here is our post before activating the feature:
After using this feature, the same post becomes:
You can test the feature yourself by installing WordPress locally and following the steps described so far.
Add the rel attribute to all WordPress links
To automatically add the rel attribute to our links, the first thing to do is to create two filters that call a single function supporthost_add_rel.
The first filter is used to apply the function to the content of the articles (the_content). The second allows us to apply the function also to the links that are present in the excerpt (the_excerpt).
add_filter('the_content', 'supporthost_add_rel');
add_filter('the_excerpt', 'supporthost_add_rel');
We must therefore define our function supporthost_add_rel.
To do this, we use the PHP function preg_replace_callback that allows us to search and replace. In practice, the function performs a search using a regular expression and finds all matching matches. It then replaces them with the string that corresponds to the return of another function, called the callback function.
In our case we pass to the preg_replace_callback three parameters function. The first is a regular expression (regex) which allows us to find all the links in the article (<a> tag). The second parameter is the callback function supporthost_add_rel_all_links. The third parameter ($ content) provides the content of posts and pages. This will preg_replace_callback use the function’s return supporthost_add_rel_all_links to add the rel tag inside the links.
function supporthost_add_rel($content) {
    return preg_replace_callback('/<a[^>]+/', 'supporthost_add_rel_all_links', $content);    }
The function supporthost_add_rel_all_links is precisely the one that will allow us to add the rel attribute to the links in our pages / posts. It will be through this function that we will be able to make the replacement and add the rel attribute.
To define it, we first set two variables:
- the link
- the blog url.
Note that at the moment our function does not perform any action or substitution. We are just declaring two variables and asking to return one of them.
function supporthost_add_rel_all_links($supporthostMatches) {

    $supporthostLink = $supporthostMatches[0];
    $supporthostSiteLink = get_bloginfo('url');

    return $supporthostLink;

}
At this point we need to add a condition that checks if the link already has a rel attribute. To do this we use an “if” that allows us to do replace only one if the rel attribute is not present.
In this case we want to add the rel attribute only to external links, so we use the function preg_replace using a regular expression as a parameter that allows us to apply the function only to external links.
We can decide to add the rel attribute we want, we just replace it ‘rel="nofollow" $1‘with another attribute, like this:
- ‘rel = “noopener” $ 1’
- ‘rel = “sponsored” $ 1’
- ‘target = “_ blank” $ 1’
Our function will be this:
function supporthost_add_rel_all_links($supporthostMatches) {

    $supporthostLink = $supporthostMatches[0];
    $supporthostSiteLink = get_bloginfo('url');

    if (strpos($supporthostLink, 'rel') === false) {
        $supporthostLink = preg_replace("%(href=\S(?!$supporthostSiteLink))%i", 'rel="nofollow" $1', $supporthostLink);
    }

    return $supporthostLink;

}
We used the above function for external links only.
How do we change all the URLs instead?
We just need to use a different regex in the function preg_replace, as you can see here:
$supporthostLink = preg_replace("%(href=\S(.+))%i", 'rel="nofollow" $1', $supporthostLink);
Keep in mind that also in this case we can use the rel attribute we want: we just need to replace in the code above rel = ”nofollow” with a different attribute.
You can also combine the two functions preg_replace. In the function that I will show you at the end of the article, I used the two functions preg_replace one after the other. This way I can add attributes nofollow and sponsored to external links, and attributes nofollow and noopener to internal links.
Our final example with the two functions is just for you to understand what we can do with PHP, it may not make much sense in SEO and link building to use attributes this way.
The function we just saw allowed us to add rel attributes to all links. However, links that already had a rel attribute were not changed because we used this condition:
if (strpos($supporthostLink, 'rel') === false) { [...]
To make our function replace the rel attribute by setting what we want we add an “elseif”. For example, let’s use another regex to check if the link is external. So if the link is external and already has a rel attribute, let’s modify the rel with the function preg_replace.
In practice, if the link has a rel attribute other than:
- rel = “nofollow”
- rel = “nofollow, [other attribute]”
We replace it by setting it as rel = ”nofollow”.
This is the function we use:
    if (strpos($supporthostLink, 'rel') === false) {
        [...]
    } elseif (preg_match("%href=\S(?!$supporthostSiteLink)%i", $supporthostLink)) {
        $supporthostLink = preg_replace('/rel=\S(?!nofollow)\S*/i', 'rel="nofollow"', $supporthostLink);
    }
Note that this function above is not complete, but it serves to make you understand how to use the elseif condition.
Our complete code will be this:
add_filter('the_content', 'supporthost_add_rel');
add_filter('the_excerpt', 'supporthost_add_rel');

function supporthost_add_rel($content) {
    return preg_replace_callback('/<a[^>]+/', 'supporthost_add_rel_all_links', $content);
}

function supporthost_add_rel_all_links($supporthostMatches) {

    $supporthostLink = $supporthostMatches[0];
    $supporthostSiteLink = get_bloginfo('url');

    if (strpos($supporthostLink, 'rel') === false) {
        $supporthostLink = preg_replace("%(href=\S(?!$supporthostSiteLink))%i", 'rel="nofollow, sponsored" $1', $supporthostLink);
		$supporthostLink = preg_replace("%(href=\S(.+))%i", 'rel="nofollow, noopener" $1', $supporthostLink);
    } elseif (preg_match("%href=\S(?!$supporthostSiteLink)%i", $supporthostLink)) {
        $supporthostLink = preg_replace('/rel=\S(?!nofollow)\S*/i', 'rel="nofollow"', $supporthostLink);
    }

    return $supporthostLink;

}
In the example above we have inserted two functions preg_replace: the first allows us to add the nofollow and sponsored attributes to external links. With the second we are going to insert the rel nofollow and noopener attributes to the internal links.
Now it’s your turn to modify the code to fit what you want to do. To make sure the code works the way we want it, the best thing to do is test it in staging.
To use the code we just need:
- Edit the regexes to define whether to apply the function to internal or external links
- Change the value of the function
preg_replaceto choose which type of rel attribute to set (ex.'rel="nofollow, noopener" $1')
And that’s it.
Conclusion
There are several cases where we may need to add a rel attribute to all links in WordPress. We can use this system in all cases where we cannot or do not want to go to manage the attributes manually, but we want to change them automatically.
Please note that we are not editing the code of our post in the database, but we are filtering the content and changing the links before showing the page to the customer. If we deactivate the filter, the links lose the rel attributes we have set.
As you have seen, we can modify the code to adapt it to our needs. For example, you can add rel nofollow and sponsored attributes to all external links.
Have you ever found yourself in a position where you want to add rel attributes to all links? Please let us know if this tutorial was helpful to you or if you have any concerns about it.
Ready to build your WordPress site?
Try our service free for 14 days. No obligation, no credit card required.


