
Google AdSense is one of the most accessible ways to monetize a website. You display ads, visitors see them, and you get paid. No need to negotiate with advertisers or chase down payments. Google handles all of that.
The setup process is straightforward, but there are a few different ways to go about it. You can use a plugin to simplify things, or add code manually for more control. Below, you’ll learn what Google AdSense is, how to sign up, and a few different ways you can add Google AdSense to WordPress, both with and without code.
Table of Contents
How Google AdSense Works
Google AdSense is an advertising program that lets website owners earn money by displaying ads. Once you’re approved, Google places targeted ads on your site based on your content and your visitors’ interests.
The ads come in different formats, including text, images, videos, and interactive media. Google automatically selects which ads to show, so you don’t need to manage relationships with advertisers yourself.
Ads are chosen based on relevance to your content, but you won’t have control over which ads are displayed. However, if there’s a specific ad you don’t want to show on your site, you can block that individual ad or all ads from a specific advertiser.
You get paid based on a cost-per-impression (CPM) model, which means you earn money based on the number of times ads are displayed on your site, not just when visitors click them. The amount you earn per thousand impressions varies based on factors like your niche, the advertiser’s bid, and the location of your visitors.
Here are a few reasons why AdSense is a great way for WordPress site owners to monetize:
- No upfront cost to join the program
- No minimum traffic requirements to get started
- Google handles everything, including advertiser relationships, payment collection, and ad serving
- You focus on content while AdSense handles monetization
- Publishers receive 80% of the revenue after the advertiser platform takes its fee, which works out to roughly 68% of total ad revenue.
Understanding the Google AdSense Guidelines
To continue participating in the AdSense program, you must comply with Google’s guidelines. Here’s what you need to know before applying.
You need to meet the content requirements:
- Your site needs original, high-quality content that provides real value to visitors
- Copied content, thin articles, or pages stuffed with keywords won’t pass review
- You need essential pages, including an About page, Contact page, and Privacy Policy
- A Terms and Conditions or Disclaimer page is recommended if you have affiliate links
Your site needs to meet the design requirements:
- Your site should be easy to navigate with a clean design
- Google looks for professional-looking sites with clear menu structures
- All links should work properly with no broken pages
- Fast loading times matter for approval
- Mobile responsiveness is important since most web traffic comes from phones and tablets
Finally, while there’s no official traffic requirement, having some organic visitors improves your approval chances. Google also prefers search traffic to other sources.
How Much Can You Earn with Google AdSense?
Unfortunately, earnings per view are hard to estimate. There are a lot of things that can influence this, like the amount of traffic, your site’s content, the location of your visitors, advertiser demand, and the type and size of ads displayed.
The best you can do is generate an estimate using the Google AdSense earnings calculator. To get an estimate, choose the geographic area of your visitors and the category of your site, then select the amount of traffic, and you’ll see an annual revenue estimate.

Remember, these values should be taken with a grain of salt because actual payments vary based on the factors above. A percentage of impressions could also be considered invalid, which affects your total.
Sign Up for Google AdSense and Add Your Site
To join the Google AdSense program, the first thing you need to do is register. Head over to the Google AdSense website and click Sign Up. Sign in with your Google account or create a new one if needed. Then, you’ll need to enter relevant information about your website and click Start Using AdSense.

Once you have created your AdSense account and logged in, the first thing you’ll need to do is add your site to your account. To do this, simply click on the Add Site button. Then fill in the website address and click Save. Then accept the terms and conditions.
After that, you need to connect your site to AdSense. To do this, just click Let’s Go in the box labeled Connect your site to AdSense. In the new window that opens, you’ll be able to see the code to insert on your site.

It’s a single script that needs to be placed in the header of your site so it loads on every page. Once this code is on your site and Google approves your account, you can start showing ads. If you’re using the plugin method below you don’t need to copy this code, but if you’re using the manual method, then you’ll want to copy this code for later.

Method 1. Add Google AdSense to WordPress Using the Site Kit Plugin
The simplest method to add Google AdSense to WordPress is using Site Kit, Google’s official plugin. It connects your site to multiple Google services, including AdSense, Analytics, Search Console, and PageSpeed Insights.
The big advantage of Site Kit is that it handles all the code insertion automatically. You won’t need to manually copy and paste any AdSense code. The plugin takes care of everything for you.
To get started, log in to your WordPress site and go to Plugins > Add New. Search for the plugin Site Kit by Google and click Install. After installation, click the Activate button.

Once the plugin is activated, you’ll see a banner appear at the top that allows you to start the configuration. If you don’t see the notice, just click Site Kit > Dashboard. You’ll then need to click the Sign in with Google button and log in with the same account you used to sign up for Google AdSense.

Now it’s time to connect AdSense. Click Site Kit > Dashboard and then click Monetization at the top of the page to get to the AdSense program section. From there, click the Connect Now button. On the next page, select your Google account and grant the requested permission.

At this point, the plugin will ask you to log in to your AdSense account to complete the setup. You’ll need to request a site review (which usually takes a couple days), then you need to create a consent message for your site. Google can do this automatically.

After that, your site is connected, and all that’s left to do is wait for your account to be approved. Then, ads should start appearing on your site automatically.
You may want to double-check that Auto Ads are enabled. Head over to your AdSense account and click on Ads, then click the Edit pencil icon next to your website URL.
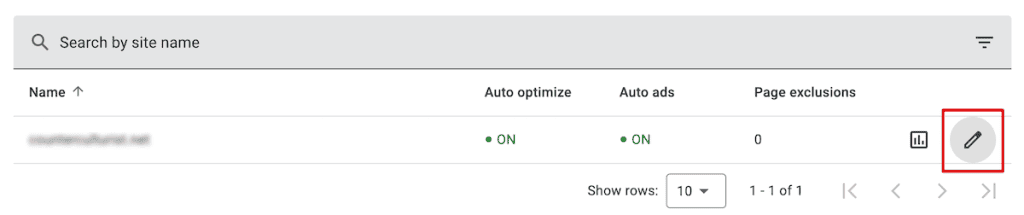
After that, check that the Auto Ads toggle is turned on. Now, ads should begin to automatically display on your site.

Customizing Ad Positions with Ad Inserter
With the plugin above, you’ll already have AdSense Auto Ads running on your site, but you might want more control over where specific ads appear. That’s where the Ad Inserter plugin comes in. This plugin lets you insert individual ad spots to precise locations.
To get started, install the Ad Inserter plugin, just like you installed the Site Kit plugin above.
After the plugin is installed, open up a new tab and head back to your AdSense dashboard and create an individual ad unit by going to Ads > By ad unit, then click Display Ads.

On the next screen you’ll see your ad unit example. Name your ad unit and select responsive for the size.

After you click Create it’ll take you to a new screen where you need to copy the code.

Next, go back to your WordPress dashboard and go to Settings > Ad Inserter, and click on Block 1. Then, paste your ad code into the text box.

Below that, you can select where you want the ad to appear. You can also control which pages show the ad and whether it appears on desktop, mobile, or both. Once you’ve configured your settings, save your changes.
If you want to continue with more custom ad spots, then use Block 2, Block 3, and so on.
Method 2. Add Google AdSense to WordPress Without a WordPress Plugin
If you prefer not to add another plugin to your site, you can insert AdSense code manually. Remember that Auto Ads code you got when you signed up for AdSense? You’ll be adding that to your site using one of the methods below.
If you forgot to copy it earlier or need to find your code again, just log in to your AdSense account and navigate to Ads > By site. Then, click Get code at the top of the page and your ad code will popup.

For the Auto Ads code to work properly, it needs to be placed in the header section of your site so it loads on every page. This lets Google analyze your content and automatically place ads. You have three options for adding it. Let’s look at each method.
1. Adding Code to Your Theme’s Header
This is the most common method for Auto Ads code. You need to add the snippet to your site’s header so it loads on every page.
You can edit this file directly, by navigating to Appearance > Theme File Editor in your WordPress dashboard. Alternatively, you can connect to your website via FTP or log in to cPanel and use File Manager to edit your website files.

Finally, you can create a child theme, which lets you modify an existing theme without directly editing the theme’s code. All of your changes here will stay saved after you update your theme, and this is the safest option for most website owners.
Make sure you add the code snippet from Google Adsense above the closing </head> tag. After updating the file, your AdSense code is now active across your entire site. The code loads before the page content, allowing Google to analyze each page and serve appropriate ads.
2. Using Built-In Theme Options
Some WordPress themes include built-in options for adding header or footer scripts. This is an easier alternative to editing theme files directly if your theme supports it.
Check your theme’s documentation or look in Appearance > Customize for a section labeled Header/Footer Scripts. You might also be able to add hooks in the header, if your theme supports it. Basically, you’ll want to see if your theme offers a built-in way to add code to your header.
This method keeps your code separate from theme files while avoiding additional plugins. Not all themes offer this functionality, so this option depends on your specific theme.
3. Using WordPress Widgets (For Individual Ad Units)
Widgets work if you want to add individual ad units to specific areas like sidebars or footers. This method doesn’t work well for Auto Ads code since Auto Ads needs to be in the header.
If you want to place a specific ad in a sidebar or footer widget area, first create an individual ad unit in your AdSense dashboard under Ads > By ad unit, just like we did above. Then, copy that code and head to your WordPress dashboard and go to Appearance > Widgets.
Next, add a Custom HTML block to your desired widget area. Paste the ad unit code into the widget and click Update to save. The ad will now appear in that specific location.

The Difference Between Auto Ads vs. Manual Ad Units
Google AdSense offers two main approaches to displaying ads on your site. We showed you how to add both above, but here’s a bit more detail on each of these ad types.
Auto Ads use machine learning to analyze your pages and automatically determine the best ad placements, sizes, and formats. You add a single code snippet to your site, and Google handles everything else.
With Auto Ads, Google may place ads in locations you didn’t explicitly choose. You can exclude specific pages or areas, but the algorithm makes the final decisions about where ads appear.
Manual Ad Units give you complete control. You create individual ad units in your AdSense account, choosing the size and format for each. Then you place the code exactly where you want ads to appear on your site using widgets, HTML blocks, or by editing your theme files.
Manual placement requires more work upfront, but lets you integrate ads more naturally with your content. You decide whether to show a leaderboard at the top of your page, a rectangle in the sidebar, or an in-article ad between paragraphs.
Many publishers use a combination of both approaches. They place manual ad units in strategic locations while allowing Auto Ads to fill additional spots that might otherwise go empty.
FAQs: Add Google AdSense to WordPress
How do I add Google AdSense code to the WordPress header?
The easiest method uses the Site Kit plugin, which handles code placement automatically. Without a plugin, you can add the code directly to your theme’s header.php file using a child theme, or by adding code directly.
Can I add Google AdSense to WordPress without plugins?
Yes. You can add AdSense code manually by editing your theme files (using a child theme), using WordPress widgets for individual ad units, or through your theme’s settings. Plugins are optional, but make the process simpler and safer.
How long does AdSense approval take?
Approval times vary from a few hours to several weeks. Sites with substantial content, clear navigation, and proper legal pages typically get approved faster. Google advises that in some cases it may take 2 to 4 weeks.
How much can I earn with AdSense?
Earnings depend on many factors, including your traffic volume, niche, visitor location, ad placement, and overall engagement. Some niches, like finance and technology, tend to have higher CPM rates than others. You can use Google’s AdSense calculator to get a rough estimate based on your traffic and niche.
Closing Thoughts: How to Add Google Adsense to WordPress
We covered how Google AdSense works and how to add Google AdSense to WordPress, so you can start making money from your site.
For most WordPress users, Site Kit offers the simplest path. It connects your site automatically and gives you a dashboard view of your earnings right inside WordPress. If you prefer not to use a plugin, you can add AdSense manually by adding code to your header using a child theme, or alternative method.
Once your ads are running, focus on creating quality content that attracts visitors. More traffic means more ad impressions, which translates to higher earnings over time.
Now, it’s your turn. Were you able to connect your WordPress site to Google AdSense using this guide? Did you have any difficulties? Let us know in the comments.
Ready to build your WordPress site?
Try our service free for 14 days. No obligation, no credit card required.


