
In this article, Google Search Console: the complete guide, we will see how to use the Google Search Console to optimize the performance of your website. We will start from adding the website and then see, one by one, all the available features.
We will then see among the many options how to use it to send the sitemap of our site to Google, how to analyze traffic reports and how to identify errors in the site.
Firstly, let me remind you that initially the tool offered by Google to analyze the performance of a website was called Google Webmaster Tools. Subsequently, Google decided to change it to Google Search Console, but in essence, the functionality has remained pretty much the same.
The first advantage is that Search Console is completely free. The second is that, if used well, it allows you to climb the search engine rankings by optimizing your site.
Let’s get into the heart of this guide by first seeing how to add your site to Search Console.
Table of Contents
Adding a site to the Search Console
Let’s connect to the Search Console page and enter your login details.
If it is the first time on Google Search Console we will not have any property yet, that is no site linked to the account. In this case we just need to click on the menu on the left that says Add Property as shown here:

At this point we have two options Domain or URL Prefix.
If we use the Domain option we will have to verify the ownership of the site with the DNS, if instead we want to be able to use alternative methods for verification we can use the URL Prefix option.
Let’s see how you can do property verification with both methods.

Check site properties with HTML files
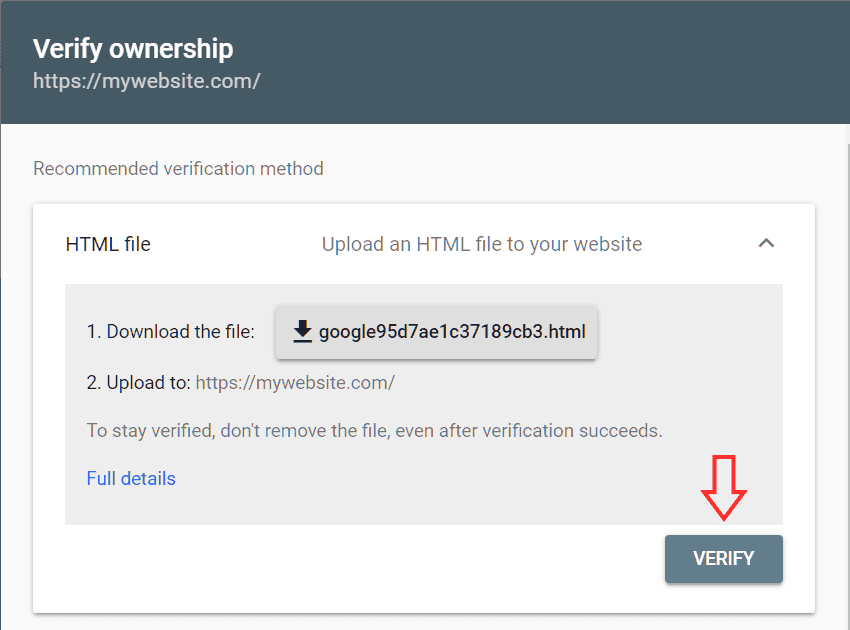
We can verify the ownership of the site with the HTML File method. First we enter the URL of the site in the Insert URL field and click Continue.

All we need to do is download the file we see in the next screen and then upload it to the site (in the public_html folder) using the file manager of the control panel (for example cPanel) or via FTP.
Another easy method to use for verification is to use the HTML Tag. In this case we will need to copy the tag that appears in this section and paste it into the home page of our site. The code copied from Search Console will then be inserted into the <head> section of your site.
After doing one of these operations we can return to the Search Console and click on the Verify button of the method we used. In this case, for example, see the HTML File method.
After verifying the ownership of the site, if the operation is successful, you will see a confirmation message like this.

Check site properties with DNS
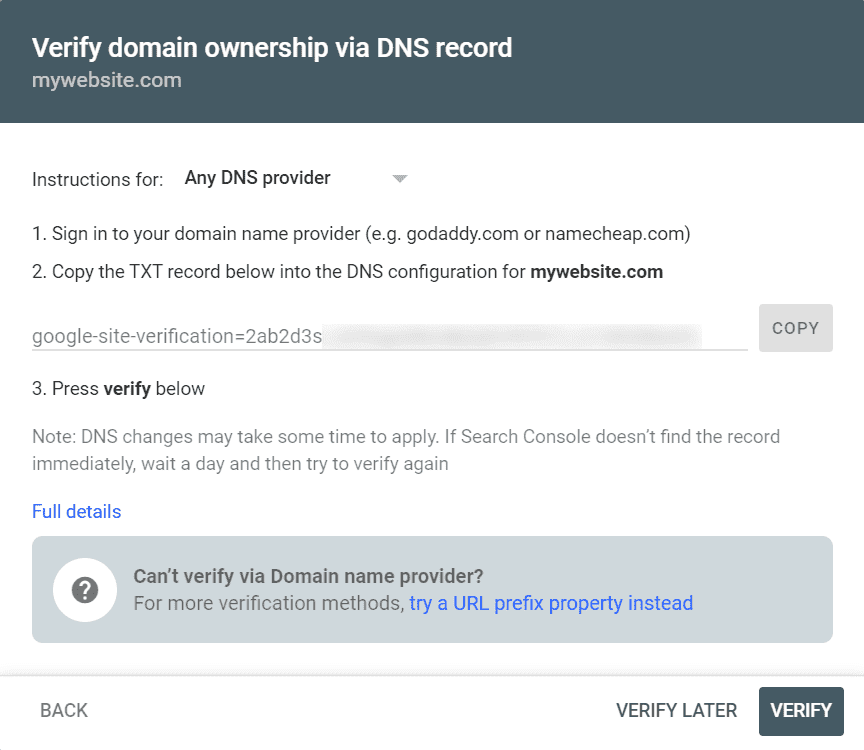
To check the domain ownership via DNS records, click on the left menu and then on Add Ownership as we saw earlier.
A window like this will appear allowing you to select the method to use to verify the ownership of the site. Enter the domain of the site in the Enter domain or subdomain field and click Continue.

We will then be shown the steps to complete the verification of the site through DNS records.
Open a new tab on your browser and log in to cPanel, you will need to return to the Search Console page to confirm your site has been verified.
Let’s open the Zone Editor tool as shown in this screenshot.

Let’s click on the Manage button at the domain we want to verify.

Click Add Record to add a new TXT record as directed by the Search Console instructions.
We must then fill in the fields that will be shown in this manner:
Name: enter the domain name with a period at the end, for example “mysite.com. “
TTL: you can leave the default value
Type: choose “TXT” from the drop-down menu
Record: in this field you will have to paste the string generated by the Search Console.
After you have filled in all fields click the Save Record button.

An alert like this will confirm that the changes have been saved successfully.

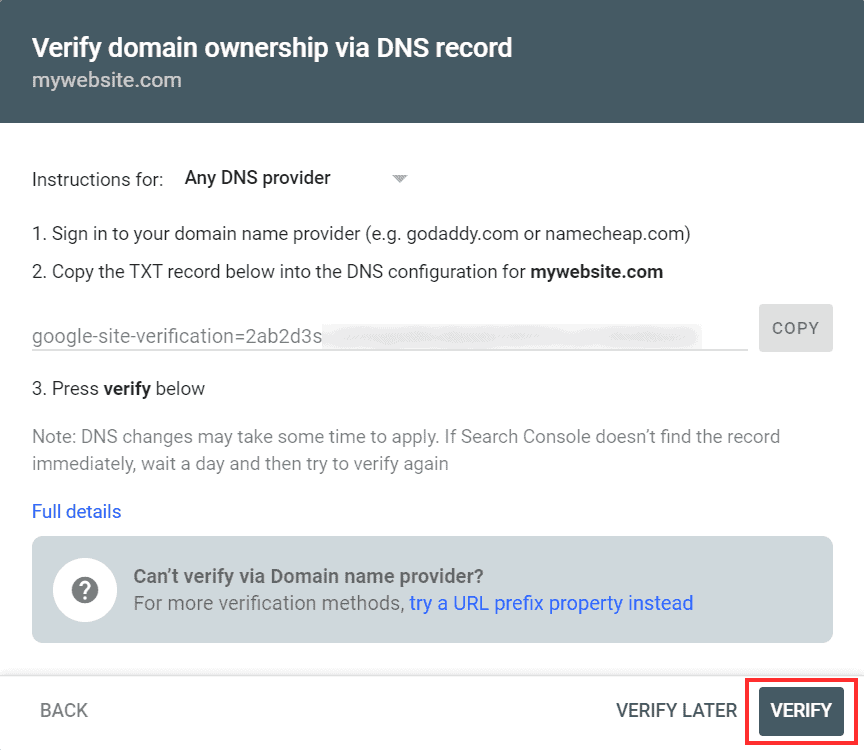
Go back to the Search Console page and click the Verify button.
Keep in mind that changes to DNS records can take a few hours, in which case you will be shown an alert like this.
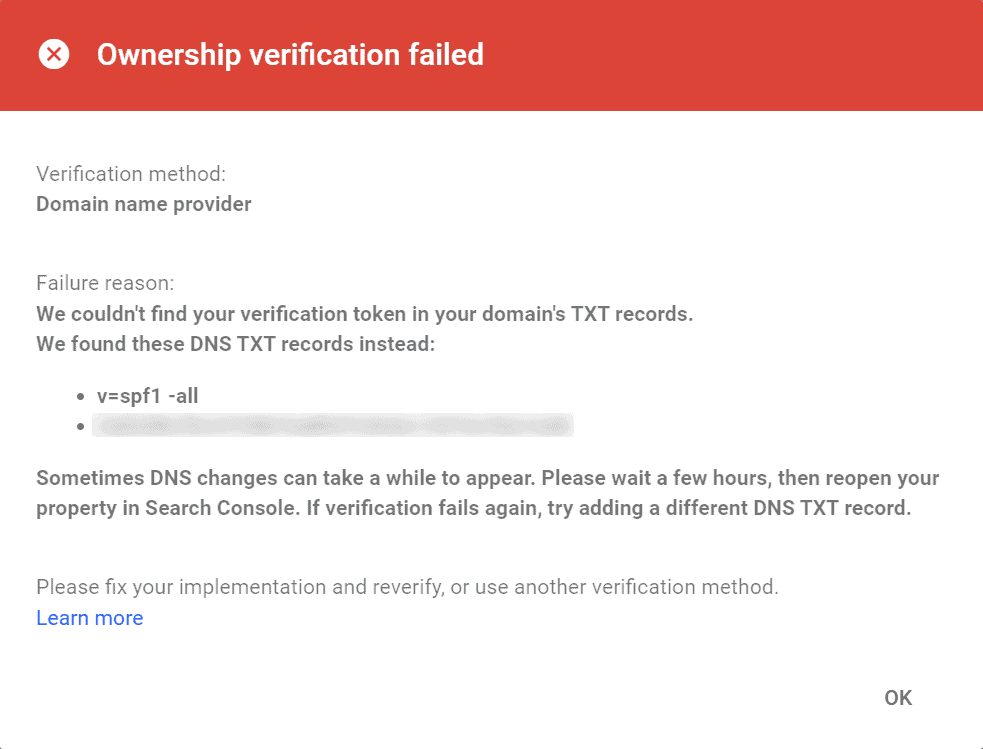
If the verification is not successfully completed right away, try again after a few hours or the next day.
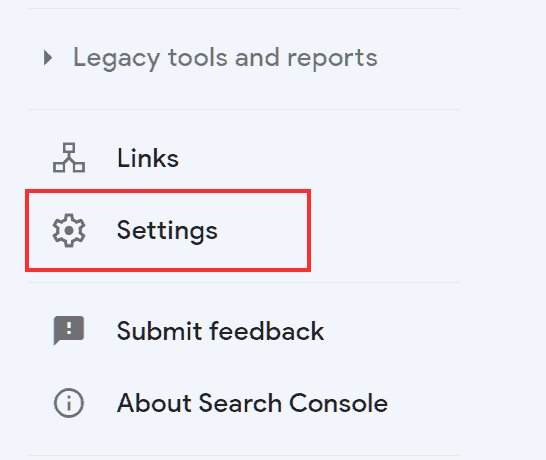
Search Console: Settings
Let’s first see what settings we find in Google Search Console. By clicking on the icon you see shown in the screenshot below, from the top menu we can access the User Settings.

From here you can manage your email preferences and choose whether to receive all notifications (the default option) or turn them off. Email notifications are designed to prevent you from having to access Google’s tool frequently. In this way, if any issues with your site are detected you will be notified with an email from Search Console.
The Search Console in the search results option allows you to display information about the performance of your site through a Google search. Of course, the clicks and impressions data will only be visible to the site owner or other users added to the Search Console and not to everyone.
From the left side menu, you can access Settings by clicking on the item you see below:
From this panel we can verify first of all the ownership of the site. In our case, since we have already verified the ownership of the site, a green tick will appear.

If we click on Ownership Verification we can see which verification method was used.
Users and Permissions
The next item, Users and Permissions allows us to verify the users who have access to Google Webmaster Tools.

If we want to add a user we just need to click on the Add user button.

After that we just have to indicate the email address (you have to indicate a Google account) and choose what type of permission to provide to the user between Full or Limited, and click Add to confirm.

Remove a user
In case we need to add a user only for a limited period of time we will be able to prevent access again at any time. All we need to do is access Users and Permissions, choose the user from the list, click on the three dots and then click Remove Access.

After that we confirm by clicking on Remove user.
Associations
By clicking on Associations from the settings we can connect other services, such as Google Analytics. In this case to proceed we will need to have previously created an Analytics account with the same email address we are using for Search Console.
Change of address
From the change of address option we can tell Google if we have transferred the site from one domain to another.

Accessing the change of address section we see that you can select the new domain from a list. For this, you will need to have added and verified the ownership of the new site before proceeding.
You can follow the steps outlined in Adding a site to Search Console to see how to add and verify the site.
Before informing Google of the change of address you must also have configured the redirect 301 from the old site to the new site.
Scan
In Google Search Console, crawl reports are accessible from settings and allow us to see data from the last 90 days.
By clicking Open Report we can see the results of the latest scans and understand if the bots encountered any issues during the scan, such as errors in retrieving the robots.txt file.

Google Search Console: the complete guide – what it’s for
Before we look at how to view site reports, analyze traffic, and detect errors on the page, let’s understand why we need Google’s Search Console.
The goal of the tools grouped in the Search Console is to allow website owners to monitor their ranking results. How does it do this? Obviously by providing data on the number of clicks, impressions and CTR of the pages of the site. But also by alerting you in case there are problems with page indexing or other site usability errors.
What should we do after adding the site to the Search Console? Should the Search Console be monitored daily? In which cases are actions required?
As soon as you add your site to the Search Console, there will be very little to do and see. In fact, it is necessary to wait a few days before being able to consult the report that will give us information on the status of the pages of our site.
Fortunately, we will be notified by email when the first data is available. Notifications will also alert us in case there are problems indexing pages. For this reason we will not need to access the Search Console on a daily basis.
Therefore, it is usually useful to do a check periodically, such as once a month to make sure there are no errors in indexing or usability from mobile devices.
The situations in which it will be necessary to intervene are when we are going to make big changes to the site. In this case, it will be useful to make sure that the bots are accessing the pages correctly and that the pages that we don’t want to be indexed remain so.
In these cases from Search Console we can also update the sitemap of the site, to help crawlers not to miss any important content.
Remember that indexing is not instantaneous, even when you submit the Sitemap to communicate addresses, it may take days for all pages to be reviewed.
Another situation in which the Search Console will be useful is if we decide to change domain. From Search Console we will have to tell Google what the new address is. When you decide to change WordPress domain it can also be useful to send the sitemap of the new site.
Now that we’ve seen when you need to access the Search Console, let’s see how to use it and where to find all the features.
What we can do from Google Search Console
The Search Console provides us with important information about site traffic, allowing us to understand which strategies to adopt to improve positioning.
Through the tools that Google makes available to webmasters you can do a complete SEO analysis of your site through performance reports, analysis of internal and external links and so on.
Search Console also allows you to guide Google to discover pages on your site. How? By sending the sitemap of the site to Google.
Let’s start from the sitemap to examine in detail all the features and reports of Google Search Console.
Send site sitemap
From Google Search Console we can submit the sitemap of our site. First of all, however, it is necessary to create one.
You can do this with a WordPress plugin like Yoast SEO or Rank Math SEO, you can create a simple text file with your site’s addresses or use an automatic generator to capture the list of all addresses from your site.
If you don’t know how to create the sitemap I suggest you to check our article on sitemap with all the detailed steps on how to do it.
After creating the sitemap follow these simple steps to submit it through Google’s Search Console.
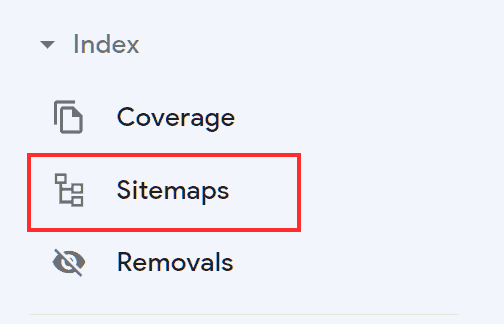
Click Sitemaps from the Search Console side menu.
Enter the address (usually domain/sitemap_index.xml) in the field Enter Sitemap URL and confirm by clicking the Submit button.

Security issues
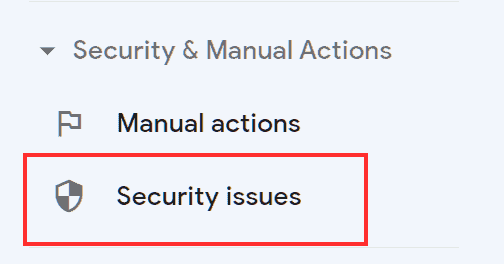
From the side panel under Security and Manual Actions, we click on Security Issues.
The security issues report allows us to check the health of our site.
If all goes well, the page will show an alert like this.

If your site has been compromised by a hacker that has added links that redirect users to other pages without our knowledge or malicious content, we will find warnings in this section of the Search Console and guidance on how to proceed to resolve the issues.
Removals
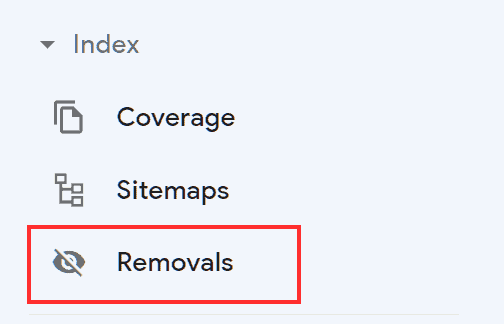
From the side panel we can access the Remove tool that allows us to remove certain pages so that they do not appear in the search results.
In order to request the removal of a page (which must obviously be one of the pages of a site added to the Search Console and verified) we just have to open the tool and then click on New Request.

At this point we have two options: requesting the temporary removal of the URL or deleting the URL stored in the Google cache.
Temporarily remove URL
This option prevents the page from being shown in search results for six months. It is not, therefore, a permanent block. If you want to permanently remove that URL from the search results you can use the noindex tag or delete the page from the site altogether.
Removal requests can be canceled by clicking on the three dots icon and then Cancel Request.

Delete cached URL
This option deletes the snippet by removing the page description, when your page appears in the search results it will then be devoid of description. As soon as a new scan of the page is performed the content of the description will be updated and restored.
Managing URL parameters
Search engine bots treat each URL as distinct, this also applies to URLs that use parameters to show variations of a page. A common condition found in ecommerce sites is to have numerous URL parameters. These parameters are used to sort products, select certain categories or products with certain features.
This means that in a ecommerce site there will be lots of URLs like this one:
https://siteexample.com/prodotti/uomo?categoria=pantaloni&colore=nero
However, when several URLs always point to the same content, there is no point in crawling them. In fact, when this happens, it results in ineffective analysis of the site because the bot ends up running out of crawl budget.
The Search Console allows us to tell the bots the function of the parameters used and thus understand whether pages need to be crawled or not.
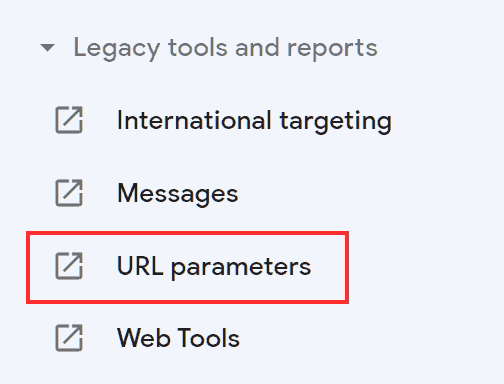
To do so, simply use the URL Parameters tool.
From the left side menu click on Tools and Previous Reports and then on URL Parameters.
A new window will open with a warning asking you to use the function with caution. Remember that we use this tool to exclude URLs from search results and we don’t want this to happen to important pages on your site.
Click the Add Parameter button to create a new rule.

In the Parameter field, you must enter the name of the parameter exactly as it appears in the URL (note that upper and lower case letters are treated distinctively). After that, you must specify whether or not the parameter affects the content of the page.
Selecting “Yes, edit, reorder or limit page content” will bring up more fields and options.

You will need to specify what the parameter is for (Sort, circumscribe, specify, translate or number pages) and most importantly indicate whether or not you want Google to crawl URLs with the parameter in question.
The options available to you are as follows.
Let Googlebot decide: select this option when you don’t know how exactly the parameter works or if the parameter changes depending on the pages it is applied to. This way the parameter is handled directly by the Googlebot.
Every URL: This indicates that URLs using that parameter should always be crawled (not contain duplicate content).
Only URLs with value: you can use this option for parameters that change the order. For example, in the case of two URLs like these:
https://esempio/categoria/portatili?sort=price-desc
https://esempio/categoria/portatili?sort=price-asc
You could choose to have only that one scanned with the sort=price-desc parameter.
No URL: With this option you tell Google not to crawl URLs with this parameter.
When you are satisfied with the settings click on Save. The created URL parameter will appear in the list and you can edit or delete it later.

Index coverage ratio
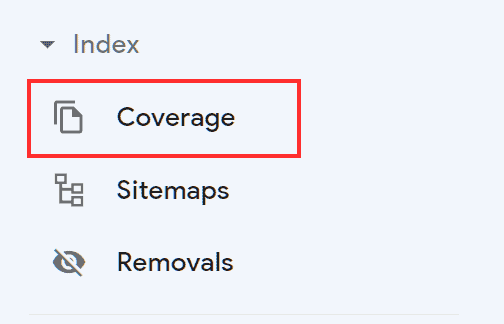
After adding your site to Search Console you need to make sure that Google has indexed your site pages correctly. To do this we can check the Index Coverage report, so click Index → Coverage to access it.
Of course if you have just added the site to Search Console you will have to wait a few days before you can review the data.
By examining this report you can figure out which pages have been indexed by Google. The report becomes useful if there are more than 500 pages on your site, if yours is a small site, however, it may be less useful to examine the report.

Each page examined by the crawler is associated with one of these four states: Error, Valid with Warning, Valid, Excluded. Let’s see what each of these states represents.
Error
Pages categorized as error are pages that have not been indexed. Errors can be due to:
- redirects (a series of redirects that results in a loop and prevents bots from reaching the page or a redirect that doesn’t work)
- server errors (typically a error 500)
- addresses blocked by the file robots.txt (the disallow directive in the robots file prevents scanning)
- error codes 4xx (error 404 page not found, error 403 unauthorized access and so on, you will have to examine each case and solve the error that prevents the bot from reaching the page).
Valid with warnings
In this case, the page was indexed, but problems were detected. One of the cases can be when the page has been indexed, but the robots.txt file blocks it. To fix this, you will need to remove the disallow directive for that page. To easily find URLs blocked by the robots.txt file you can use the Google tester.
After clicking on Open the Robots.txt File Tester you simply choose the site you want to test on by clicking on select a property, as seen here:

You will then be able to enter a specific URL to check if it is blocked or not.

Excluding
In this category the pages will be excluded from indexing. Be careful, in this case they are not skipped pages because of an error, but they should be those pages that we don’t want to be indexed.
A page might have duplicate content or an alternate version of a page identified as canonical. In this list we will also find the pages excluded because of the noindex tag.

In the list you are likely to also find some pages listed as scanned, but not indexed.

Pages of this type could include those related to tags or categories of your blog. These are all those pages that are not considered relevant and therefore automatically excluded from indexing.
If you notice a sudden increase in the number of excluded pages it is best to check for an error. For example, you may have accidentally entered a rule that prevents pages that are actually important from being indexed. Check the list of pages to make sure that there are only those that you do not want to be indexed.
Mobile usability report
As more and more searches are conducted from mobile devices every day, you should make sure that people visiting your site from smartphones or other mobile devices don’t experience navigation errors.
Remember that pages or sites with problems viewing or using from mobile devices may be penalized in search engine results.
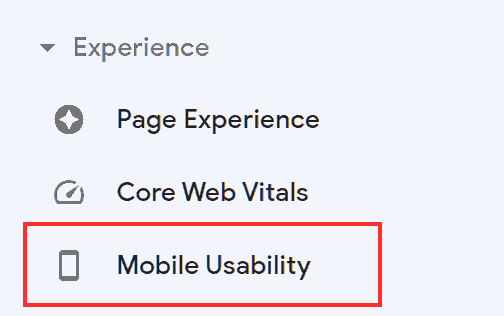
To access the report we click on Experience → Usability on mobile devices.
Again, the status code shows us at a glance whether there are any optimization problems. Pages are classified under the status error or valid.
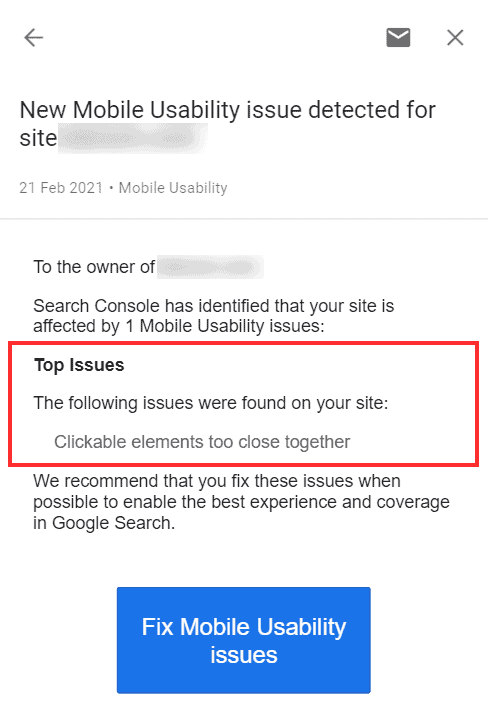
Examples of errors that can impair smartphone browsing that you might detect in this report are:
- text font is too small (and therefore poorly readable)
- clickable elements too close together
- content larger than the screen size.
In this case you will receive a warning like this one shown below, among the errors in the Usability on mobile devices section, or as in this case, as a communication from Search Console.
You can view Search Console messages about these types of errors by clicking on the bell icon in the top bar.

Site performance report
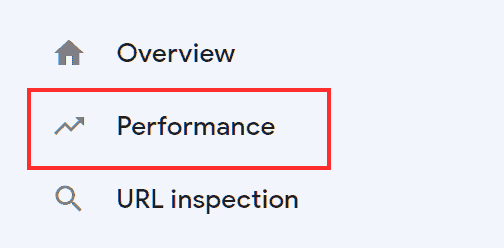
In addition to identifying the presence of errors in pages or usability from mobile devices, Google Search Console allows us to monitor the performance of our site. To do this, we simply click on Performance from the side menu on the left, as seen here:
Note that the yield panel replaces the section that used to be called Research Analysis.
The metrics we can consult refer to data from Google searches and show us the performance of our site over time. In particular, we are given information about the number of clicks and impressions of the links on our site, the CTR (a percentage value that represents the ratio between clicks and impressions) and the average position of the site.
By default the Search Type is set to web, but you can also see search data for images, videos or news. Just click on the Search Type button and then select the option you want to see.

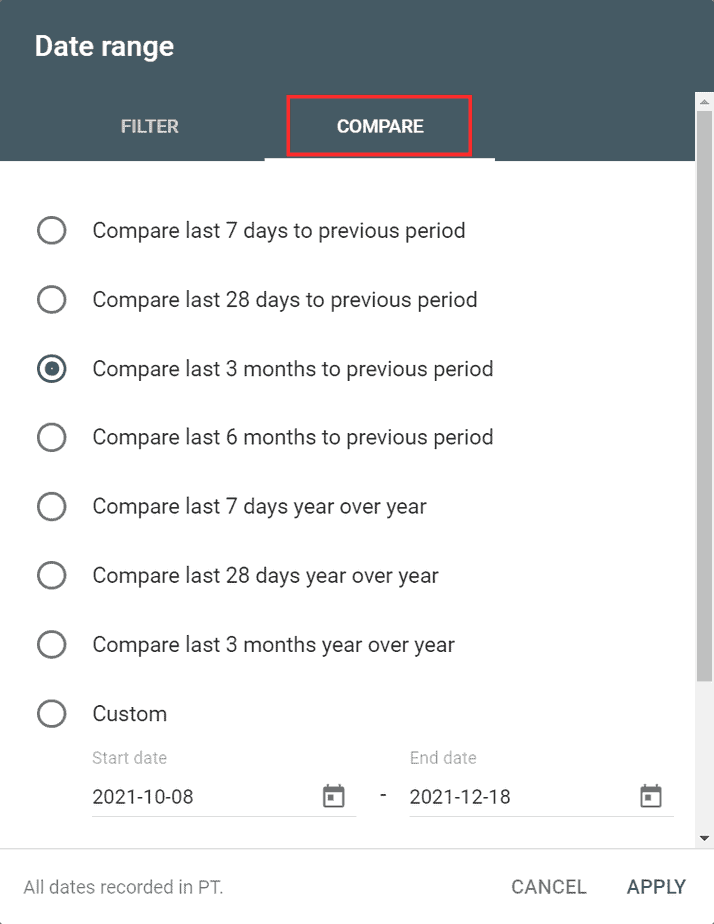
Filter metrics by date
By clicking on the date we can choose the time interval to be examined and then choose whether to show the chart of last week, last month, up to the last 16 months, or even choose a custom date interval.

If we click on the Compare tab, however, we can get a comparison of the data with another period we specify, or make a comparison between years.
Use the other filters
Next to the date we see the New button that allows us to set a new filter.

Thanks to it we can set other filters that allow us to analyze the searches made by users and get useful information to improve the performance of the site. Let’s see what the different filters are for.
Query

The option allows us to set a filter by keyword, displaying the data of searches made for a given keyword.
Immediately below the graph with the number of clicks, impressions, ctr and average position, we can find a second panel where the most frequent queries are shown. If we click on one of them, the filter will be added directly.
To delete a filter, just click on the x-shaped icon.

After selecting a keyword that our site ranks for, we can identify the pages that allowed us to rank for that keyword by clicking on the pages tab, as seen below.

This also allows us to avoid keyword cannibalism. This happens when multiple pages (e.g. multiple posts) try to rank for the same keyword.
To avoid this you could combine the content of the different pages into a more comprehensive one, or change one of them so that it tries to rank for a different keyword.
Pages
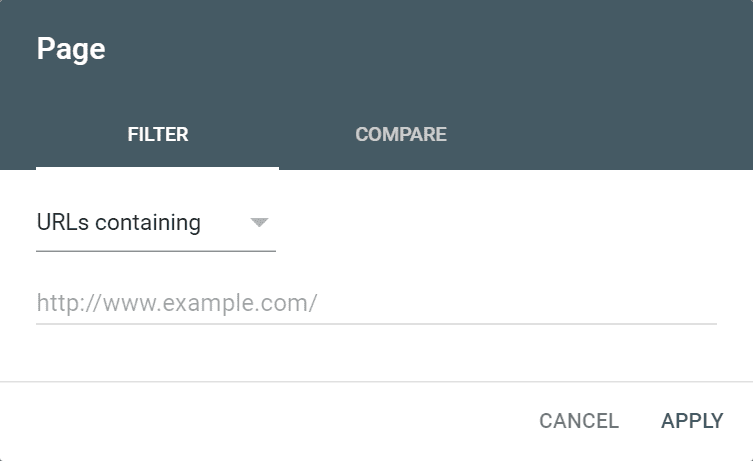
With this filter we can enter the address of a specific page and see what keywords it ranks for. To add the filter we can always click on the New button at the top and select Page from the options.
After entering the URL of the page we want to review we will get a list of the keywords the page ranks for.
This filter allows us to focus on the performance of the page as a whole and not on the individual keyword.
Checking the keywords for which our page already ranks also allows us to improve our content. We can, in fact, use keywords to deepen an aspect of the topic we have covered and make our content even more complete.
To do this, it can be helpful to sort the keywords by position by clicking on the position filter as I show you in this screenshot.

Remember that the most comprehensive content is the one that gets the best ranking results.
Country
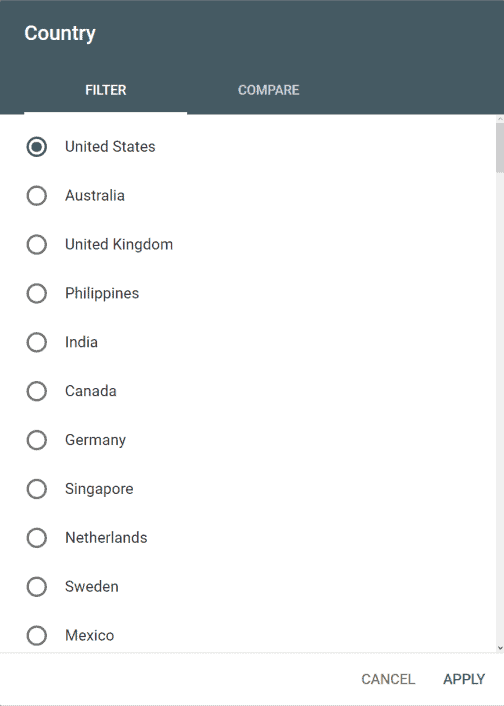
The filter allows you to see traffic data from a specific country. You can evaluate this data to see if you are receiving traffic from countries other than your own.
Of course in this case the language will be a determining factor, if you publish your content in Italian you will hardly receive traffic from visitors from other countries because of the language. In this case you might consider creating a WordPress multilingual site to expand the pool of visitors, for example by publishing content in English.
Devices
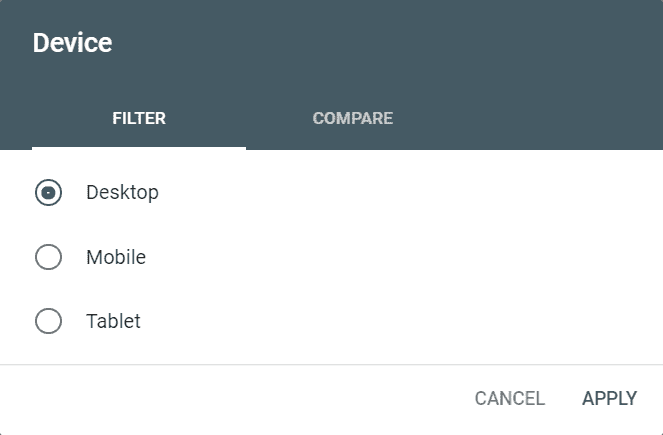
The device filter can be useful to view metrics of searches made with mobile devices. In addition to this it also allows us to compare traffic from the pc and mobile.
Click on new and choose the Device filter, then click on Compare and leave the default options (Desktop and Mobile Device) and click on apply to get the graph. If we want we can also compare Desktop and Tablet by changing the options.
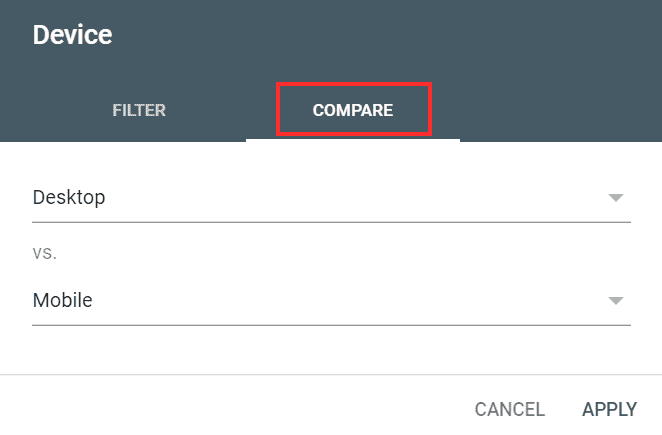
In addition to the global graph in the box below you will now see the results (clicks, CTR and impressions) broken down by the PC and smartphone and identify which content performs better on one device than the other.
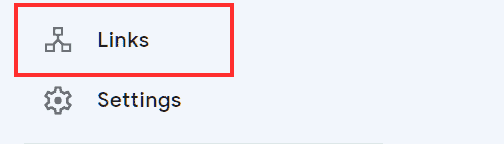
Link Analysis
From the menu we can access the section of the links to get an idea of the backlinks (the links of other sites that refer to yours) and to see the internal links.
Internal links
At the internal links section we can see the main linked pages, scroll down and click More to see them all. Remember to also take care of the internal links among the content on your site, because external links also contribute to the link juice.

We can click on Internal Links to sort the pages in ascending order and see which ones have fewer internal links.
By clicking on a single address on a page we can see all the addresses linked to that specific page. This points us in the right direction to improve our internal link building. If a page doesn’t have enough internal links, consider adding more.
External links
In this section you can review the links your site receives from other domains. You can use it to keep an eye on the quality of the backlinks you receive.
Remember that trying to manipulate the ranking of your pages by buying backlinks is not a practice that Google frowns upon. Aim to get quality backlinks if you don’t want to incur any penalties.
Conclusion
In this article, Google Search Console: the complete guide, we have seen how Search Console can prove to be a useful tool to allow webmasters to analyze site performance.
From a single platform you can check that the indexing of the pages is correct, send the sitemap of the site, get information on traffic and tell Google that you have changed domain.
Search Console also allows you to identify any errors in your site or problems navigating from mobile devices. Correcting these errors helps you improve the user experience and ensures better ranking results.
What do you think about Search Console? Was it helpful in identifying indexing or site usability issues? Let me know with a comments below!
Ready to build your WordPress site?
Try our service free for 14 days. No obligation, no credit card required.


