In this article, I’m going to delve into the topic on how to start a web hosting business.
You will see that the web hosting market is enormous and how you can reach potential customers.
By using a hosting reseller you can start this kind of business with an investment of a few hundred euros and without having any system knowledge. To get a better idea of the cost you can take a look at our hosting reseller comparison.
Let’s see in detail what this is all about.
Table of Contents
The current hosting market
I constantly hear that the web hosting market is a saturated market, that there are no possibilities to earn online in this field.
I believe that any market today is saturated, and in any market, if anyone ” knows how to do it” right, then he/she will be able to create a space and make his business profitable.
If you want to start a web hosting business you will have to, as in any other industry, be able to get a space.
What I like about this market is its size. Speaking of .it domains alone, almost 3.5 million have now been registered as of today. In addition to this, there are many other domains such as com, org, net, eu, info or other extensions.
We are talking about a large market, and we are talking only about the Italian market.

Moreover, this market is only online. That is to say that with a well-made site that is well optimized for SEO you can reach all your potential customers.
At this point, the question changes. It’s no longer: is the web hosting market saturated? But it becomes: how can I differentiate myself enough to carve out a slice in such a large and varied market?
What does it take to start a web hosting business?
If you want to start a web hosting business you actually don’t need much.
You don’t need to have a data center.
You need even less to have a server in your living room with a redundant line.
Strange but true: you won’t need any knowledge of systems.
Does this seem incredible to you?
Keep reading and you’ll see that what you need to start a web hosting business is much less than what you thought.
What do you need?
You need a website so that potential customers can find you, see your offerings and if they’re happy, consider you as their next provider.
You need a service to resell and to do that you need to start with the choice of hosting. The ideal is to start with a reseller hosting plan, as your needs grow you can switch to a VPS cloud hosting plan or a dedicated server. In this way, the initial investment is reduced and then you can deal with the cost of a cloud plan or the cost of a dedicated server when your business grows.
You need a system that allows you to automate orders, billing, payments, and helps you manage support tickets.
We’ll take a look at these solutions in a moment.
Create a web hosting site
The site will be your business card. Without a site, you can’t make yourself known and expect to find clients.
My advice is to create a site using WordPress, the most used CMS at the moment for creating websites.
If you have experience with other CMSs, by all means, you can use another CMS without any problems.
The real challenge will be bringing visitors to the site and making it known, but that’s not the purpose of this guide.
There are some sections that cannot be missed in a web hosting site.
You’ll need to create the pricing tables, which you’ll be sending to the shopping cart with a direct link, which we’ll talk about in a moment.
You’ll need to create the privacy policy, terms and conditions, and an SLA for your customers.
That’s the easy part, now comes the fun part…
Use account hosting reseller
As I said, you don’t need to have any knowledge of systems engineering to start such a business. What you need is a user knowledge (preferably advanced) of cPanel and a desire to learn.
You can imagine the hosting reseller as shared hosting. We at SupportHost will take care of the server, you will take care of the site. In this case the websites.
The particularity of reseller hosting is precisely the fact that you can resell the hosting. You can create packages according to your needs, and then create cPanel accounts for your customers. All this is done through a control panel called WHM.
Basically, the WHM (Web Host Manager) panel allows you to create and manage your clients’ cPanel accounts.
Read more about what reseller hosting is.
How to support your clients
You will be the one who has to give support to your customers. There are different levels of support.
For example, if a customer contacts you and asks how to create a database, you can simply explain how to do it from cPanel.
If, on the other hand, there is a problem on the server that you don’t know how to solve (for example, your customer writes to you that the site is offline) you can simply open a ticket on SupportHost to receive the solution to the problem.
In other words, you can answer the simplest requests as you prefer, while you act as a mediator for those requests that you don’t know or can’t solve.
Your customers will never come into contact with SupportHost, and they will never know that you are a reseller.
Once you’ve clarified the basic points about how this type of service works, let’s see how to use it. In order to follow this guide, it might be useful to get a hosting reseller free trial for 14 days.
Accessing the WHM panel
So far in this article, How to start a web hosting business, we have seen that the WHM panel is the heart of reseller hosting, the panel from where we manage all the clients.
After you purchase a reseller hosting plan you will receive an activation email that includes your login details and login link.
Each activated reseller account includes the main cPanel account, which having reseller permissions also has WHM access. With the same data (username and password) you can access the cPanel and the WHM panel.
To access the WHM panel you can use one of these two links:
dominio.it/whm
dominio.it:2087
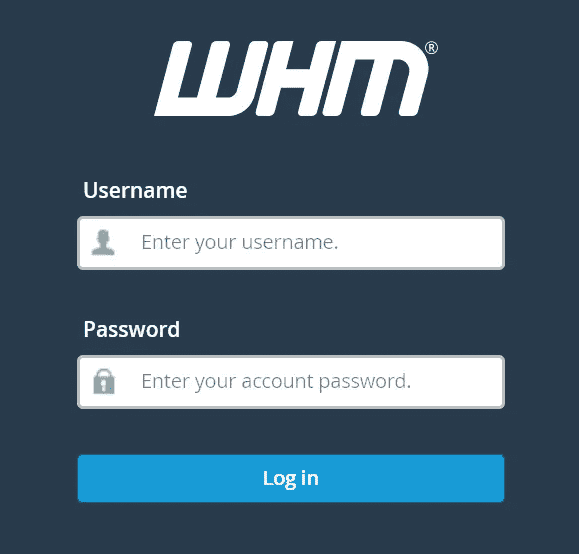
Once logged in we can start with package creation.
Create a package on WHM
The very first step if we want to start a web hosting business is to create a set of packages for our users.
If for example, you check our WordPress 1 hosting plan you will see that we offer 10GB of disk space and unlimited monthly traffic.
To create a web hosting package we look for “add a package” in the sidebar on the left.
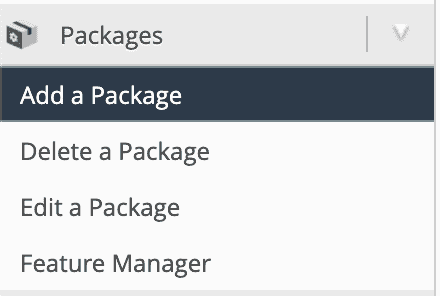
Then we fill in the required fields based on the type of package we want to create.
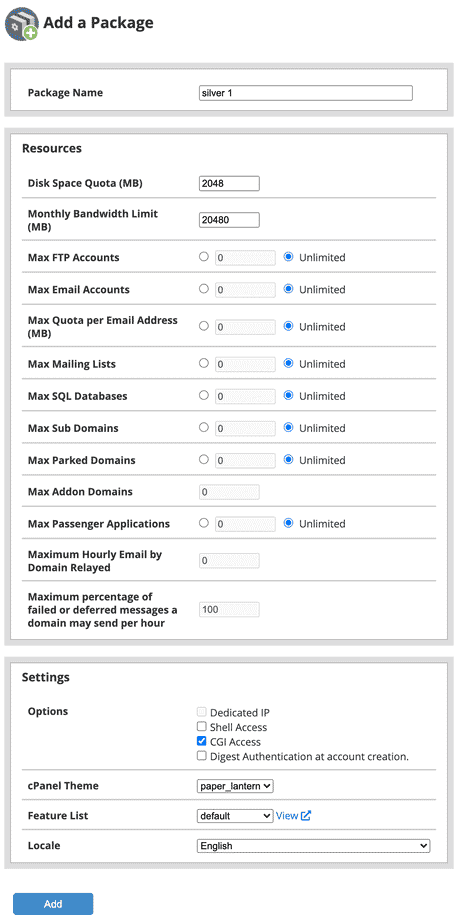
Let’s decide the name of the package and let’s set the required limits according to the type of package we want to offer to our customers.
The first section is self-explanatory, it doesn’t need any further comments.
In the second section, we can decide on a few settings.
Resellers cannot associate a dedicated IP to an account, they have to buy the IP from us and then ask us which account to associate it to.
If you check the “Shell Access” section, you give your customer the possibility to connect via SSH.
“Digest Authentication at account creation” is used to enable authentication for web disk access, this setting can be left unchecked.
In the next option, you can choose the theme, the default language and the feature list, which we will see in the next section.
Set the feature list
From the left sidebar let’s click on “Feature Manager”.
From here we can create a new list, edit or delete an existing list:

This allows us to choose which sections of the cPanel to show to our clients. For example, if you want to create a plan that involves only the use of email you can disable most of the features and show your customer only those related to email.
In this way, you offer them a panel with fewer features, and thus easier to use.
Generally speaking, if you want to offer a hosting package you should leave all, or almost all, options enabled.
Now that we have the packages set up, how can we automate hosting management?
Use a billing system
If we want to create a business worthy of the name, we need to automate the main operations.
A customer comes to our site, sees our pricing table and decides to buy one of our services.
He clicks on the order button and is sent to the order page, from where he can check if the domain is available (or if he already has a domain he can choose to transfer it) and choose any additional options for his hosting account.
When the configuration is complete you will see a summary of your cart and the option to pay.
Once the payment is received create the account automatically, or leave the order pending and activate it manually after an administrator check. Or check the order automatically through an anti-fraud system.
Once the order is activated, manually or automatically, the system must automatically create the cPanel account for the customer and send the activation email.
In addition, to better manage your web hosting service you should have an integrated ticket system that allows you to manage support requests, even having the customer history in front of you.
You have all this and much more with WHMCS.
This is WHMCS
There are several billing systems for hosting, but WHMCS is the most used and considered the best. Since it’s a professional software it has some licensing costs, but it’s money well spent.
Years ago I had found open-source hosting billing systems, but I didn’t even try them after reading mostly negative opinions.
WHMCS (WHM Complete Solution) allows you to manage your clients, payments, tickets, billing, etc.
The initial setup of WHMCS
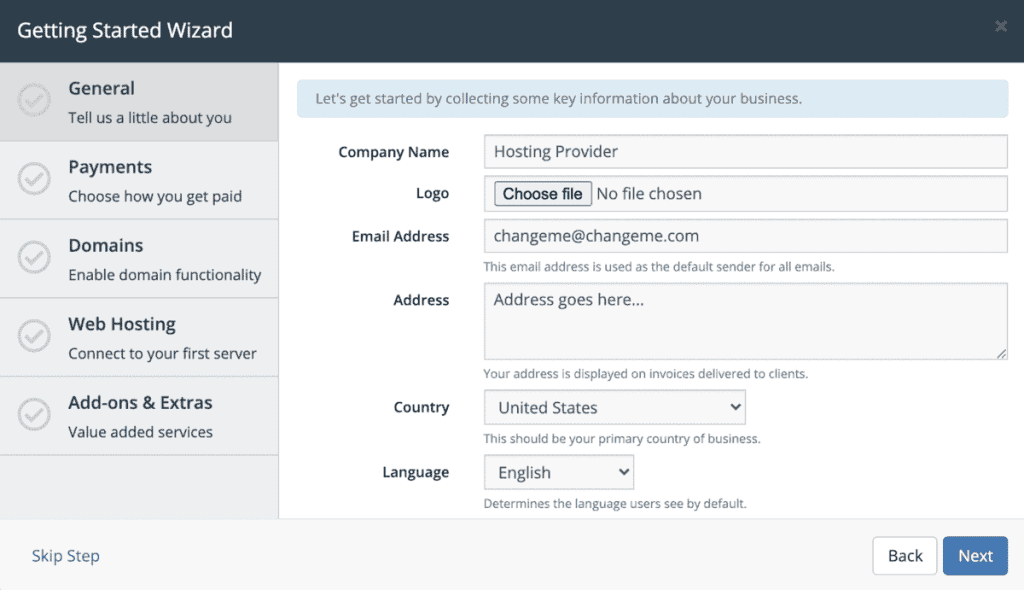
As soon as you install WHMCS you enter a configuration wizard, if it’s your first time using WHMCS I suggest you follow the steps.
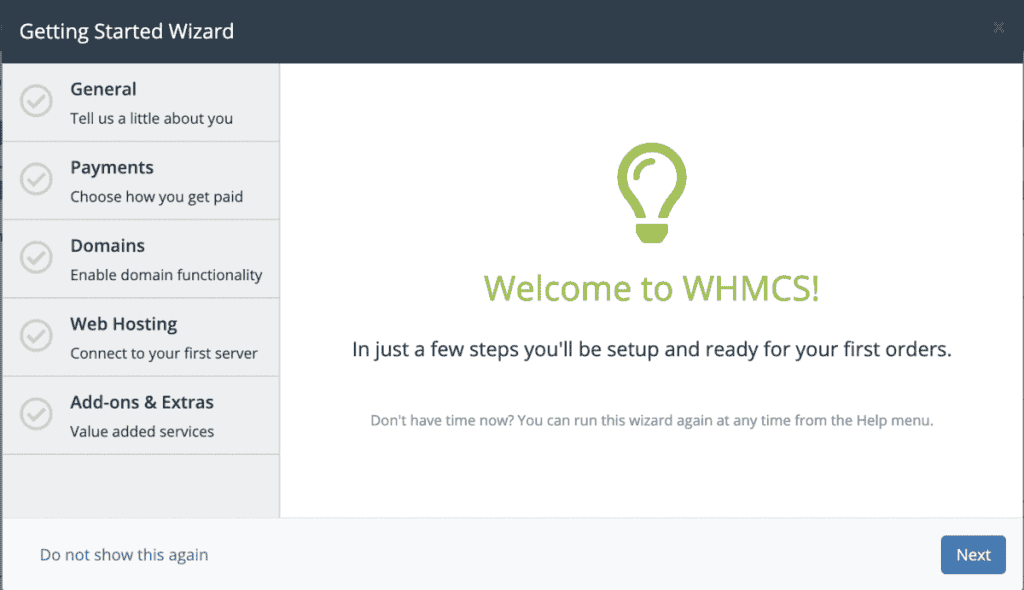
These steps will get you started in the right direction for setting up your web hosting business.
In the first part we are asked for the data of our web hosting business: name, logo, address, where our company is based and the language we want to use for the customer area (note that WHMCS only has English for the admin area).
If you don’t have some of these data you can put some fictional data or leave it blank, you can change these settings at any time from WHMCS settings.
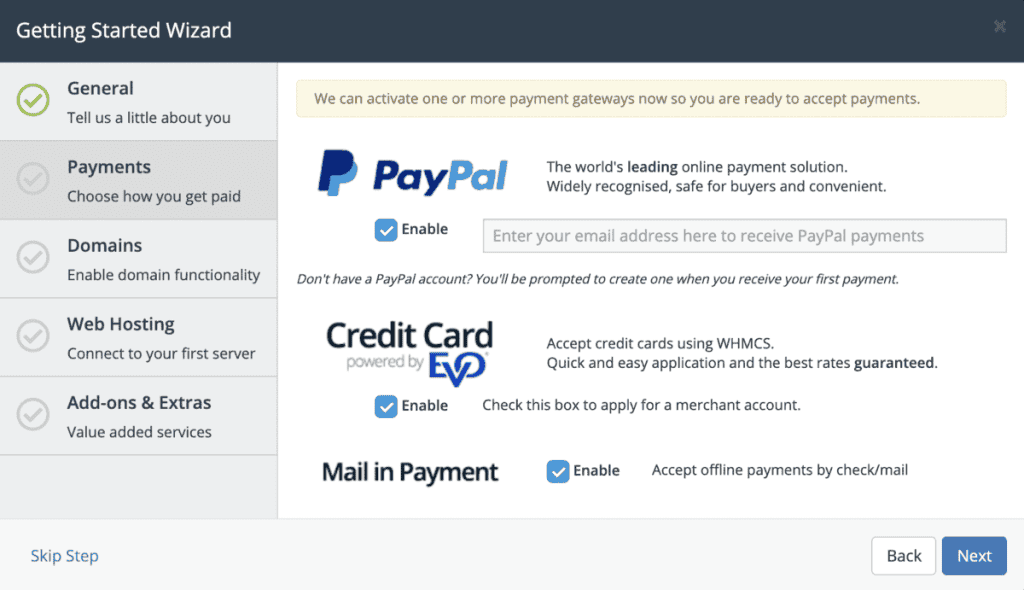
In the next step, you are asked to enter the payment information, even these can be changed later, for the moment I recommend you to use only PayPal.
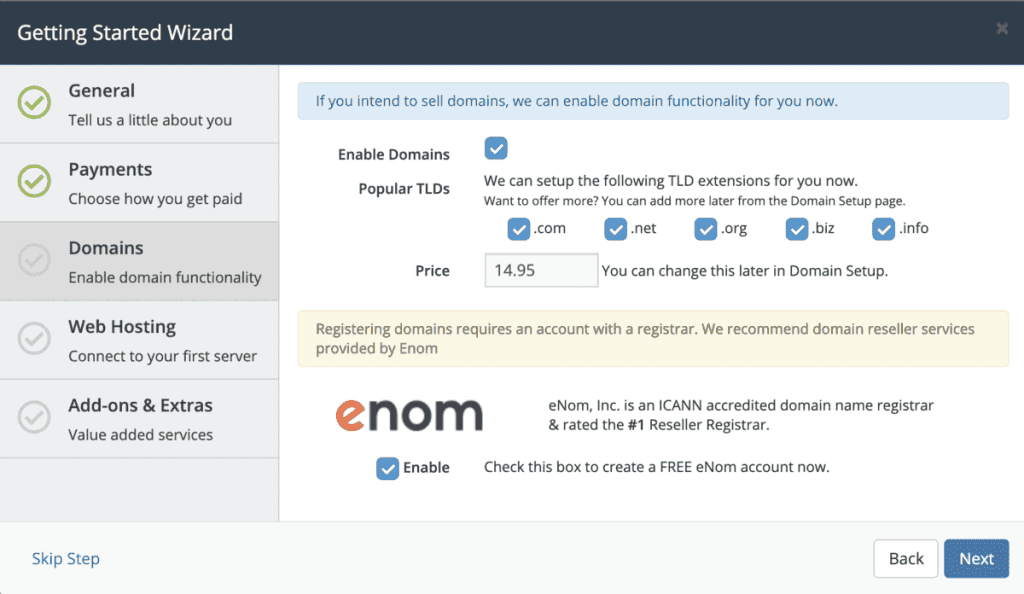
Continuing with the configuration of the billing system for our web hosting business, WHMCS asks us to set the price of the main domain extensions.
WHMCS offers several modules for domain resale, so you can manage domains entirely from the admin area and customer area. Moreover, you can give complete autonomy to your customers (and to your system administrators in the future) to manage the domains, without having to go to the registrar’s panel every time to modify them manually.
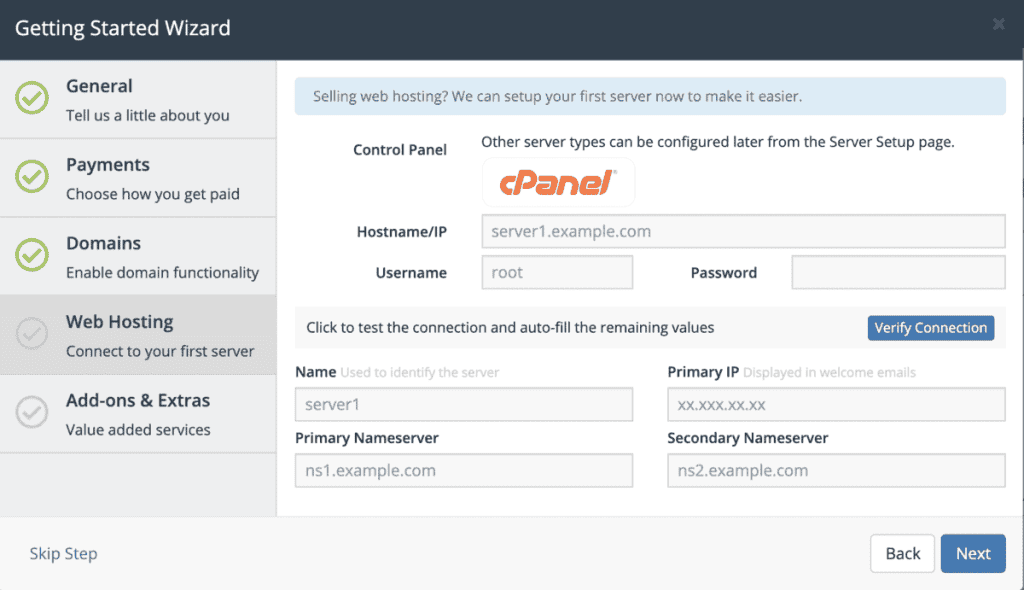
The next step is to add your web hosting reseller account on WHMCS so that the billing system can communicate with WHM to create cPanel accounts every time you receive an order.
You will find all the required data on this screen in the activation email, all you have to do is fill in the fields, verify the connection and continue.
In the last step, WHMCS asks you if in addition to reselling web hosting you want to resell the products of their partners. The choice depends on you and what direction you want your business to take.
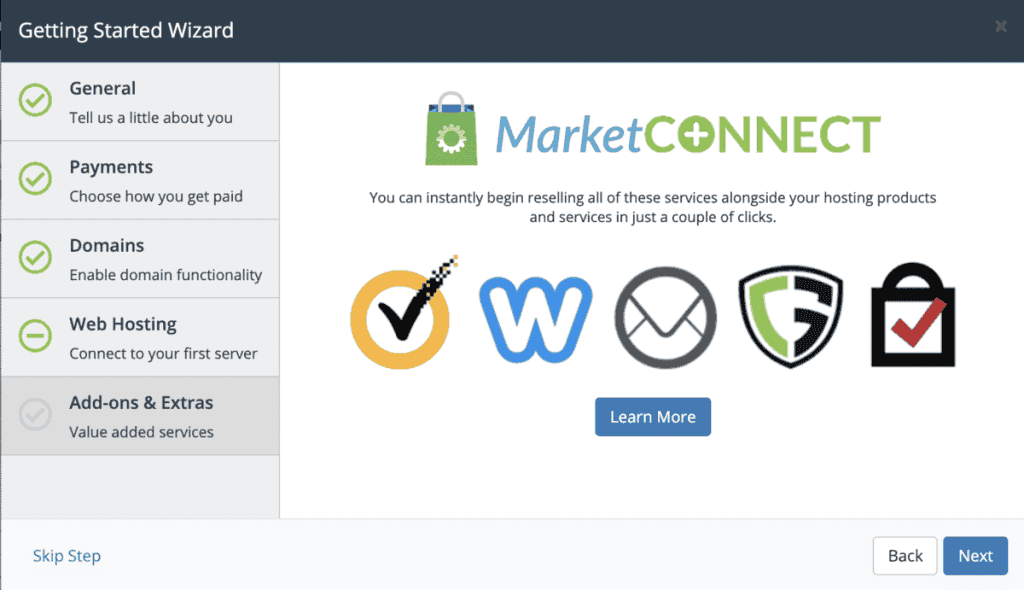
At this point the initial configuration is complete.
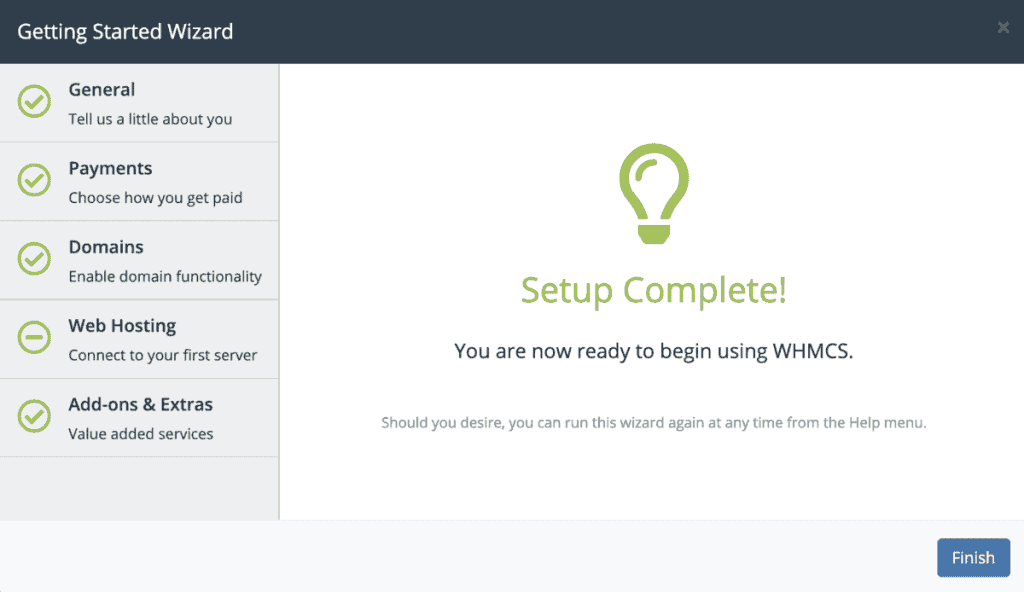
Now we need to create our products, then we’ll be ready to go with our web hosting business.
Create web hosting packages on WHMCS
At this point, we are almost ready to go, but we need to create the products.
In the top right corner click on settings:
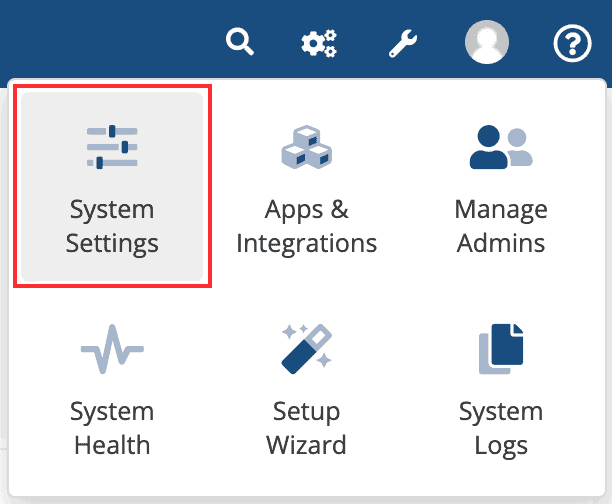
Let’s click on “Products/Services”, then on “Create a new Group”.
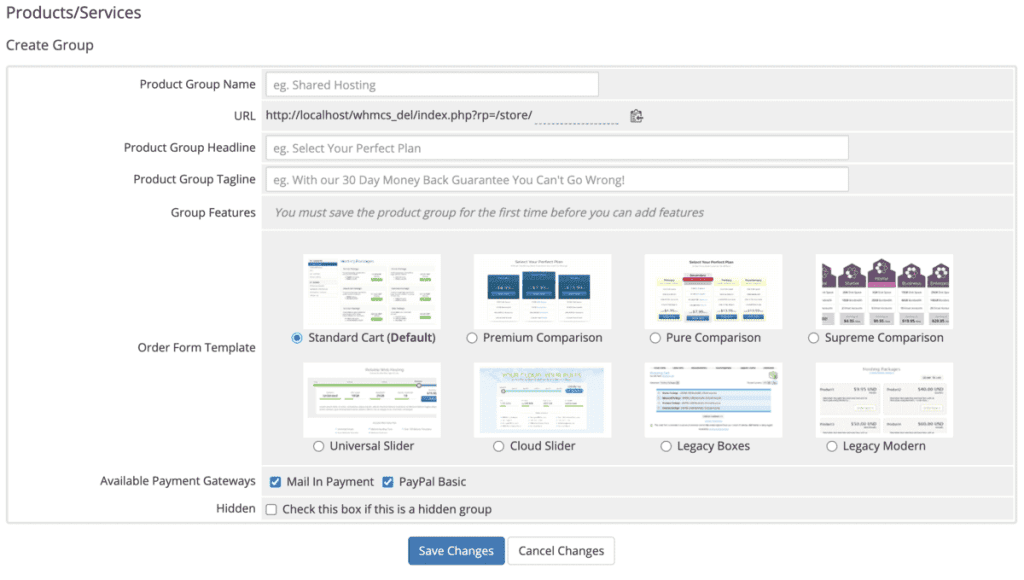
We’ll give our group the name “Shared Hosting”, choose a theme for the group, a payment method and, if the theme provides for it, we can set a title and description.
Now we can create our first product. Click on “Create a new product” to create your first web hosting plan.
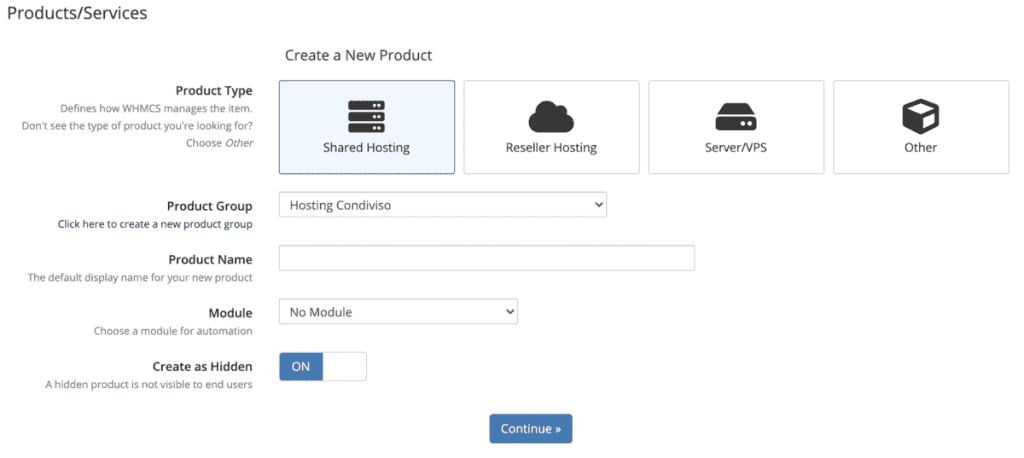
We choose the type of product, in our case let’s choose “Shared hosting”, let’s give a name to the product (for example Silver 1).
Select the cPanel module and turn off “Create as hidden”.
On the next screen, we set a description for the product. Note that you can use some HTML tags, and you can also use a:
Disk space: 2GB
Traffic: Unlimited
To show a pricing table with some shopping carts.
We click on the tab “Pricing” we select recurring, check the payment periods we want to activate and save.

Now we go to tab “Module Settings” and choose a package from the list, in our example silver 1.
Then we set it to activate the plan automatically as soon as the first payment is received, or when you accept a pending order manually. It depends on your needs. Since we automatically check all orders for fraud we activate them automatically.
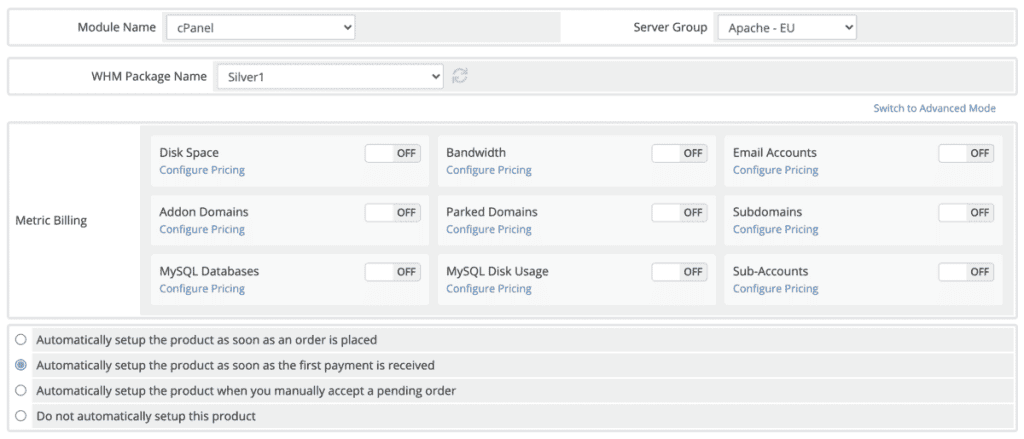
Our product is ready. All we have to do is take the link and insert it into our pricing table on the WordPress site.
Click on the “Links” tab and copy the first link: “Direct Shopping Cart Link”. When a user visits that link they will see the same page they see when trying to order a shared web hosting plan from our site.

Use the ticket system
As I mentioned earlier, a self-respecting web hosting company must have a ticket system. WHMCS helps you here as well.
We need to create a department called support to which we will send all emails to supporto@dominio.it.
Let’s go into settings again and select “Support departments”. You will see a department already created, click on the right icon to edit it.

From this screen, you can set a name (for example Support), a description and an email address.
We recommend checking the “Feedback request” option to request feedback from your customers after the ticket is closed.
You can choose to send emails to WHMCS via pipe or via pop.
To be on the safe side, I recommend installing WHMCS in a subdomain, as we did with my.supporthost.com, and creating a new cPanel account for the subdomain. This way if your WordPress site were to be hacked they would not be able to gain access to WHMCS and thus to all of your clients’ data.
If you install WHMCS for your web hosting business in this way you can’t use pipe: you can only pipe an email within the same cPanel account, and you’ll have to use pop.
That is WHMCS downloads emails via pop. To make it work properly, you’ll have to set up your mailbox access data correctly.
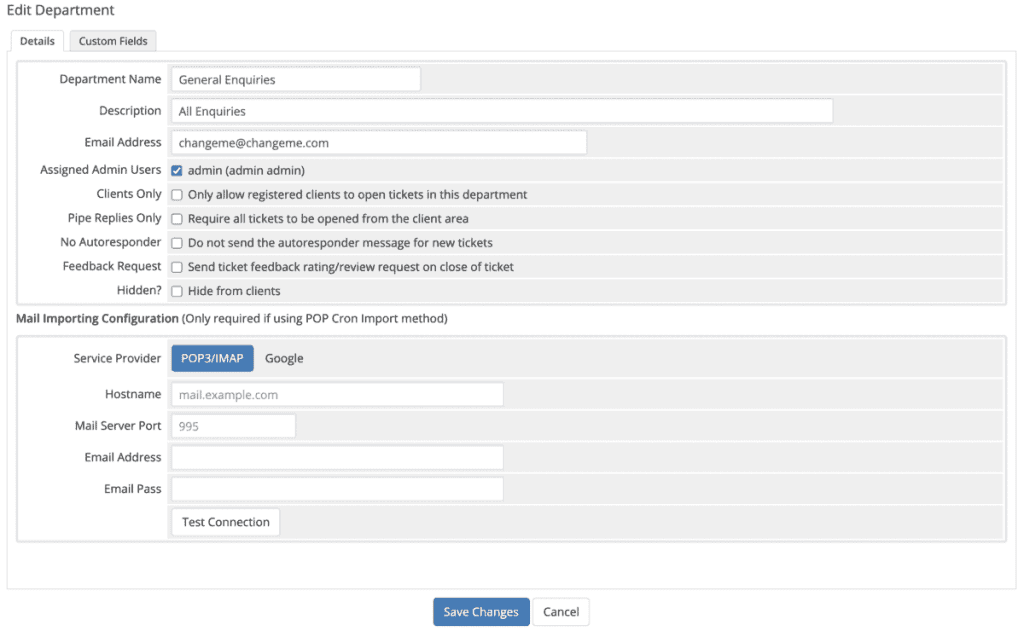
Now you have a department up and running to support your customers.
Conclusion
As you may have guessed in this article, how to start a web hosting business, despite its length I’ve only been able to touch the surface of what you need to do and what’s possible.
If you want to create a successful web hosting business I’m sure this guide won’t be sufficient, unless you already have a very good knowledge of cPanel/WHM and WHMCS.
The cPanel and WHMCS documentation will be your best friends for a while and you’ll be spending days with your first setups, but I’m sure this guide will allow you to take your first steps in the right direction and then start figuring out the details on your own.
Web hosting, and computer science in general, is a fascinating world and if you’re passionate about it you can learn something new every day.


Leave a Reply