
Do you want to learn how to use Oxygen Builder with WordPress to create your site?
With this easy to use plugin you can customize the look of your site easily.
Let’s start by looking at how the plugin works, what differentiates it from other page builders, and what the licensing prices are.
In this article Oxygen Builder: the definitive guide, we will discover how to use the plugin.
Table of Contents

What is Oxygen Builder
Oxygen Builder is a visual site builder for WordPress.
Through this plugin you can create websites without having programming knowledge and without having to write code. The creation of the site, in fact, is based on an editor that allows us to see the changes in real time.
Among the main features there is an editor that supports drag and drop. This means that you can move elements within the page simply by dragging and dropping them. Moreover, it is also possible to set the space between the elements by dragging & dropping.
Oxygen Builder vs Elementor
It is important to remember that a site builder, such as Oxygen Builder, allows us to create every part of the site. Specifically, we can create templates and modify every component of the site: header, footer, menu and so on.
Page builders, such as Elementor, on the other hand, are specifically designed to customize the structure of pages.
In the case of Elementor, to create the other elements of the site like the header and footer you have to use the Theme Builder which is available only with the Pro version of the plugin. To learn more about the features of this page builder and learn how to use it, check out our guide on Elementor.
With Oxygen do I need to use a theme?
With Oxygen Builder you don’t need a theme, because by activating the plugin, the internal WordPress themes will be deactivated. You will be able to manage the layout and style of your site directly through the plugin.

Oxygen Builder: pricing and licensing
Oxygen Builder is a paid WordPress plugin. You can try the plugin features by using the demo provided by the official website.
There are different licenses: Basic, WooCommerce, Agency and Ultimate.
Currently, the regular license fees are as follows:
- Basic at $129;
- WooCommerce at $199 (now discounted to $169);
- Agency at $279 (now discounted to $199);
- Ultimate at $349 (now discounted to $229).

In all cases, updates, lifetime support and unlimited installations are always included.
This means that with one license you can use the plugin on as many sites as you want. If you are a web agency or developer you can use Oxygen to create client sites, without individual clients having to purchase a license.
The licenses are differentiated by additional features. For example, with the WooCommerce license you also get WooCommerce integration and can customize the appearance of your ecommerce.
The Agency license also includes the builder for Gutenberg which allows you to create custom blocks and then use them from the WordPress editor.
With the Ultimate license you also get lifetime access to the Composite Elements library of ready-to-use elements.
How to install Oxygen Builder on WordPress
Oxygen Builder installs like any other WordPress plugin.
The prerequisite is to already have a WordPress site. If you’re still looking for hosting, take a look at our WordPress hosting plans or activate a no obligation trial with our free hosting.
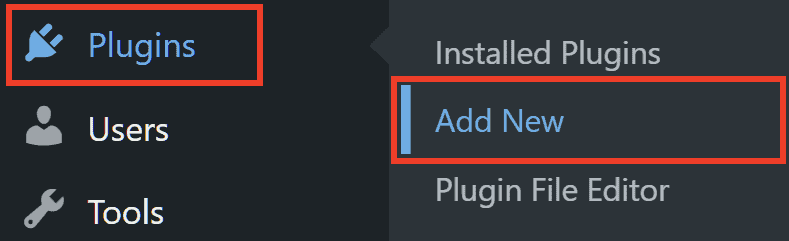
If you’re already familiar with WordPress, you’ll know that plugins can be installed in several ways. Free plugins can be installed directly from the dashboard by clicking Plugins > Add New and then searching for the plugin in the directory.
From this same section we can also upload compressed plugin files.
This second option is exactly the one that allows us to install the premium plugins that we purchase and of which we are provided with the .zip file.
Installing Oxygen on WordPress
Click on Plugin – > Add New and then click on the Upload Plugin button.

Drag and drop the .zip file into the highlighted area to load it and then click Install Now.

After installing Oxygen Builder, we will see a warning like this and we can activate it by clicking on Activate plugin.

You will be asked if you want to start from an “empty” installation or if you want to load a site ready to customize. The second option is suitable for those who are starting out, because it allows you to start from a base.
If you want to start from the easiest option choose Default install, if you want to start from scratch choose Blank Install.

For the purposes of this guide we will use a basic site, so let’s click Default Install to continue.
The default option is to install the base site “Atomic” and import templates, stylesheets and pages. We can also choose another base site by clicking Browse Library.
Then click Confirm & install to continue.

Oxygen Activation
After installation we can activate the plugin by entering the license key that was provided with the purchase.
To do this simply click on Oxygen > Settings.
From this section we need to open the License tab and we can enter the key in the field shown in this screenshot. After that click on Save Oxygen License.

After entering the license, the valid status will appear next to the entered key.

How to use Oxygen Builder
In this section of the article, Oxygen Builder: the definitive guide, we will learn how to use Oxygen Builder step by step.
Let’s start with an overview of the visual editor and the main operations.
The Oxygen editor and basic operations
Oxygen Builder has a visual editor that allows us to create pages and edit them seeing the changes in real time.
In this section we will see how to access the visual editor and how to perform basic operations such as adding and managing elements.
Access the Oxygen Builder editor
There are several ways to access the Oxygen editor:
- from the WordPress editor;
- from the list of pages;
- from the front end.
Access Oxygen from the WordPress editor
First, we can create a new page (or even an article) and publish it.
If you’re still not familiar enough with the CMS, check out our WordPress tutorial for a step-by-step explanation on how to create pages, articles, and more.
After that simply click on the Edit with oxygen button.

Access Oxygen from the list of pages
If we have installed a basic site, we will already have sample pages.
In this case, from the list of Pages we simply have to click on Edit with Oxygen to edit a page.

In this way we can open the editor and add elements or edit those already present.
This is what the editor looks like when we go to edit a page that has already been created.

Access Oxygen from the front-end
If we are viewing the site from the front end and are already logged into WordPress, we can edit the page we are visiting by clicking Oxygen > Edit with Oxygen from the top bar.

Oxygen Builder: the editor structure
Before we see in practice how to add the elements and start building the pages of the site, let’s see what options there are in the editor.
Starting from the left in the upper bar we can find a series of buttons.

Add: allows us to add an element to the page.
Hide / Show: with this button we can show or hide the left sidebar where we are shown the options of the selected element or the list of elements that we can add to the page.
Structure: allows us to open the structure panel, which will be shown to the right of the screen. Structure shows us the hierarchy among the elements of the page. In the next sections of this article, Oxygen Builder: the definitive guide, we’ll take a deep look into how the panel looks like.
History / Undo / Redo: allow us to open the history and undo or restore changes. We will see in the next section how to do it.
Manage: allows us to access settings, style sheets and selectors.
Back to WP: From here we can go back to the WordPress back-end or front-end of the site.
Save: allows us to save the changes made.
Save or cancel changes
In the top bar of the Oxygen Builder editor we find these three elements: History, Undo and Redo that allow us to undo the changes we have made.

By clicking on Undo we can undo the last action, Redo repeats the undone action. Clicking on History opens a panel that shows us the history of the changes made in this session.

To save the changes on the page we simply have to click on the Save button.
Add an item
The Add button at the top left allows us to add new elements. By clicking on it, we can access all the elements that are ready, such as: icons, texts, titles and so on.

To add an item we simply have to click on it and it will be added directly to the page in the selected position.
For example, let’s add a header to our home page and edit the text.
First click on Add > Heading, to enter the heading.
Then to edit the text just double-click on the element and type the text.
In the screenshot below you can see the steps I just described.

When you edit a text element, you will see the bar shown above appear with the number 4 next to it.
From this bar we can quickly change the alignment and formatting. After making the changes we can click on Done or click elsewhere on the page (outside the element), to exit the edit.
Edit elements
Each element can be modified, let’s see how to do it with an example.
To edit an element with Oxygen we have to select it by clicking on it. For example, let’s see how to modify a type of button (text link).
Clicking on the item will open the left side menu, giving us a range of information.
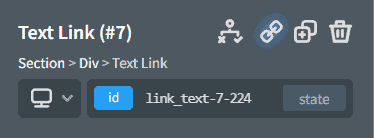
At first we see the name of the element: text link (#7).
Immediately below the name we find the hierarchy of the elements, in this case our button is contained in a div which is in turn included in a section. The whole hierarchy will be Section > Div > Text Link.
Each element is also distinguished by a unique id.
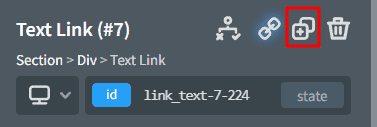
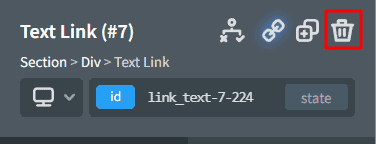
Next to the name we can see four buttons, from the left we find: Conditions settings, Link settings, Duplicate component and Remove component.
Conditions settings allows us to set conditions in which to show or hide that element.

Link settings allows us to edit the link, clicking it will open a new window from which we can enter the URL.

Duplicate component is used to duplicate the selected element.
Remove component allows us to delete the element.
For each element we have two tabs: Primary and Advanced.
In the Primary tab we find the main options, such as colors and font size.
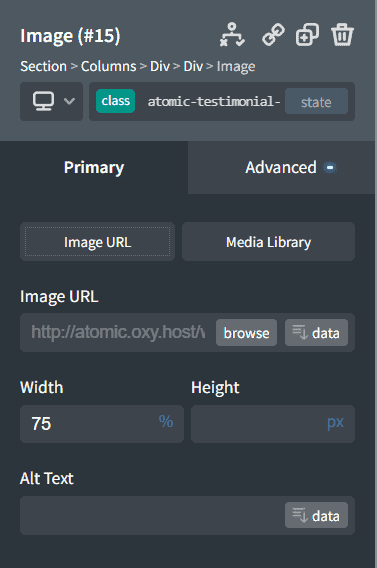
The options vary depending on the item, for example if we select an image in this tab we will see the image URL, size and alternative text.
The Advanced tab gives us access to more options regarding element size, background color, and layout. In the next sections of this Oxygen Builder tutorial, we’ll see what all the options are.

Navigate between elements
We can navigate between elements directly from the visual editor, the left sidebar or the Structure panel, let’s see how.
If we have selected an element that is part of a parent element we can click on the upwards arrow to move to the top element.
For example if we select the text link element and want to go to the top element we click on the arrow (1) shown in this screenshot.
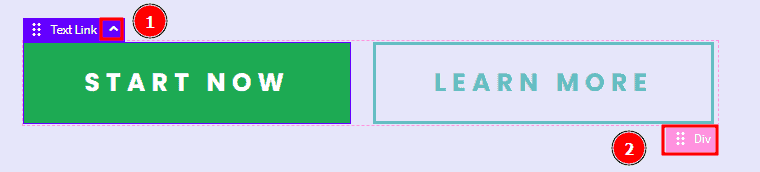
Alternatively we can click on Div as you see in the screenshot above (2).
In both cases, we’ll switch to the top element, in this case a div.
Another way to navigate between elements is to click on the element we want to select directly from the hierarchy that is shown to us under the name of an element in the sidebar.

In addition, to locate a specific element in the page we can click on the Structure button from the top bar. A panel will open where we will be shown the structure of the page with the hierarchy between the elements.

Move elements
Oxygen Builder editor supports drag and drop and all elements in the page can be moved by dragging them from one position to another.
Another way to move the elements is to use the Structure panel that we have just seen. Also in this case we just need to drag the elements to change their position.
Change the spacing between elements
With Oxygen we can modify the page structure and in particular the space between elements directly from the visual editor.
First we have to select the element we want to edit.
We can modify both the space outside the element, i.e. the margins, and the space inside the element, i.e. the padding.
Then hover the mouse near the outer edge of the element until we see a purple bar like the one shown in this screenshot.

All we have to do is drag the slider in order to change the size of the bar and increase or reduce the space between the different elements.
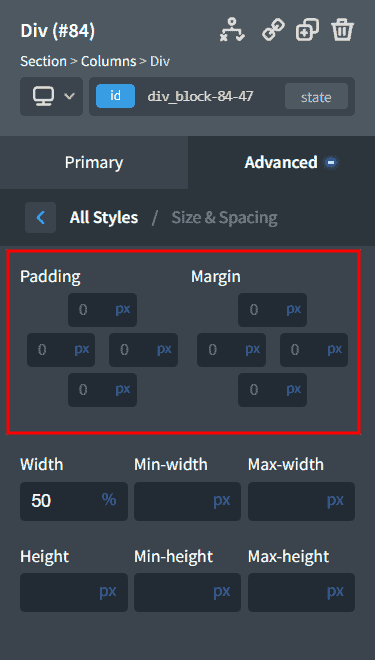
In addition to this we can also edit margins and padding from the Advanced > Size & Spacing tab.
The Oxygen editor: the layout
With Oxygen Builder we can create the page structure using three main elements: sections, columns and divs.
These elements will be containers for all other elements such as text, icons, buttons, images and so on.
Sections
The sections are the main container, inside which we can place all the other elements.
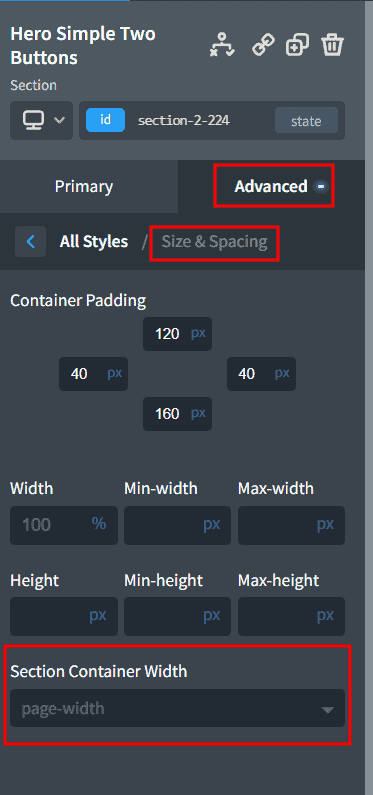
By default the sections are set to have a page-width size. We can also change them to have custom sizes or to be displayed in full screen.
To change the settings we just have to select the section and then open the tab Advanced > Size & Spacing > Section Container Width. From here through a dropdown menu we can change the choice on the size of the section.
Columns
Columns are a preset element that allows us to create a column layout from predefined ones or by modifying them.

Div
Divs are the containers that are used to group multiple elements within a column or section.
In this way we can change the alignment of some elements that are part of a section. Divs, in fact, also allow us to change the layout and create vertical or grid layouts in a section where a horizontal layout is used.
For example, if we create a column with a 50-50 layout, two divs will be created, each corresponding to half a column. The elements within each div can be arranged vertically or horizontally. To do this we simply select the preferred layout from the Primary > Layout child elements tab.

This below is an example of the left div where we have used a vertical layout and in right div where we’ve used a horizontal layout.

From the Layout child elements options we can choose whether to arrange the elements vertically, horizontally or in a grid.
We can then also set item alignment and spacing from the Horizontal and Vertical item alignment options.

The elements of Oxygen Builder
Oxygen has a collection of elements divided into categories: basic, helper, WordPress, library and reusable.
After seeing how to add an element, let’s do an overview of the main elements.
Basic
In this section there are these categories: container, text, link, visual and other.
Containers include sections, columns, and divs, the elements we saw earlier in detail in the layout section.
Text elements include titles (h1, h2, h3, etc.), text, and rich text, i.e. text that can be formatted through the WordPress editor.

Links include buttons, text with links, buttons with icons and so on.
Visual elements include images, videos, icons and lists with icons.
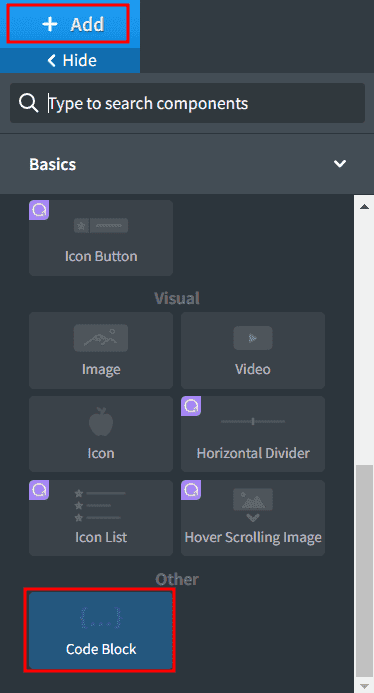
In the other section we can find the code block that allows us to embed JavaScript code, custom CSS and so on in the page.
Helper
In the helper list we can find compound or dynamic elements such as review boxes, progress bars, counters, indexes and sliders.

These are predefined elements that we can insert into pages and then customize.
WordPress
In this section we find menus, search bars, comment forms, the shortcode element that allows us to embed shortcodes and so on.
We’ll see later how to use some of these elements, such as the shortcode to embed a contact form.
Library
In the library we find ready-made elements such as entire sections of the site or pages already set up.
To add them just click on Add > Library > Design Sets.
Currently we can find 18 sets consisting of elements and sections of the site in different styles.
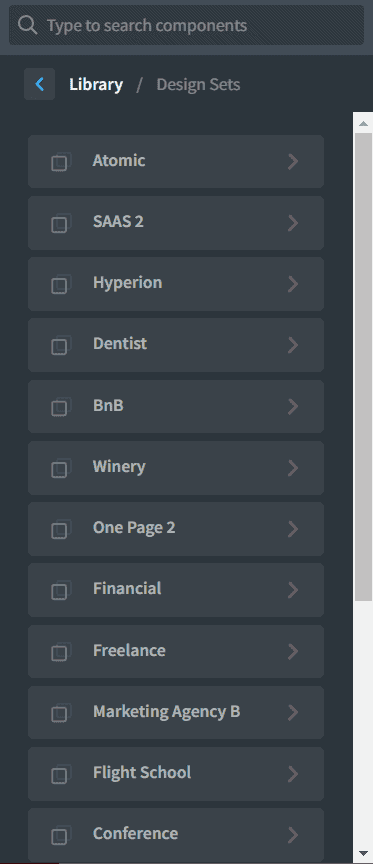
First we need to select a design and then click on Pages to see the ready-made pages available or on Sections & Elements to access the list of sections and elements.
These include headers, footers, showcases, headlines, sliders, call to action and so on.

Reusable
In this section we will find the items we have saved as reusable.
To add an item to this list we simply have to select the item and open the Structure panel.
After that we can click on the pencil icon and click on Make Re-Usable to save the item in the Reusable list.

We will be asked to enter a name for the item, after which we click Ok to save.
When adding a reusable element we have two options: single or editable.

If we add the element as single, any changes made to the reusable element will be reflected on the element added to the page.
If, on the other hand, we want the element in question to be unaffected when we modify the original model, we need to enter it as editable.
Element style options: advanced tab
As we have seen we can customize each element using the options on the primary and advanced tabs.
Let’s see what settings are available in the advanced tab:
- background
- size & spacing
- layout
- typography
- borders
- effects
- custom CSS
- JavaScript
- attributes
Background
From the Advanced > Background settings we can change all the settings on the element’s background.
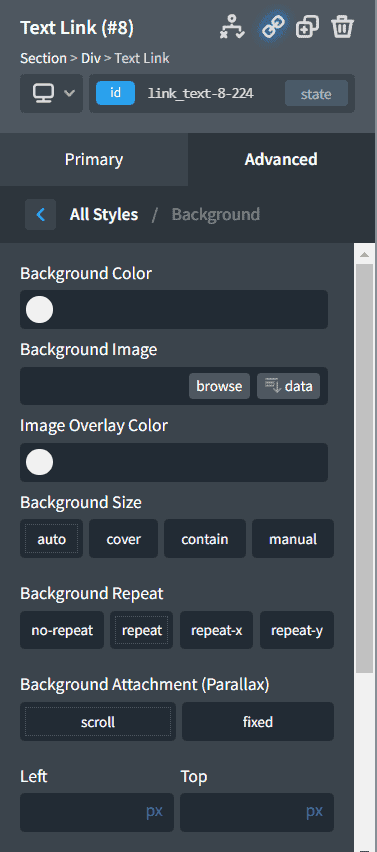
From here we can change the background color, use an image as the background of an element and change its appearance.
To change the background color just click on Background color and choose the color with the selector. Some colours will be suggested, in our case it’s the “atomic” style since we are working on a ready-made template.

In addition to selecting the color we can also change the opacity by regulating the bar shown in this screenshot.

To use an image as the background of an element we simply have to do so with the browse button from the Background Image section. We can choose an image from the WordPress media library or upload a new one.
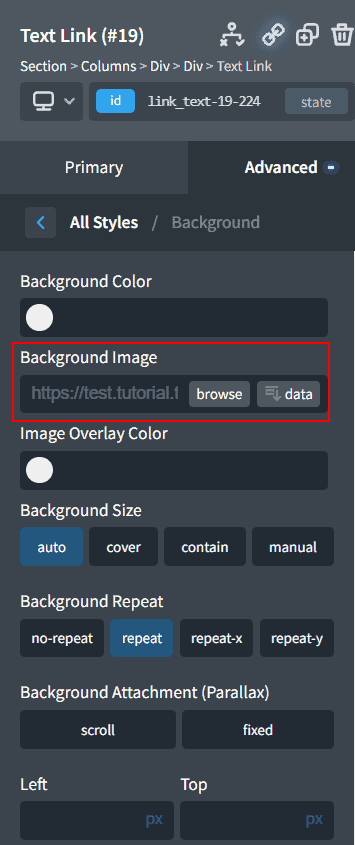
The next item, Image Overlay Color, allows us to apply a colored gradient, but also lighten or darken the background image.
Through Background size we can change the appearance of the image and scale it, we have several options, for example auto allows us to use the image in the original size.
Background Repeat allows us to create patterns by duplicating the image vertically (repeat-y), horizontally (repeat-x), in both directions (repeat). By default the image is not duplicated (no-repeat).
Size & Spacing
By clicking on Advanced > Size & Spacing settings, we can change padding and margins as well as the size of the elements.
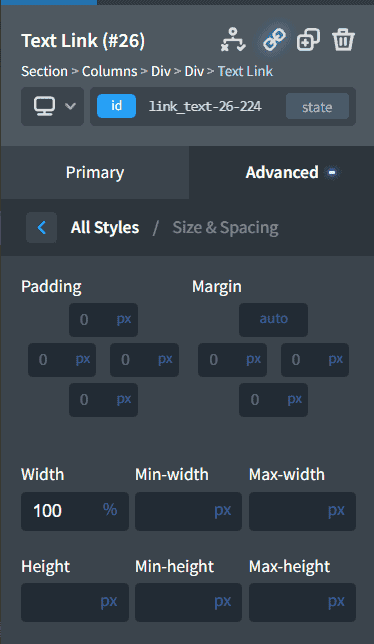
As we saw in the section Modifying spacing between elements, you can change padding and margins directly from the editor by dragging the purple bars that appear near the edge of the selected element.
From this section we can also change the size of the elements by setting a specific width or height, or maximum and minimum height or width.
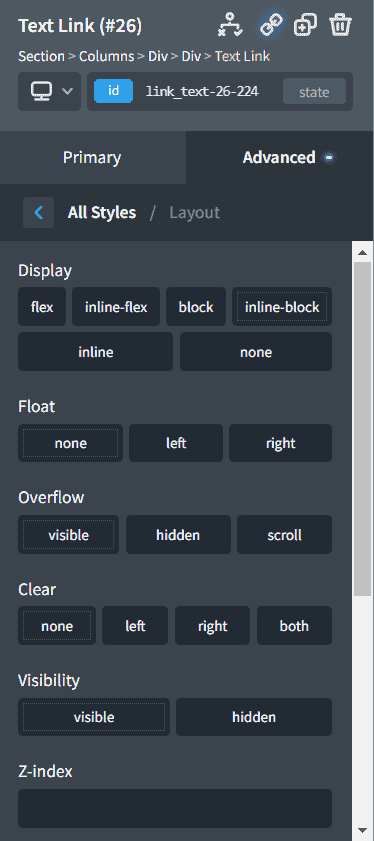
Layout
By clicking on Advanced > Layout section, we can change the options display, float, overflow, clear, visibility, z-index and position.
These options allow us to have more precise control over the placement of elements.
Typography
The options in Advanced > Typography allow us to change the style of the texts.
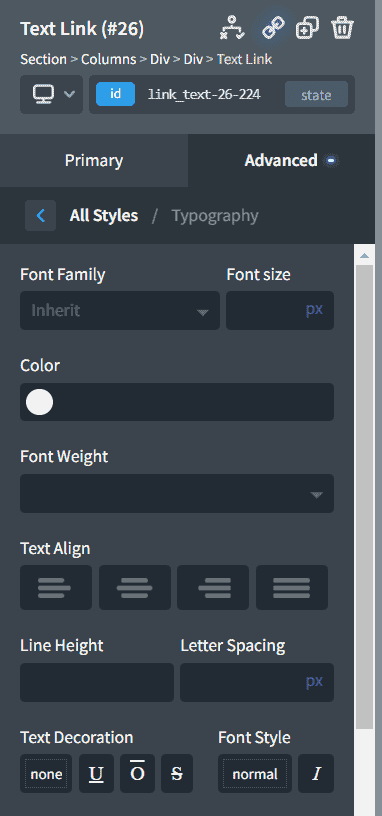
From here we can change the font used, size and weight.
We can change the color, text alignment, and spacing between characters, as well as change the text (case only, lower case only, or initial case).
Borders
The Advanced > Borders option is suitable for editing the borders of elements such as containers or buttons.
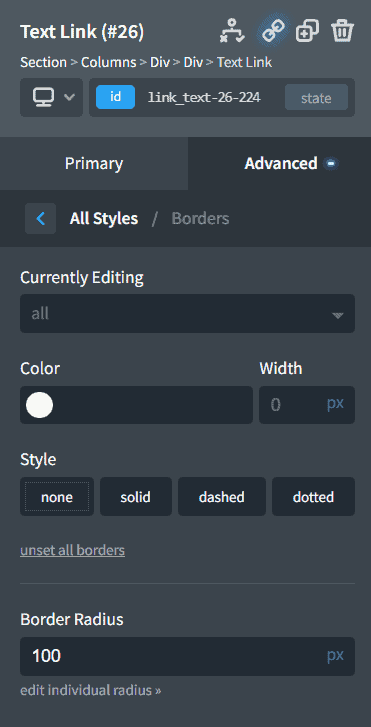
From here we can set the color, size and style of the borders, as well as the radius. Through the Border radius option we can, for example, make the buttons rounded.

By clicking on edit individual radius we can edit the radius of the corners separately, as in this example.

Effects
The Advanced > Effects section allows us to add animations and filters to the elements. Let’s see what options there are.
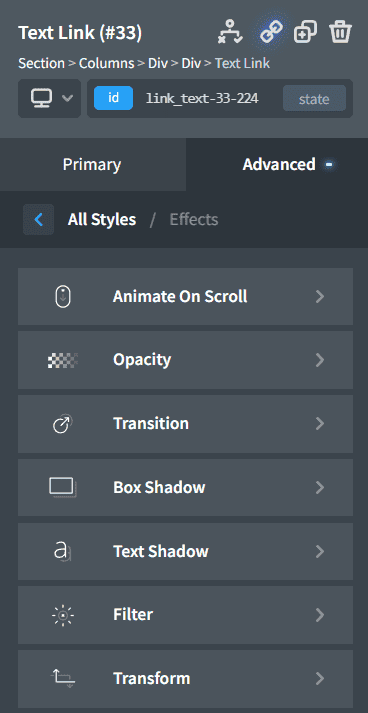
Animate on scroll: from here we can set different types of animation for the element and manage the duration and other settings.
Opacity: we can change the opacity of the elements, setting a value from 0 to 1.
Transition: This option allows us to create a transition between two CSS values.
Box shadow: from here we can apply a shadow inside or outside the element. We can define the color, the blur and the position of the shadow.
Text shadow: this option allows us to apply a shadow to the text, also in this case we can modify the positioning and the blur.
Filter: allows us to apply a filter to modify saturation, contrast, grayscale, invert colors and so on.
Transform: from here we can apply various modifications, such as scaling, rotating or moving elements.
Custom CSS, JavaScript and Code block
By clicking on Advanced > Custom CSS / JavaScript options, we can insert custom code to add new properties to the elements.
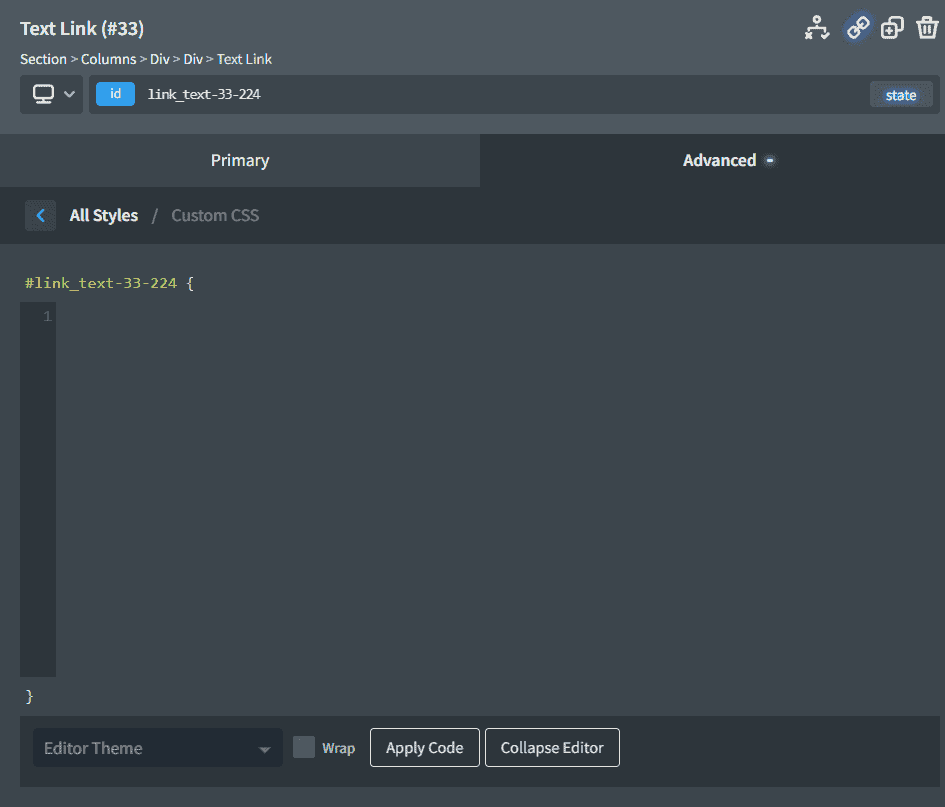
We can also place a “code” block within the page and add php, CSS or JavaScript code.
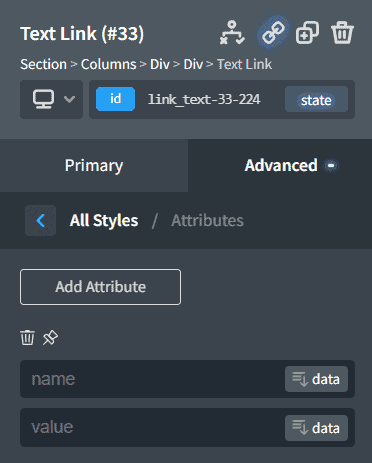
Attributes
From the Advanced > Attributes section we can add HTML attributes to elements.
Element style options: states
With Oxygen Builder we can manage states, i.e. pseudo-classes that modify the style of elements according to their state.
You can learn more about CSS pseudo-classes in the documentation for Mozilla developers.
For example, we can make changes when an element switches to the hover state. A common example is a button that changes color when we move over the mouse cursor.
To change the style based on the state, we have to select an element and click on State, then select which state we want to change, for example hover.

At this point we only need to make the changes that will be applied to that state.
For example if we want the background color of the button to change when the element is in the hover state we have to open the Advanced > Background tab and change the background color.
Create a template
Oxygen Builder allows us to create templates and use them as the basis for creating pages, blog posts and so on.
Let’s see how to create a template.
Create a new template
First from the WordPress dashboard click on Oxygen > Templates.
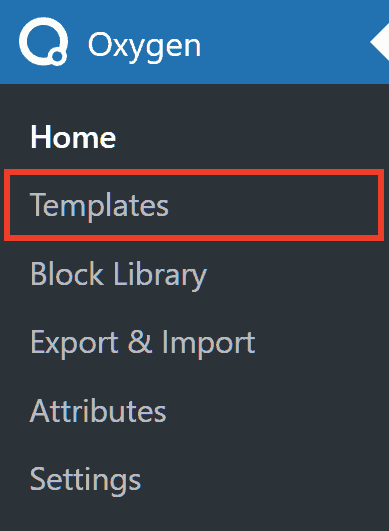
In this section we’ll find the templates and reusable elements we have created.
To create a new template click on Add New Template.

Enter a name for the template and click publish.

By scrolling down the page we can specify which sections of the site will be applied to this template.
From the section Where Does This Template Apply? we can choose whether to apply the template to articles, menus, pages, media and so on.
In our example we select Pages to create a template for the main pages. After changing the settings, we click on Update to validate the changes.

To create the template with Oxygen Builder editor click Edit with Oxygen.

Create the template structure with the editor
Let’s see for example how to create the template of the pages of our site.
For the purposes of this article, Oyxgen Buidler: the definitive guide, we’ll create a template where the header and footer are maintained on all pages, while the middle portion of the page will change from time to time.
First we can create the header or use one of the ready-made ones available in the library.
To do so, click on Add > Library > Designs Sets > Design Name > Sections & Elements > Headers.

Then we can modify the header we have chosen, for example by changing the logo or modifying the links of the menu elements.
Let’s take a look at a practical example, we added an existing header, changed the colors and the logo.

At this point we can edit the menu items that are text links.
To do this, we select an item, for example “home” and go to enter the home address in the URL field.

We can repeat the same operation for all menu items.
After finishing the changes to the header, we can add a new element: Inner Content.
Click on Add and search for inner content to add it.
This element will be editable in all the pages, in this way we can create the pages of our site keeping the other elements, but being able to modify only the central section.

All that is left is to add the footer. Again, we can use a ready-made element and then customize it.
We simply have to click on Add > Library > Designs Sets > Design Name > Sections & Elements > Footers.

Again, we can modify the footer in appearance and text, as in this example.

After completing our template, click on Save to save the changes.
Use templates with Oxygen
As we saw before when we create a template, we can choose to apply it directly to some sections of the site, for example to all pages.
We can create multiple templates that apply to pages. In this case we can manage which template will be applied by default thanks to the priority.
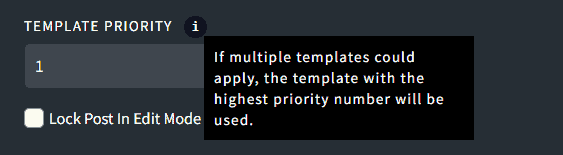
The template that has the highest number in this field will be used by default.
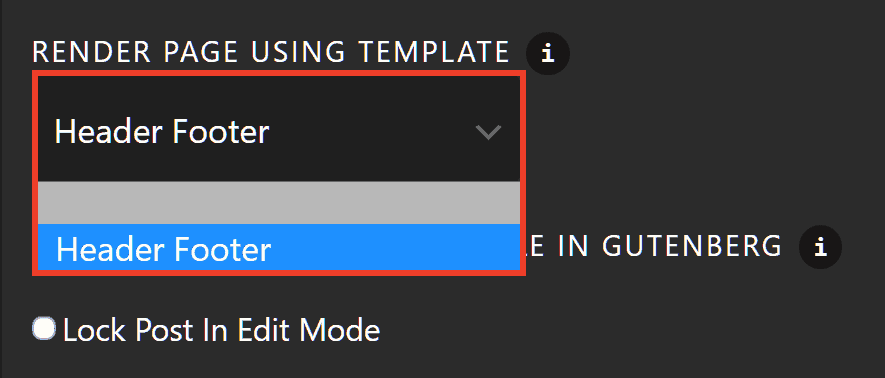
However, when we create a new page, we can also choose which template to apply. In this way we can use a specific template for a single page.
To do this we simply have to create a new page and choose from the Render Page Using Template drop-down menu which template to use.
Incorporate a shortcode
There are several cases where it may be necessary to embed a shortcode on the page to display elements created with a plugin.
For example Contact Form 7 allows us to create contact forms for WordPress and add them to the page via a shortcode.
To understand how to embed a shortcode, let’s create a contact page.
For th epurpose of this guide, we’ll use this example with Contact Form 7, but you can use the same process to embed shortcodes created by other plugins to embed event calendars, sliders, and so on.
In the case of Contact Form 7, we simply click on Contact > Contact Forms from the WordPress dashboard and then copy the shortcode corresponding to the form we want to embed.

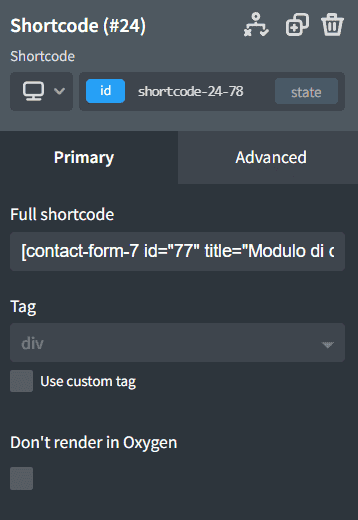
Let’s create a page for contacts and add the Shortcode element (Add > WordPress > Shortcode).
After that we paste the shortcode into the Full shortcode field as you can see in this example.
Again, we can place the shortcode element in a specific section of the site, as in this example where we used a column-like layout.

To customize the appearance of the contact form we can create a stylesheet by clicking on Manage > Stylesheets and add the CSS code.

Make pages responsive
It is important to make sure that the pages display correctly even on mobile devices.
To help us out, Oxygen Builder allows us to display pages according to how they will look on different screens.
When we open the default editor we are shown what the pages look like on all devices. Through the devices drop down menu, we can select devices by size and check the page preview.

In this way we can choose among the standard sizes. We can also modify the width of the preview by acting on the ruler that will appear at the bottom.

By selecting one of the devices, for example less than 768px we can make changes that will only be applied to that size and smaller.
Let’s look at some of the changes we can make.
Manage Columns
Columns in Oxygen Builder are responsive and change from landscape to portrait layout automatically when the screen size is changed.
There are cases, however, where you need to change these settings.
By selecting the columns element we will see some options in the primary tab.
Stack columns vertically: from here we can set the size below which the columns should be vertically aligned.
Set Column Width to 50%: this option allows us to arrange the elements on multiple rows, as in this example.

Hide or show elements
We can choose to show or hide some elements as the screen size changes.
To hide an element below a certain size we can hide the element for all devices and then reactivate the display only for a specific screen size.
To see how to do this, let’s consider the case of wanting to show an element only for screens below 768px.
As a device, we have to choose: All devices.
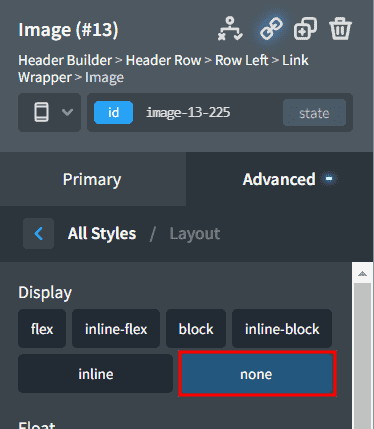
To hide an element, select it and click Advanced> Layout.
From here we can change the display option, selecting none.
After that we choose the screen size in which the element should be shown, for example lesser than 768px.

Then we click on Advanced> Layout and from here we can set the display option again so that the element is visible, for example by choosing the flex option.
Create responsive menus
To change the settings of a menu, click Mobile responsive from the primary tab of the menu.
We can then change the settings for the floating menu and choose below which size the menu should be compressed.

Eliminate responsive styles
If we create specific layouts for devices, we will see them highlighted in the device list.
In this case to delete them we just need to click on the red X next to the screen size.

Settings
In the top bar of the Oxygen Builder editor we find Manage item, from here we can access the Settings.

In the settings we can find: Page settings and Global Styles.
Page settings: allows us to change the page width. Keep in mind that by default it is set to 1120px.
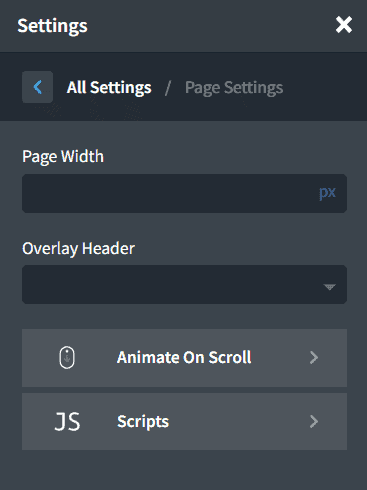
Global Styles: from here we can access settings for colors, fonts, heading, body text, links, selections and so on.
Let’s see specifically what we can change from these settings.
Global styles: colors
By clicking on Settings > Global Styles > Colors we can define the Global colors.
In this way we can create and save a color palette to use on the pages.
Let’s see how.
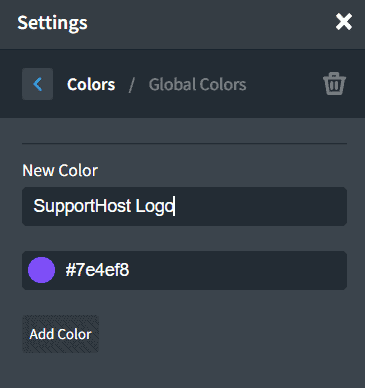
First we can choose whether to add the colors to one of the sets already present, such as Global colors or create a new set. In the latter case click on Add color Set and choose the name.

After clicking on the set, click on Add color. You can then specify the name of the color and choose it from a selector or enter the corresponding hexadecimal code, as in this example.
Global styles: fonts
Settings > Global Styles > Fonts, let’s us set the fonts we will use on our site.
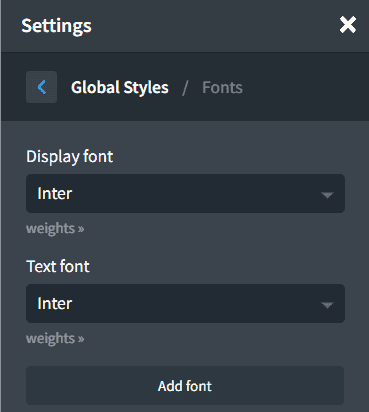
Display font: from here we can set the fonts for the headings.
Text font: from here we can set the fonts for all other text elements.
Oxygen uses Google Fonts by default.
Would you also like to use icons? Learn more about WordPress icon fonts.
Global styles: headings
By clicking on the following: Settings > Global Styles > Headings, we can manage the settings for H1, H2, H3 headings and so on.
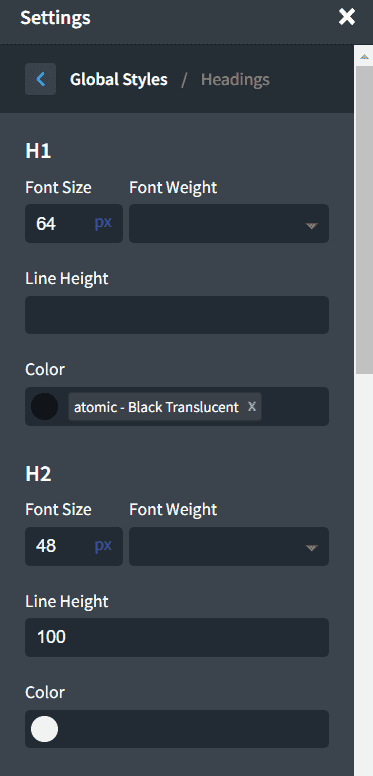
For each heading we can set: size, font weight and color.
Global styles: body text
Settings > Global Styles >Body Text, allow us to change the global options for text on pages.
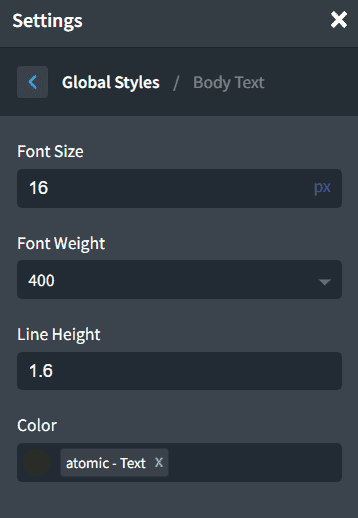
We can change font size, font weight, line spacing and color.
Global styles: links
By clicking on Settings > Global Styles > Links, we can change the settings on all types of link elements (All) or on a specific one.
By choosing the All option the changes will also apply to the links in the site, not just the elements added through the builder.
Oxygen Builder includes three such elements: button, text link and link wrapper.
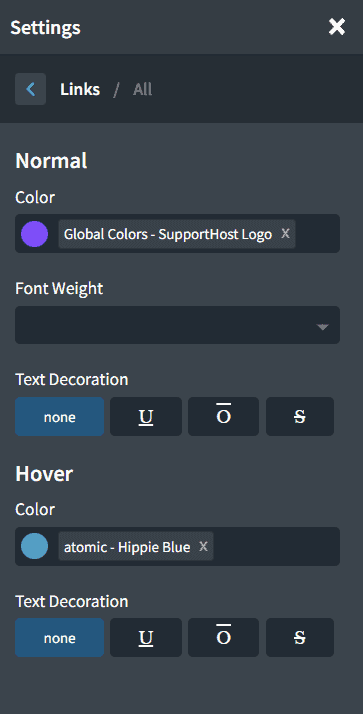
The settings allow us to change font color, weight and element color.
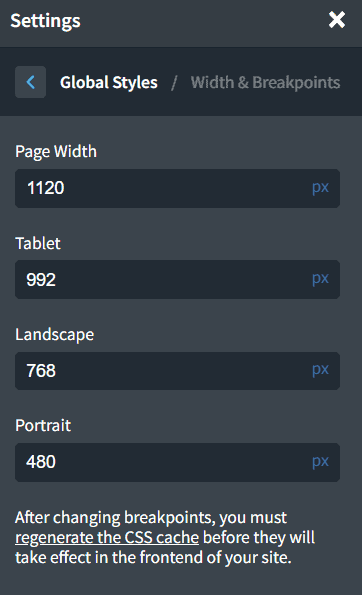
Global styles: width & breakpoints
Through Settings > Global Styles >Width & Breakpoints, we can change the page size and the size of the breakpoints.
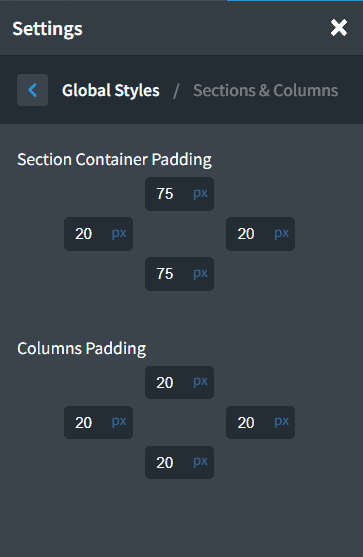
Global styles: sections & columns
From Settings > Global Styles >Sections & Columns, we can set the padding for section and column elements.
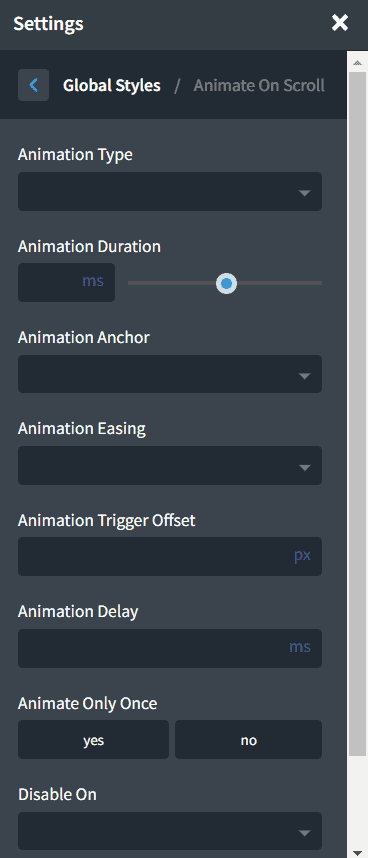
Global styles: animate on scroll
Through Settings > Global Styles >Animate on Scroll, we can set an animation as default.
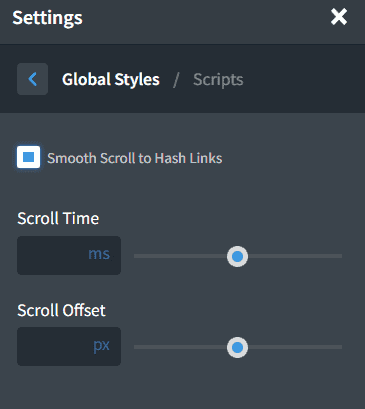
Global styles: scripts
From Settings > Global Styles > Scripts section, we can activate the Smooth Scroll to Hash Links feature and set the scroll time.
Conclusion
Oxygen Builder is undoubtedly one of the most comprehensive site builders on the market. It gives us a high level of customization and at the same time it is easy to use.
The visual editor has drag & drop and the library of ready-made elements make this plugin convenient for everyone.
This article, Oxygen Builder: the definitive guide, is intended to be a guide to understand how the interface is structured and how to perform the most important operations. From adding elements to creating templates and responsive pages, we have tried to cover all the basic operations you can do with this builder.
What about you, have you already tried Oxygen or do you use other site/page builders? Let us know in the comments below.
Ready to build your WordPress site?
Try our service free for 14 days. No obligation, no credit card required.


