
Choosing the right WordPress theme is one of the most important steps in building a website. The theme controls how your site looks, how fast it loads, and how easy it is to customize. Neve is a lightweight, flexible theme that has become a favorite for beginners, businesses, and even agencies.
In this guide, we’ll walk you through everything you need to know about the Neve WordPress theme, including its features and pricing to step-by-step instructions for building your own site with it.
Table of Contents
What is the Neve WordPress Theme?
Neve is a popular WordPress theme made by Themeisle. It is known for being fast, light, and easy to use. Many people like it because it works well with page builders like Elementor and Gutenberg. You can build almost any type of site with it, from a blog to a store to a business site.

The design is simple and clean. It gives you a strong base to work from, and you can customize it without touching code. Neve is also mobile friendly, so your site looks good on any device.
How Much Does Neve Cost?
You can get Neve for free in the WordPress theme library. The free version has enough tools to build a basic site. If you want more features, you can upgrade to a paid plan on the Themeisle website.
Plans start at $69 per year for one site. Higher plans cost more, but they also add features for agencies or people who manage many sites.
What Do the Paid Versions Offer?
The paid versions give you extra design and site options. You get more starter templates so you can launch faster. You can also unlock custom layouts, more header and footer options, and extra blog settings.
If you run an online store with WooCommerce, the Pro plan also adds tools to make your shop look and feel more professional. These include product layouts, quick view, and checkout design options.
Who is Neve Best For?
Neve is a good fit for almost anyone. It works well for beginners who want a simple setup. It also works for small businesses that want a clean and fast site. Agencies and freelancers use it because it lets them build sites quickly for clients.
Neve Theme Features
Let’s look at all the features of the Neve WordPress theme.
Neve Free Features
- Lightweight and fast loading
- SEO-friendly, AMP-ready, Core Web Vitals optimized
- Responsive and mobile-first design
- Drag-and-drop header/footer builder (basic)
- Global colors and typography controls
- Works with major page builders (Elementor, Gutenberg, Divi, Beaver Builder, etc.)
- Basic blog and post layout options
- Limited starter site templates
- WooCommerce compatibility (basic)
Neve Pro Features
- Starter sites: Full premium template library, save and reuse designs
- Advanced header/footer: Sticky and transparent headers, extra components, footer presets
- Blog and post layouts: Grid, masonry, featured post controls, related posts, share icons
- Custom layouts: Build custom headers, footers, 404, and other templates
- Elementor booster: Extra widgets and animations
- WooCommerce booster: Product quick view, wishlists, swatches, advanced layouts
- Performance tools: Lazy load, script optimization, self-hosted fonts
- Custom sidebars and content restriction
- LMS support: LearnDash and LifterLMS layouts
- Adobe typekit integration
- White labeling (agency plan only)
- Priority updates and support
How to Install the Neve Theme
Install Neve like you would any other Theme. Visit Appearance > Themes, search for “neve,” and select it from the results. It’s likely the first result.

Hover over the theme’s name and click the Install button. After a moment, it will change to Activate. Click that to activate the theme.

If you purchase the premium version of Neve, you’ll need to download the theme files from your Themeisle account and upload it manually. Navigate to Appearance > Themes and click Add Theme at the top. Click the Upload Theme button and then use Choose File to find the theme package you downloaded.
How to Build a WordPress Website with Neve
Now that you’ve installed the Neve theme, let’s walk through the steps of creating your custom WordPress site.
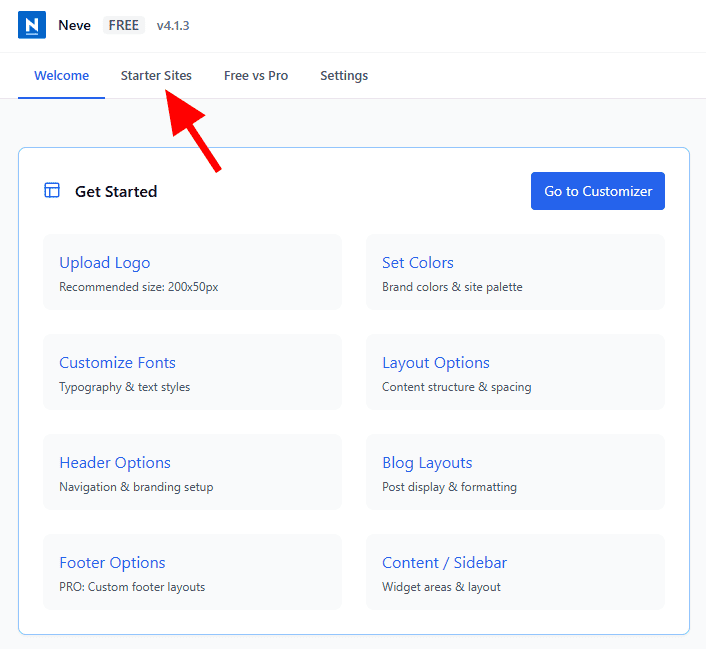
1. Explore the Dashboard
Neve comes with a dashboard that controls all of the theme’s settings. This is an easy place to make changes that affect your entire site. For instance, you can choose your preferred colors, upload a logo, change the fonts, adjust blog layouts and more.
Go through each of the options under Get Started to make your changes. You should also review the Recommended Plugins to see if there’s anything that would enhance your website.

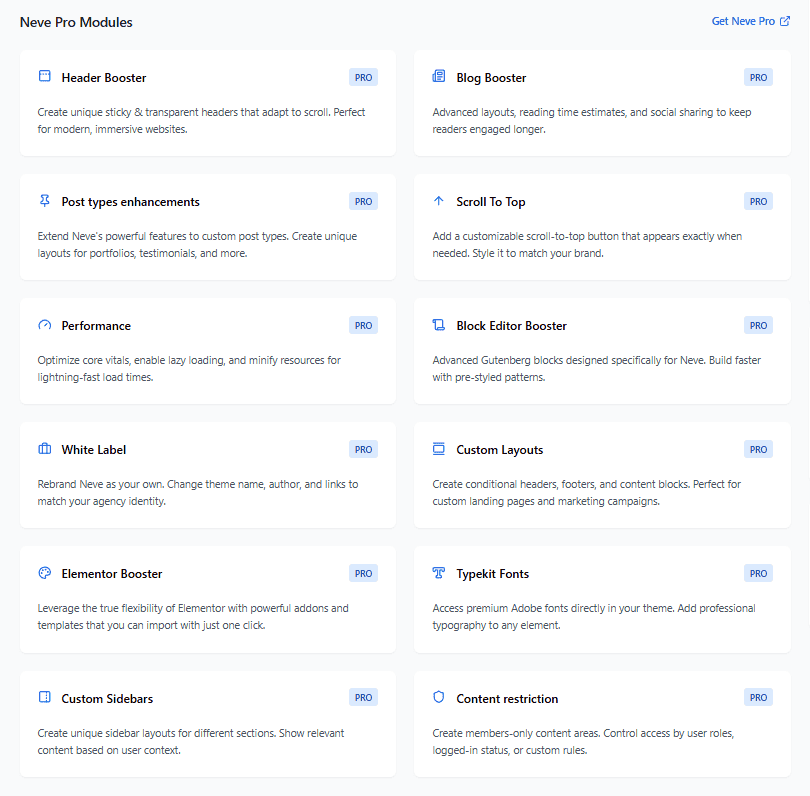
At the bottom of the dashboard you’ll see the Neve Pro Modules. These are all the tools that come with the premium version of the Neve WordPress theme. If any of these appeal to you, you may want to upgrade.
2. Load a Starter Website
An easy and fast way to build a website with the Neve theme is to use a starter site. These are pre-built designs you can import with one click.
Click Starter Sites at the top of the Neve dashboard.
You’ll be prompted to install the Starter Sites & Templates by Neve plugin. Click Install and Activate.

Here you’ll find a library of templates for different types of websites. Browse through the options until you find one that fits your project. For this tutorial, we’ll use the Marketing Agency starter site.

Clicking on a starter site lets you preview it. On the preview page, you can make some basic changes to get an idea of what it would look like as your own site. You can add your logo and choose from pre-designed color palettes. When you’re happy, hit Continue.

Next, select some features you need for your site. Some of them are only available in the paid version of Neve. Scroll down to see more. Image optimization and caching are great tools to speed up your website.
When you’re ready to customize your site further, click the Import Website button.

3. Customize Your Site
Now it’s time to make specific customizations for your needs. You’ll find these controls in Neve > Customize in your WordPress dashboard. This allows you to see your site as you edit it.
Neve uses the WordPress customizer with some added bonus features. You can customize your site by editing the content in each of the tabs on the left. You can also click on an element and WordPress will open the correct settings panel.

We’ll go through each of the sections for settings. Make sure to hit the Publish button when you’re finished making changes.
Global Settings
We recommend starting in the Global settings. These changes will have the most dramatic impact on your site. You can adjust the container size and spacing (for multiple layouts, like pages and posts), your colors and backgrounds, sidebar positions, buttons, and form fields.

Blog
Neve gives you options to control the layout of your blog posts and blog archive pages.

You have lots of options here. You can change the sidebar (or remove it), content width, page layout, and more.

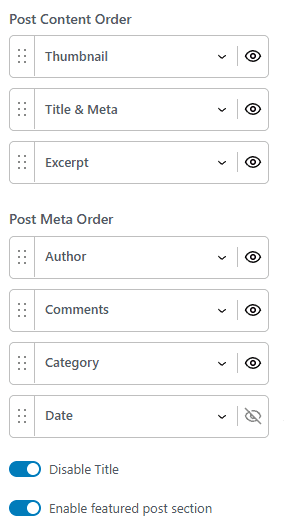
You can also make changes to individual content sections: the thumbnail, title and meta, excerpt, author, comments, category, and date.
Header and Footer
You’ll probably want to change the header and footer content to whatever is right for your project. Neve uses a drag-and-drop header and footer builder here. Simply drag the elements you want into their positions and click the settings icon to edit its parameters.
Typography
Neve lets you change the typography of your entire site all at once. You can choose from a selection of preset font combinations or choose your own. Adjust size, line height, spacing, and more.

Menus
Your visitors need an easy way to move around your site. That’s where navigation menus come in. In the Menus panel, you’ll see all of your existing menus and some menus that your starter template imported.
Click a menu to open its options. Here you can add or remove pages in the menu, reorder them, and change their locations.

Widgets
Widget areas are places on your site that appear on multiple pages. You can fill these areas with your own content. By default, Neve offers two widget areas: Sidebar and Shop Sidebar. You can create custom widget areas if you purchase the premium theme.

Click a widget area to open the editor panel. It uses the block editor just like any page or post. Click the + icon to add a block.

Homepage Settings
By default, WordPress shows your latest blog posts on the front page. If you created a custom Home page, you need to change the setting. You can change this in the Neve theme.
Under Your homage displays, select “A static page.” Then choose your custom Home page from the dropdown menu. While you’re here, set the Blog dropdown to whichever page contains your blog roll.

4. Create Your Own Pages
Every site needs a few key pages for users. That generally includes some of the following:
- Homepage – The main entry point that explains who you are and what you do.
- About Page – Tells your story, mission, and why people should trust you.
- Contact Page – Ways to reach you (form, email, phone, address, map).
- Services / Products Page – What you offer, with details and benefits.
- Pricing Page – Clear breakdown of costs, packages, or plans.
- Testimonials / Reviews – Customer feedback that builds credibility.
- Case Studies / Portfolio – Examples of your work and results.
- Blog / Resources – Ongoing content for education and SEO.
- Privacy Policy – Required by law in many regions.
- Terms of Service / Terms & Conditions – Rules for using your site or service.
- Cookie Policy / Consent Page – For GDPR and other compliance needs.
Pages on your Neve theme work the same as any other WordPress theme. Click Pages > Add Page in your WordPress dashboard.

When you create a page, all of the styles you set in the Customizer will carry over. That means your fonts, colors, and container sizes are already set in place. All you have to do is create the content (page titles, body copy, images, etc.).
If you don’t have any experience building websites or using the Gutenberg editor, consider installing a page builder plugin like Elementor, Beaver Builder, or Breakdance. These tools like you design pages on your live site so you can see exactly what you’re making.
5. Add Plugins to Extend Functionality
Plugins let you extend what the Neve theme can do. You can add features like SEO tools, ecommerce, or backups in just a few clicks. Here are some popular options:
- Yoast SEO or Rank Math; Improve your site’s SEO and optimize your content. (See our guide on SEO plugins.)
- WPForms: Build simple or advanced contact forms.
- WooCommerce; Turn your site into a full ecommerce store.
- UpdraftPlus: Schedule automatic backups and restore with one click. (See our guide on the best backup plugins.)
- SiteGround Optimizer or WP Rocket: Speed up your site with caching and performance tweaks.
- Elementor: Drag-and-drop page builder that works perfectly with Neve.
- Smush or Imagify: Compress and optimize images for faster loading.
- MonsterInsights or Site Kit by Google – Connect Google Analytics and view reports.
- Wordfence Security or Sucuri: Protect your site from malware and hackers. (See our guide on the best WordPress security plugins.)
You don’t have to install all of those plugins, of course. Choose the plugins that fit your needs, but don’t overload your site with too many. Stick to essentials for speed and stability.
6. Publish Your Site
Go through your Neve theme site one last time and remove any demo content (the stuff that came with the starter site template) that you don’t need. Review your pages and menus to make sure everything looks right and works properly. Most importantly, check all of your links, otherwise users will have a bad experience.
Neve WordPress Theme FAQs
Is Neve a good WordPress theme?
Yes. Neve is popular because it’s lightweight, fast, and works with all major page builders. It’s great for blogs, business sites, and online stores. The theme is flexible and easy to customize. It’s a good choice whether you’re a beginner or an experienced WordPress user.
How much is the Neve theme for WordPress?
Neve Pro is available in three pricing tiers: Personal, Business, and Agency. Prices start around $69 per year for the Personal plan, with higher tiers offering WooCommerce modules, white labeling, and priority support. The exact price can change during sales or promotions so check Neve’s pricing page.
Is the Neve theme compatible with Elementor?
Yes. Neve is fully compatible with Elementor. In fact, many of Neve’s starter sites are built using Elementor, so you can edit them easily. The Pro version even includes extended Elementor settings with extra features to give you more creative control.
Does the Neve theme work with WooCommerce?
Absolutely. The free version supports WooCommerce so you can run an online store. If you upgrade to Pro, you’ll unlock advanced shop features like product quick view, wishlists, swatches, and custom layouts. Neve is a strong choice for ecommerce businesses.
Is the Neve theme for WordPress beginner-friendly?
Yes. Neve is designed to be easy for beginners. With starter sites, a drag-and-drop header/footer builder, and clear customization settings, you can set up a site quickly without coding. It also works smoothly with popular page builder plugins, so you can add new pages and features as your site grows.
Final Thoughts
Neve is one of the easiest ways to build a fast, flexible WordPress site. With starter templates, simple customization tools, and full compatibility with popular plugins, you can launch quickly without coding skills. Whether you’re starting a blog, business site, or online shop, Neve gives you a strong foundation.
Still looking for the right theme? Check out our complete guide on WordPress themes, which includes some of our favorites. If you’re opening an online store, check out our favorite WooCommerce themes.
Ready to build your WordPress site?
Try our service free for 14 days. No obligation, no credit card required.


