
In this article we will look at a practical guide to Magento SEO optimization.
The steps we will show you will enable you to understand how to change the settings and use the integrated functions of this CMS to improve your site’s ranking.
You will not find general advice, but a series of tips aimed precisely at those who want to take advantage of Magento’s SEO features.
Don’t have a site yet and want to start putting the tips into practice right away? If you want to create a high-performance ecommerce store, you can rely on our Magento hosting plans.
Table of Contents

Use SEO-friendly URLs
When creating an ecommerce site it is important to decide the structure of the URLs beforehand.
Parameters, IDs, and other types of filters can significantly lengthen URLs. If you think about the structure of product pages, for example, parameters such as those for sorting and filters come into play.
Google’s guidelines recommend adopting a simple structure for site URLs. Luckily with Magento 2 we can change the configuration settings and simplify the URLs.
By default, product pages and categories created with Magento will have URLs with this structure:
- https://domain.com/product-name.html
- https://domain.com/category-name.html
We can modify this structure to remove the “.html” extension.
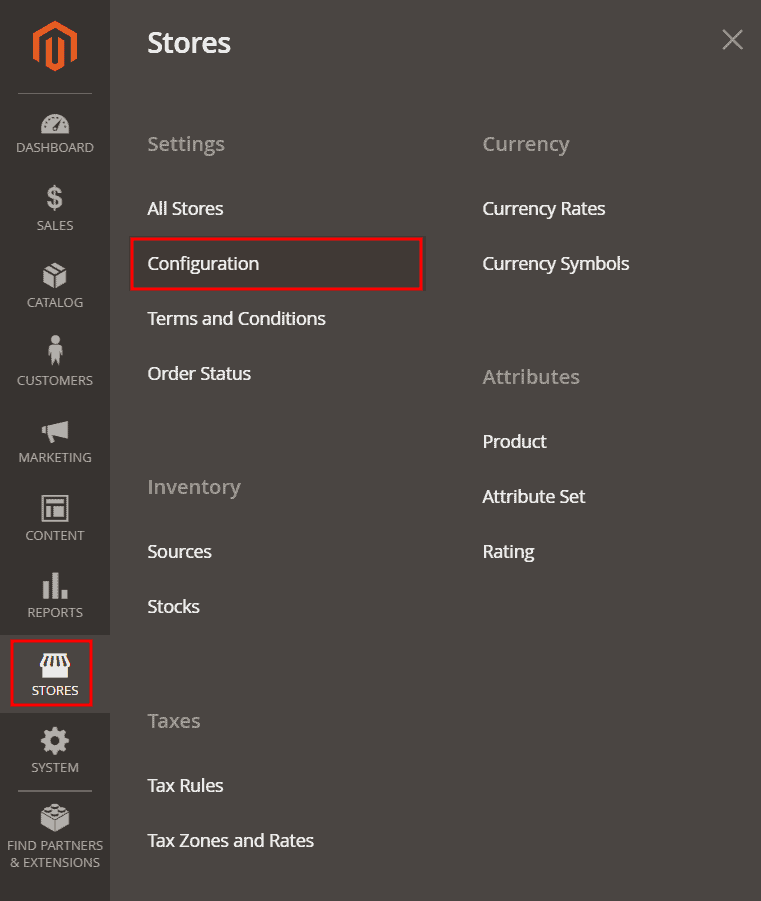
To do this we go to Stores > Configuration.
Expand the Catalog section and click on Catalog.
Then we expand the ”Search Engine Optimization” section, from here we have to deactivate the Use system value option next to Product URL suffix and Category URL suffix and then replace the “.html” value with “/”.

By doing so, the URLs of products and categories will no longer have the “.html” extension, but will end with a “/”.
Remember that it is important to establish the structure of the URLs before even creating the site.
If your ecommerce is already running it is not advisable to make changes to URLs lightly. In this case you will need to analyze the situation and if you make changes to existing URLs you will need to implement redirects.
Redirects will allow users to reach the page they are looking for without encountering 404 errors. In the next chapters we will see how to manage them with Magento.
Now, however, let’s begin to see what to keep in mind to improve the contents.
Magento SEO: content optimization
In this section we are going to see how to optimize product pages and categories.
We will see how to customize the title and meta description, what precautions to adopt for the images and how to show related products.
How to set title and meta description on Magento 2
HTML tags, title and meta description, are important elements for SEO. The title is the title that will be shown in search results and the meta description is the short description that will accompany the title.
Setting the title and meta description is one of Magento’s SEO functions. Since this is an integrated function, we do not need to install any additional extensions.
We can set title and meta description when we create a new product or page.
We just scroll down to the Search Engine Optimization section and fill in these fields:
- Meta Title: enter the title that will be shown in the browser and in search engine results.
- Meta Description: enter the meta description.
Here I show you an example for a product page.

Set a suffix for all titles
We can decide to set a suffix or a prefix for the title of all the pages of our ecommerce with Magento.
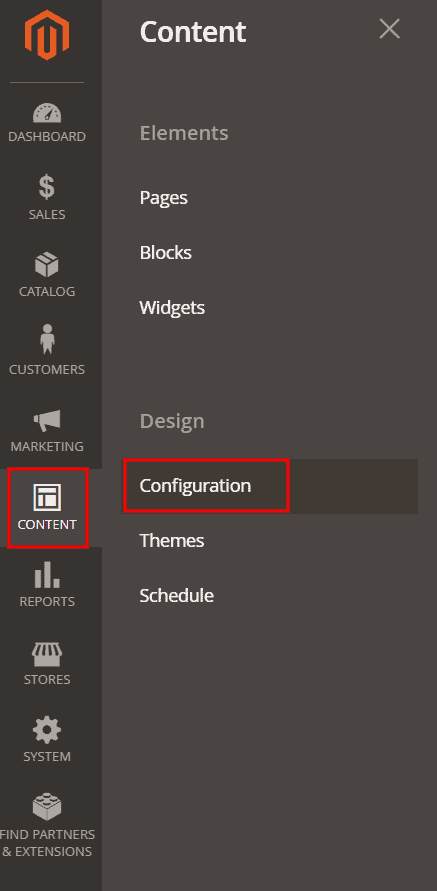
Go to Content > Configuration and click on Edit to change the configuration of the main site.
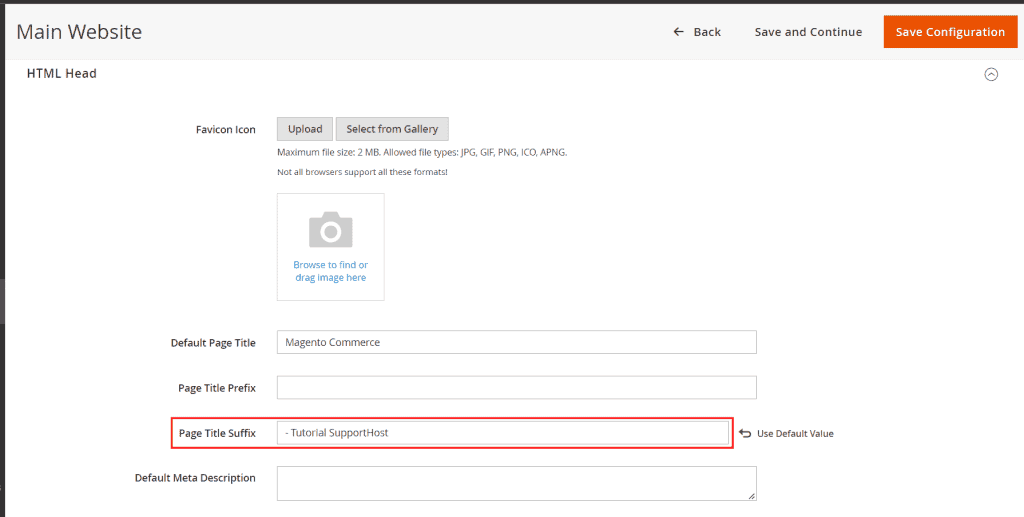
Let’s open the HTML Head section and we will see the following fields:
- Page Title Prefix – we can insert a prefix that will be inserted before the title of the pages.
- Page Title Suffix – we can insert a suffix that will be added after the title of the pages.
Here is an example with which we are going to add the name of the site to each page:
How to add alt text to images
Image alt text, also called alt text or alt tag, is a relevant attribute not only for SEO. This tag is used to describe images and comes into play in all those cases where the image cannot be shown or seen.
This attribute has a very important value for accessibility: it is thanks to this text, in fact, that it is possible to understand the content of the images when using a screen reader for navigation. Using the alternative text appropriately, therefore, makes our site accessible also for those with visual impairments.
As far as SEO is concerned, since crawlers can’t see images like we do, alt text is for them to determine the content.
On Magento when we add an image to a product, we can click on it to access the settings and enter the alt text in the “Alt text” field as I show you here:

Magento SEO and internal links: related products
When we create a blog we use internal links to suggest readers to read other related articles. A site’s internal links are also important for search engines. By linking site content together, we allow search engine robots to discover new pages.
The same concept applies when we create an ecommerce. In this case, however, we have an ace up our sleeve: related products.
When we create a product with Magento we can select a number of related products to display. These work exactly like links and have a dual role:
- allow those browsing the site to discover products that may be of interest;
- they are useful to search engines and pass link juice between pages.
To set up related products, simply open a product page and scroll down to the “Related Products, Up-Sells, and Cross-Sells” section, then add related products by clicking Add related Products.

We then select one or more products to show and click on Add Selected Products:

The added products will be shown in a list, from this section we will be able to add others or remove existing ones.

Fixing duplicate content problems
In an online store one of the most common problems is that of duplicate content. When different URLs refer to the same product of our ecommerce, we talk about duplicate content.
When Google is faced with several URLs linking to the same content, it chooses which of these URLs to show in the SERPs. If we want to help search engines choose the most suitable URL we can use the rel canonical tag.
The first thing to do is activate this feature on Magento.
Go to Stores > Configuration.
From the side menu, click on Catalog > Catalog and then scroll down to the Search Engine Optimization section.
Here we find two options:
- Use Canonical Link Meta Tag For Categories;
- Use Canonical Link Meta Tag For Products.
By default the two functions are deactivated. To activate them, remove the check next to Use system value and then set them to “Yes”, like this:

This function will allow us to automatically add a “self-referential” rel canonical tag to the product pages and categories of our ecommerce. This is equivalent to setting a rel canonical tag for each page indicating that that page is the canonical version of itself.
Here’s an example of a product page where the tag was automatically added:

Create sitemap with Magento
In many cases, especially when the site has many pages, it is useful to create the sitemap of our ecommerce and send it to search engines.
The sitemap is a file, usually XML, which lists all the URLs or at least the most important ones. This file is used to help search engines find and index all pages on the site.
Among the SEO functions of Magento we find the possibility of generating the sitemap directly from the back-end. This is a very convenient option that allows us to avoid using sitemap generators or resorting to third-party extensions.
To create the sitemap with Magento go to Marketing > Site Map:

If we haven’t created any sitemaps yet, we’ll see an empty list. To create one, click on Add Sitemap:

We can then choose the name of the sitemap and the path where it will be accessible, then click on Save & Generate.
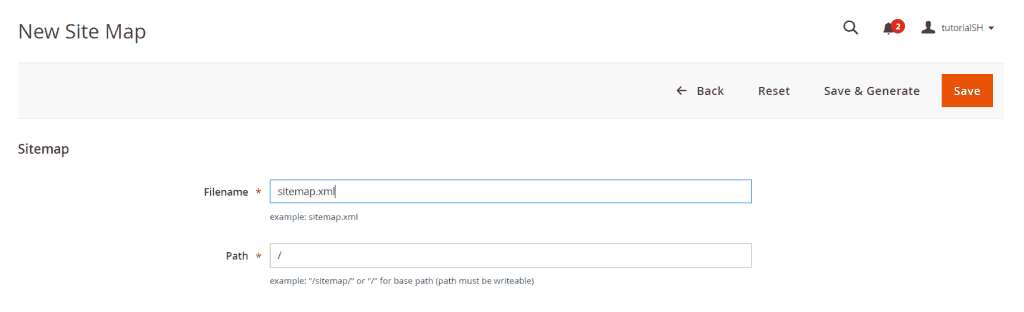
By entering “/” in the Path field, the sitemap will be accessible at the address:
domain.com/sitemap.xml
Here is an example:

Now we just have to send the sitemap to search engines: we can do it from Search Console for Google and from Webmaster Tools for Bing. In our sitemap guide you can find the step-by-step explanation if you don’t know how to proceed.
Manage redirects with Magento
Magento allows us to change the global settings for redirects. This type of configuration will apply to redirects that are created automatically.
Let’s go to Stores > Configuration:
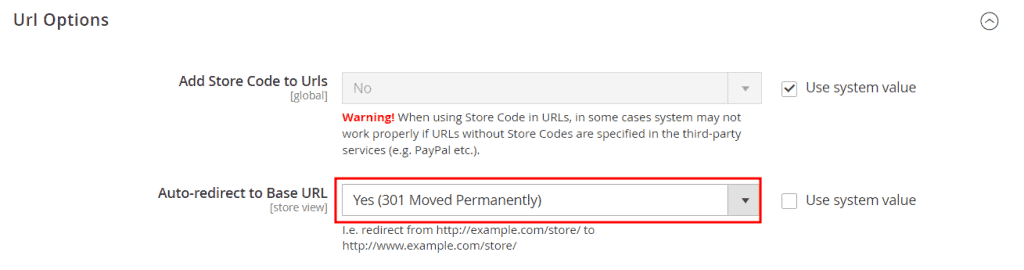
Let’s open the General > Web section and expand the first item: Url Options. Here we will see that, by default, redirects are set up automatically. When a link is modified, a 302 redirect is automatically created.

If the redirects indicate a permanent move of a resource, it is good to use 301 redirects. We can then modify this option so that the redirects are of the type 301.
Implementing individual redirects
Another SEO function integrated in Magento is the ability to manage the redirects of individual pages directly from the back-end.
Go to Marketing > URL Rewrites:

From here we can see the redirects created and add new ones. To create a new redirect click on Add URL Rewrite:

We just have to fill in the required fields by entering the starting URL in the “Request Path” field and the destination URL in the “Target Path”. After that we can choose the type of redirect: 301 or 302.
Here is an example:

Editing the robots.txt file
We can use the robots.txt file to tell search engines not to crawl certain site pages. For example, we may wish to block search results within the site or login pages via this file.
Magento simplifies the creation of the robots file by allowing us to edit it directly from the back-end.
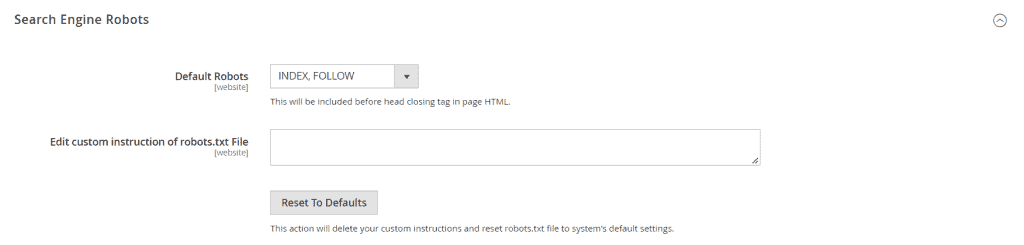
Click on Edit corresponding to the store to edit (if there is more than one). And let’s scroll down to the Search Engine Robots section. From here we can enter new instructions in the Edit custom instruction of robots.txt File field.
To do this, go to Content > Configuration:
Improve site performance
Having a fast site is important, especially if it is an ecommerce. The loading speed makes everyone happy:
- reduces user abandonment rate;
- it is important for search engines and in fact it is among the ranking factors.
How can you improve Magento SEO by boosting site performance?
There are several tricks you can implement, the one we want to tell you about in detail is the importance of using a cache system.
You can consult the documentation to discover all the other best practices for performance.
Use a caching system
Cache systems allow for faster loading times and improve performance.
If LiteSpeed is installed as web server on your server, you can use LiteMage Cache for Magento.
From the data collected by LiteSpeed, adopting this caching system allows you to have a speed 4 times faster than the Apache + Varnish combination.
On our Magento hosting plans we use LiteSpeed to guarantee you higher performance than Apache.
To change the cache options, just go to Stores > Configuration, open the Advanced > System panel and then expand the “Full page cache” section.
Here we will set as Caching Application “LiteMage Cache Built-in to LiteSpeed Server“, like this:

We can also follow the same steps to use other cache systems such as Varnish for example.
Conclusion
We have seen a number of recommendations that can help you improve your SEO on Magento.
By taking advantage of the built-in features of this CMS and taking care to avoid common mistakes, you will be able to obtain a better ranking. Now that you have the basics, you are ready to get started.
Are there any other SEO practices you follow for your ecommerce that you would like to recommend? Let us know with a comment.
Ready to build your WordPress site?
Try our service free for 14 days. No obligation, no credit card required.


