When you decide to change hosting everyone focuses on trasferring the site however, it is equally important to perform email migrate correctly.
In this article, I’m going to explain how to perform the domain transfer without losing emails, an important operation if you have valuable emails that you don’t want to delete.
Table of Contents

What is email migrate ?
All emails are received and maintained on the server. When you are using an email client you usually just synchronize emails between the server and the client, if you use IMAP.
When you transfer your site from one hosting to another manually or with the help of a plugin like duplicator, you usually think about the site transfer only. The transfer of email accounts and their content then takes a back seat.
Since emails are nothing but files kept on the server, if you don’t want to lose your mail when migrating your site you need to make sure that you transfer the content of the email accounts correctly.
Note that I am not referring to email forwarding, also known as email forwarding or some people call it email hijacking. Email forwarding is a redirection from one address to another, meaning that if a customer sends an email to your old address it is redirected to your new address.
By email transfer, I mean the migration of old emails to the new server, a real transfer from one place to another.
The difference between IMAP and POP3
Before explaining how to perform this transfer, I would like to explain the difference between the two email protocols.
There are two different email protocols: IMAP e POP3.
POP3 is an old protocol, practically out of use, that permits the download of emails from the server but nothing more. The only option you have with this protocol is to decide if you want to leave the emails on the server once downloaded or if you want to delete them.
As you can imagine this protocol is not optimal if you use multiple devices.
In fact, if the server receives an email and you download it to the computer client using POP3, the phone doesn’t know if the email has been read or downloaded, and downloads it again showing it as unread. So you have to mark the email as unread on both devices.
It’s even worse if you have set your devices to delete email messages on the server after downloading them. In this case, the second device will not download the message since it has already been deleted from the server.
IMAP protocol has been introduced to overcome these problems, which instead of downloading mail, synchronizes it.
IMAP synchronizes the various folders on the server with those on the client. In this way, it is able to keep emails synchronized between the server and all your devices.
For example, if you delete an email using the client of your computer it will be deleted on the server and consequently also on the client of your smartphone at the next synchronization.
For this reason, IMAP is the protocol that everyone uses for email. Today it seems that only Aruba requires extra payment for the IMAP protocol and offers only POP3 as a base, an outdated choice.
If you want to have IMAP emails without paying any extra fee here is a great alternative to Aruba. In this guide, I will explain how to migrate emails manually from Aruba.
It’s important to understand the differences between these two protocols to understand how email migrate works.
But before going to see what options we have to transfer emails from one place to another let’s see the different types of transfer.
Types of email transfers
Depending on our situation we may need a different type of email transfer.
Email migrate from one provider to another
This is a common case: You are not happy with your hosting and you have decided to migrate your site.
You have some addresses linked to your domain and you want to perform the domain transfer correctly without losing emails.
If your previous provider has cPanel and you switch to another provider that uses cPanel email migration is not necessary. The emails are migrated in bulk with the whole account since it is a copy of the whole account, therefore, it is not necessary to email migrate manually.
If we migrate a site from cPanel to cPanel we don’t need to email migrate manually since we make a complete copy of the account. Kind of like doing copy-paste.
If either provider does not have cPanel you will need to manually migrate your mailboxes, which you can do by following one of the methods I describe below.
Email migrate from Alice or Gmail to your domain
This is the case when you want to move from an address like yourname@gmail.com or yourname@alice.it to an address like info@yourname.it.
In this case you have just created a business address and you want to move all your old emails to the new address to keep them all together.
Since both services use IMAP you can use imapsync for the transfer.
You will then need to set up email forwarding, also known as hijacking. In this way if one of your contacts writes to you at the old address you redirect their email to your new address without losing it.
Email migrate from Aruba to Gmail
This can be considered as a particular case. Probably on Aruba you use POP3 and in this case Gmail comes to our help with its import function.
Gmail is in fact able to import mail from a POP3 account. Let’s see how it works.
At the top right click on the gear and see all the settings.
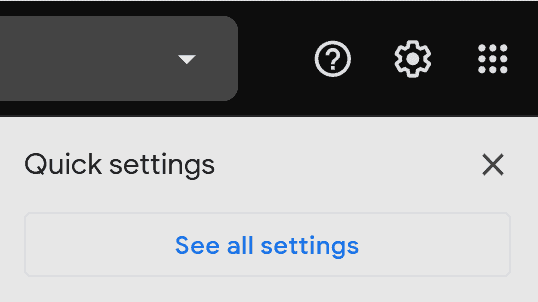
Then click on the “Accounts and Import” tab, then “Add an email account” under the “Check mail from other accounts” section.

A popup will open asking you for your POP3 box access data. You will need to know the username, password, hostname and port of your mailbox.
In the case of Aruba the information is as follows:
- Username: the email address
- Password: the chosen password when creating the email account
- Hostname: pop3s.aruba.it
- Port: 995
Depending on the number of emails you have to import it may take more or less time, you can check the progress from the “Account and import” tab.
Migrate domain without losing email
Let’s get to the point of this article. How can we proceed to migrate email in the right way?
As I said there is a difference between IMAP and POP3, and this implies that we have to migrate emails using different systems depending on the protocol.
Use imapsync
If both email accounts use IMAP (99% of cases) the easiest way to migrate email is to use imapsync.
Once you click on the link you’ll be asked for the login details for the old email address (including the password for the email account) and the login details for the new one. You have a few options to check and then you can initiate the transfer. The duration of the process depends on the size of your mailbox and you will see a complete log with all the necessary information (in English).
This tool performs a synchronization from the source account to the destination account of all folders, so even sent mail, drafts, etc…
You can also synchronize multiple times in case you receive other emails on the source account before you have changed the targeting to the new account.
This service was free until a few days ago, but now accounts larger than 300MB are required to pay.
Let’s see what settings we have.
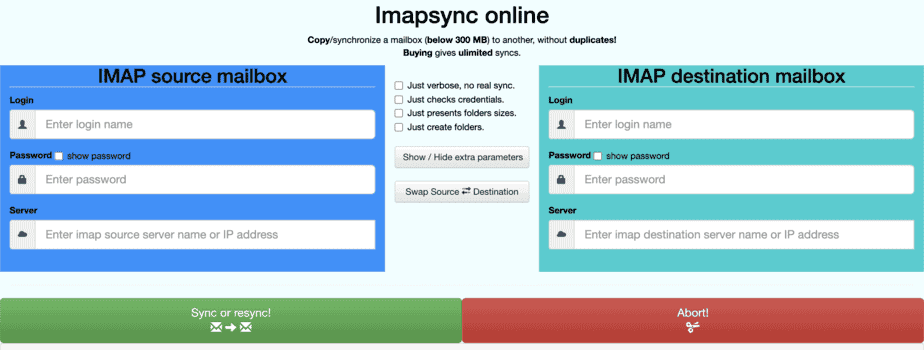
First of all, we need to enter the login details of the source email account and the destination email account.
If we want to perform the transfer we have to make sure that none of the four ticks is checked and then click on the green button.
If we only want to check the credentials, just do a test without any synchronization or see the size of the folders from one of the options. A popup will open indicating what precisely that option is for.
Email migrate from Aruba
If you have paid for the IMAP service the best advice is to use the method above. If your mailbox uses POP3 you have to migrate the emails manually.
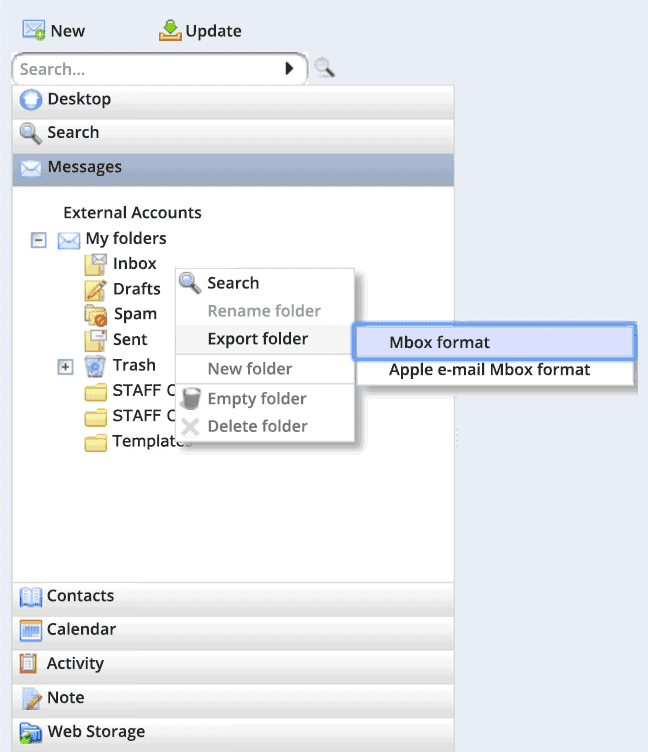
Access the Aruba webmail, then right click on the Inbox folder and export the folder in the mbox format.
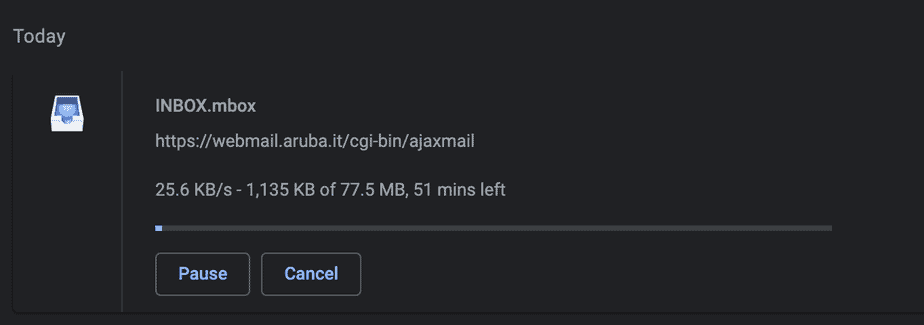
Download the MBOX file to your computer, its size depends on the size of your mailbox.
Now we can import the file. Login to the webmail, for this guide we will use roundcube.
On the top right click on “Actions” and then click on “Import”.
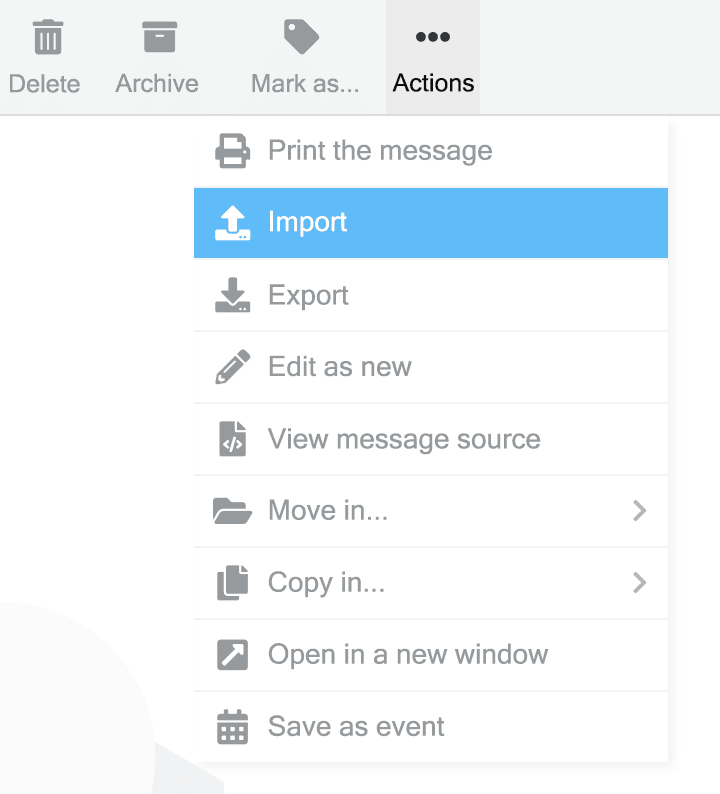
Let’s choose the file to upload and wait for the webmail to do its job.
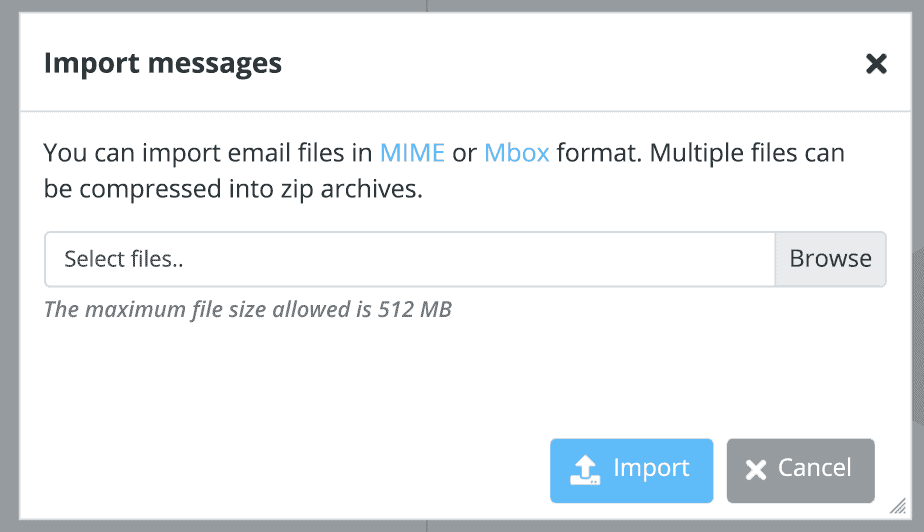
All of your inbox emails will now be available on your new email account.
Using an email client to transfer email
As I mentioned IMAP connection is a connection that allows a synchronization between the client and the server.
This means that if you have two different email accounts on the same email client you can simply drag and drop emails from one account to the other to move them.
The correct procedure for email transfer is therefore:
- Add source account on the mail client (using IMAP or POP3)
- Add destination account on the client (using IMAP)
- Note: if you are moving your web site from one provider to another use a hostname that is not connected to the domain
- Select all emails from the source account and drag them into the target account
- Wait for all emails to be uploaded to the new account
Tramite mailsync da WHM
Mailsync is a free application for WHM that allows email migrate. It can use either IMAP or POP3 email as a source and as a destination it uses an email on the server.
Through a simple graphical interface it allows you to choose the cPanel account, then the email account (or multiple email accounts) onto which to transfer emails.

It prompts you for email account login details and performs the email transfer autonomously creating a log file in case of errors.

Transferring from cPanel to cPanel
Earlier I mentioned that it is possible to make a transfer from one server to another by making a full copy of the account.
However, some providers try to block the client from them by disabling the backup feature of cPanel. With this feature disabled, it is not possible to create a full backup of the account in order to copy it from the source server to the destination server.
In this case we still have another method to transfer the mail.
Through cPanel (of the source server) we go to the file manager and create a compressed archive of the “mail” folder of our account.
We have to select the mail folder, then click on compress:
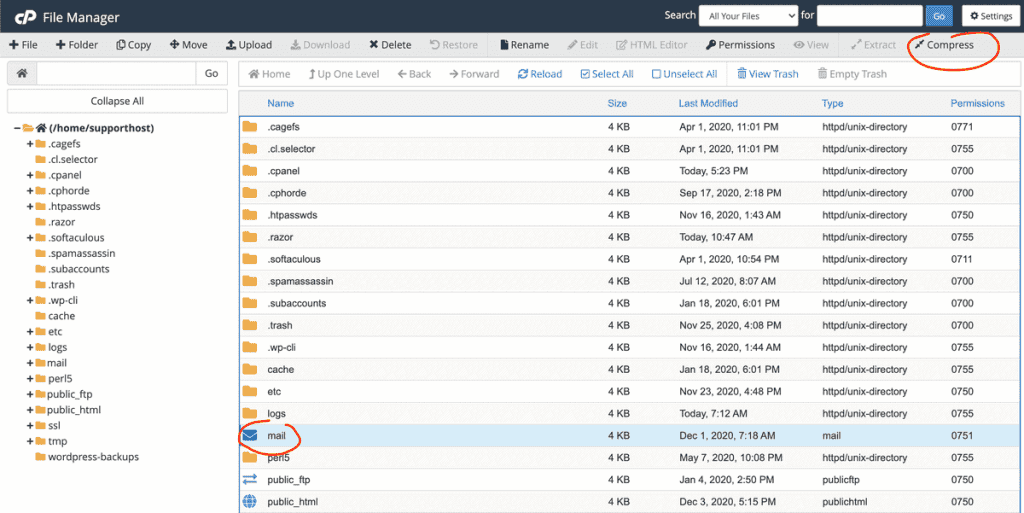
At this point, you enter the cPanel of the destination server, upload the zip file and replace the mail folder with one of the old servers.
At this point, we have imported all the emails but we need to create the accounts.
The passwords of the email accounts are saved inside the “etc” folder of the server so to finish the migration you’ll have to create the email accounts from cPanel and choose a new password (or use the old one if you prefer).
The process is quite simple, luckily there are few providers that block the backup function for their customers.
Conclusion
We have seen several ways to migrate emails from one provider to another without losing old emails.
Were you successful in the operation?
Did you have any problems?
Were there any unclear parts in this guide?
Let me know in the comments below.


Leave a Reply