WordPress emails are usually sent with the native function. This PHP function sends unauthenticated emails and often, using it, one encounters the problem of unsent emails. To fix it, simply send emails via SMTP with WordPress.
The SMTP protocol, in fact, allows us to send authenticated emails and solve sending problems.
To adopt this system, you can use the SMTP server of your WordPress hosting provider or use a mail provider of your choice.
We will see two methods to send authenticated emails via SMTP:
- how to use a simple function (without plugin);
- how to do it using a plugin.
Finally, we are going to see the list of the best SMTP plugins for WordPress.
Let’s begin.
Table of Contents
WordPress SMTP: the advantages of sending authenticated emails
WordPress allows us to send emails in different cases for example when a new user profile is activated, to recover the password and also in other circumstances.
By default, WordPress sends emails with PHP. However, this system can often cause deliverability problems: emails are not delivered or end up in the spam folder.
This difficulty is due to the fact that when emails are sent with PHP, no authentication system is used. For this reason, many mail messages risk ending up in spam or in some cases not reaching the recipients.
Since WordPress’ native configuration for email is limited, we need to use another system that allows us to send authenticated email via SMTP. This will allow us to fix the WordPress not sending email issue.
Let’s open a brief parenthesis to understand how authenticated emails work.
How email authentication systems work
SMTP stands for Simple Mail Transfer Protocol and is one of the most used protocols for sending emails. On the other hand we find IMAP: one of the protocols used to receive e-mail.
Unlike the default WordPress feature which uses PHP, the SMTP protocol supports authenticated emails.
Authenticated emails can be sent via SMTP, but how does this authentication work?
There are several email authentication systems, the main ones are:
- SPF
- dkim extension
- DMARC extension.
SPF (Sender Policy Framework) is an authentication method that recognizes mail servers associated with the domain or IP address.
This system allows the ISP to understand if the emails are sent from a reliable sender or not.
DKIM (DomainKeys Identified Mail) is an authentication system based on digital signatures.
DMARC (Domain-Based Message Authentication) works in conjunction with SPF and DKIM methods to verify that emails are authenticated.
How to set up WordPress SMTP without plugins
Now that we have seen the advantages of sending emails with authentication, let’s see how to proceed with the configuration.
As we said at the beginning, there are two ways to use the SMTP protocol with WordPress:
- use a function;
- use a plugin.
Let’s start with the first method and see how to use a function to send emails via SMTP with WordPress.
Benefits of the function
SMTP plugins for WordPress often include other functions than just sending emails. If what interests us is only sending authenticated emails and we don’t need other additional operations, using a plugin can be counterproductive.
Using a simple function, the code is only called when sending emails. This means that we can use the feature without affecting the site’s performance.
Some plugins slow down WordPress and can have a negative impact on site speed. This problem does not arise if we use a simple function like the one we are going to see in the next chapter.
Using a feature to send authenticated email via SMTP with WordPress
As we said, it is not necessary to use a plugin to send emails via SMTP with WordPress.
We just use this simple function:
remove_action('phpmailer_init', 'swpsmtp_init_smtp');
add_action( 'phpmailer_init', 'custom_phpmailer_init' );
function custom_phpmailer_init( $phpmailer ) {
    $phpmailer->Host = 'HOSTNAME';
    $phpmailer->Port = 465; //or different
    $phpmailer->Username = 'USERNAME';
    $phpmailer->Password = 'PASSWORD';
    $phpmailer->SMTPAuth = true;
    $phpmailer->SMTPSecure = 'ssl';//or tls
    $phpmailer->IsSMTP();
    // $phpmailer->XMailer = 'XMAILER'; // Qui possiamo inserire un XMailer diverso
}

function website_email() {
    $sender_email= '[email protected]';
    return $sender_email;
}
add_filter('wp_mail_from','website_email');
The function above contains sample data, you’ll need to make sure you replace the uppercase and quoted data with the correct SMTP credentials.
- Host = ‘HOSTNAME’ – enter the name of the email server.
- Username = ‘USERNAME’ – enter username for SMTP authentication.
- Password = ‘PASSWORD’ – replace with the password for the SMTP authentication.
- SMTPSecure = ‘ssl’ – you can use ‘ssl’ or ‘tls’ as protocol.
- XMailer = ‘XMAILER’ – you can edit the email header.
- sender_email= ‘ [email protected]’ – replace with the email address you want to use for sending.
Where to find the SMTP credentials
With all our plans from shared hosting to LiteSpeed and semi-dedicated plans you can create unlimited email accounts using your own domain (for example [email protected] ).
If you want to use the SMTP server associated with your hosting account, you can find the information you need on the email client settings page. From cPanel, just go to the Email Accounts section.
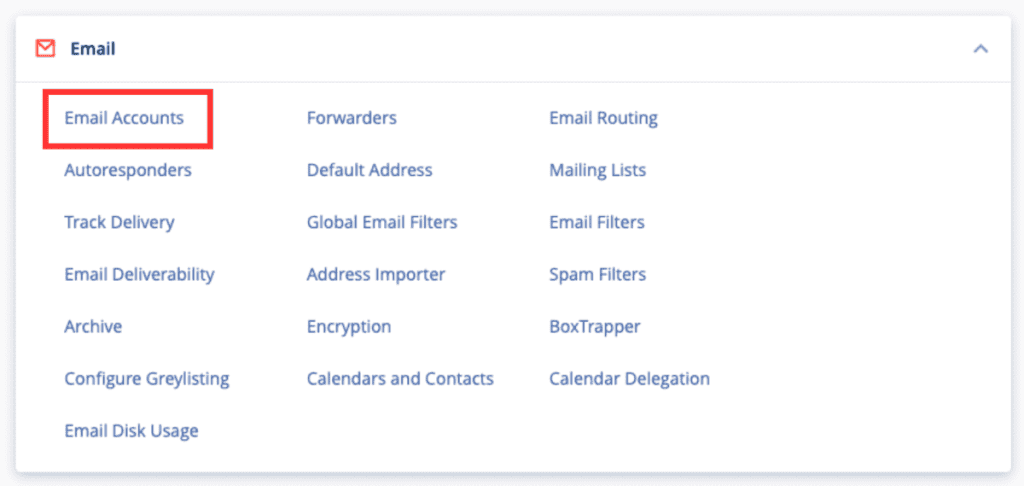
Then click on Connect Devices to open the configuration page.

Scrolling down to the “Mail client manual settings” section you will find the data: username, password, outgoing mail server and SMTP port.

These are the data you will need to use in the function we saw earlier to configure the SMTP protocol.
How to add the feature
There are several methods to add the function we just saw:
- put the function in the child theme’s functions.php file;
- use a plugin like Code Snippets;
- create a site specific plugin.
Let’s see how to do it.
Put the function in the functions.php file
One of the simplest methods is to add the function to the functions.php file of the child theme.
We need to make sure that we edit the child theme’s functions.php file and not the parent themes. This way when the theme updates, we won’t lose the changes and we can continue sending emails via SMTP with WordPress.
Using Code Snippets
If we don’t want to modify the functions.php file, we can use a plugin that allows us to add code to the site.
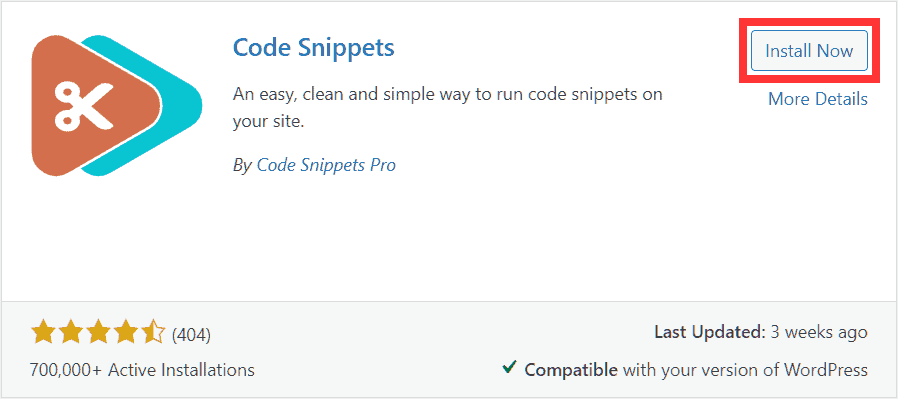
Code Snippets is an example of a plugin that does just that.
We just need to install and activate it.
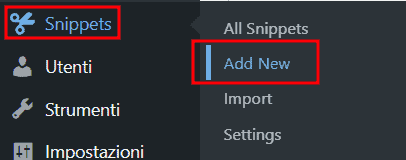
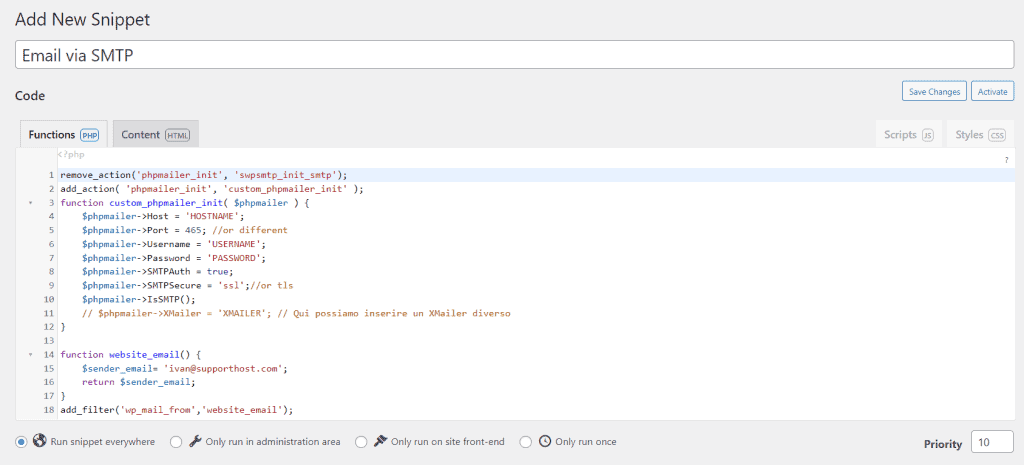
So let’s add a new snippet by going to Snippets > Add New.
At this point:
- Enter a title, for example “Email via SMTP”.
- We paste the code in the php functions box and modify the data with the correct ones.
- Finally, click on Activate to save the changes.
Use a site specific plugin
Another way to add custom code to a WordPress site is to use a site specific plugin.
In practice it is a question of creating a plugin by adding the function we have seen before and then installing and activating it as a normal plugin.
This solution, compared to inserting the code in the functions.phpchild theme file, allows us to have a more flexible system because it is independent of the theme we are using.
Example of sending with custom email template via SMTP
You can send emails using SMTP with a custom email template.
Vincenzo Casu (KolorWeb.it) has built a custom plugin with a class that allows you to integrate a custom email template that allows you to switch colors, add a logo, and customize the footer to include the sender’s company details.
Look at how the plugin was used in the example – by tweaking the code, the class can be separated from the plugin and included in the child theme (as mentioned earlier) or in other plugins.
Plugin code:
<?php
/**
 * KolorWeb Mail Manager
 *
 * @link              https://kolorweb.it
 * @since             1.0.0
 * @package           Kolorweb_Mail_Manager
 *
 * @wordpress-plugin
 * Plugin Name:       Kolorweb Mail Manager
 * Plugin URI:        https://kolorweb.it
 * Description:       Kolorweb Mail Manager is a Software developed to handle custom mailing system.
 * Version:           1.0.0
 * Author:            Vincenzo Casu
 * Author URI:        https://kolorweb.it/
 * License:           GPL-2.0+
 * License URI:       http://www.gnu.org/licenses/gpl-2.0.txt
 * Text Domain:       kolorweb-mail-manager
 * Domain Path:       /languages
 */

if ( ! defined( 'ABSPATH' ) ) {
	exit( 'No Such File' );
}

if ( ! class_exists( 'KolorWeb_Gest_Mail_Manager' ) ) {

	/**
	 * Custom Mailing System Manager
	 **/
	class KolorWeb_Gest_Mail_Manager {

		/**
		 * SMTP Configuration data.
		 *
		 * @var array
		 */
		private $args;

		/**
		 * Constructor.
		 *
		 * @param array $args SMTP configuration.
		 * @throws Exception If configuration array is empty.
		 */
		public function __construct( $args = array() ) {

			$add_notice = false;

			if ( empty( $args ) || ! is_array( $args ) ) {
				$add_notice = true;
			}

			$data_check = array_sum(
				array_map(
					function( $v ) {
						return false === strpos( $v, '_HERE' );
					},
					$args
				)
			);
			if ( $data_check && intval( $data_check ) !== intval( count( $args ) ) ) {
				$add_notice = true;
			}

			if ( $add_notice ) {
				add_action( 'admin_notices', array( $this, 'add_missing_config_notice' ) );
				return;
			}

			$this->args = $args;

			add_action( 'phpmailer_init', array( $this, 'custom_phpmailer' ) );

			add_filter(
				'wp_mail_content_type',
				function( $content_type ) {
					return 'text/html';
				}
			);

			add_filter(
				'wp_mail_charset',
				function( $content_type ) {
					return 'UTF-8';
				}
			);

			add_filter( 'wp_mail', array( $this, 'custom_wp_mail' ) );
			add_action( 'wp_mail_failed', array( $this, 'log_mailer_errors' ), 10, 1 );
		}

		/**
		 * Show Missing Config Notice.
		 */
		public function add_missing_config_notice() {
			?>
			<div class="error notice">
				<p><strong>KolorWeb Mail Manager: </strong><?php echo esc_html__( 'Please provide a valid smtp configuration', 'kolorweb-mail-manager' ); ?></p>
			</div>
			<?php
		}

		/**
		 * Log Mail Error
		 *
		 * @param WP_Error $wp_error WP_Error instance.
		 */
		public function log_mailer_errors( $wp_error ) {
			error_log( $wp_error->get_error_message() ); //phpcs:ignore;
		}

		/**
		 * Override phpMailer
		 *
		 * @param PHPMailer $phpmailer phpMailier instance.
		 */
		public function custom_phpmailer( $phpmailer ) {
			//phpcs:disable WordPress.NamingConventions.ValidVariableName.UsedPropertyNotSnakeCase
			$phpmailer->isSMTP();
			$phpmailer->Host       = $this->args['Host'];
			$phpmailer->SMTPAuth   = $this->args['SMTPAuth'];
			$phpmailer->Port       = $this->args['Port'];
			$phpmailer->Username   = $this->args['Username'];
			$phpmailer->Password   = $this->args['Password'];
			$phpmailer->SMTPSecure = $this->args['SMTPSecure'];
			$phpmailer->From       = $this->args['From'];
			$phpmailer->FromName   = $this->args['FromName'];

			if ( 'text/html' === $phpmailer->ContentType ) {
				$alt_body           = strip_tags( $phpmailer->Body, '<br><p><li>' );
				$alt_body           = preg_replace( '/<[^>]*>/', PHP_EOL, $alt_body );
				$phpmailer->AltBody = $alt_body;
			}
			//phpcs:enable WordPress.NamingConventions.ValidVariableName.UsedPropertyNotSnakeCase
		}

		/**
		 * Handle Custom WP Mail.
		 *
		 * @param array $args arguments.
		 */
		public function custom_wp_mail( $args ) {

			$template_path = plugin_dir_path( dirname( __FILE__ ) ) . 'kolorweb-mail-manager/template/template.html';
			$template_url  = plugin_dir_url( dirname( __FILE__ ) ) . 'kolorweb-mail-manager/template/template.html';

			$html_message = $args['message'];

			/**
			 * Apply our Custom Email Template.
			 * Check if file exists and load it.
			 */
			if ( file_exists( $template_path ) ) {
				$html_message = $this->custom_wp_mail_template( $args['message'], $template_url );
			}

			$args['message'] = $html_message;

			return $args;
		}

		/**
		 * Handle Custom Email Template.
		 * Apply logo and content to the template.
		 *
		 * @param string $message Current Email Message.
		 * @param string $template_url HTML Template URL.
		 */
		public function custom_wp_mail_template( $message, $template_url ) {

			if ( false !== strpos( site_url(), '.test' ) || false !== strpos( site_url(), '.local' ) ) {
				add_filter( 'https_ssl_verify', '__return_false' );
			}

			$template_response      = wp_remote_get( $template_url );
			$template_response_body = wp_remote_retrieve_body( $template_response );
			$template               = str_replace( '{#logo_image#}', esc_url( $this->args['logo'] ), $template_response_body );
			$template               = str_replace( '{#mail_content#}', $message, $template );
			$template               = str_replace( '{#mail_footer#}', wp_kses_post( $this->args['mail_footer'] ), $template );

			return $template;
		}

	}

	/**
	 * Load Instance.
	 */
	add_action(
		'init',
		function() {

			/**
			 * Filter to customize site name and logo url.
			 * Default site name is the blog name.
			 * Default logo url is a logo in the the template directory.
			 */
			$site_name = apply_filters( 'kw_mail_site_name', get_bloginfo( 'name' ) );
			$logo      = apply_filters( 'kw_mail_logo_url', plugin_dir_url( dirname( __FILE__ ) ) . 'kolorweb-mail-manager/template/logo.png' );

			/**
			 * EDIT CONFIGURATION
			 */
			if ( ! defined( 'KW_MAIL_CONFIG' ) ) {
				define(
					'KW_MAIL_CONFIG',
					array(
						'Host'          => 'HOST_HERE',
						'SMTPAuth'      => true,
						'Username'      => 'USERNAME_HERE',
						'Password'      => 'PASSWORD_HERE',
						'SMTPSecure'    => 'ssl',
						'Port'          => 465,
						'From'          => 'FROM_EMAIL_HERE',
						'FromName'      => $site_name,
						'logo'          => $logo,
						'mail_footer'   => $site_name,
						'email_testing' => 'EMAIL_TESTING_HERE',
					)
				);
			}

			new KolorWeb_Gest_Mail_Manager( KW_MAIL_CONFIG );

			/**
			 * To test the delivery of the email.
			 */
			if ( isset( $_GET['kw_mail_test'] ) ) { //phpcs:ignore;
				if ( is_email( KW_MAIL_CONFIG['email_testing'] ) ) {
					wp_mail( KW_MAIL_CONFIG['email_testing'], 'Test Mail ' . wp_date( 'Y-m-d H:i' ), __( 'This email ensures that there are no operational problems with the current configuration.', 'kolorweb-mail-manager' ) );
				}
			}
		}
	);
}
Just set up the parameters in the configuration array with your SMTP credentials.
Email template:
<!DOCTYPE html>
<html xmlns="http://www.w3.org/1999/xhtml" xmlns:v="urn:schemas-microsoft-com:vml"
      xmlns:o="urn:schemas-microsoft-com:office:office">

   <head>
      <meta http-equiv="Content-Type" content="text/html; charset=UTF-8">
      <meta name="viewport" content="width=device-width, initial-scale=1">
      <!-- So that mobile will display zoomed in -->
      <meta http-equiv="X-UA-Compatible" content="IE=edge"> <!-- enable media queries for windows phone 8 -->
      <meta name="format-detection" content="telephone=no"> <!-- disable auto telephone linking in iOS -->
      <!--[if gte mso 9]>
		<xml>
			<o:OfficeDocumentSettings>
				<o:AllowPNG />
				<o:PixelsPerInch>96</o:PixelsPerInch>
			</o:OfficeDocumentSettings>
		</xml>
		<![endif]-->
      <style>
         body {
            background-color: #ffffff;
            margin: 0;
            padding: 10px;
         }

         .header,
         .title,
         .subtitle,
         .footer-text {
            font-family: Helvetica, Arial, sans-serif !important;
         }

         .container-padding {
            padding-left: 24px;
            padding-right: 24px;
         }

         .header {
            font-size: 22px;
            font-weight: bold;
            color: #333;
            font-family: Tahoma, Verdana, Segoe, sans-serif !important;
            text-align: center !important;
            padding: 50px 0 30px 0;
            line-height: 1.2;
            text-decoration: none;
         }

         .header a {
            font-weight: bold;
            color: #40a6c5;
            text-decoration: none;
         }

         .header-image {
            height: auto;
            vertical-align: middle;
            border: none;
         }

         .full-width-header-image {
            width: 100%;
            display: block;
         }

         .button {
            text-align: center;
            background: #5156be;
            margin: 0 auto;
            box-sizing: border-box;
            width: fit-content;
            border-radius: 1rem;
            border: 1px solid #5156be;
            padding: 0 1rem;
         }

         .button a {
            padding: 8px 12px;
            border-radius: 2px;
            font-family: Helvetica, Arial, sans-serif;
            font-size: 14px;
            color: #ffffff;
            text-decoration: none;
            font-weight: bold;
            display: inline-block;
         }

         .footer-text,
         .footer-text th,
         .footer-text td,
         .footer-text li {
            font-size: 12px;
            line-height: 16px;
            color: #aaaaaa;
            background: #ffffff;
         }

         .footer-text a,
         .footer-text th a,
         .footer-text td a,
         .footer-text li a {
            color: #aaaaaa;
         }

         .container {
            width: 600px;
            max-width: 600px;
         }

         .content {
            padding-top: 12px;
            padding-bottom: 12px;
            background-color: #ffffff;
         }

         code {
            background-color: #eee;
            padding: 0 4px;
            font-family: Courier, monospace !important;
            font-size: 12px;
         }

         hr {
            border: 0;
            border-bottom: 1px solid #cccccc;
         }

         .hr {
            height: 1px;
            border-bottom: 1px solid #cccccc;
         }

         h1 {
            font-size: 21px;
            font-weight: bold;
            text-transform: none;
            color: #343434;
            font-family: Tahoma, Verdana, Segoe, sans-serif !important;
            text-align: left;
         }

         h2,
         h3,
         h4 {
            font-size: 20px;
            font-weight: bold;
            color: #343434;
            font-family: Tahoma, Verdana, Segoe, sans-serif !important;
            text-align: left;
         }

         .subtitle {
            font-size: 16px;
            font-weight: 600;
            color: #343434;
         }

         .subtitle span {
            font-weight: 400;
            color: #999999;
         }

         .body-text,
         .body-text td,
         .body-text th,
         .body-text li {
            font-family: Helvetica, Arial, sans-serif !important;
            font-size: 14px;
            color: #878787;
            line-height: 1.5;
         }

         .body-text,
         .body-text td,
         .body-text th {
            text-align: left;
         }

         a {
            color: #40a6c5;
            font-weight: bold;
         }

         .body-text .content-twocol td,
         .body-text .content-twocol h1,
         .body-text .content-twocol h2,
         .body-text .content-twocol h3,
         .body-text .content-twocol h4 {
            text-align: left;
            vertical-align: top;
         }


         body {
            margin: 0;
            padding: 0;
            -ms-text-size-adjust: 100%;
            -webkit-text-size-adjust: 100%;
         }

         table {
            border-spacing: 0;
         }

         table td {
            border-collapse: collapse;
         }

         .ExternalClass {
            width: 100%;
         }

         .ExternalClass,
         .ExternalClass p,
         .ExternalClass span,
         .ExternalClass font,
         .ExternalClass td,
         .ExternalClass div {
            line-height: 100%;
         }

         .ReadMsgBody {
            width: 100%;
            background-color: #fff;
         }

         table {
            mso-table-lspace: 0pt;
            mso-table-rspace: 0pt;
         }

         img {
            -ms-interpolation-mode: bicubic;
         }

         .yshortcuts a {
            border-bottom: none !important;
         }

         /**** ADD CSS HERE ****/

         @media screen and (max-width: 599px) {

            table[class="force-row"],
            table[class="container"] {
               width: 100% !important;
               max-width: 100% !important;
            }
         }

         @media screen and (max-width: 400px) {
            td[class*="container-padding"] {
               padding-left: 12px !important;
               padding-right: 12px !important;
            }

            .header-image {
               max-width: 100% !important;
               height: auto !important;
            }

            table[class*="content-twocol"] {
               float: none;
               width: 100%;
            }

            table[class*="content-twocol"],
            table[class*="content-twocol"] p,
            table[class*="content-twocol"] h1,
            table[class*="content-twocol"] h2,
            table[class*="content-twocol"] h3,
            table[class*="content-twocol"] h4 {
               text-align: left !important;
            }
         }

         /**** ADD MOBILE CSS HERE ****/

         .ios-footer a {
            color: #aaaaaa !important;
            text-decoration: underline;
         }
      </style>
   </head>

   <body>
      <span style="display:none; visibility:hidden; font-size: 1px !important;"></span>
      <!-- 100% background wrapper (grey background) -->
      <table border="0" width="100%" height="100%" cellpadding="0" cellspacing="0" class="">
         <tr>
            <td align="center" valign="top">

               <br>
               <table id="holder" class="container" border="0" cellspacing="0" cellpadding="0"
                      style="width:100%; max-width:600px!important;" align="center">
                  <tr>
                     <td align="center">
                        <table width="100%" border="0" cellspacing="0" cellpadding="0">
                           <tr>
                              <td>

                                 <!--[if gte mso 9]>
											<table id="outlookholder" class="container" width="600" border="0" cellspacing="0"
												cellpadding="0" align="center">
												<tr>
													<td>
														<![endif]-->
                                 <!--header-table-->
                                 <table width="100%" border="0" cellspacing="0" cellpadding="0">
                                    <tr>
                                       <td class="container-padding header" align="center">
                                          <img width="260px" height="60px" alt="Logo" src="{#logo_image#}">
                                       </td>
                                    </tr>
                                 </table>
                                 <!--/header-table-->
                                 <!--content-table-->
                                 <table width="100%" border="0" cellspacing="0" cellpadding="0">
                                    <tr>
                                       <td class="content" align="">
                                          <div class="body-text">
                                             {#mail_content#}
                                          </div>
                                       </td>
                                    </tr>
                                 </table>
                                 <!--/content-table-->
                                 <!--footer-table-->
                                 <table width="100%" border="0" cellspacing="0" cellpadding="0">
                                    <tr>
                                       <td class="container-padding footer-text" align="left">
                                          <p style="text-align: center;">
                                             <span
                                                   style="font-size: 12px; font-family: Helvetica, Arial, sans-serif  !important; color:#808080;">{#mail_footer#}</span>
                                          </p>
                                          <br>
                                       </td>
                                    </tr>
                                 </table>
                                 <!--/footer-table-->
                                 <!--[if gte mso 9]>
										</td>
									</tr>
								</table>
								<![endif]-->
                              </td>
                           </tr>
                        </table>

                     </td>
                  </tr>
               </table>
            </td>
         </tr>
      </table>
      <!--/100% background wrapper-->
   </body>

</html>
To use the template, just edit the html file without editing the placeholders.
Send to the email address entered in the configuration (email_testing) to run a test, just call any page on the site with the variable:
$_GET ?kw_mail_test=trueUsing an SMTP Plugin for WordPress: Pros and Cons
Another way to use the SMTP protocol with WordPress is to use a plugin. We can find several plugins designed for this purpose, we have collected the list of the best WordPress SMTP plugins.
But first of all let’s see what are the pros and cons of using one of these plugins.
The main advantage of using a plugin is ease of use. You don’t need to have any coding knowledge and you don’t need to go and edit any files.
Another advantage of using a plugin is the additional functions. For example, some plugins allow us to have a history of sent emails. It is therefore necessary to evaluate whether the additional functions of the plugin are useful or even indispensable.
In all other cases better not to use a plugin. First of all because if we don’t use all the functions, it is superfluous to have a plugin and the very simple function we have seen is enough.
Adding plugins, especially when they have several functions that are not used, can slow down the site. For this reason it is good to check that the chosen plugin does not affect the loading speed.
How to use WP Mail SMTP to send emails via SMTP with WordPress
We have seen that with a simple function we can configure the sending of emails with WordPress via SMTP.
In some cases we may prefer to use a plugin. For this reason, in this part of the guide we are going to see how to configure the sending of emails using one of the best SMTP plugins out there: WP Mail SMTP.
The first thing to do is install and activate the “WP Mail SMTP” plugin in WordPress.
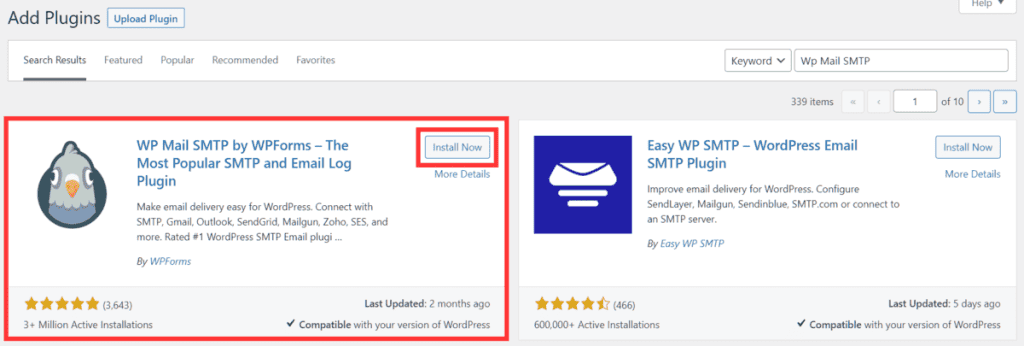
After activating it, we will be redirected directly to the wizard to configure the plugin.
Configure WP Mail SMTP with the wizard
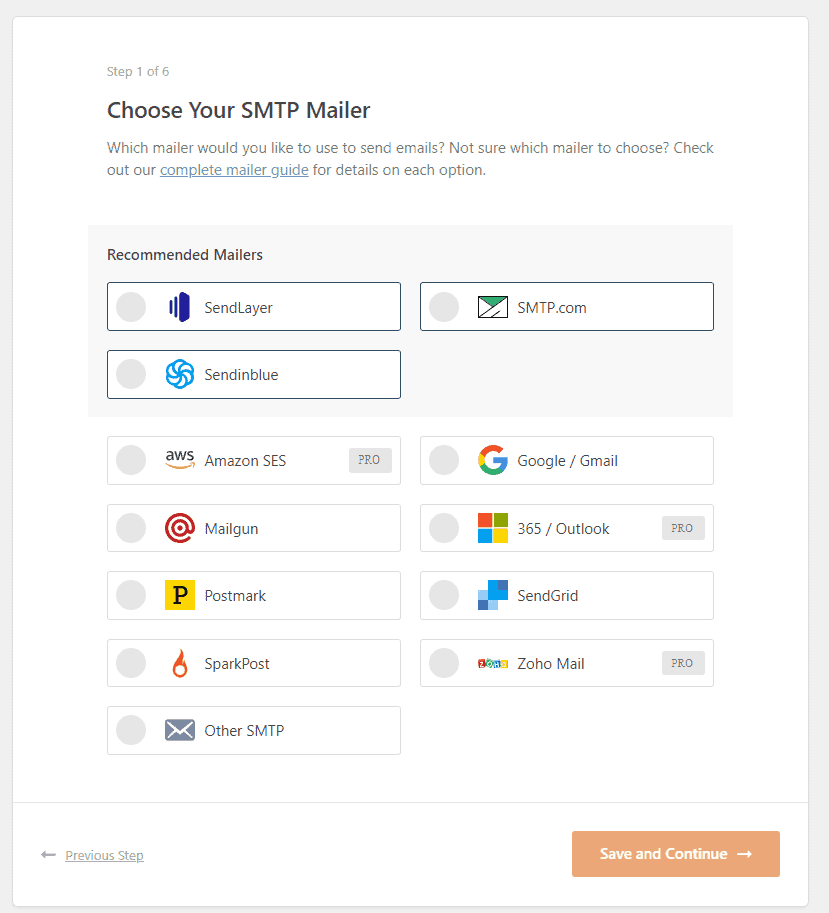
In the first step we have to choose the SMTP service we want to use.
If we use an email provider like Gmail, we will then have to connect via API. In this case you can refer to the WP Mail SMTP documentation.
If the provider is not in the list, for example if we choose to use the SMTP server of our hosting provider, we just need to select the “Other SMTP” option.
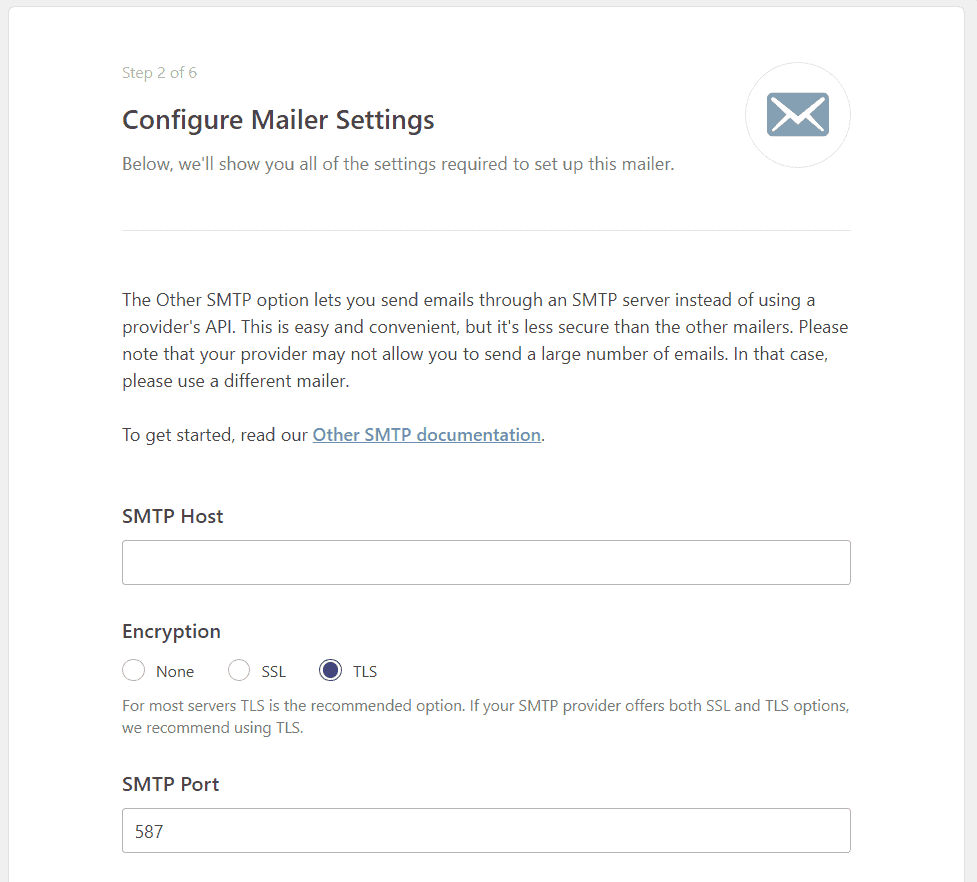
In the second step, if we have chosen the “Other SMTP” option, there will be the actual configuration. We will have to fill in the information required to connect to the SMTP server manually.
In particular:
- SMTP host: type the server name.
- Encryption: we choose the type of encryption, SSL or TLS
- SMTP Port: insert the correct port number.
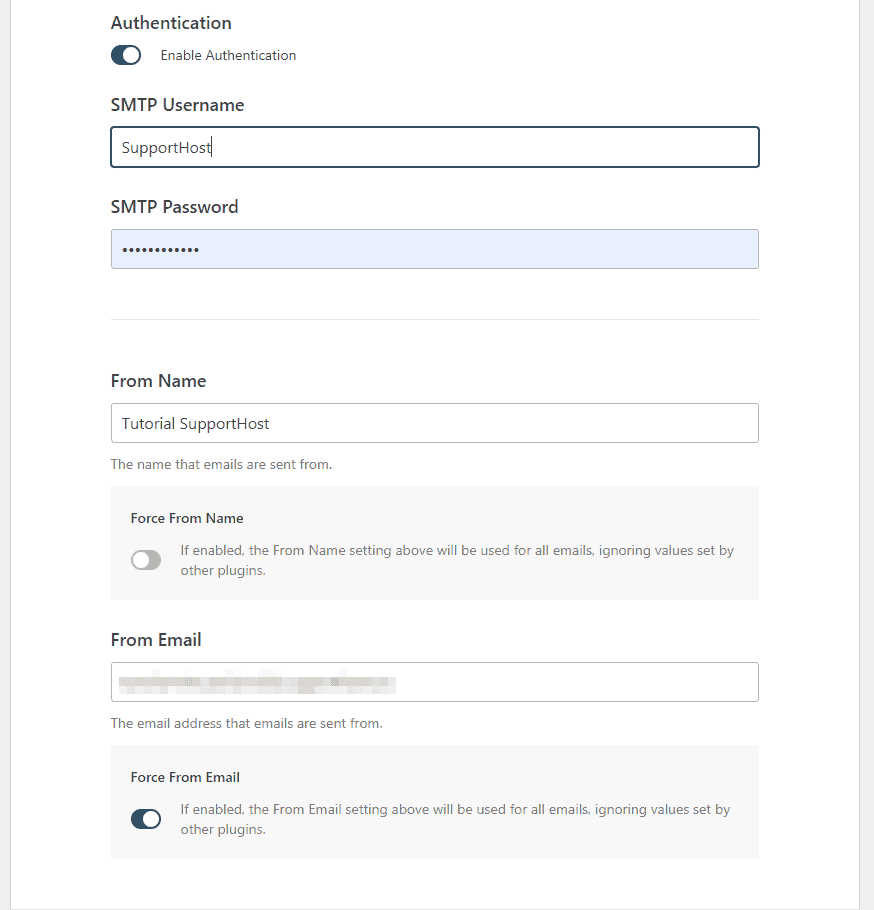
SMTP Username: enter the username.
SMTP Password: type the password.
From Name: we choose the name that will be shown in the sender.
From Email: we choose the email that will be used for sending.
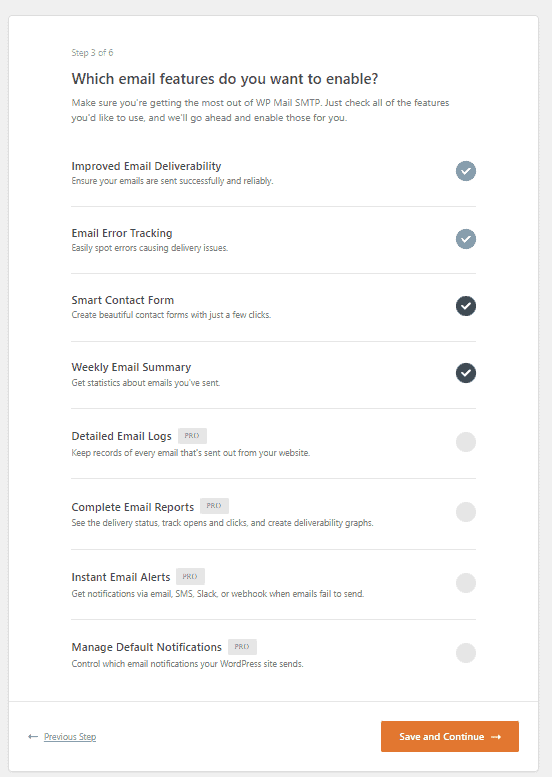
In the third step we can choose the functions we want to use. By default all functions are active, except those reserved for the Pro version of the plugin.
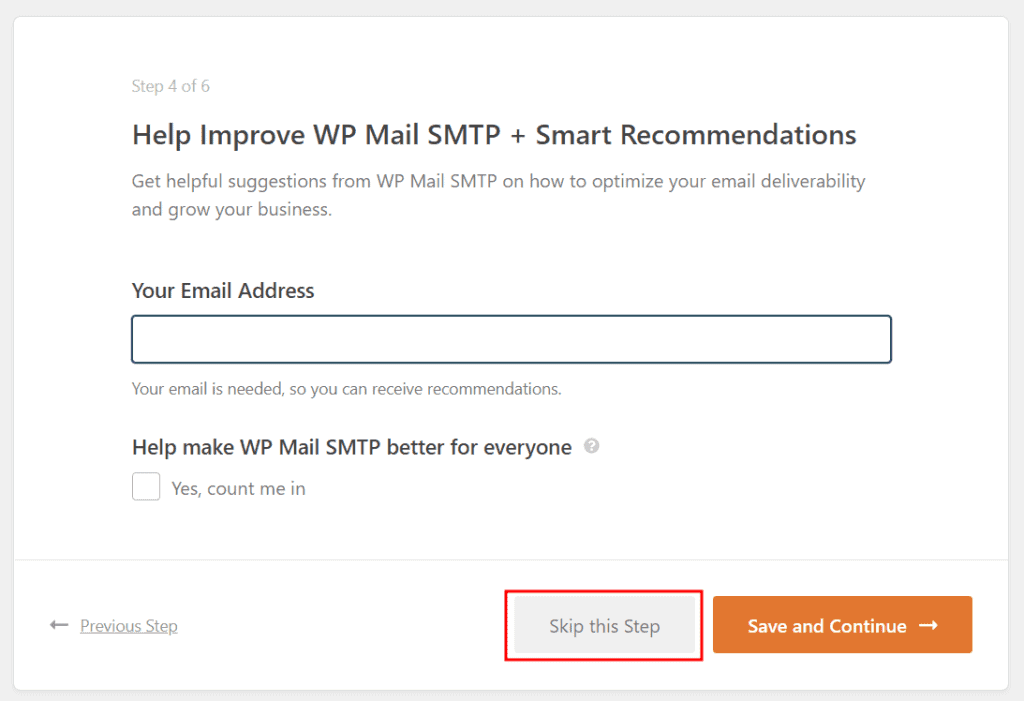
The fourth step asks us if we want to receive suggestions via email. We can also skip it by clicking on Skip this step.
If we have purchased the Pro license of WP Mail SMTP we can enter the key in step 5, otherwise we click again on Skip this step.
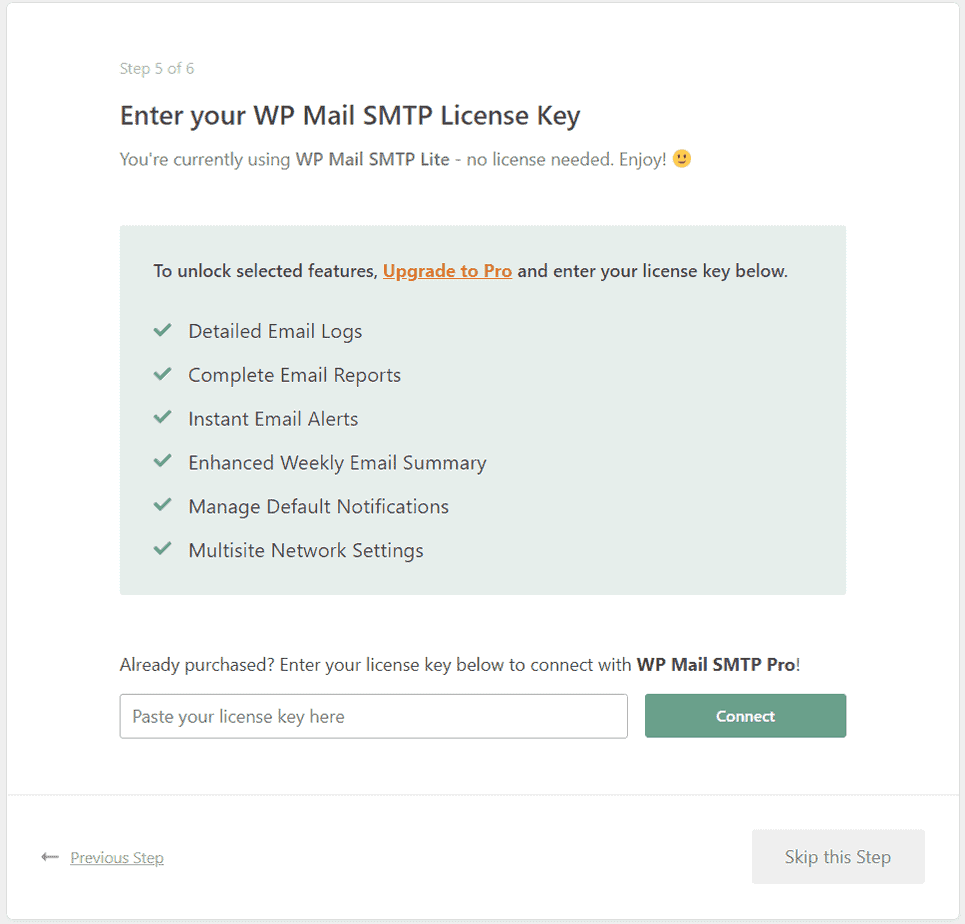
The final step will be to verify and let us know if the configuration is correct.
Change WP Mail SMTP settings
If we want to change the settings of this SMTP plugin after completing the wizard, just go to WP Mail SMTP > Settings.
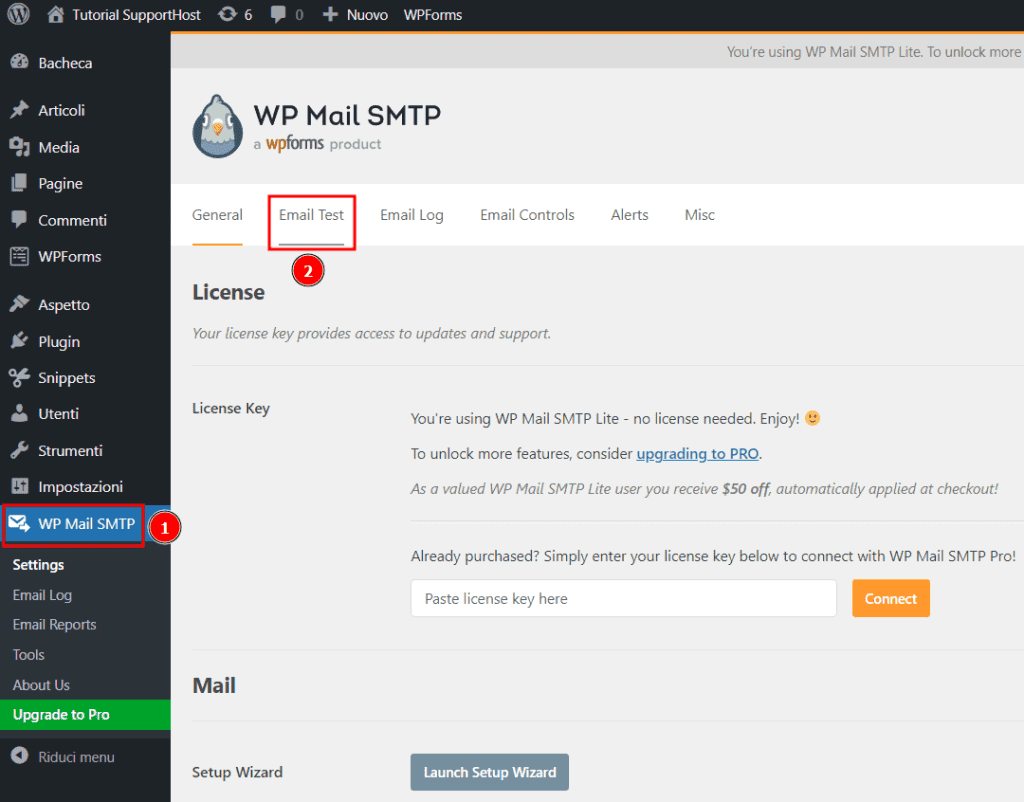
From here we will be able to modify the data that we entered during the configuration.
Or we can change the email sending service to use, choosing one of those present.
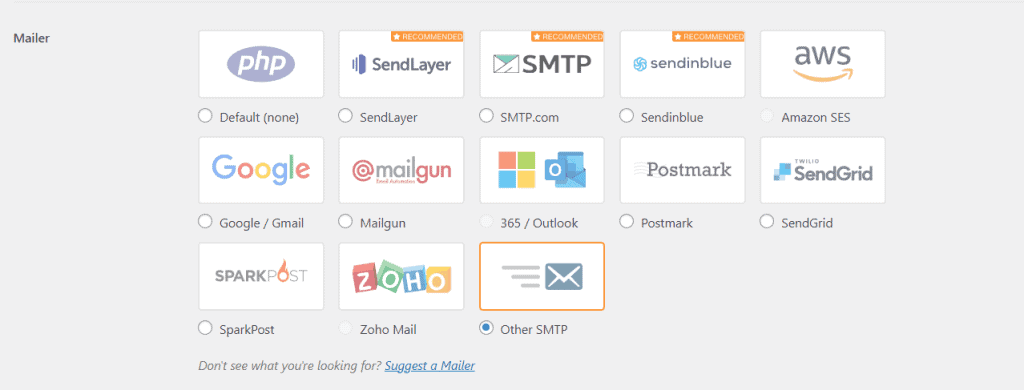
Note that the PHP (default) option is also present, which is the native WordPress function.
Problems configuring WP Mail SMTP
In case of errors during the configuration, we will see a screen like this and we will be able to start the troubleshooting procedure.
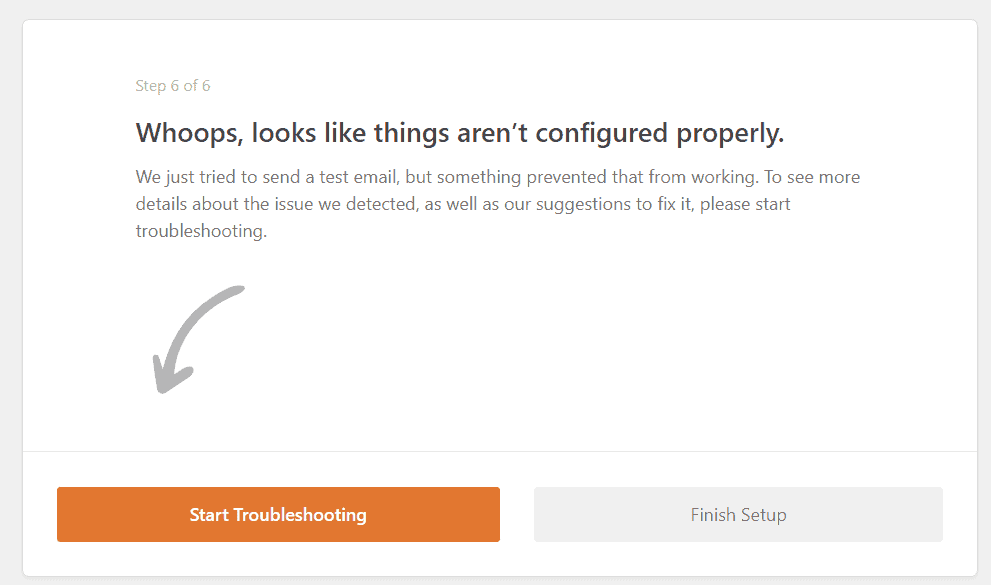
By clicking on “Start Troubleshooting” we will be redirected to the test page and will be able to access the error log to understand what problem is preventing the sending of the test email.
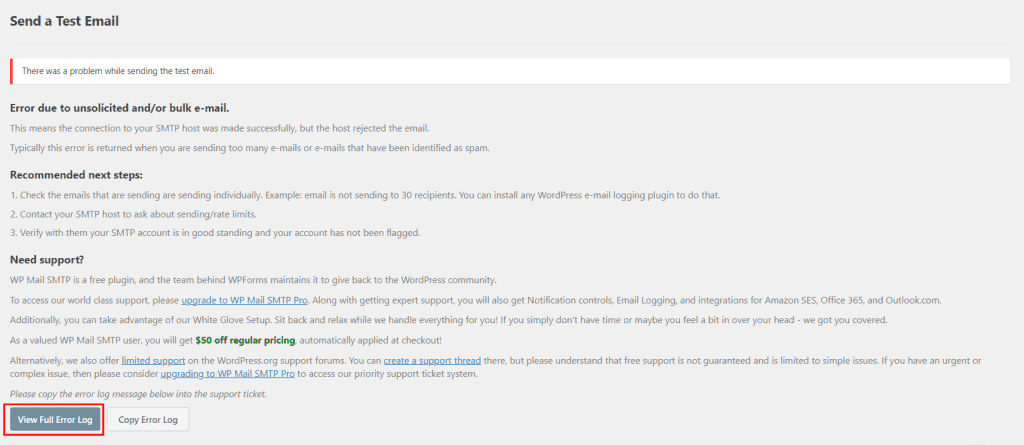
We can also open the Debug Events section, like this:

Here we will find the list of errors that occurred while trying to send the emails.

Test sending emails
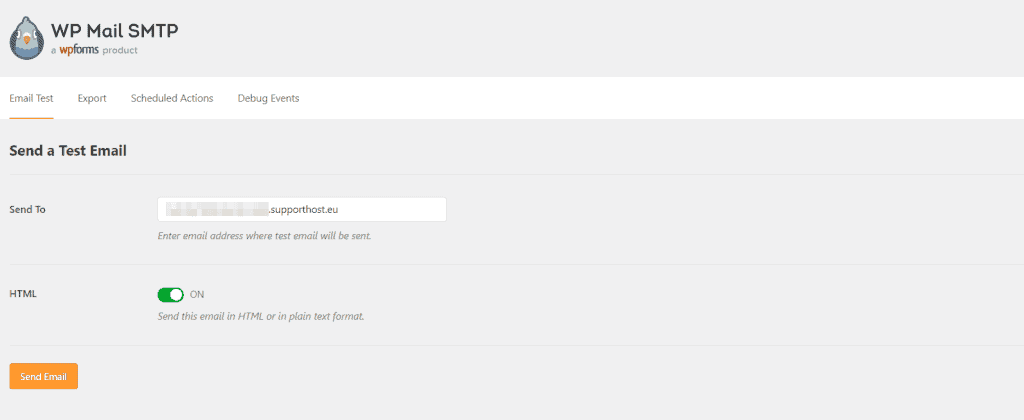
To carry out a new email sending test with WP Mail SMTP, just click on WP Mail SMTP > Email Test.

Make sure that the recipient’s email is correct and click on the “Send Email” button.
The best SMTP plugins for WordPress
The plugin we just saw, WP Mail SMTP, is just one possible system.
Now let’s see the features of the best plugins that allow us to send emails via SMTP with a WordPress site.
In this list we have collected the most complete plugins: these are extensions that are also available in a free version and are all compatible with the main email services.
Let’s see in detail:
- WP MailSMTP;
- EasyWPSMTP;
- SMTP Post;
- FluentSMTP.
We will then see other specific plugins for certain email providers.
WP Mail SMTP (free and premium)
WPForms’ WP Mail SMTP is undoubtedly the most used WordPress SMTP email plugin. There are currently over 3 million WordPress installations using it.
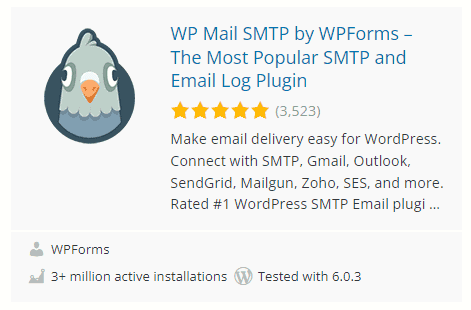
The extension is compatible with WordPress version 6.0.3 and is kept up-to-date by the developers.
You can configure the SMTP server by entering the necessary credentials or you can directly use the APIs to use services such as Gmail, SendLayer, Sendinblue, Amazon SES and others.
WP Mail SMTP is a free WordPress SMTP plugin. In addition, if you need to use other functions, you can evaluate the purchase of the Pro version.
With WP Mail SMTP Pro you have several additional functions, let’s see some of the most interesting ones.
- Email log: the plugin allows you to store the history of sent emails.
- Resending emails: You can use the email history to resend or resend emails.
- Email opening rate: you can access statistics that let you know how many times emails have been opened.
- Attachment storage: You can save attachments so you can send them faster later.
- Export of email logs: you can download the email history in different formats such as csv and Excel.
Prices
In addition to the free version of the plugin, you can purchase one of the premium licenses.
- WP Mail SMTP Pro: It is a single site license with the features we mentioned before and some additional ones. The cost is $49.00 per year.
- WP Mail SMTP Elite: other advanced features are added to the pro functions, such as the ability to test sending emails. Cost $99.00 per year.
- WP Mail SMTP Developer: ideal for multiple sites, the license is valid for up to 20 sites. The price is $199.00 per year.
- WP Mail SMTP Agency: Ideal for multiple sites, up to 100 websites. The annual license costs $399.00.
Easy WP SMTP (free)
If you are looking for a free plugin to configure SMTP with WordPress, Easy WP SMTP could be the one for you.
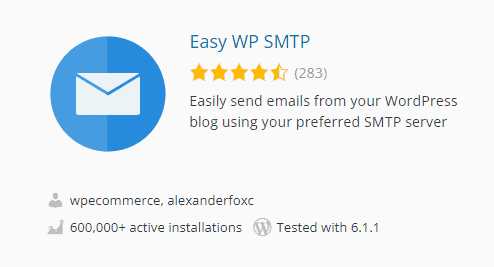
Among the functions included in this plugin we mention:
- the ability to send emails with Gmail, Hotmail and Yahoo (just have an account);
- send test emails to understand if the configuration used is correct;
- an option that allows us to activate debugging and make sure that emails are sent correctly.
Prices
Easy WP SMTP is a free SMTP plugin.
Post SMTP Mailer/Email Log (free and premium)
Post SMTP Mailer/Email Log developed by Post SMTP is a plugin available in free and premium version.
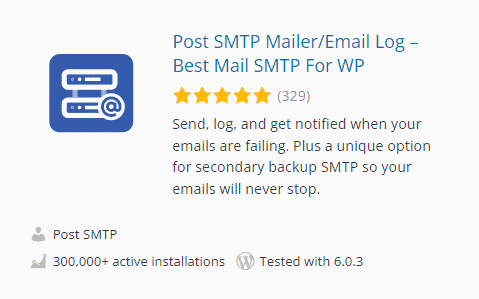
Among the basic functions, available in the free version of this plugin, we find:
- a wizard that accompanies us during the configuration of the plugin;
- a test system to verify that the sending of emails is correct;
- the ability to access the email history and resend emails if there have been problems;
- API support for major services including: Gmail, Mailgun, Mandrill, SendGrid and Sendiblue;
- the ability to install a Chrome extension to display notifications if emails are not sent correctly.
Prices
Pro version extensions allow us to use other services such as Amazon SES, Office 365, Better Email Logger, Twilio and Mail Control.
Post SMTP Mailer offers several annual subscription plans: Basic, Basic Plus and Ultimate.
- Basic, starting at $34.99, includes a single site license and the pro extensions mentioned above.
- Basic Plus, starting at $69.99 also includes setup as well as a single site license, plus one year of support and an additional year of guaranteed updates.
- Ultimate, starting at $104.99, is a license valid for 30 sites and includes the additional features of the other plans.
FluentSMTP (free)
FluentSMTP by FluentSMTP & WPManageNinja Team is one of the most useful WordPress SMTP plugins.
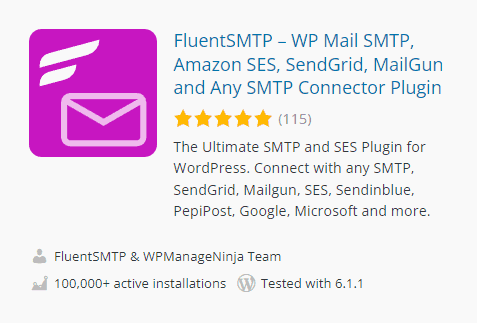
The plugin supports API connection with major email services including Gmail, Outlook, Amazon SES, Google Workspace and more. We are talking about a free plugin that includes several features including:
- email logs;
- a function to resend emails;
- the debug function to solve sending problems;
- a reporting system to keep track of sent emails;
- Compatibility with several form builder plugins including Elementor Forms and Contact Form 7.
Prices
FluentSMTP is a completely free SMTP plugin.
Other SMTP plugins for WordPress
We have just seen the most used plugins to send authenticated emails via SMTP. Then there are other specific plugins for email providers, let’s see some of them.
If you use only one provider, it can be convenient to use a specific plugin instead of a generic one.
Gmail smtp
It is the specific SMTP plugin for Gmail.
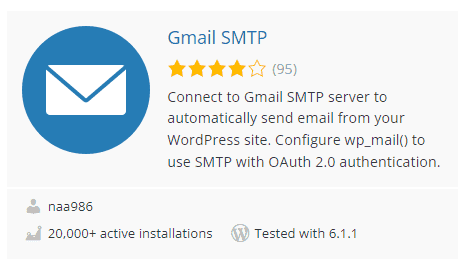
To use it, all you need is a Gmail account, the plugin allows us to connect via API using OAuth 2.0 authentication.
Newsletter, SMTP, Email marketing and Subscribe forms by Sendinblue
Sendinblue has an official plugin that also allows us to send emails via SMTP with WordPress.

In this case it is not only an SMTP plugin, but there are also other functions such as managing contact lists and sending email campaigns.
With this plugin we can connect to the Sendinblue account via API and send emails via SMTP.
HubSpot – CRM, Email Marketing, Live Chat, Forms & Analytics
HubSpot has an official and free plugin that allows us to manage email campaigns and contact list directly from WordPress.

In this case we are not talking about a real SMTP plugin. Using this extension, however, we can also configure the SMTP protocol to send emails and therefore not having to use the default WordPress system.
Conclusion
Sending emails via SMTP with WordPress allows us to solve sending problems. If the emails you send often end up in spam or fail to arrive in your inbox, you can almost certainly solve the problem this way.
We have seen how to use SMTP with WordPress with a simple function. Alternatively, you can also use a plugin, for instance one of those in our list.
In either case, you can use your hosting provider’s SMTP server or a third-party service.
Were you able to configure WordPress to send authenticated emails? Let us know in the comments which method you used.


Leave a Reply