
One of the errors we may come across while surfing the internet is the dns_probe_finished_bad_config error. This is a DNS error that may depend on problems with the configuration or the network.
In this article, How to solve dns_probe_finished_bad_config, we will see what causes the problem and what are the possible solutions. We will examine the possible causes and show you the methods you can use to solve the error on Windows, Linux and MAC operating systems and on Android devices.
Firstly, let’s see what the dns_probe_finished_bad_config error is and how it appears on the browser.
Table of Contents

What is dns_probe_finished_bad_config error
The dns_probe_finished_bad_config error is part of DNS errors and occurs when DNS servers fail to successfully complete DNS resolution.
DNS (Domain Name System) is the system that is used to associate IP addresses with domain names. Think of it as a huge telephone directory that allows domain names to be converted into their corresponding IP addresses.
This system is one that allows us to connect to a website by remembering its domain name, without having to know or memorize individual IP addresses.
The DNS resolution process is precisely for converting a domain to an IP address.
When the DNS resolution is successful, we are able to reach the desired web page, but if something goes wrong, errors may appear including the error: err_name_not_resolved.
Specifically in the case of the dns_probe_finished_bad_config error message, there can be many causes, including the presence of outdated data in the cache, local hosts file configurations, up to browser settings or third-party programs such as antivirus and firewalls.
These and other variables can interfere with the DNS (or network) configuration and generate the error. The error message can occur regardless of the browser and operating system we are using.
In this article, How to solve dns_probe_finished_bad_config, we’ll see what the dns_probe_finished_bad_config error looks like on Chrome.

How to solve dns_probe_finished_bad_config
Let’s see how to solve the dns_probe_finished_bad_config error starting from the quickest solutions, such as restarting the router, to other checks to be done to be able to solve the error.
We will specifically look at these possible solutions:
- restart the router
- Clear the cache and DNS cache
- change DNS servers
- restart the DNS client
- act on the browser settings
- check the hosts file
- update drivers
- do an antivirus scan
- Disable programs such as antivirus and firewall.
Try restarting the router
One of the first tests you can do to try to resolve the dns_probe_finished_bad_config error is to restart the router. You should unplug the power to the router and modem, wait at least a minute, and then plug it back in.
After that you can check if the error has resolved, if not you can try the next methods.
Clear the cache
Typically, the DNS errors, including dns_probe_finished_bad_config, depend precisely on a wrong network configuration or in DNS settings.
However, in some cases even outdated data stored in the browser cache can cause these errors to appear.
To see if the error may be cache-dependent, you can try visiting the site using incognito browsing. If the error does not occur, then try clearing the cache to see if you can resolve it.
If you use Windows as your operating system, with any browser you can use the key combination Ctrl + Shift + Delete to access the browsing data settings and clear the cache.
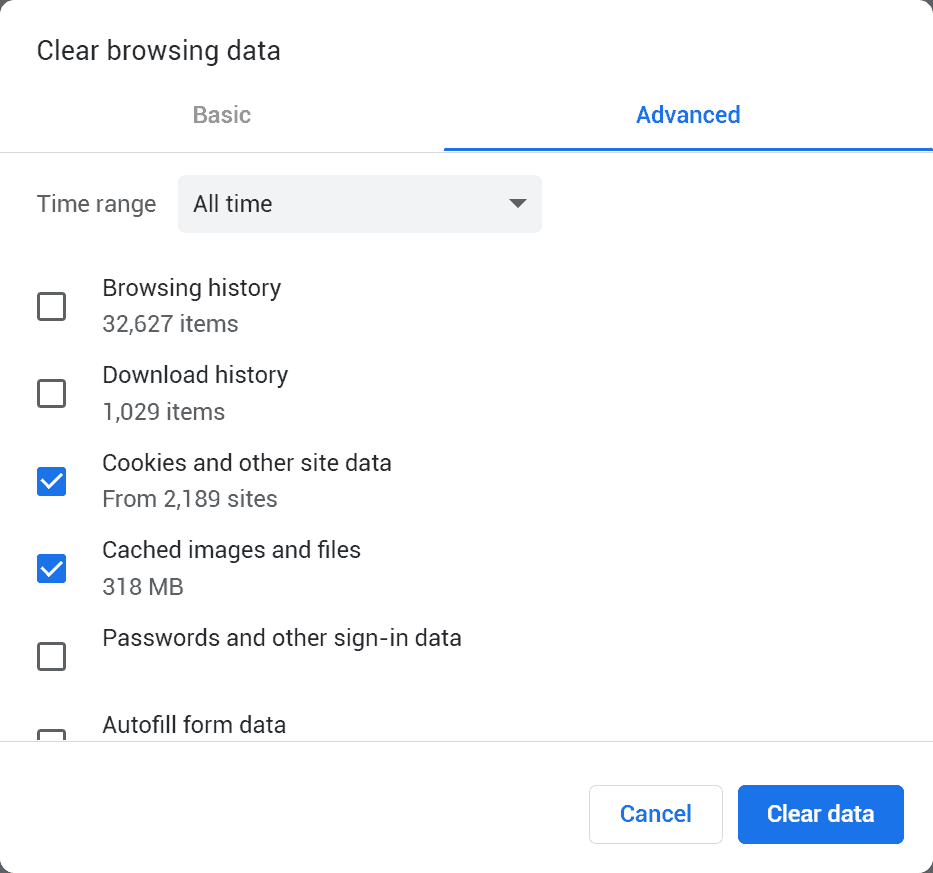
For a detailed procedure you can check our article on how to clear cache on major browsers.
Empty the DNS cache
Within the DNS cache, IP addresses of visited sites are stored. Just as is the case with the browser cache, obsolete information stored in the DNS cache can also generate errors while browsing.
To check whether the dns_probe_finished_bad_config error depends on it, you can clear the DNS cache and try visiting the page you couldn’t reach again.
How to clear DNS cache on Windows
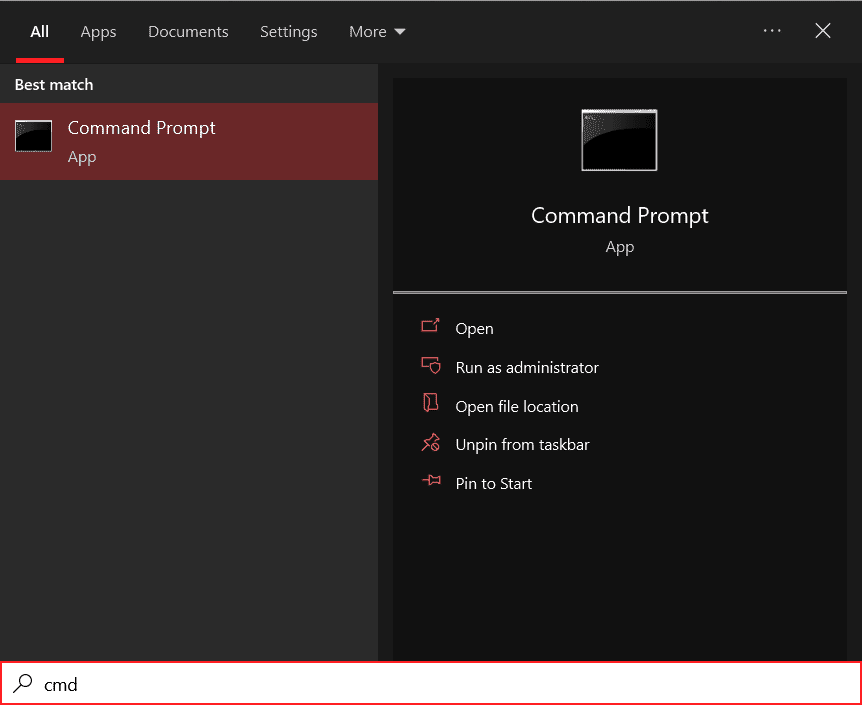
On Windows you can clear the DNS cache through the command prompt.
First, start the command prompt as Administrator. Just search for “command prompt” in the Windows search bar and then click on Run as Administrator.
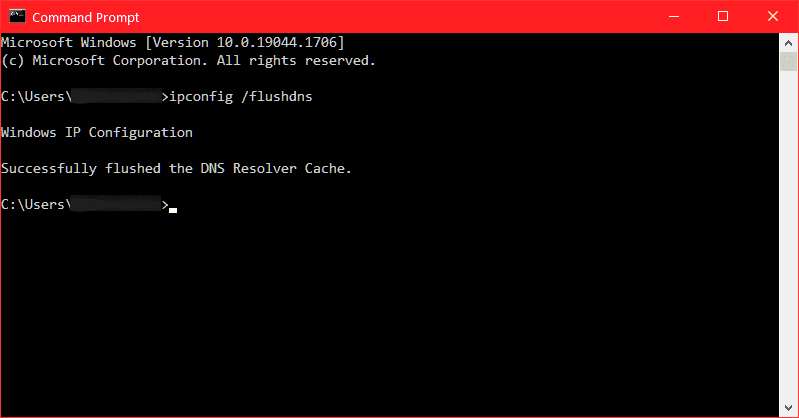
The command to use to clear the DNS cache is as follows:
ipconfig /flushdnsWe simply type it in and press enter. If the operation was successful, we will see a message like the one shown in this screenshot.
How to clear Chrome’s DNS cache
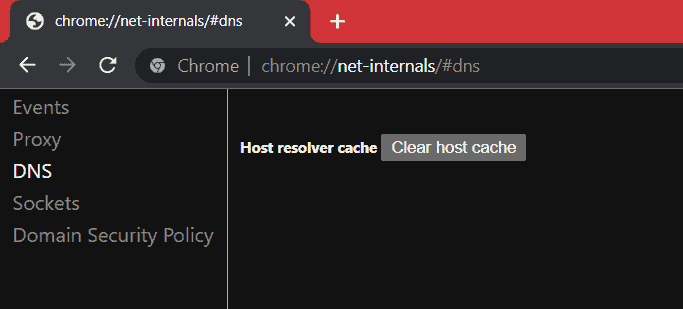
Google Chrome also keeps its own DNS cache, in some cases emptying it can help us solve the dns_probe_finished_bad_config error and other DNS problems like dns_probe_finished_nxdomain or other error like ERR_CONNECTION_RESET.
To do this we need to open Chrome and enter in the address bar:
chrome://net-internals/#dns
After that we will just click Clear host cache to clear Chrome’s DNS cache.
Renew IP address.
In addition to clearing the DNS cache, it can also be useful to renew your IP address. Let’s see how to do it on Windows.
Open the command prompt as Administrator as we saw in the previous section.
Use the following command to release the current IP address:
ipconfig /releaseAfter that, if you haven’t already done so, you can clear the DNS cache with the command:
ipconfig /flushdnsAfter completing this step as well, use the command given below to renew the IP address:
ipconfig /renew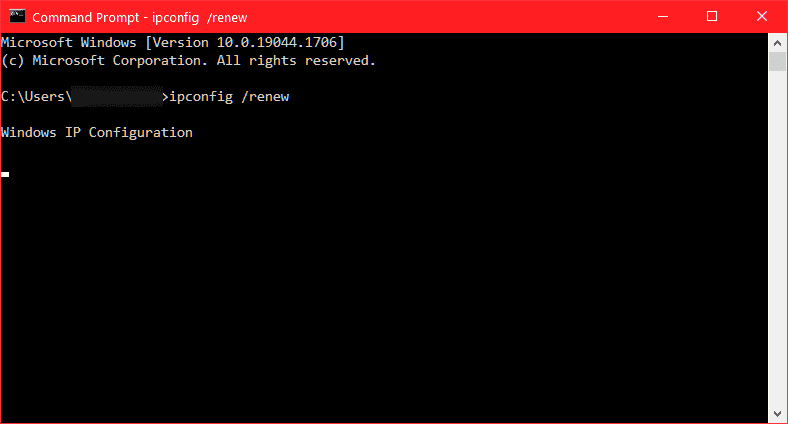
Switch to public DNS servers.
Usually the automatic setting is to use the DNS of the Internet service provider. In some cases, however, to resolve errors such as dns_probe_finished_bad_config or even when the DNS server is not responding, you can change the DNS servers.
The procedure allows you to use public DNS servers such as those from Google, CloudFlare, or OpenDNS.
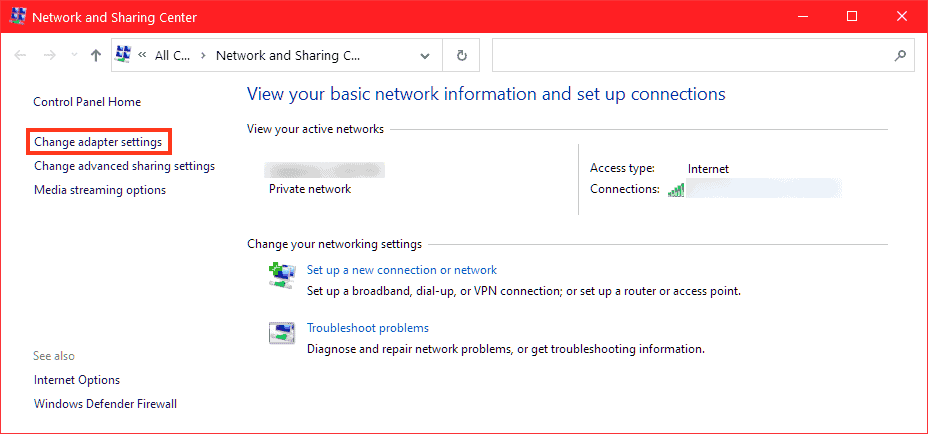
How to change DNS servers on Windows
To change the DNS servers on Windows 10 we need to access the Network and Sharing Center. We can find these settings in the control panel, as shown in the screenshot below.

We there’s a need to access the network settings by clicking on Edit Card Settings.
We will see the list of network connections and we will have to select the one in use and right-click on it and then click on Properties.

In the list of items, we will need to locate Internet Protocol version 4 (TCP/IPv4) and click on the Properties button after selecting it.

In the General tab of the IPv4 protocol properties we will find the option Use the following DNS server addresses and we can enter the DNS we want to use.

For example, if we wanted to use Google DNS, we would simply enter:
Preferred DNS server: 8.8.8.8
Alternate DNS server: 8.8.4.4
Alternatively, we can use other public DNS such as OpenDNS:
Preferred DNS server: 208.67.222.222
Alternate DNS server: 208.67.220.220
How to change DNS servers on macOS
To change DNS servers on macOS, we need to access the network settings (Network) from System Preferences.
From here we need to select the network in use and access the options (Advanced/Other Options) and then open the DNS tab.
Using the “+” button we can add the DNS servers we want to use. In this example below we have used Google DNS.

How to change DNS servers on Linux
To change DNS servers on Linux we can make changes to the resolv.conf file.
After opening the file with a text editor such as nano or gedit, directly from the terminal, we can set the public DNS servers.
Servers should be set next to nameservers as you can see in this screenshot where we used Google’s nameserver.

How to change DNS servers on Android
If we are faced with the dns_probe_finished_bad_config error on Android, we can try to change the DNS servers in use, let’s see how to do it.
The first step is to access the settings of the network we are using. After that we have to select the option that allows us to use a static IP. By doing this we can change the DNS and choose to use public DNS.
In the screenshot below is an example where we have set Google DNS as primary (DNS 1) and secondary (DNS 2).

Restart the DNS client.
On Windows, another way to resolve the dns_probe_finished_bad_config error is to restart the DNS client. Let’s see how to do it.
How to restart DNS client from terminal
To restart the DNS client, we can use the Windows command prompt.
We simply have to type the following command to stop the service:
net stop dnscacheAnd then restart it with this command:
net start dnscacheIf the procedure was successful, we will receive a message confirming that the DNS client was successful.
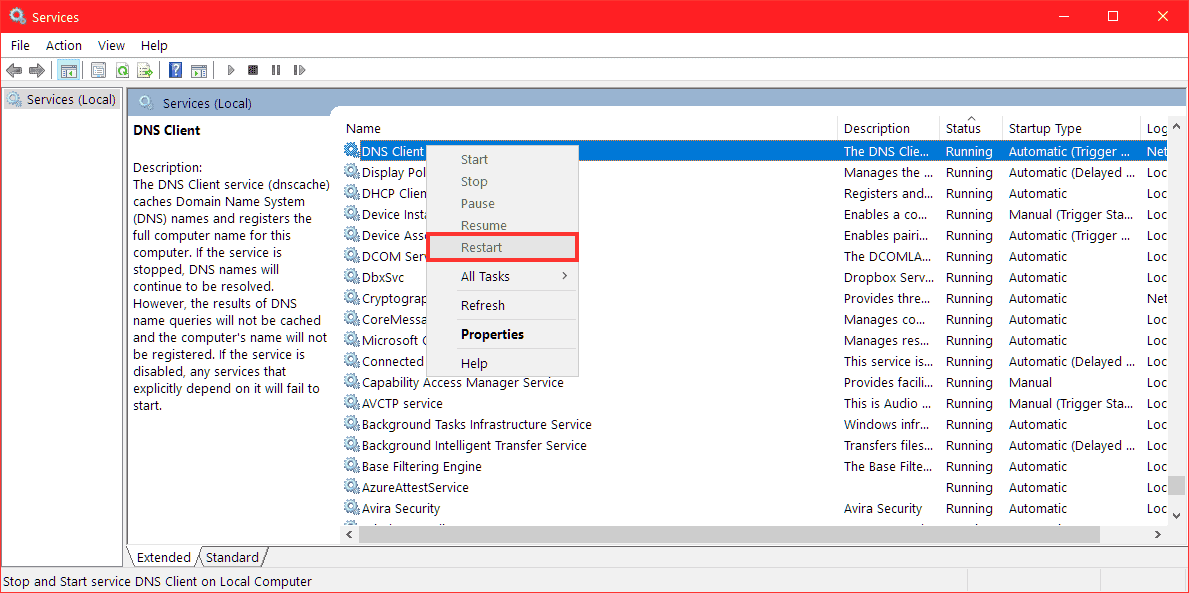
How to restart the DNS client from the Services manager
Another way we can use to restart the service is to use the Windows Services manager.
In the list of services we will need to locate “DNS Client” and then restart it. Keep in mind that in some cases it will not be possible to restart the service in this way.
Reset Google Chrome flags
In some cases, errors such as dns_probe_finished_bad_config are due to browser settings.
On Chrome we can reset the options to the default ones, especially if we had activated additional options for the browser.
We then simply open the browser and type in the address bar:
chrome://flags
By doing this we can access the browser’s experimental settings and reset them. First we will have to click on the Reset all button to return to the basic settings.

After doing so we will have to click Relaunch to restart the browser with the new settings. All that remains is for us to try visiting the site again to see if the dns_probe_finished_bad_config error has resolved.
Check the hosts file
The file hosts file is a file on our computer that allows us to associate domains with specific IP addresses. This file is useful on several occasions, for example when we want to connect to a site in staging.
If we are experiencing navigation errors, it may be useful to check that there have been no changes to the hosts file that are preventing us from reaching the desired site.
The hosts file is typically located at the following path C:\Windows\System32\drivers\etc.
We can open it with any text editor and verify that the site we are trying to visit is not inside it. If that address is associated with an incorrect IP address, that is probably the cause of the error.

In this case we simply remove the line in question and save the file. Remember that you must open the text editor, such as Windows Notepad, as an administrator in order to make changes to this file.
Update network card drivers
As we mentioned, dns_probe_finished_bad_config error can be associated with incorrect DNS or network configurations. Therefore, one of the possible solutions is to update the network card drivers. Let’s see how to do a driver update with Windows 10.
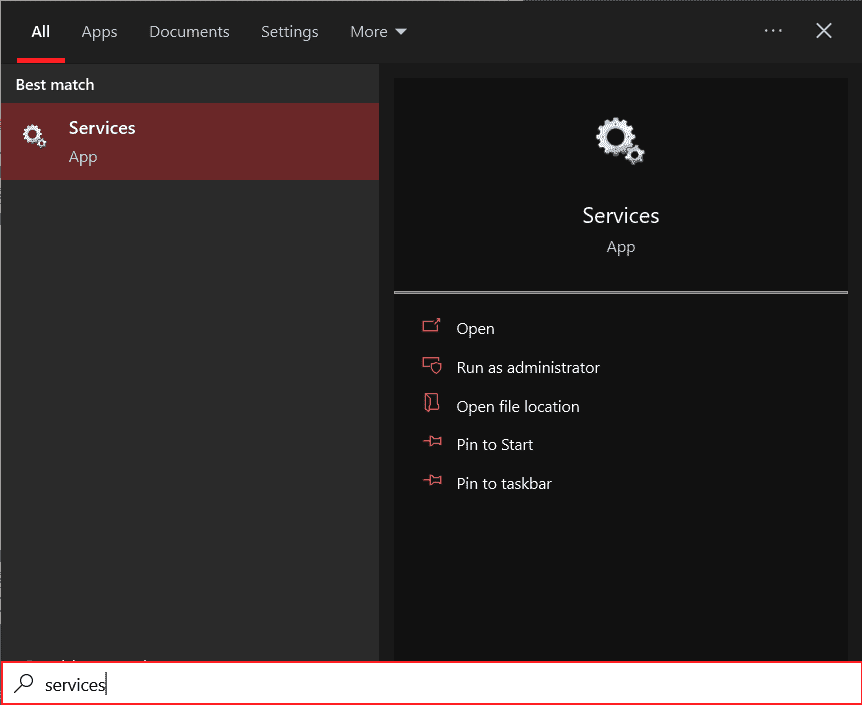
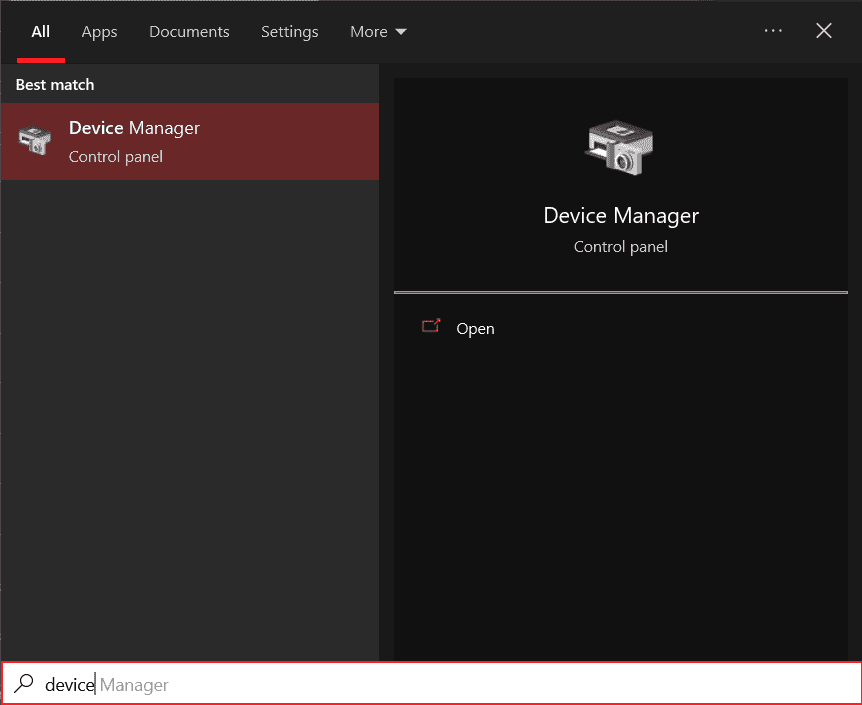
Open the control panel and then click on Device Manager, or search for the control panel option directly with the Windows search function, as you see here.
You’ll be faced with the list of devices present, locate the network card in use, right-click on it, and then click Update Driver as shown in this screenshot.

After that you will have to follow the instructions to provide the automatic update or you will have to get the driver from the manufacturer’s site.
Keep in mind that after updating the drivers you may need to restart your computer for the changes to take effect.
Check problems with antivirus and firewall
In some cases the DNS errors including dns_probe_finished_bad_config may result from unwanted programs such as malware or be caused due to a conflict with security programs.
The solution in this case may be to first proceed with a scan of the antivirus you are using, and then possibly try disabling the antivirus, firewall and VPN. With this test you will be able to figure out if the error depends on one of these services.
Conclusion
As you may have guessed dns_probe_finished_bad_config error can be generated by several causes. In this article, How to solve dns_probe_finished_bad_config, we looked at the possible causes and saw step by step what are the solutions you can use to solve the error.
Were you able to solve this problem? What solution worked in your case? Let us know in the comments below.
Ready to build your WordPress site?
Try our service free for 14 days. No obligation, no credit card required.

