cPanel allows us to create a database with two different tools that we find in the Database section: MySQL database and the wizard. In this guide, we will see how to create a database from cPanel. But first, let’s see what databases are used for.
Table of Contents
What is a database
A database is a set of data organized in tables, and MySQL is one of the most used database management systems.
Databases can be used for a PHP application or the operation of the main CMS, such as WordPress, Joomla, or PrestaShop.
For example, if you have to install WordPress or PrestaShop manually, you will need to create a new database. Instead, in the case of a WordPress hosting or PrestaShop hosting, the MySQL database needed by the CMS will be configured automatically when we provision your account.
How to create a database
The first thing to do is to login to cPanel. After logging in, you will see the main page of the control panel of your hosting account, and you will have to scroll to the Database section and click on MySQL Database as you see on this screen:

To create a database, just enter the database name in the first section, “Create a new database”, and click on the “Create database” button.
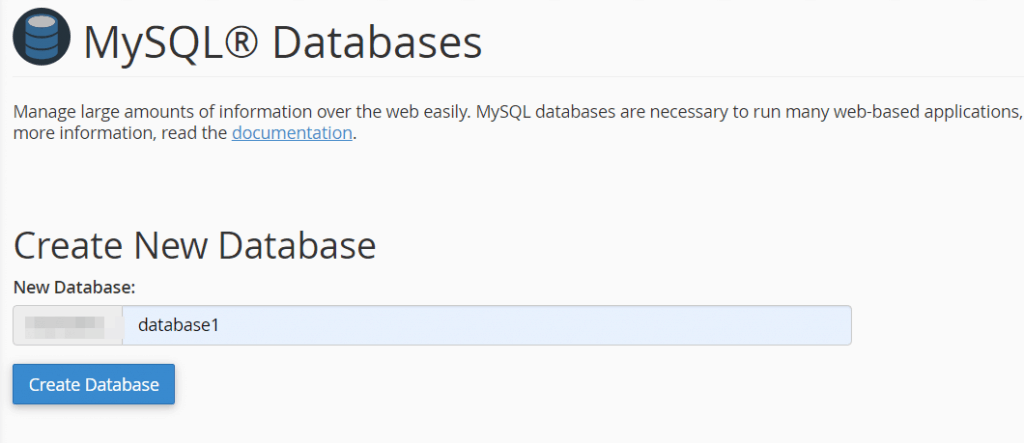
A warning like this will tell you that the database creation was successful.

Note that cPanel will automatically insert a prefix preceding the database name. This prefix is your cPanel username.
The full database name will then look like this:
Username_database
If your username is Mysite and your database name is database1 the full name will be
Mysite_database1
Note that to connect to the database, you will need to use the full name.
To use the database you have created, you will need to create and then add a user to the database. Let’s see how to create a new user and associate it with the newly created database.
Create a new user
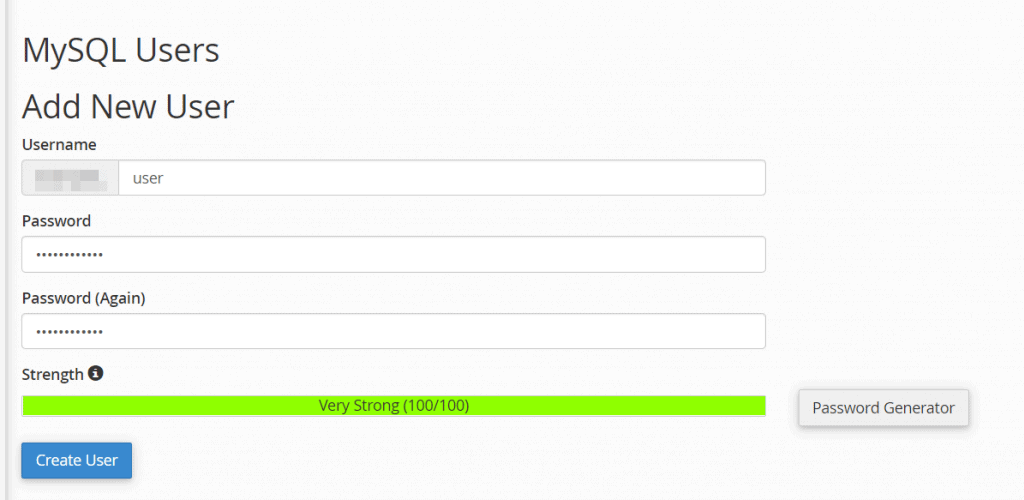
From the cPanel main page, click on MySQL database. This time we scroll down the page to MySQL Users – Add New User section.
So we now have to choose the username and password and write them twice in the two fields you see. To complete the operation, click on the Create user button.
Add the user to the database
We have just created our new user, now we have another step to take, which is to associate this user with our database, giving it the right privileges.
If you are not already on this screen, open MySQL Databases from the Database section of cPanel.
Scroll down to the Add User to Database section. The first drop-down menu allows us to select the user in our case user1, the second menu allows us to choose which database to associate the user with (db1 in our example). After selecting them, click on the Add button.

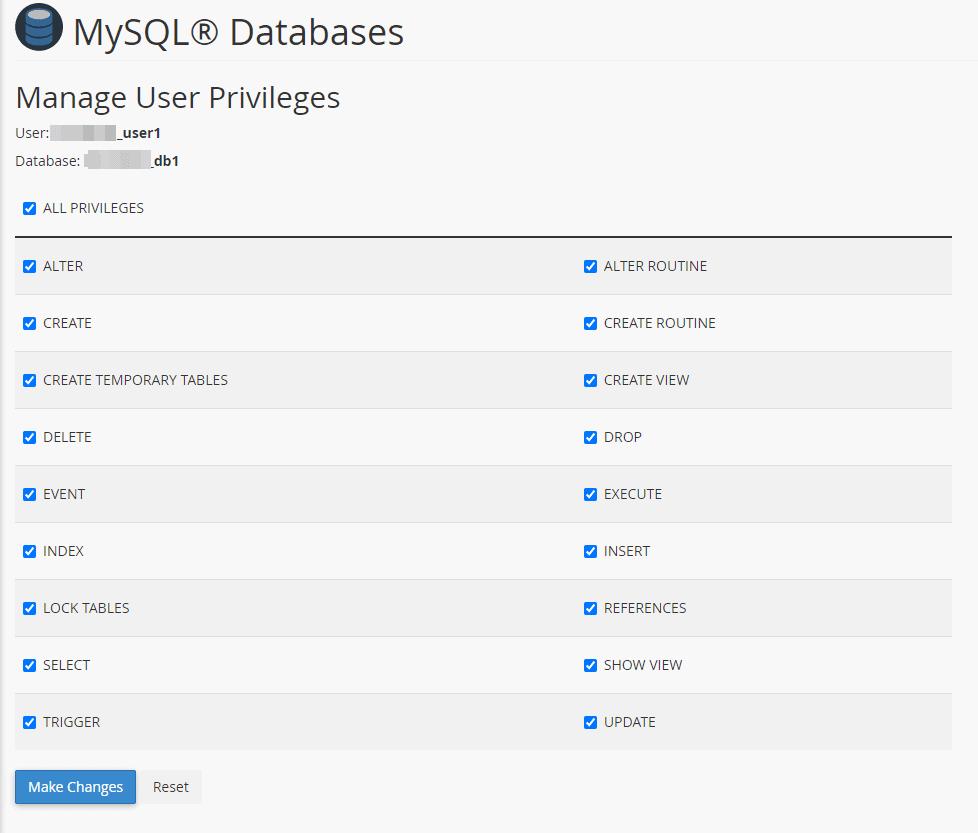
A new window will open in which you will need to select the user’s privileges, click on the box next to All privileges and then click on the Make changes button at the bottom.
How to create a database with the Database wizard
An even easier way to create a database is to use cPanel MySQL Database Wizard tool. This tool basically does all the steps we did before, but in a more automated and faster way.
Log in to cPanel and scroll down to the Databases section, then click on MySQL Database Wizard, as shown below:

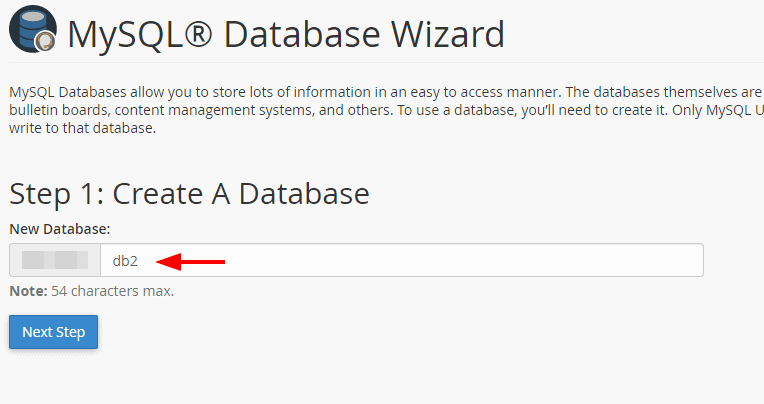
Step 1: enter the database name. Note that the full database name will consist of a prefix (indicated in the gray box) and the name you choose. Fill in the field and click on Next step.
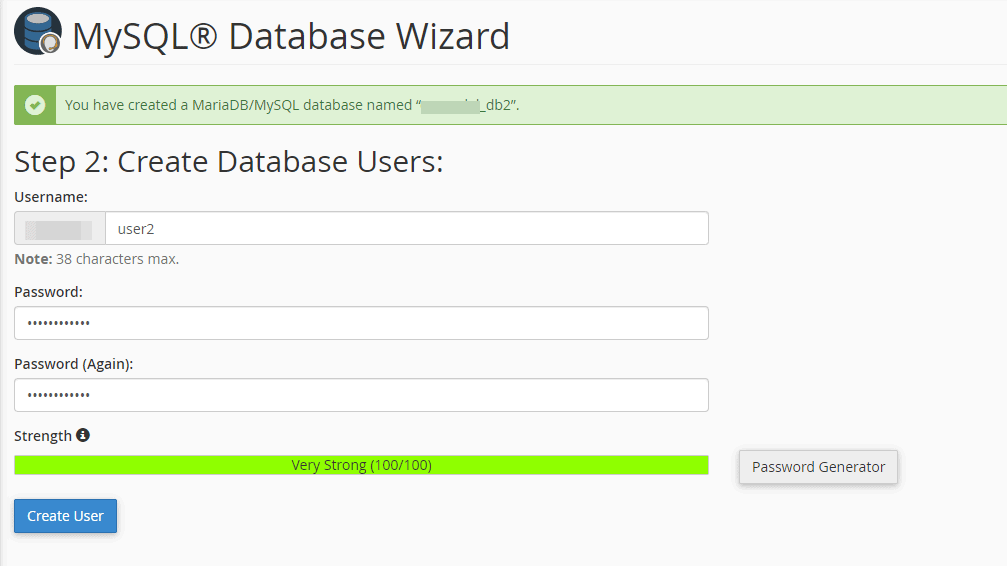
Step 2: now, you will need to create a new user to associate with your database. The first field to fill in is that of the username, note that also in this case, as for the database name, the user name will be provided by a prefix and the name you choose.
Choose the user’s password and enter it a second time in the Password field (again). You can also use the password generator to create one, be sure to copy it to a safe place before proceeding. After filling in all the fields, click on Create user.
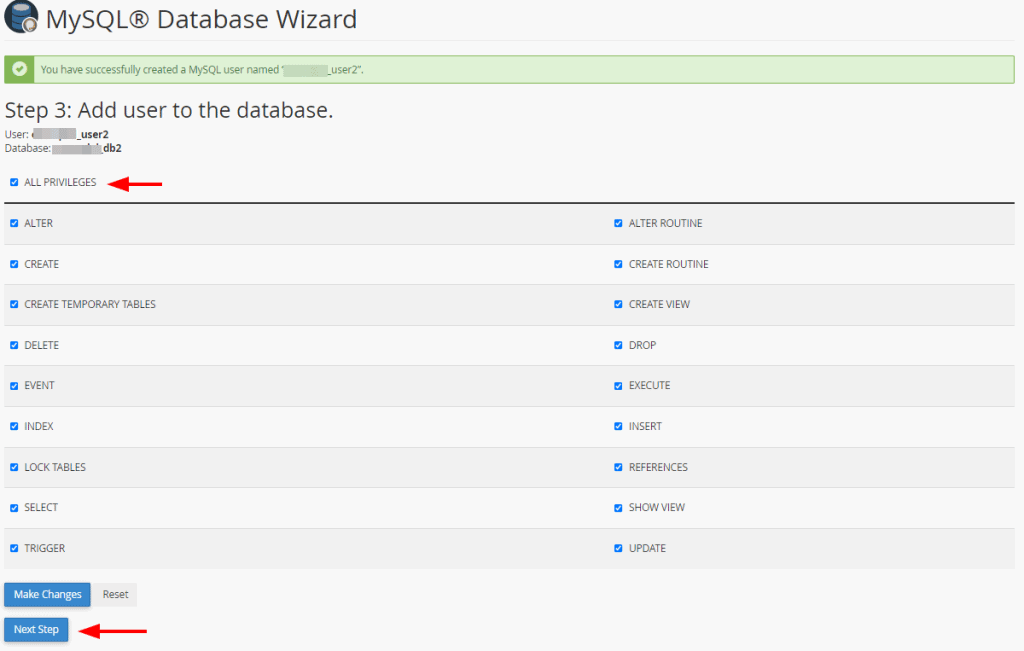
Step 3: at this point, we can assign privileges to the newly created user. Check the box for All Privileges, as you see in the screenshot below, and then click on Next step.
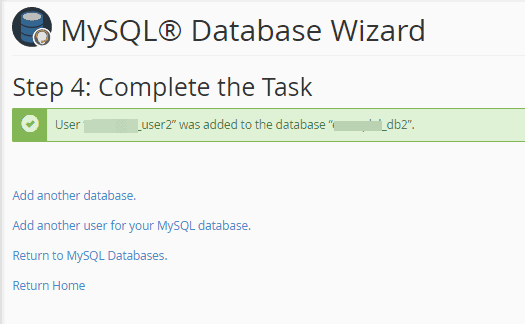
Step 4: we created the database, a new user, and associated the user with the database. At this point, we can complete the procedure by returning to the cPanel home page, create another database, create another user or return to the MySQL databases screen.
