Do you want to improve your website speed without sacrificing image quality? WebP WordPress images might be exactly what you need.
WebP is a modern image format developed by Google and can dramatically reduce your image file sizes while still being very high quality. This is a perfect solution for website owners who want to optimize their website performance without sacrifice.
In this guide, you’ll learn everything you need to know about WebP images in WordPress. We’ll cover what they are, why you want to use them, and how to add WebP images to WordPress the easy way.
Table of Contents
What Are WebP Images and Why Should You Use Them?
As mentioned above, WebP is an image format developed by Google and is specifically designed for the web. It uses advanced compression algorithms to create smaller file sizes without a noticeable quality loss.
But why should you care about implementing WebP on your WordPress site?
Here are some of the main benefits:
- Smaller file sizes. WebP images are typically 25-34% smaller than JPEG images and 26% smaller than PNG images.
- Faster loading times. Smaller image files mean your pages load faster, improving user experience.
- Better SEO. Site speed is a ranking factor for search engines, so faster-loading pages can help your SEO.
- High image quality. Even with a smaller file size, the image quality still looks great.
Plus, with over 60% percent of traffic coming from mobile, having optimized images that load quickly will go a long way towards mobile performance, giving your visitors a better experience and improving your rankings in search.
WebP vs. Traditional Image Formats: A Comparison
Before we jump in, let’s look at a quick comparison between WebP and other image formats so you can see how they compare to each other:
Format | Strengths | Weaknesses | Best Use Cases |
|---|---|---|---|
JPEG | Good compression for photos | Lossy compression, no transparency | Photographs, complex images |
PNG | Lossless quality, transparency support | Larger file sizes | Graphics, logos, and images needing transparency |
GIF | Animation support | Limited to 256 colors, large file sizes | Simple animations |
WebP | -Smaller file sizes with comparable quality -Supports both lossy and lossless compression, transparency, and animation | Not universally supported by all browsers | General web use where browser support exists |
As you can see, WebP essentially combines the best features of JPEG, PNG, and GIF while offering better compression:
- Like JPEG, it can efficiently compress images
- Like PNG, it supports transparency
- Like GIF, it supports animation
And it does all that while offering significantly better compression. This basically makes WebP a no-brainer choice for website owners as long as you implement it the right way.
WebP WordPress: Does WordPress Offer Native Support?
If your WordPress website is running WordPress version 5.8 and above, then native support for WebP images is included. And unless you have a very good reason, you should always be running the latest version of WordPress to help keep your site secure.
WebP support means that you can upload WebP images directly to your media library and use them the exact same way as JPEGs or PNGs.
Essentially, native support lets you upload and use WebP images, but it doesn’t act as a WordPress WebP image converter for exsiting JPEG and PNG images into the WebP format. To do this, you’ll need to use a third-party WordPress plugin. We’ll highlight multiple options for doing this below.
Native support for WebP is great. But unless you’re building a new site from scratch, you’ll likely want to convert your existing images to WebP format. Plus, you need to ensure that image fallbacks exist, so if your user’s browser doesn’t support WebP, then it’ll load other image formats.
Advanced tip: If you want to prevent image theft, read our guide on protecting images on WordPress.
Browser Compatibility for WebP Images
Before implementing WebP, it’s important to understand browser image compatibility. Support for WebP and other next-gen formats like AVIF is pretty widespread. However, it’s not universal.
Here are the browsers that WebP currently supports:
- Google Chrome (desktop and mobile)
- Firefox (desktop and mobile)
- Microsoft Edge
- Opera (desktop and mobile)
- Safari (from macOS 11 Big Sur and iOS 14 onward)
This covers about 95% of internet users. However, that still leaves around 5% of users, mainly those on older versions of Safari or Internet Explorer, who will be unable to view WebP images.
This is why proper implementation of WebP in WordPress should include fallback options to ensure all visitors can see your images regardless of their browser.
Note: you can set up Google Analytics and Bing Webmaster Tools to track what browsers your visitors use to access your website.
How to Add WebP Images to WordPress (5 Ways)
There are a few different ways to add WebP images to your WordPress site. First, you can manually convert your images to WebP or use a tool and then upload them to WordPress.
Or, you can use a WordPress image optimization plugin to convert your new and existing images to the WebP format.
Below, we’ll highlight a few different plugins so you can choose the plugin that works best for your website and needs.
Method 1: Using WordPress’s Native WebP Support
Let’s say you already have your images saved in the WebP format. You can take advantage of the native WordPress support and upload your images.
Here’s how you do it:
First, make sure you’re logged into the back of your WordPress dashboard. Then, go to Media > Add New and upload your image files.

You can follow the same approach if you’re adding images to your pages and posts. All you need to do is select the Image block. Then, drag and drop your image or upload it by selecting the file.

The standard approach works well if you want to spend time preparing your images for upload. This includes doing things like reducing the file size through a tool like TinyPNG and converting the image to WebP format.
However, this method only works for new images you’re uploading to your website. It won’t automatically convert older images to the WebP format. It also doesn’t offer a fallback if your visitors happen to be using a browser that doesn’t support WebP images.
For most WordPress users, you’ll probably want to use an image optimization plugin just to save time and ensure you have a fallback of other image types just in case. This is also true if you have a very large image library that you want to convert to WebP.
Method 2: Converting Existing Images with WordPress Image Optimization Plugins
The methods below will show you a few different ways you can optimize your images and convert them to WebP using an image optimization plugin.
We’ll offer a few different plugin options because not every plugin will work for your website. For example, Ewww Image Optimization is an incredible plugin, but some server configurations don’t work with the free plan. So, you’ll find a few different options, which should be enough to cater to your website and server requirements.
1. Using the ShortPixel Image Optimizer Plugin
Shortpixel is a powerful image optimization plugin that makes it easy to convert your images to WebP format. This plugin has over 300,000 active installations and a 4.5/5 star rating.
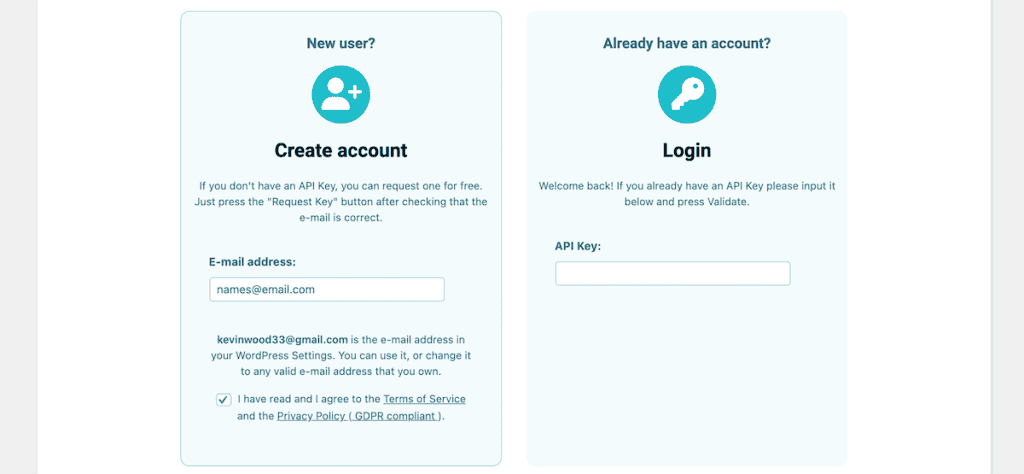
Once you install and activate the plugin, navigate to Settings > ShortPixel, and then you’ll be prompted to sign up for a free API key. For the free plan, you get up to 100 free image optimization credits every month.
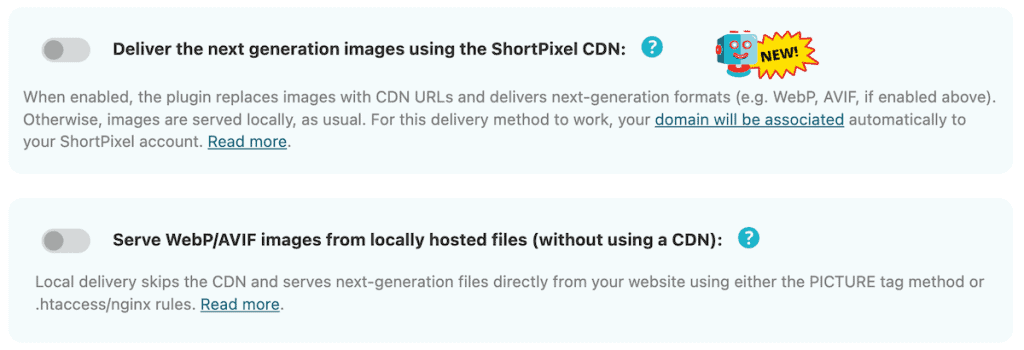
Then, click on the WebP/AVIF & CDN tab and click the Create WebP Images slider to enable WebP conversion.

Below that, you can choose to enable your images being served via CDN or from your locally hosted files. If you choose CDN, then your files will still be served locally as a fallback.
If you choose local, then, for the delivery method, select Picture tag which provides the best browser compatibility. This option creates HTML picture tags that serve WebP to supported browsers and original formats to unsupported browsers.
Once you’re finished, click on Save and Go to Bulk Process, and the plugin will start optimizing and converting your existing images. On the next screen, You’ll see a progress screen showing how many images have been processed.
The nice thing about this plugin is that ShortPixel will automatically optimize and create WebP versions of any new images you upload in the future.
2. Using the EWWW Image Optimizer Plugin
EWWW Image Optimizer is another extremely popular image optimization and WebP conversion plugin. It has over 1 million active installations and a 4.8/5 star rating. It offers a variety of different optimization and conversion settings.
For example, you can enable automatic WebP conversion with Easy IO or use the Bulk Optimizer tool. It even lets you optimize images beyond what’s in your media library.
Here’s how you can use it to convert and optimize your WebP images.
First, you need to install and activate the plugin. Once that’s done, navigate to Settings > EWWW Image Optimizer. Here, you’ll see the main plugin settings page.
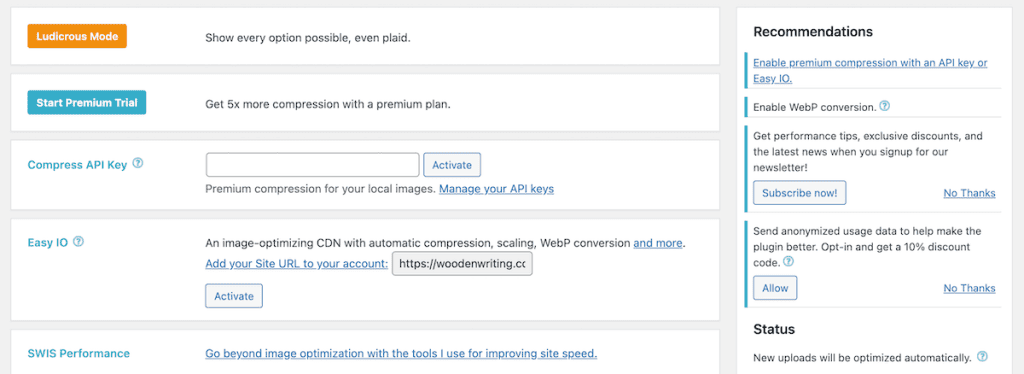
Scroll down to the bottom, and you’ll see a checkbox in the Web Conversion section. Check this, and the plugin will convert your originals to WebP while still keeping the other versions to serve on other browsers if WebP isn’t supported.

You can use the default delivery method (recommended for most users), but you also have the option of using JS WebP Rewriting or Picture WebP Rewriting.
Using Bulk Optimizer
First, you have the bulk optimizer feature. To use this, just click the Bulk Optimizer link at the top of the plugin settings page. Then, click the Start optimizing button to begin optimizing and converting your images to WebP.
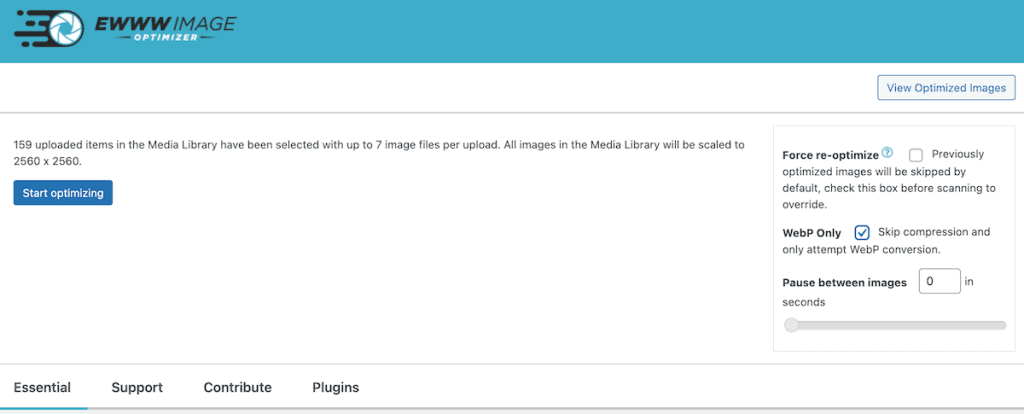
If you don’t care about optimizing your images and are only worried about conversion, then make sure the Web Only checkbox is checked.
Then, click the Let’s go! button, and the plugin will start converting all of your images to WebP.

That’s it. The plugin will automatically convert or optimize and convert your images to WebP while still retaining the original versions.
Using Easy IO
The other option you have is using Easy IO. This tool does everything for you. Simply turn it on and never worry about WebP conversion or image optimization again.
The caveat is this tool is only available on premium plans and will host all of your images will be stored on their CDN servers.
If you want to use this, then on the same plugin settings page, scroll down to the Easy IO box and click the Add your Site URL to your account link.

Then, you need to pick a plan, create an account, and add your website URL. Note that there is a 30-day free trial available that’ll let you test one site and compress 1,000 images.
Once your account is set up, head back to the plugin settings page and click Activate.
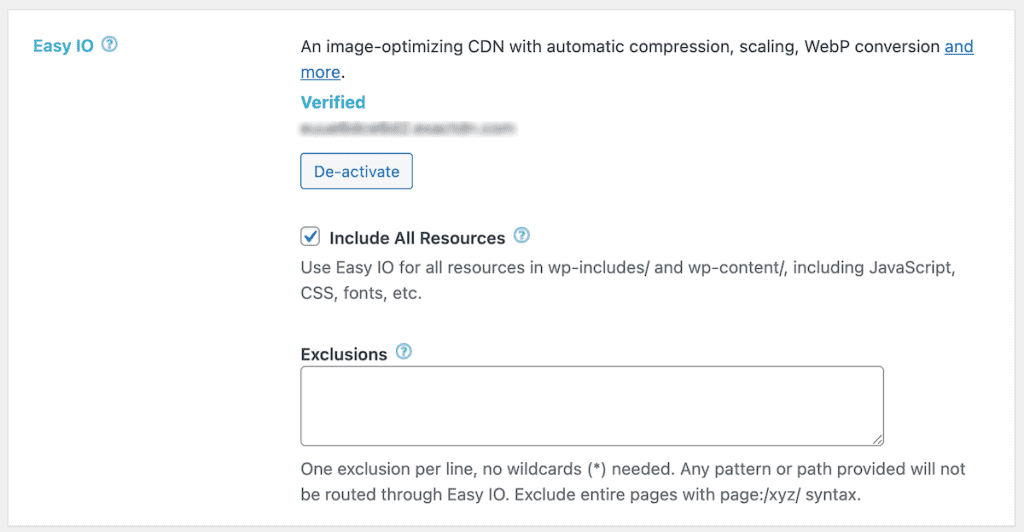
That’s all you have to do. The plugin will take care of the rest.
3. Using the Imagify Plugin
The next image optimization and PNG and JPG to WebP converter WordPress plugin we’ll be using is Imagify. This plugin is used by nearly 1 million WordPress sites, and it a relatively hands-off plugin. Meaning, you enable the settings and it does all the image conversion work for you.
Once you install and activate the plugin, you’ll need to enter an API key. If you’re planning on using the free version, then navigate to Settings > Imagify and click the Create a Free API Key button.
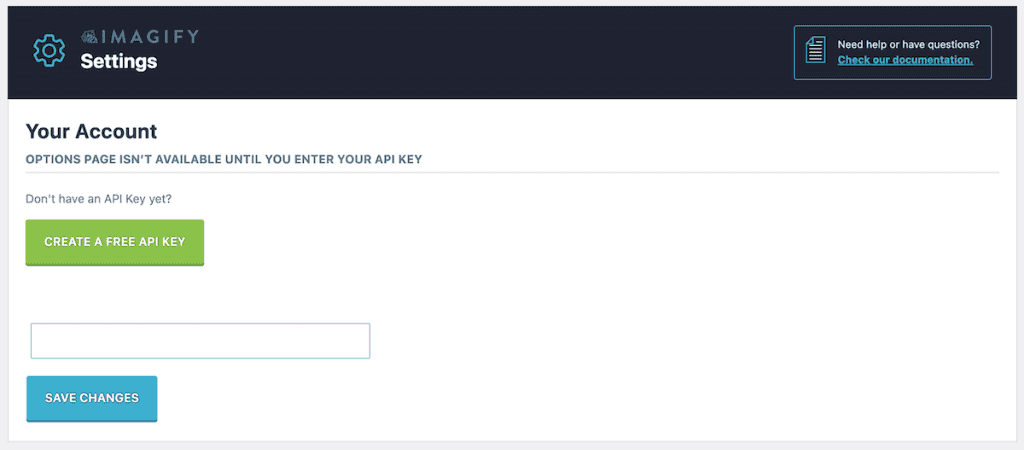
To get a free API key, you’ll need to enter your email address and then create an account. After that, you can view and copy your API key from your account settings page.

Once you copy the key, head back to the plugin settings page and paste it into the box.
After that, scroll down to the Optimization section and click on WebP. Then, check the Display images in Next-Gen format on the site checkbox.
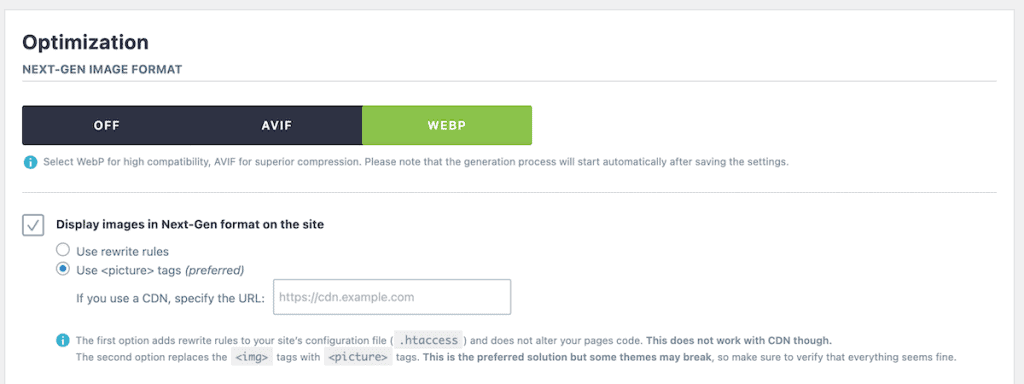
There are a few other settings you can adjust, including the maximum size for larger images and the size of other images on your site, like thumbnails, medium images, large images, and more. However, the default options work great for most websites.
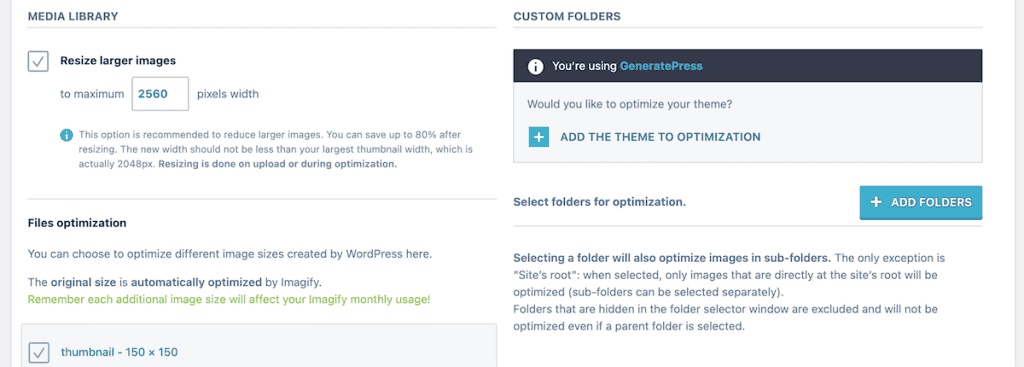
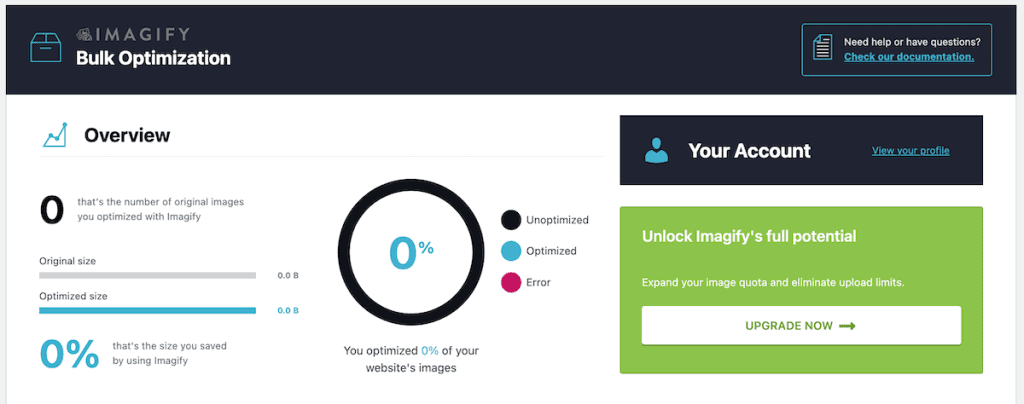
Once you’re finished, click Save & Go to Bulk Optimizer at the bottom of the page.
4. Using the Optimole Plugin
The final plugin we’ll take a look at is Optimole. Optimole takes a different approach by handling image optimization in the cloud and serving images via its own CDN, which can significantly improve your site’s loading speed and make things very hands-off for you.
First, you need to install and activate the plugin. Then, click on Optimole to bring you to the plugin settings page.
Here, you need to enter your email address and click Create & connect your account, or if you already have an account, you can use your existing API key.
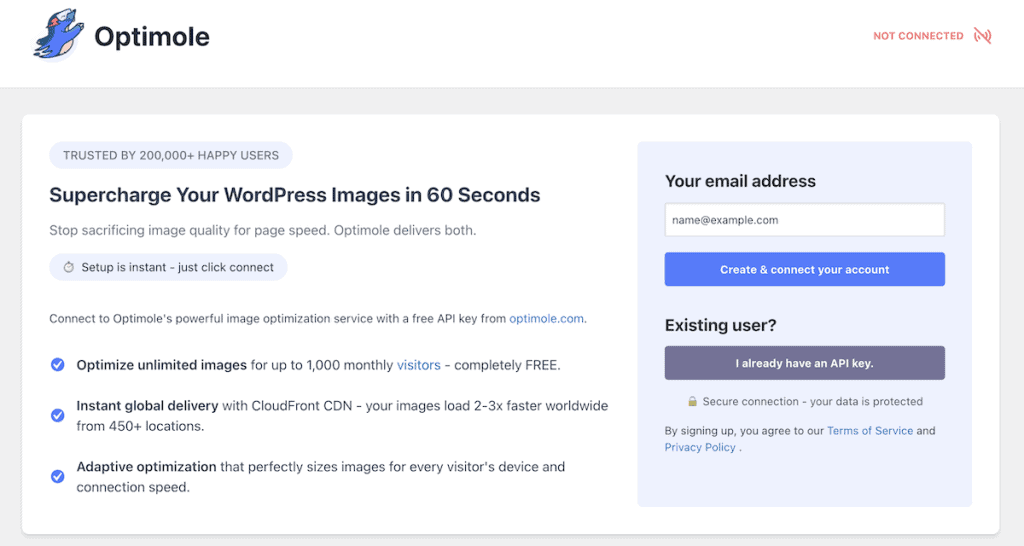
Once you connect Optimole to your account, your work is done. The plugin will automatically start optimizing your images. There’s nothing left for you to do.
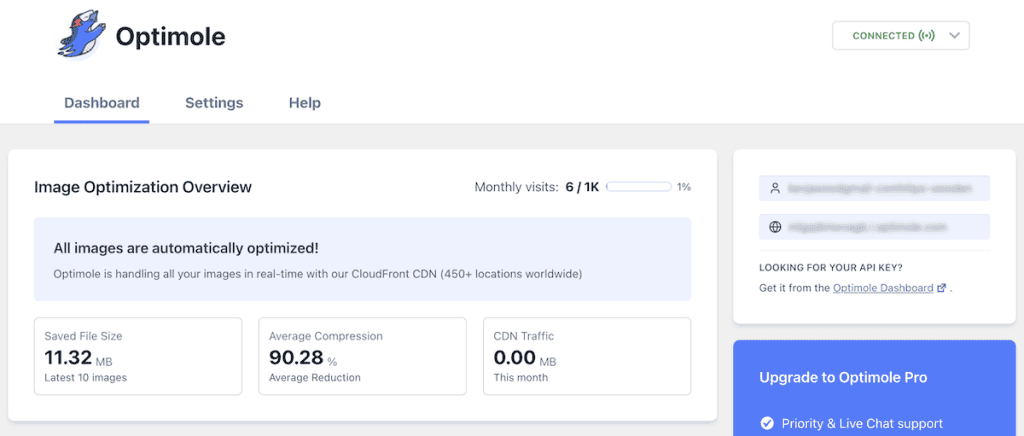
Now, when a visitor lands on your site, Optimole will automatically detect the screen size, browser, device, and connection speed and will serve them the ideal version of the image.
The free plan supports up to 1,000 visitors per month. If it goes beyond this, then you’ll need to upgrade to one of the premium plans.
WebP WordPress FAQs
Can I upload WebP images directly to WordPress?
Yes, if you’re using WordPress 5.8 or newer, you can directly upload WebP images to your media library. WordPress treats them like any other image format. You can insert them into posts and pages normally. If you can’t upload WebP to WordPress, then make sure you’re running the latest version of WordPress, and don’t have any server issues preventing the upload.
How much smaller are WebP images compared to JPEG or PNG?
On average, WebP images are typically 25-34% smaller than comparable JPEG images and 26% smaller than PNG images while maintaining the same visual quality. The exact savings will vary depending on the specific image and compression settings you use.
Do I need to create WebP versions of all my images manually?
No, you don’t need to convert images manually. All of the plugins mentioned in this article (ShortPixel, EWWW, Imagify, and Optimole) can automatically convert your existing images to WebP format and handle future uploads too.
Will using WebP images slow down my website during the conversion process?
There might be a slight performance impact during the initial bulk conversion of your media library, especially if you have a ton og images. However, most plugins handle this process in the background or in small batches to minimize the impact. Once the conversion is complete, your site will actually load faster, thanks to the smaller image sizes.
Do WebP images affect my SEO?
Yes, but in a good way. Since page speed is a ranking factor for search engines, using WebP images can improve your SEO by making your pages load faster. Google actually recommends using next-gen formats like WebP in its PageSpeed Insights tool.
Do WebP images take up additional storage space?
Yes, implementing WebP essentially doubles your image files since you’ll have both the original format (JPEG/PNG) and the WebP version. However, since WebP files are significantly smaller, the overall increase in storage usage is typically less than 50%. Some hosting providers, like SupportHost, offer generous storage space that easily accommodates this increase.
Closing Thoughts: Using WebP WordPress Images
Using WebP images in WordPress is one of the most effective ways to improve your site’s performance without any noticeable difference in image quality. With file sizes typically 25-34% smaller than traditional formats, the impact on your page load times can be substantial, especially for image-heavy sites.
The good news is that with WordPress’s native WebP support and the variety of image conversion and optimization plugins shown above, implementing WebP has never been easier. Whether you’re using the WordPress built-in support for WebP images, or using one of the plugins above to convert your existing image library.
Have you implemented WebP WordPress images on your site? What changes in performance did you see? Share your experience in the comments below!


Leave a Reply