Avada is one of the most popular themes on Themeforest, which is one of the main platforms through which to buy WordPress themes. The theme, in fact, counts more than 23,600 reviews to date with a rating of 4.76 stars out of 5.
So, in this article, I decided to tell you about Avada’s features and the reasons why it is the best-selling WordPress theme. In addition to discussing the main features, I’ll also explain how to install and configure the theme.
We’ll also see how to take advantage of the Avada Builder features to create our website and we’ll also understand how to use Avada Live to make front-end changes in an even more practical way.
Table of Contents
Avada theme for WordPress: the secret of its success
For several years now, Avada for WordPress has been the best-selling theme on Themeforest, and so far it has in fact sold more than 629,500 licenses. Its success is due to the fact that, besides being fully customizable with all the options it provides, Avada is also intuitive and easy to use.
To help us in the construction of our site, in fact, Avada also provides us with preset templates. Moreover, both in the creation from scratch and in modifying the basic templates we will see that every operation will be simplified thanks to the drag & drop system used to place the various elements.
Avada is also constantly updated, thanks to the continuous release of new versions that expand its potential. For example, the current version, 7.1, has introduced the ability to integrate the site’s forms to HubSpot‘s free CRM.

In addition, new preset themes have been added and compatibility with WooCommerce (version 5.5) is also guaranteed. Moreover, Avada’s license also includes premium plugins for WordPress.
In fact, in addition to those that will be necessary for the proper functioning of the theme (as we will see later), you will also be able to take advantage of the following third-party plugins: Avada Builder, Slider Revolution, Convert Plus, Layer Slider, Advanced Custom Fields PRO and Fusion White Label Branding.
As we will see, the theme will allow you to create a website optimized for any type of display. You’ll also have many options available to better configure the look of your site and thus adapt it to the screen on which it will be displayed: PC, tablet or smartphone.
What is the price of an Avada license?
Now that we broadly went over the theme’s capabilities, you’re surely wondering how much it costs to get all the features offered by Avada, right? Well, you just need to purchase a license on Themeforest for $60 and with it you’ll also get six months of support.
A single license will be valid for a single domain and can also be transferred from one site to another.
For example, you may need to transfer your Avada license from a test site to an active site, or from a discontinued site to a new one. This meets the needs of those who develop the site locally before bringing it online with WordPress hosting or a dedicated server as needed.
How to install Avada on WordPress
After purchasing the theme and downloading it from Themeforest, you will be in possession of a .zip file with the theme files inside.
To install Avada you will have to access the control panel of your site and, in the sidebar, you will have to click on Appearance and then on Themes.
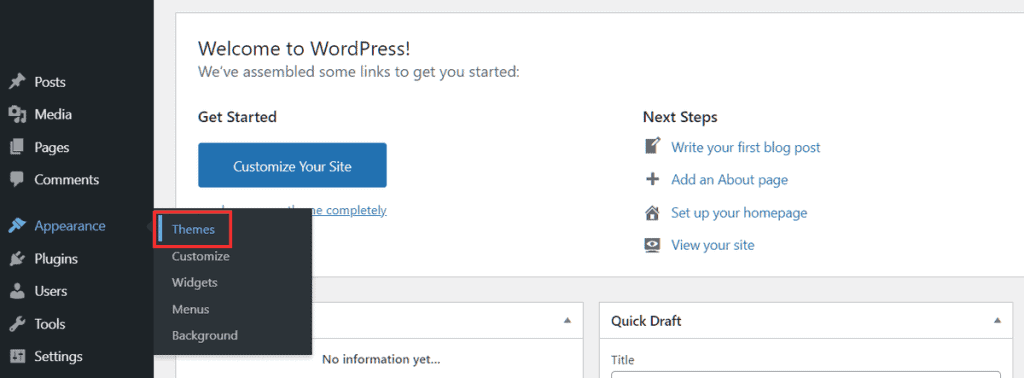
A new window will open, related to the themes, where you can click on Add New and in the new page you must click on Upload Themes.

At this point you just need to upload the .zip file of your Avada theme directly by dragging it, or by clicking on Choose file and then searching for it on your computer.
After loading it, just click on Install Now to proceed with the installation process. At the end of the procedure a message will tell you that the theme has been successfully installed.
At this point you can activate the theme directly by clicking on Activate. Alternatively, if you need to return to the themes page, you can also activate it from here as shown in the image below.
IMG
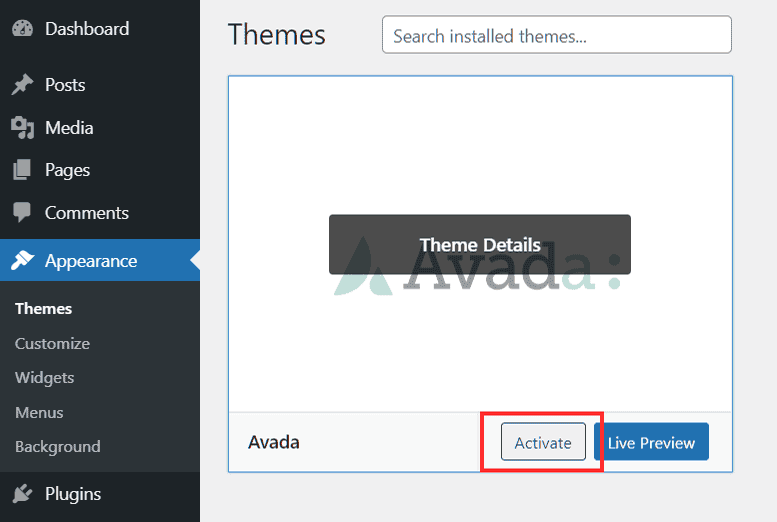
To complete the activation of Avada, you will need to enter the registration code of your product. This code must be created from the account page on Themeforest with which you purchased the license.
After completing the registration, you will also need to install the plugins necessary for the theme to work. There are two of them: the Fusion Core and the Fusion Builder. You can’t go wrong since the plugins in question are marked Required at the top.
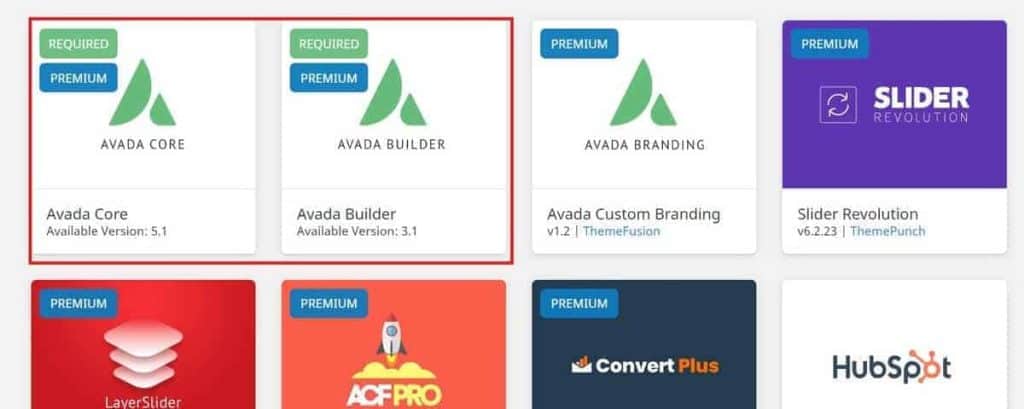
To do so, you’ll just have to access the Plugins section from the WordPress panel and then install them.
How to configure Avada
Avada allows you to completely customize every aspect of your site. In the Option menu, in fact, there are categories to set each section of the pages and the site.
Under Layout, for example, you can set the width of the entire page and of the single elements: content and sidebars.
In the Responsive section you can choose whether or not to make the site responsive and thus make it automatically adapt to the device in which it is displayed. In addition, you can change the options in order to optimize the final result, for example by setting a minimum font value so that the texts remain equally readable.
Under colors you can set what the basic colors of the site will be, however, each area will then be editable separately.
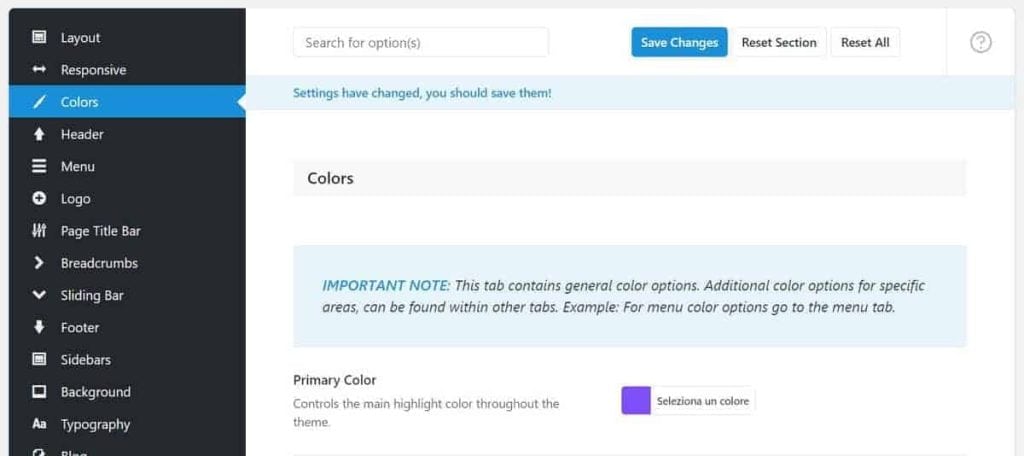
Through the header section you can manage the header of the site and its position and margins in addition to the layout itself. This section contains sub-menus that allow, for example, to manage the header in the mobile and tablet version.
The Menu section allows you to set up all the menus of your site (main manu, mega menu and any secondary menu) as well as the menu icons. Again you can choose specific settings for the menu of the mobile version as well.
Similarly under Footer, Page Title Bar, Sliding Bar and Sidebar, you will find options to customize the corresponding different sections of your site.
From the Logo section you’ll be able to insert your custom logo, and again choose whether to use a different version for the mobile site. Also from here, you’ll be able to upload your favicon in different sizes so that it displays correctly on iPhone and iPad.
The font section of the entire site is located under Typography, with different subsections that will allow you to choose the fonts of the body of the text and those of the headers.
The remaining options will allow you to set the search bar, site forms, social section, cookies and so on. Each category, in any case, is quite self-explanatory and it won’t be difficult to find what you’re looking for, since the options are also organized in a very linear way.
How to use Avada
At this point you have two possibilities: the first one is to build your new site with Avada from scratch; the second option, which is the most immediate, is to start working on the demos that this theme offers you, which at this moment are 72.
In the case of the second option, all you need to do is go to the websites section and choose one of the templates available

Depending on the template you choose, you may need to install some other plugins, such as WooCommerce. In this regard, if you want to speed up WordPress I suggest you take a look at my list of plugin that slow down WordPress.
After choosing the template, you can decide whether to import the entire content, including images and sample posts, or select only what interests you. At this point clicking on Import will allow you to upload what will be the basis of your website.
How to modify the theme with Avada Live
After importing the theme, you’ll be able to modify it in every part. Starting from version 6 Avada offers, in fact, the possibility to modify the whole site directly from the front-end, therefore seeing the results of our modifications as we go along.
The possibility to act directly from the front-end, or even from the back-end but with a block interface, allows the use even to those who don’t have any knowledge of HTML or PHP. This is also true for page editors like Elementor.
By directly applying our changes, we’ll immediately have a precise idea of how our page will look once it’s finished. By doing so, we won’t need to save every time we make a change and then see through a new tab the preview of what the site will look like.
In the following example (see image below) we used the demo of a landing page and we changed the default logo, inserting one uploaded by us. If that’s what you’re aiming for, you might want to explore this topic further by reading how to create an effective landing page.
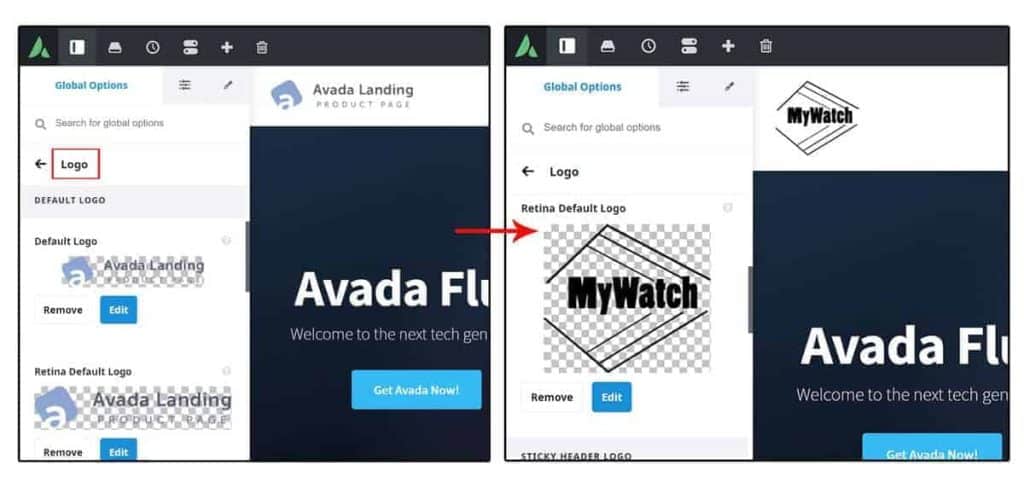
When it comes to the Logo, Avada provides several options. In addition to being able to change the alignment and margins, for example, you can choose a different logo for the mobile version of the site.
Every change we make will be saved in the history, accessible from the clock icon. To undo the changes we’ve made, we’ll just have to click on the edit history icon.
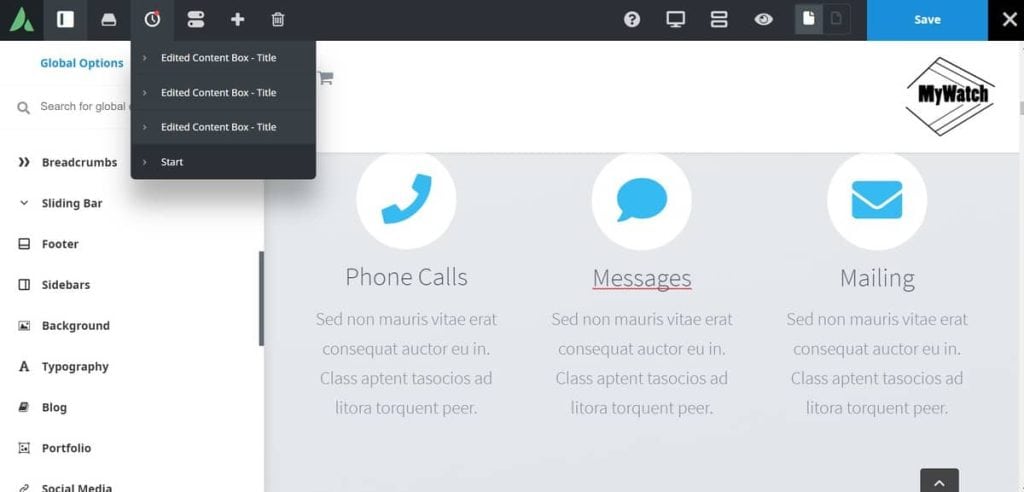
At any moment we can also save the changes we’ve made, simply by clicking on Save.
Each element can be modified completely and in addition to modifying images, texts and products, buttons can be customized.
In the case of buttons, under the General options, in addition to inserting the destination link we can modify the text displayed on the button. There is also an option that lets you choose whether to show the text in all capitals.
Through the Design tab it’s possible to customize other elements of the button, making it 3D for example, changing its size and colors. We also have the option of inserting icons next to the text, as shown in the example below, in which I made some changes to one of the buttons already present.
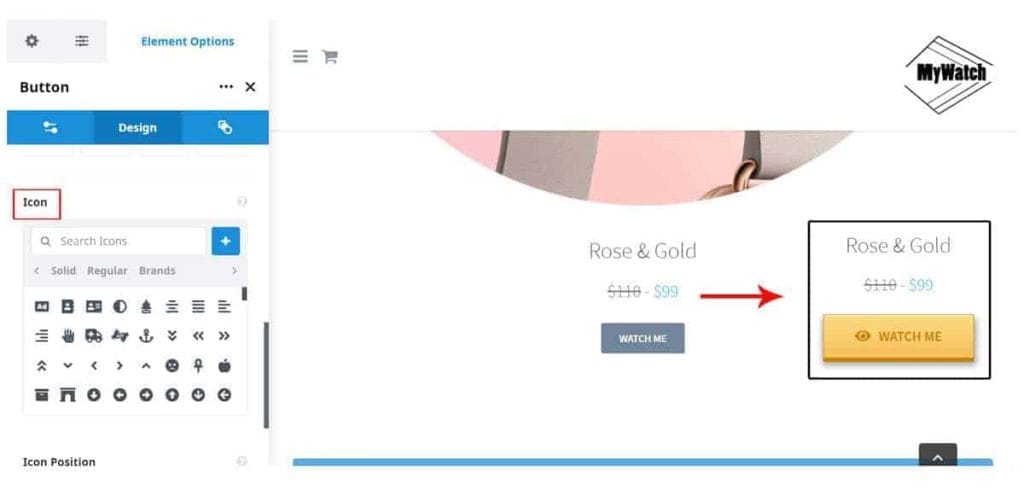
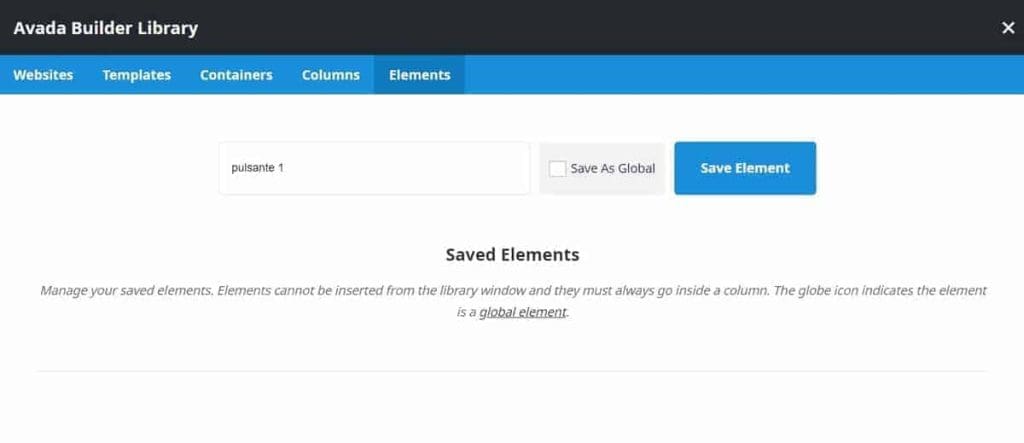
Each element that we are going to modify can also be saved in the Library, therefore it can be imported again if needed.
To save any of the elements click on the Save Element icon.
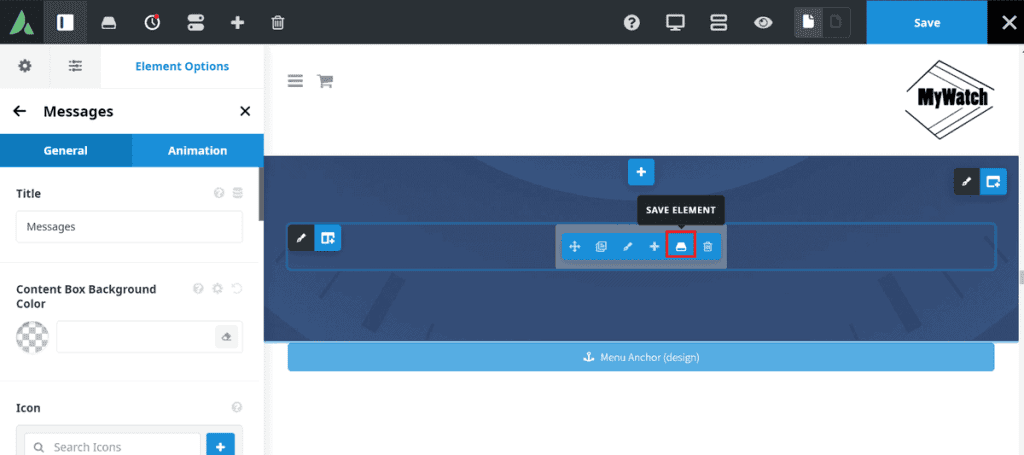
This will open a new window through which we can name the element and save it in the library.
How to change the theme with Avada Builder
Starting with version 7.0 of Avada, the Fusion Builder has changed its name to Avada Builder, although no particular changes have been made to the editor except for the name itself.
Through the Avada Builder, therefore, you can continue to do all the operations that were possible with the Fusion Builder. The construction of your website would not be as intuitive as it is with Avada Live, but in some cases you may prefer this system. In any case, even with this somewhat more classic Builder, creating your site will be simple.
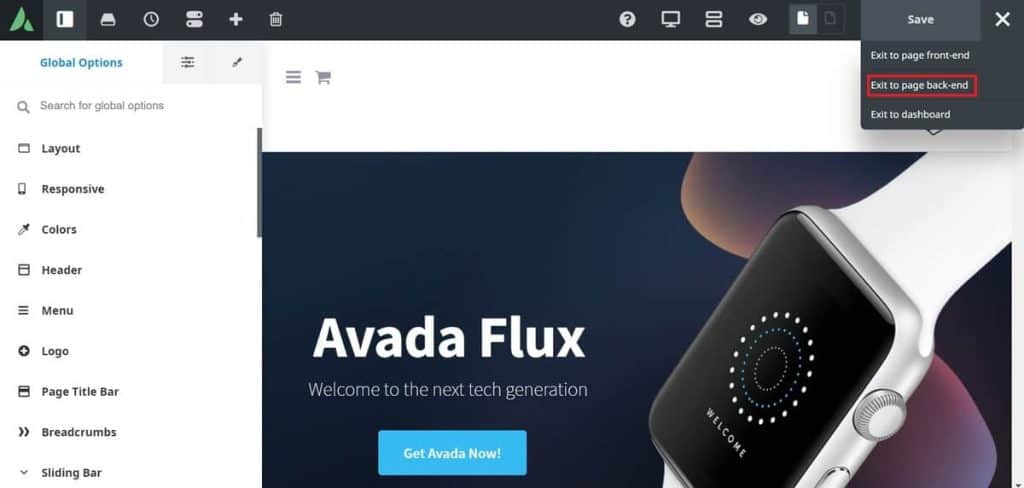
Even if you are making changes through the Avada Live front-end builder, you will be able to switch to the back-end, and then to the Avada Builder, at any time. To do so, just click on the X icon in the upper right corner and then select Exit to page back-end.
Avada Builder can also be used to create a website from scratch, or to modify one of the preset themes that Avada provides.
If you are not familiar with the editors I suggest you to start from a preset template. This way you will be able to understand how to group the different elements within the page, in order to manage them more quickly.
Avada’s builder, in fact, allows you to group several elements in Containers, so that you can edit them and even move them very rapidly.
In order to arrange the elements inside each container you’ll have to create columns, which will allow you to insert elements side by side (vertically or horizontally). Each container, as well as the columns and the elements within them can be repositioned using drag and drop.
At this point, as explained at the beginning of this article, Avada allows you to work on your website with ease, both from the back-end and the front-end according to your needs and preferences. To better illustrate the potential of this theme, below is a short tutorial on the creation of the elements and the management of the library.
Avada: tutorial on library and elements creation
Even when starting from a template you’ll always have the possibility of deleting a section or adding new elements.
In Avada you’ll have elements available for all your needs: classic buttons, search boxes, menus, images and so on. Among the elements you’ll also be able to choose one of the many sliders that the theme makes available. There are, in fact, the Avada Slider, the Slider Revolution, the Media Slider and the Post Slider.
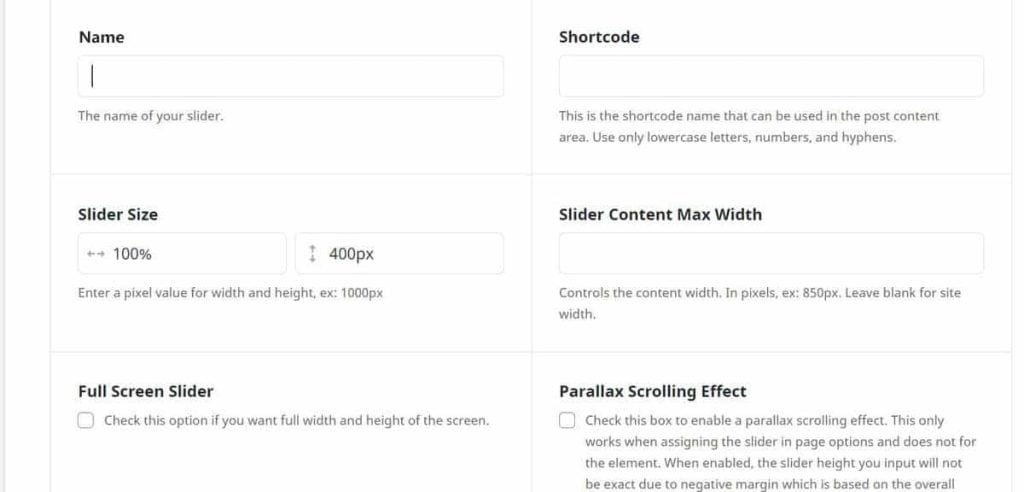
The Avada Slider for example, which was previously known as Fusion slider, will allow you to integrate not only carousels of images, but also animations and videos. You’ll be able to set the size of this slider according to your preference and you can even choose to set it to full screen.
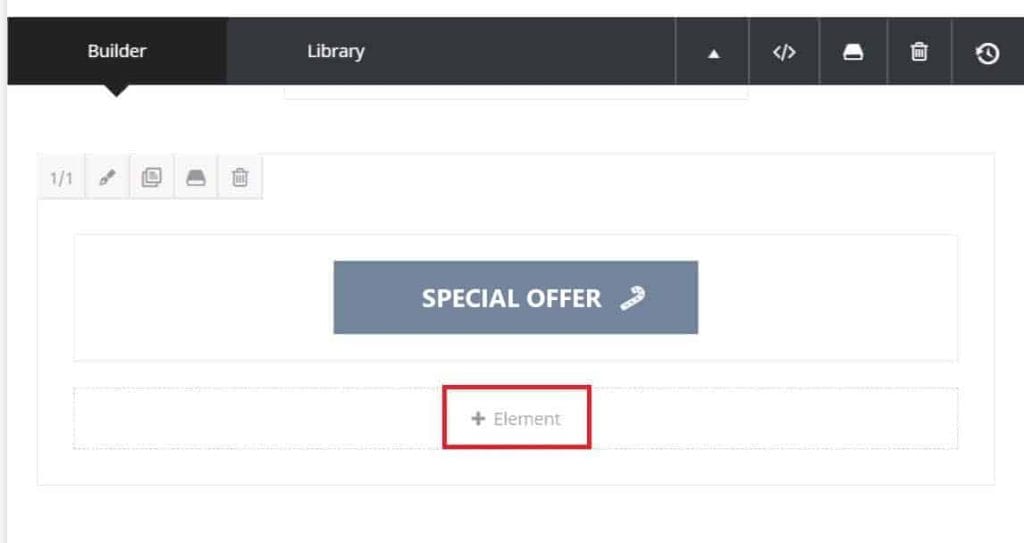
Let’s go back to creating a new element: to add an element to a previously created column click on +Element.
As seen for elements in the previous paragraph, you can also save entire columns or containers in the library, to reuse them when needed.
Each time you want to add a new element, in fact, you can choose to build one from scratch, or to use one you have already saved in the library.
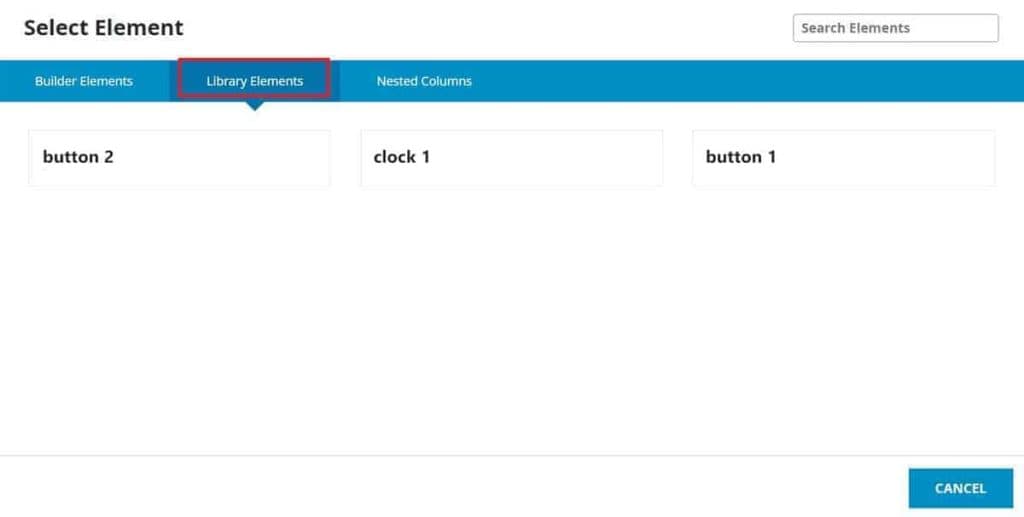
If you have saved elements in the library, after clicking on the button to add a new element, simply open the Library Elements tab and click on the one you want to import.
Conclusions
In this article I told you about Avada for WordPress and we got to see why it is still the best-selling theme ever on Themeforest. I explained how to install and configure the theme and how to use the demos made available so you don’t have to create your website from scratch.
We also saw what the new Avada Live feature offers, which allows you to edit your site directly in the front-end, and what differences there are compared to using the Avada Builder.
What about you, have you ever tried this WordPress theme? Do you have any doubts about how to go about using it? Let me know with a comment.


Leave a Reply