
Icons are a simple way to improve your site design and help visitors find what they need. By adding WordPress icon fonts, you can add clear, sharp visuals without slowing your site. In this guide, you’ll learn what icon fonts are and how to use them.
Table of Contents
What are WordPress Icon Fonts and Why You Should Use Them?
WordPress icon fonts are just like regular fonts, but instead of letters, they show icons. When icons are fonts (or vectors), they can scale up or down infinitely.
You’ve probably seen icons used all over the web. They’re used to give extra meaning to labels, menus, and sections of websites.
Icons work the same way as text. You can change their size, color, and style using simple settings. You don’t need to mess with images or upload anything extra. This makes them fast and easy to use.
You should use icon fonts because they load faster than images. They also look sharp on all screens, even on mobile. Since they are part of the font file, they don’t need separate image files. This helps your site stay light and speedy.
Another reason to use icon fonts is they’re easy to style with CSS. Want to make an icon bigger or change colors when someone hovers over it? You can do it in one line of code.
Icon Fonts and Accessibility
One downside to using icon fonts is their poor accessibility. Screen readers tend to skip over them or read the unicode or characters aloud, which can be confusing for users.
Ideally, icons should simply disappear if they aren’t loaded. Critical icons should be replaced with descriptive text. You can tell screen readers to ignore the icon by adding the aria-hidden=”true” parameter to the icon code. It will look like this:
<i class="fa-regular fa-camera" aria-hidden="true"></i>It’s always smart to test your site for accessibility so it’s available to everyone. PageSpeed Insights and Accessibility Checker are useful tools.
Where to Find WordPress Icon Fonts
Icons are everywhere! Countless sites provide font libraries that you can download and load to your WordPress website or link to externally.
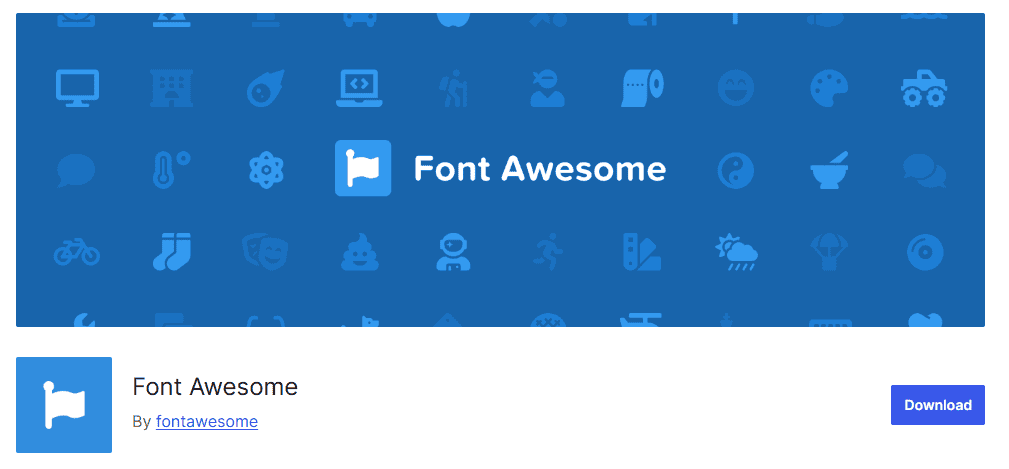
Font Awesome is by far the most popular and the one you’ll see mentioned throughout this guide. They give you access to millions of icons. Some icons require payment, but the free library has more than enough to find icons for your needs.
If you can’t find something suitable in Font Awesome, here are some other options:
How to Use WordPress Font Icons
Using WordPress font icons is fairly simple. Let’s look at four simple methods.
Method 1: Use the Built-In Dashicons
Dashicons are a set of icons that come with WordPress. WordPress uses these icons itself throughout the dashboard, so you can access them as well.

By default, Dashicons only work on the backend, so you have to add an enqueuing script to make them available on the frontend of your site.
Paste the following code into the bottom of your functions.php file.
(Alternatively, you can paste it into a snippets plugin. This reduces the chance of breaking your WordPress theme and prevents WordPress from overwriting your code during an update. We recommend Code Snippets.)
function my_theme_styles() {
wp_enqueue_style( 'dashicons' );

}
Next, visit the Dashicons website. Select an icon and click Copy HTML.

Highlight and copy the HTML code.

To insert the icon into a page or post, paste the icon’s code into an HTML block.
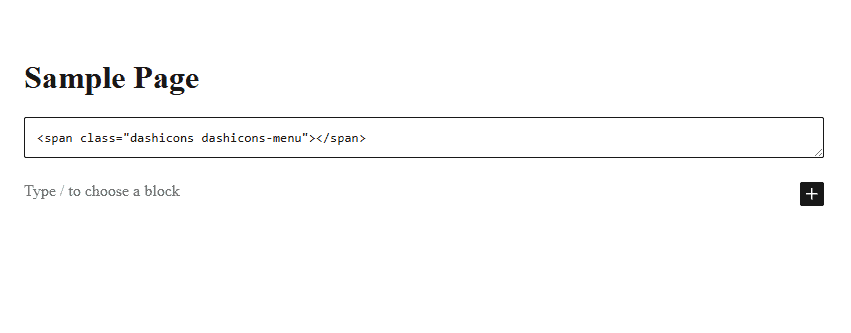
The icon will appear wherever you place it in your page or post.
Unfortunately, Dashicons don’t offer an easy way to edit the icons on your site. If you want to customize them, you’ll have to do it with CSS.
Add a class to the icon’s HTML code, like this:
<span class="dashicons dashicons-menu" class=”icon-styles”></span>Then add styling in your CSS stylesheet. You might add a style like this:
.icon-styles {
  color: #ff6600;
  font-size: 40px;
  padding: 10px;
  border: 2px solid #ff6600;
}
Method 2: Use a WordPress Plugin
Like many things with WordPress, the easiest and fastest way to insert and use WordPress icon fonts is to install a plugin.
In most cases, a plugin simply links out to an icon library that exists on another website, so you don’t have to install the icons to your own website.
The Font Awesome plugin is the most popular way to install WordPress icon fonts. It lets you use any of Font Awesome’s massive library of icons without making any changes to your theme files. Plus you get new icons whenever Font Awesome updates their library.
Font Awesome isn’t the only icon plugin, but it’s the biggest and most popular, so we’ll use it for our example. Other plugins behave similarly.
To start, install the Font Awesome to WordPress. If you’ve never used a plugin before, see our guide on installing and using WordPress plugins.
After activating the plugin, navigate to a page or post editor. Click the + symbol to add a new block. Then select the Font Awesome icon block.
Click Choose Icon to open Font Awesome’s library.
Use the search box to find an icon that meets your needs. You can also adjust the filters to narrow down your search or browse the list of popular icons.
This method doesn’t give you much control over the look of the icon. If you want to customize the icon’s size or color, you’ll need to insert icons manually.
First, click the + symbol to add a new block. Then select the HTML block. You may have to click the Browse All button or use the search box to find it.
Enter any Font Awesome code snippet into the shortcode box. The format should look like this:
<i class="fa-solid fa-download"></i>To find the right shortcode, head over to the Font Awesome library and find the icon you want to use on your site.
Click the icon to open the editor. Use the palette icon to open the styling settings.
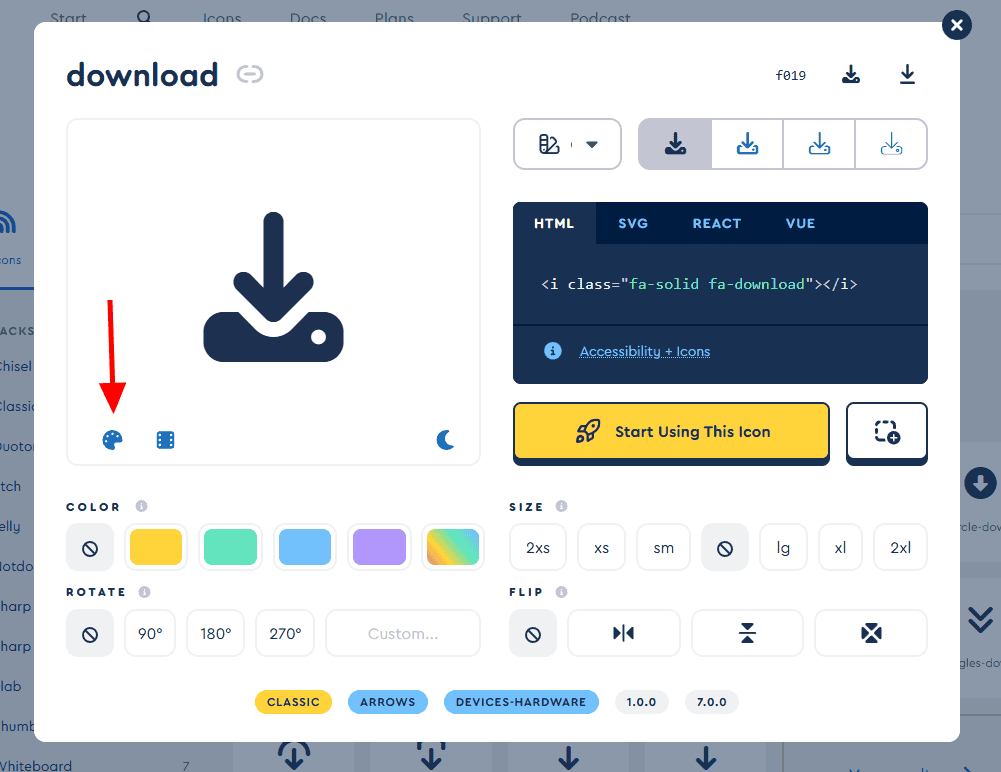
Use the tools to change the color, rotation, size, and orientation. Notice how the code in the HTML block changes
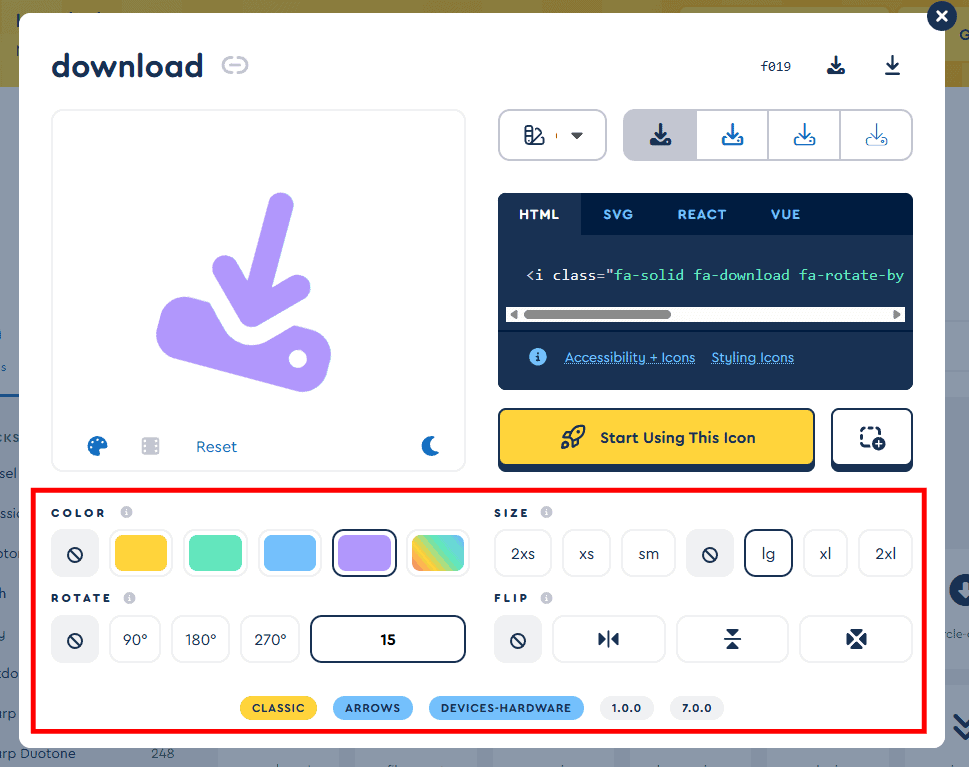
Click the HTML code to copy it to your clipboard. Return to your WordPress site and paste this code into the HTML block.
Click Save to save the page, then visit the page to preview your icon.
Suppose you want to display your icon within a line of text. For instance, you may want to put a symbol after your name or alongside an important word.
In this case, you’ll need to use a shortcode. A shortcode is a small piece of text in square brackets that you add to a post or page to display dynamic content without writing code.
To create a shortcode, simply add the name of the icon and a prefix. The prefix is the style of the icon you want to use. Here’s an example of a coffee icon. The prefix “fas” refers to the solid style.
[icon name="coffee" prefix="fas"]You can add attributes to the icon shortcodes to style them to your needs, including CSS classes and accessibility attributes. You can change the size and orientation. You can even animate it.
Here’s an example of a yin and yang icon in the solid style, double the usual size, and using the spin animation. It also uses a custom class called “menu-icon” that gets styling from the stylesheet and hides the icon from accessibility readers.
[icon name="yin-yang" prefix="fas" class="fa-2x fa-spin menu-icon" aria-hidden=”true”]Method 3: Link to Externally Hosted Icon Fonts
The third option is to simply link to a font library that’s stored somewhere else. This is basically what happens when you use a font icon plugin like we mentioned in Method #1.
In order to link to externally hosted icons, you need to link to the library, usually in the <head> of your website.
Visit your favorite font icon library and locate the instructions for embedding fonts on your website. This will be different for each library, though it usually involves finding a CDN (content delivery network) link.
For example, Font Awesome offers their link after you make an account. It’s a bit of Javascript that you can add to the <head> or <footer> of your site. (The link is unique to each account, so don’t use this one.)
<script src="https://kit.fontawesome.com/8289abd372.js" crossorigin="anonymous"></script>You can get a link to some Google icons on the Google Materials Guide. Their link is the same for all users. Add the following to the <head> of your website.
<link href="https://fonts.googleapis.com/icon?family=Material+Icons" rel="stylesheet">To use the icons throughout your site, you’ll have to check the font creators documentation to learn exactly how. This typically involves using <span> or <i> tags, often with specific classes). You’ll need to look up the name of each icon.
To add a Font Awesome icon, use the following code, but replace the “fa-solid fa-circle-user” with your icon of choice.
<i class="fa-solid fa-circle-user"></i>To add a Google Materials icon, use the following code, but replace the “check_circle” with your icon of choice.
<span class="material-symbols-outlined">check_circle</span>Method 4: Host Icons on Your Website
The last method is a bit more complex, but it also gives you the best performance. Instead of pulling icons from an external library, you host the icon font files directly on your own server.
Since the files are stored on your server, your site does not need to fetch them from outside sources. This cuts down load times and avoids issues if the external library goes offline.
To use this method, you must first download the font files from the icon library you want, upload them to your web hosting account, and link the files in your theme’s CSS.
Step 1. Download the files
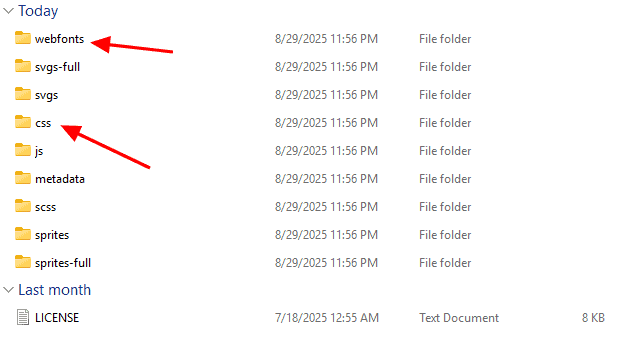
Go to the icon library site and download the self-host package. For Font Awesome, pick the Web download. You will get a CSS folder and a webfonts folder.

The CSS folder contains all of the core styling for the font. It may include multiple CSS files depending on the creator’s setup. If you’re using Font Awesome, you’ll receive CSS files for different versions of fonts. (Don’t worry, you can change any styling later by editing the CSS.)
Step 2. Upload to your hosting
Open your File Manager in cPanel or use FTP to access your website files on your hosting account.
Copy the provided webfonts folder and the CSS folder into your child theme. Place them in an asset directory to keep things organized, though it doesn’t matter where they live as long as the URL is public. It’s very important to put this folder in the child theme or it will be overwritten if you update your WordPress theme.
Example location: /wp-content/themes/your-child-theme/assets/icons/

Step 3. Reference the Font in Your Site
Your final step is to link the link to the core CSS file (in the case of Font Awesome, it’s called fontawesome.css) as well as any of the other provided CSS files you want to use.
Place this link in the <head> of your website. Double check that the paths correctly point to where you placed the files.
Here’s an example of the HTML of a page with the file links in the <head>.
<head>
  <!-- Links to Font Awesome Sharp Solid -->
  <link href="/your-path-to-fontawesome/css/fontawesome.css" rel="stylesheet" />
  <link href="/your-path-to-fontawesome/css/sharp-solid.css" rel="stylesheet" />
</head>
<body>
  <i class="fa-sharp fa-solid fa-user"></i>
</body>
Now you’re ready to use your new icons throughout your site!
What is the difference between icon fonts and image icons?
Icon fonts are made of scalable vector shapes stored in a font file. Image icons are separate image files like PNG or SVG. Icon fonts load faster, can be resized without losing quality, and are easier to style using CSS compared to image icons.
Do WordPress icon fonts slow down my site?
No. Icon fonts are often faster than image icons because they load as one small font file instead of many image files. This reduces the number of requests your site makes to the server and helps keep your pages lightweight and quick to load.
That said, if you add too many WordPress icon fonts, or fonts with thousands of icons, it may cause increased load on your server and slow down the site. Limit your fonts to the ones you use. If possible, limit yourself to only the specific icons you use.
Can I use WordPress icon fonts without coding skills?
Yes. Many WordPress themes and page builders include built-in support for WordPress icon fonts. You can choose icons from a library and insert them directly into your pages without writing code.
Styling options like size and color are usually available in the visual editor, though that isn’t guaranteed. You may need to write on some CSS to style your icons.
Are WordPress icon fonts free to use?
Many popular icon font libraries are free, such as Font Awesome’s basic set. Some libraries offer premium icons for a fee. Always check the license for any icon font you download to make sure it allows use on your type of website.
Do icon fonts work on all devices?
Yes. WordPress icon fonts are designed to be responsive and scale perfectly on any device or screen size. They look sharp on desktops, tablets, and smartphones, and they work well on high-resolution screens like Retina displays.
WordPress Icon Fonts Final Thoughts
WordPress icon fonts give you an easy way to add style and function to your site. They load fast, look great on any screen, and are simple to use. You can place them in menus, buttons, headings, or anywhere you want to guide attention. They also save time because you don’t need to upload and manage separate image files.
With a little styling, you can match WordPress icon fonts perfectly to your site’s colors and design. Try adding a few to your pages or menus and see how much they improve your site’s look and feel.
Ready to build your WordPress site?
Try our service free for 14 days. No obligation, no credit card required.

