Let’s see how to restore the database in a few clicks starting from an automatic backup. To do this, we will use JetBackup, which allows us to restore the database if there are data losses or changes that have compromised the website’s functioning.
To give our customers maximum peace of mind, we provide free 30 days of backups with all accounts. That means that we create a daily backup for each hosting account of our customers and keep the last 30 copies on an external server. In fact, for each account, we have 30 backups available that can be restored independently by customers through a simple control panel.
Note that this tutorial is about restoring the database from backup. We have tutorials related to restoring files and emails to follow you in the various operations.
In this guide, we will see how to restore a MySQL database. This in case you have had a problem and your website database is corrupt or data is missing.
The steps are different if you have JetBackup or JetBackup 5.
Table of Contents
Restore the Database with JetBackup
First, we need to log in to cPanel, then scroll down to the “JETBACKUP” section and click “Database Backups”.

Here we see a list of the databases we have on our account and the date of their backups. By clicking on the top, we can sort the columns by database name or date.
If you have any databases, you can enter the database name in the search box above and sort by date to easily find the backup of a MySQL database you are interested in. This way, you can search by name and date to select the database you want to restore.

Once you have decided which database is right for you, you can choose whether to download it or restore it directly.
Restore the MySQL database from backup
If you want to perform a database restore, click on restore. A window will open asking you for confirmation to put the restore in the queue. Click on the “Add to Restore Queue” button to add the restore in the queue.

The system adds the task to the queue and processes it as soon as possible, usually within minutes. As soon as the restore is completed, you will receive a confirmation email.
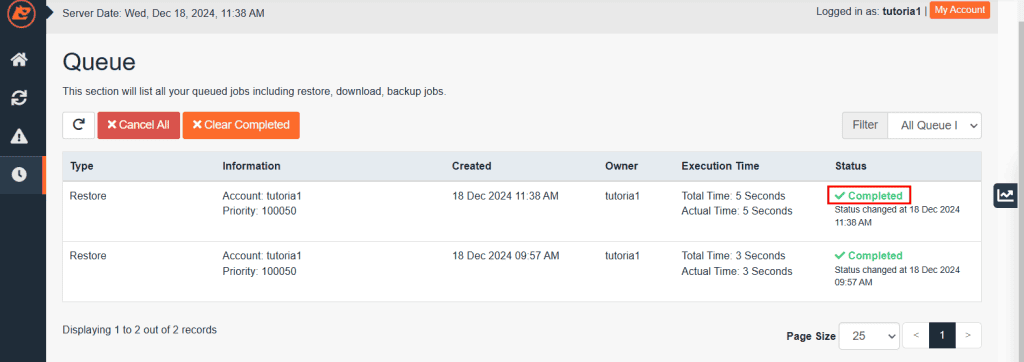
You can check the status of the restore using the “Queue” tool:

If the status of the operation is in “Pending” it means that it has been queued, but the operation is still pending and will start as soon as possible. Once the operation starts, you will see it in the “Processing” state. The duration of this operation depends on the size of the database being restored but usually takes only a few minutes. Once the database restore operation is over, you will see the status set to “Completed”.
Download a backup copy of the database
If you prefer, you can download a MySQL dump of your backup in MySQL format to analyze it locally before performing the restore. If you want to download a backup of your database, you can select “Generate Download”. Again you will need to confirm that you want to add the operation to the queue.

Once the operation is complete, you will receive an email notification, and then you can download the database backup from cPanel.
To download the database, access the cPanel and from the “JETBACKUP” section, click on the “Queue” tool.

From here, you can download your database backup file or delete it after downloading it to free space on your account.
Restore the database with JetBackup 5
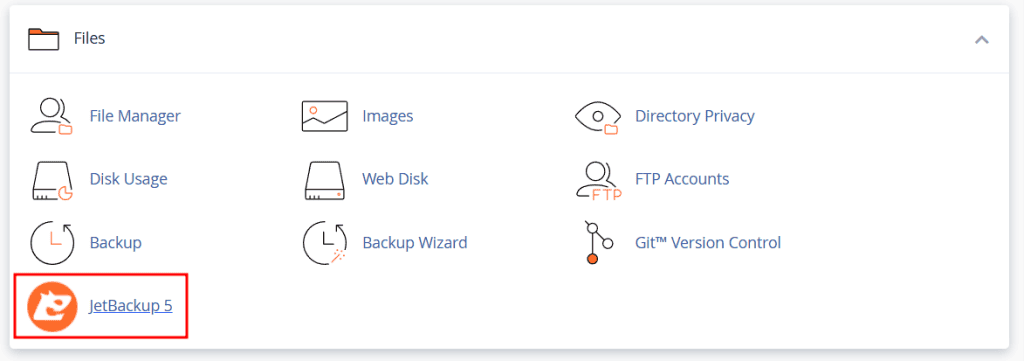
Log in to cPanel and, under the “Files” section, click on “JetBackup 5.”
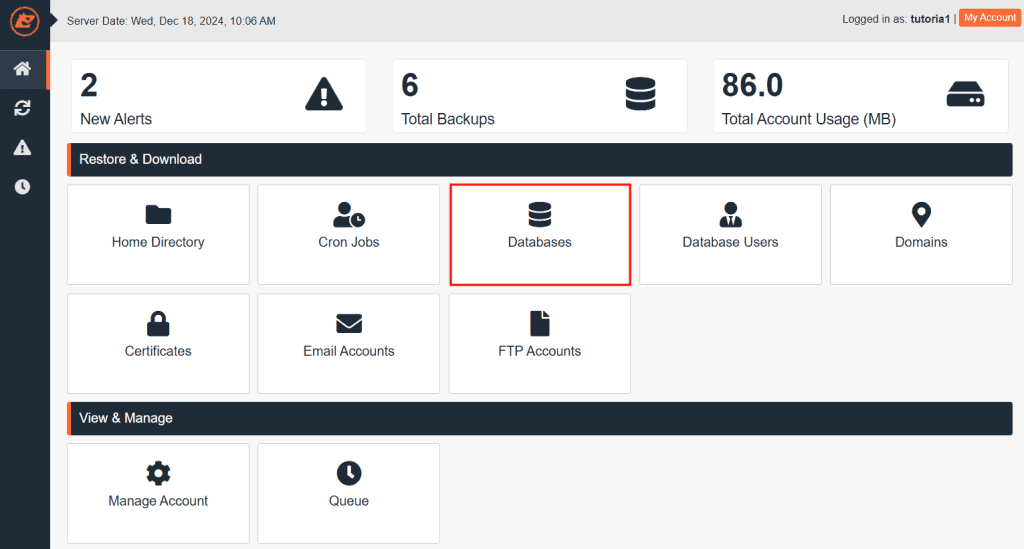
You will be directed to the JetBackup 5 dashboard, where you can see a summary of the available backups.
To restore a database, click on “Databases” under the “Restore & Download” section.
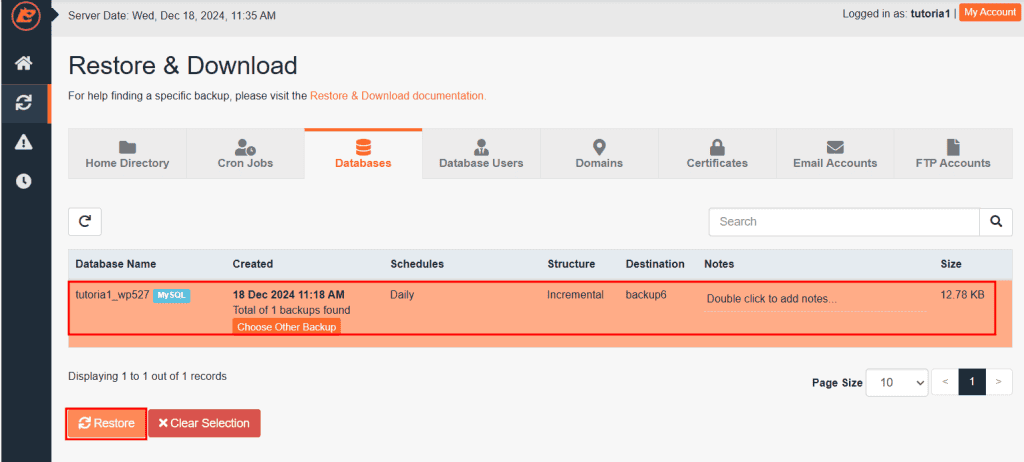
Here, you will find a list of database backups along with the dates they were created. Select the backup you wish to restore, and then click on the “Restore” button.
A window will appear displaying a summary of the database you are about to restore. To proceed, click on “Restore Selected Items.”
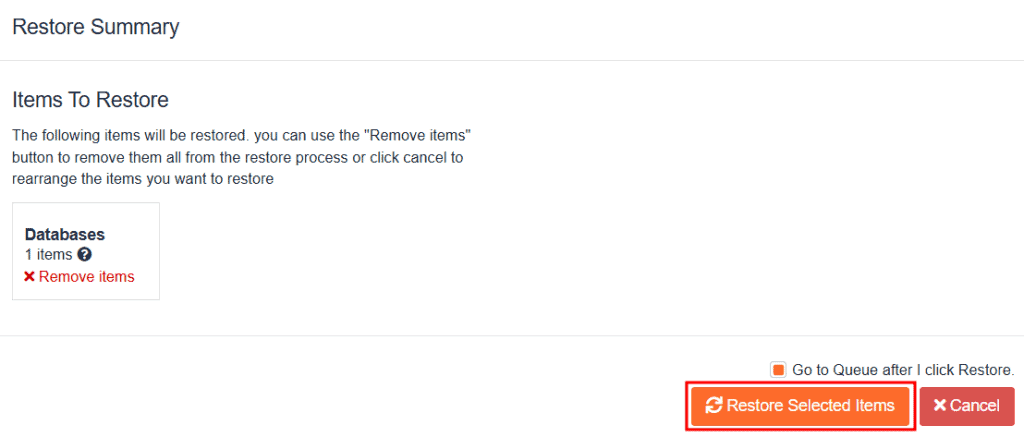
You will then be redirected to the Queue section, which shows a list of all ongoing restore processes. Here, you can track the progress of the operation, and once the restore is complete, you will see the status marked as “Completed.”
