Learn how to install and configure the SupportHost WHMCS module to start reselling domains with us.
Table of Contents
Activate your reseller account
Open a ticket with the billing department and request to become a domain reseller. After asking you for some information, we will enable your account for domain reselling.
Modify your reseller account settings
Once your account is enabled as a domain reseller, you can access your account settings.
Go to Domains > Reseller Settings.
From here, you can:
- Modify domain auto-renewal settings.
- Create the API key
- Add authorized IPs allowed to use the API key
Create the API key
As soon as your account is enabled as a reseller, you can create the API key needed to configure the WHMCS module.
- Log in to the client area and go to Domains > Reseller Settings.
- In the “API Key” section, click the “Generate a new API key” button.
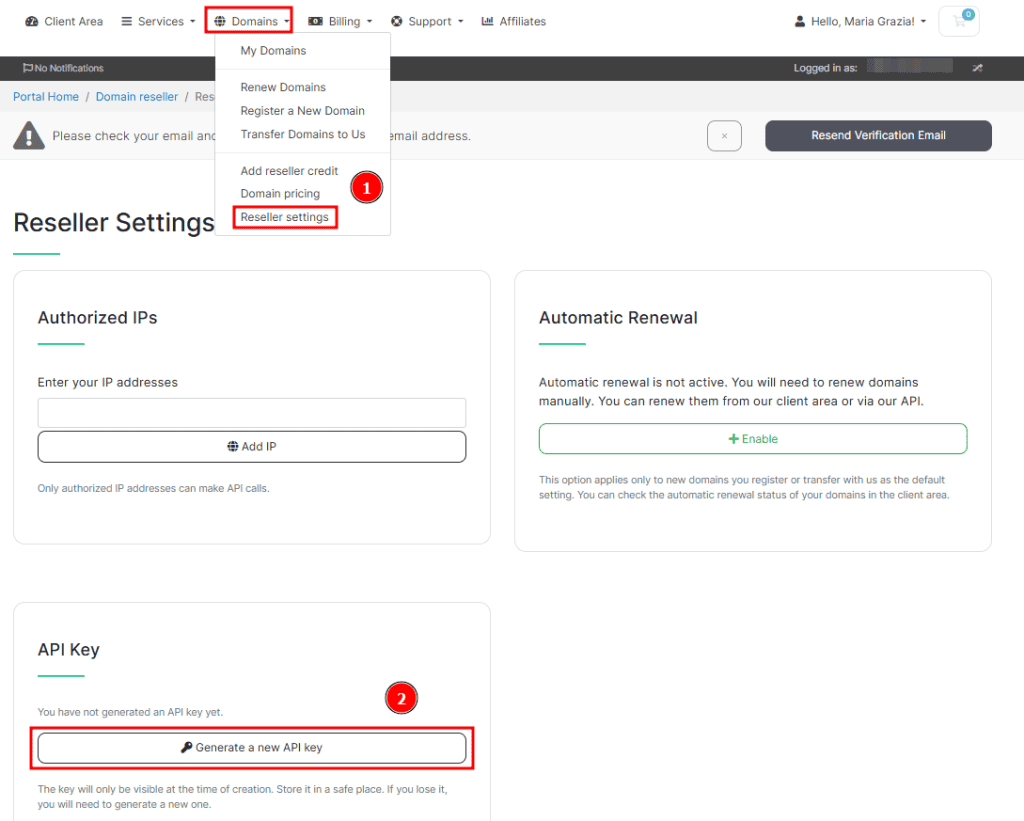
Warning: once generated, the API key will no longer be visible. Copy and save it immediately after generation. If you lose the API key, repeat the steps to generate a new one.
For instructions on how to manage all domain management, registration, and transfer operations via API, please refer to our documentation.
Add authorized IPs
In the client area, go to Domains > Reseller Settings.
In the “Authorized IPs” section, enter the IPs you want to authorize to make API calls:
- Enter the IP in the field
- Click “Add IP”.
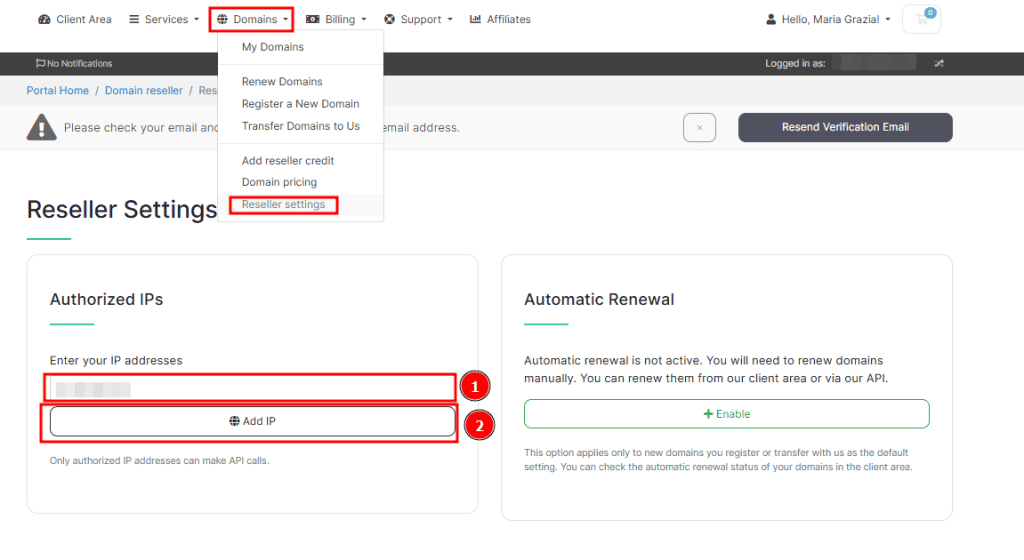
Repeat the step to add each IP you want to authorize.
Note that if there are errors during an API call, you will see an error indicating the IP is not authorized. To fix this, access the settings as shown above and add the IP.
To remove a previously authorized IP, click the “-” icon next to the IP as shown here:

Set up automatic renewal
By default, if you don’t change the setting, automatic domain renewal is disabled.
With automatic renewal disabled:
- You must manually renew domains
- via API call;
- through the SupportHost client area.
You can enable automatic renewal by clicking the “Enable” button in the Automatic Renewal section.
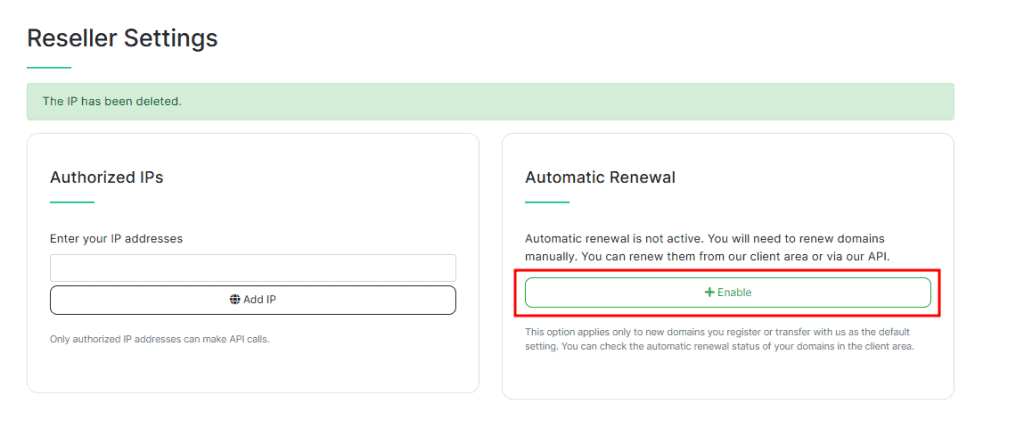
With automatic renewal enabled:
- All domains registered or transferred after you activate automatic renewal will have it enabled.
- 30 days before domain expiration, we will send you an invoice for renewal. If you have credit available, the domain will be renewed 30 days before expiration.
From the client area, Domains > My Domains, you can check if automatic renewal is active for your domains.
How to top up credit
As a reseller, you have two payment options for domains:
- Bank transfer
- SEPA direct debit
Additionally, you can add credit to your account and use it for registrations, transfers, and renewals.
To do this, log into the client area and click Domains > Add Credit.
Then:
- Enter the amount to top up — minimum amount €100
- Click Top Up.
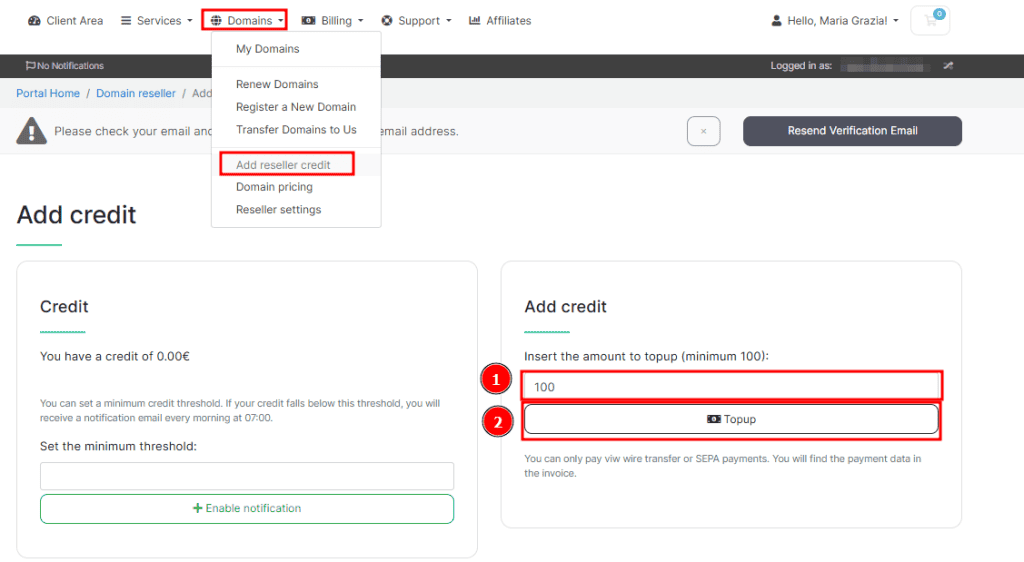
An invoice will be generated, and you can pay it via bank transfer or SEPA direct debit.
The added credit is non-refundable.
Installing the module on WHMCS
After generating the API key, adding authorized IPs, and choosing the automatic renewal settings, you can configure the module.
The steps to follow are:
- Download the module ZIP file and upload it to WHMCS;
- Activate the module;
- Configure the module by entering the API key;
- Configure the additional fields;
- Perform a final check;
- Add other languages (optional).
Let’s see how.
Download the module and upload it to WHMCS
First, you need to download the module and upload it to WHMCS:
- Download the “SupportHost” module for WHMCS.
- Unzip the module ZIP file.
- Upload the files to the folder: WHMCS/modules/registrars/
Activate the module from WHMCS
To activate the module:
- Log in to WHMCS.
- Hover over the wrench icon and click on System Settings.
- Use the search bar to find “Domain Registrars” and click on it.
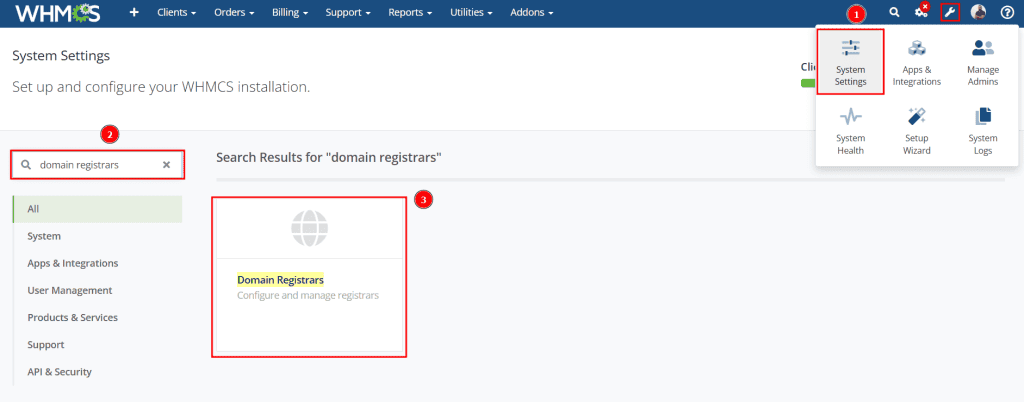
You will see a list of Registrars. Scroll down to “SupportHost” and click the green “Activate” button.

Configure the module
After activating the “SupportHost” module, on the same page (System Settings > Domain Registrars), click the “Configure” button:
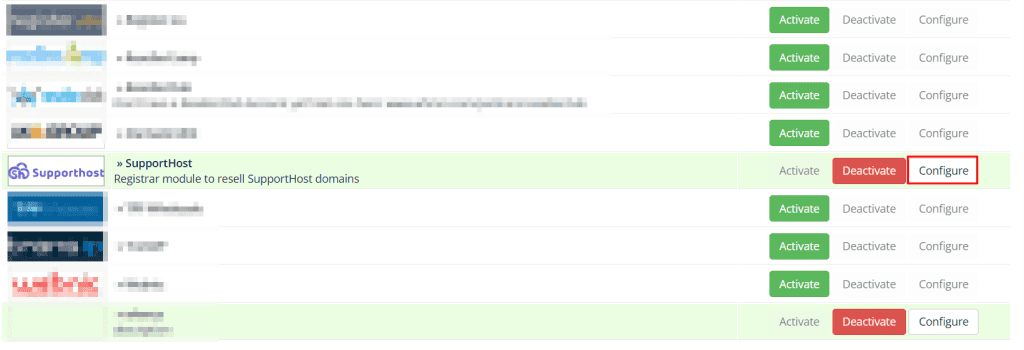
The fields you will see are:
- Email: enter the email you use for your SupportHost account (you can find this in the client area).
- API key: enter the API key you created earlier by following this tutorial’s steps.
- Move domains to SupportHost: here you can enter the domain extensions you want to transfer automatically to SupportHost. When your client renews a domain with one of these extensions, instead of renewing with the current registrar, a TODO is created with the expiration date; on that date, the domain transfer to SupportHost is initiated.
After filling in the fields, click Save changes.

Edit the additionalfields.php file
This change allows the additional domain fields to display correctly and enables validations.
You need to edit the file: WHMCS/resources/domains/additionalfields.php
Note that if the file does not exist, simply create an empty file named additionalfields.php in the path above and paste the following line.
Open the file, add this line, and save:
include(ROOTDIR."/modules/registrars/SupportHost/lib/supporthost-additionalfields.php");At this point, it’s best to check if there are other modules adding additional domain fields. Here’s how.
Verify additional fields and validation
Now you need to verify that the domain additional fields are correct:
- Try ordering a .it domain (from the client area)
- You should see the following 4 additional fields:
- Entity Type
- Tax-ID
- Publish Personal Data in WHOIS
- Accept .it registry terms and conditions
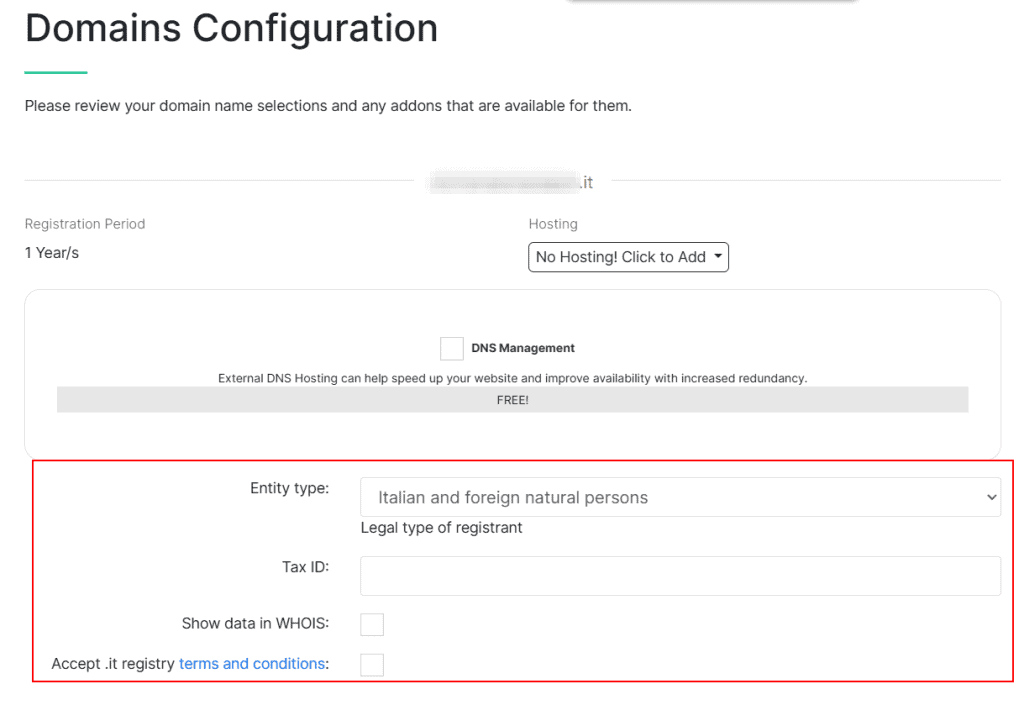
If you see fields other than these, it means another module you’re using (a registrar module) is adding extra fields. In this case, you need to check which modules you have installed and figure out how to remove the additional fields added by those modules.
The module includes a field validation system that prevents errors. For example, if you’re placing an order as an “individual” (private person), you must enter a tax code—not a VAT number. Check the most common errors for .it domain registration.
Add other languages
Inside the module files, you’ll find a “lang” folder containing language files: english.php and italian.php.
To add a new language:
- Duplicate one of the existing files
- Translate its content
- Save it with a new name, for example, french.php.

