
Setting up payment processing on your WordPress site doesn’t have to be complicated. But many site owners waste hours trying to figure out which plugin to use and whether they’ve configured everything correctly.
You can actually have Stripe working on your WordPress site in about 30 minutes. That includes testing with demo card numbers to make sure everything works properly.
This guide shows you the easiest way to integrate Stripe with WordPress. We’ll cover the complete setup, how to test payments before going live, and what to do if something goes wrong. You’ll also learn about alternative methods if you need a shopping cart or digital downloads.
Let’s get started.
Table of Contents
What You Need to Know Before Adding Stripe to WordPress
Before you start the setup, there are a few things you need to understand about how Stripe works with WordPress.
First, you need an SSL certificate on your site. This is mandatory. Without HTTPS, your payment forms won’t work at all. Most hosting providers offer free SSL certificates through Let’s Encrypt. If you don’t have one, contact your host.
Next, let’s talk about fees. Stripe charges 2.9% + 30¢ per successful transaction in the US. Other countries have different rates. But keep in mind, many WordPress plugins add extra fees when you use their free versions.
For example, WP Simple Pay adds 3% on top of Stripe’s fees. So a $100 payment costs you $2.90 + $0.30 for Stripe, plus $3 for the plugin. That’s $6.20 total.
You also need to know about test mode and live mode. Test mode lets you process fake payments with demo credit card numbers. Live mode processes real payments. You always start in test mode to make sure everything works.
Choosing the Right Stripe Plugin for Your Needs
WordPress has several Stripe plugins. Picking the wrong one means wasted time or features you don’t need.
Here are some of the most common options:
- WP Simple Pay. Best for simple payment forms. No shopping cart needed. Takes 15 minutes to set up. The free version adds 3% to transactions.
- WooCommerce Stripe. For full online stores with shopping carts, product pages, and inventory. Free with no extra fees, but takes 30-60 minutes to set up.
- Easy Digital Downloads. Built for selling digital files like PDFs or courses. Handles file delivery automatically. Free with Stripe included.
- WP Full Pay. Most flexible free option but charges 5% extra per transaction. Good for complex payment forms.
- WPForms. Requires the Pro version with the Stripe add-on ($199.50/year). Worth it if you need complex forms with payment fields.
How to Integrate Stripe With WordPress
For this tutorial, we’ll use WP Simple Pay. It’s the easiest to set up and works for most situations. You can always switch later if you need more features.
Step 1: Create Your Stripe Account
First, you need a Stripe account. Go to Stripe.com, enter your email, and click Start now. On the next screen, you’ll need to create an account.

Stripe will ask for your business information. This includes your business type, address, and tax ID. Be accurate here. Stripe uses this information for fraud prevention and tax reporting.
The initial signup is quick, but Stripe needs to verify your identity before you can accept real payments. This usually takes 1-2 days. You can start testing immediately though.
During setup, Stripe asks what payment types you want to accept. Just enable card payments for now. You can add Apple Pay, Google Pay, and other methods later.
Once your account is created, you’ll see the Stripe dashboard.
Note: If you’re outside the US, some features might be different. Stripe works in 46 countries, but each has slightly different options and fees.
Step 2: Install WP Simple Pay
Log into your WordPress dashboard. Go to Plugins > Add New. Search for WP Simple Pay. Look for the one created by Syed Balkhi.

Then, click Install Now and wait for it to download and click Activate.
The plugin will offer to start its setup wizard. Click Let’s Get Started.

WP Simple Pay keeps things simple. Everything is under one menu item in your dashboard. The plugin is lightweight and won’t slow down your site.
Step 3: Connect Stripe to WordPress
In the WP Simple Pay setup wizard, you’ll see a blue Connect with Stripe button. Click it.

You’ll go to Stripe’s connection page. If you’re already logged into Stripe, it asks you to authorize the connection. If not, log in first.
This method is called Stripe Connect. It’s more secure than entering API keys manually because everything happens on Stripe’s servers.
After you authorize the connection, Stripe sets up webhooks automatically. Webhooks tell WordPress when someone pays, gets refunded, or when other events happen. Without webhooks, your site wouldn’t know about successful payments.
You’ll be redirected back to WordPress with a success message. WP Simple Pay shows your connected Stripe account email to confirm the link worked.
If you see an error, it’s usually because:
- Your site doesn’t have SSL
- There’s a plugin conflict
- Your browser is blocking cookies.
Step 4: Create Your First Payment Form
Now that Stripe and WordPress are connected go to WP Simple Pay >Add New Payment Form. You’ll see payment form templates.
For the free version of the plugin you can create payment buttons you can add anywhere on your site, while the Pro version lets you create complete payment forms.

Choose Payment Button for a basic setup. Or, if you’re on the Pro version then you can use the payment form templates.
Give it a name like “Product Payment”. This is what will appear on your Stripe checkout page.

In the Payment tab you can set your price. For testing, we’re just going to use $10.00.
You can also choose a one off payment or a subscription, or check the box to let customers set their own price.

The Form Fields option lets you customize any active form fields.

Next, set up your confirmation message in the Confirmation Page tab. Tell customers what happens next.
For example, “You’ll receive a receipt via email within 5 minutes.”

Once you’re finished click Publish to save the form. You’ll see a shortcode like:
[simpay id="123"]Copy this, since you’ll need it to display the form.
Step 5: Add Payment Form to Your Site
Create a new page by going to Pages > Add New or open up the page where you want to add the Stripe payment button.
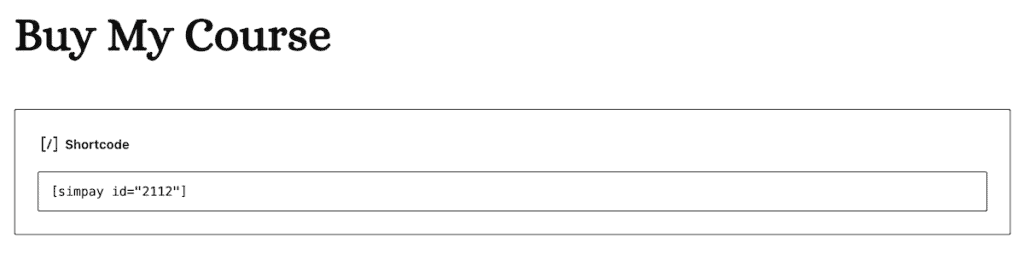
Then, add a shortcode block if using the block editor and paste your shortcode:
[simpay id="123"]Your ID number will be different.
Publish the page and view it. You should see your payment button (or your payment form) with “Test Mode” at the bottom.
You can add this anywhere on your site that accepts shortcodes. Pages, posts, widgets, anywhere. Some people create landing pages for each product. Others add forms or payment buttons directly to sales pages.

Consider what goes around your form. Add text explaining what they’re buying. Include your refund policy. Maybe add testimonials nearby. The form/button is just one part of the payment page.
If you use a page builder like Elementor or Divi, they have shortcode blocks. The form should match your theme automatically. You can customize colors in WP Simple Pay settings if needed.
How to Test Stripe Payments Before Going Live
Testing is critical. Skip this and you risk losing sales to preventable errors.
1. Enable Test Mode
First, head over to your Stripe dashboard and make sure Test Mode is enabled. To do this go to your account drop-down, select Switch to sandbox, then Test mode.

After that, go to WP Simple Pay > Settings > Stripe. Make sure the Test Mode option is selected. You’ll see orange “TEST MODE” badges in your admin area.

In test mode, Stripe processes everything like real payments. But no money moves. No real cards get charged. The API responds the same way. Webhooks fire the same way.
2. Run Test Transactions
Visit your payment form on your site. You’ll see TEST MODE ENABLED below the form.
For a successful payment, use these details:
- Card number: 4242 4242 4242 4242
- Expiration Date: Any future date (like 12/34)
- CVC: Any 3 digits (like 123)
- ZIP: Any valid ZIP (like 90210)
Enter any email address and click pay. The form processes, then shows your success message.
You just completed your first test payment.

Test other scenarios using the following numbers:
- Declined card: Use 4000 0000 0000 0002
- Card requiring authentication: Use 4000 0025 0000 3155
- Expired card: Use 4000 0000 0000 0069
Test each one and make sure error messages are clear. Check that the success page has all the right information. Make sure you fix any issues now, not after going live.
3. Verify Test Payments
Check your Stripe dashboard. Make sure you’re in test mode and click Payments in the left sidebar.
All your test transactions appear here. Click one to see details like amount, email, and metadata. Real payments will look exactly like this, just without the TEST labels.

In WordPress, go to WP Simple Pay > Payment History. Your test transactions should be here too.
This is where you’ll manage payments and issue refunds in the future.

4. Switch to Live Mode
After testing everything, you’re ready for real payments. But make sure you check this list first:
- Test payments worked correctly
- Error messages make sense
- Confirmation emails arrive
- Payment amounts are right
- Your Stripe account is verified
Then, go to WP Simple Pay > Settings > Stripe. Then, switch from Test Mode to Live Mode in the Payment Mode section. The opposite of how you enabled test mode above. After you switch from test to live mode you might need to reconnect Stripe again.
Once you’re finished, save your settings. Then, check your payment form. The “TEST MODE” message should be gone. The form/button now accepts real credit cards.
After that, process one real payment with your own card. You can refund it later. This confirms everything works with real money. Check that the payment appears in both Stripe and WordPress. Make sure you get the confirmation email.
After that, you should be ready to go and your site can now fully accept Stripe payments.
Alternative Methods to Integrate Stripe with WordPress
WP Simple Pay works for most payment needs. But some situations need different solutions. Here are a few of the top Stripe alternatives.
If You Need a Full Shopping Cart: WooCommerce
WooCommerce powers over 5 million online stores. Use it when you need:
- Multiple products with variations
- Shopping cart functionality
- Inventory tracking
- Shipping calculations
- Tax handling
Setting up WooCommerce takes 30-60 minutes. You install WooCommerce, add products, configure shipping and taxes, then add the Stripe gateway. It’s more complex but much more powerful.
The official WooCommerce Stripe gateway is free. No extra transaction fees. But WooCommerce has a learning curve. You might need paid extensions for specific features.
If You’re Selling Digital Downloads: Easy Digital Downloads
Easy Digital Downloads (EDD) is built for digital products. Perfect for PDFs, courses, software, or music files.
After payment, customers get secure download links automatically. EDD handles download limits, expiration times, and customer accounts. It even generates license keys for software.
Stripe support is included free. Setup takes about 20 minutes. You can easily create products, upload files, set prices, and connect Stripe. Plus, there’s no extra fees on the free version.
The main advantage over WP Simple Pay is automated delivery. No manually sending files. Everything happens automatically after payment.
If You Need Custom Forms: WPForms
WPForms makes sense when payment is part of a complex form. Maybe you need:
- Detailed customer information
- Conditional logic based on selections
- Price calculations before payment
- Multiple form steps
WPForms requires the Pro version ($195/year) for Stripe. The form builder is more advanced than WP Simple Pay. It offers drag-and-drop fields, conditional logic, calculations. But expect a much longer setup process.
The 3% transaction fee seems high. But if you need the form features anyway, it’s worth considering.
Common Stripe and WordPress Issues and How to Fix Them
Even with careful setup, problems happen. Here are some common problems to look out for.
Payment form not showing
This is usually a JavaScript conflict. Start by disabling other plugins one by one to find the problem. Caching plugins often cause this. Make sure you exclude your payment page from caching.
“No SSL certificate” error
Stripe requires HTTPS. Contact your host about enabling SSL. Most offer it free through Let’s Encrypt. Check for the padlock icon in your browser’s address bar, or consider upgrading to a WordPress host that offers a free SSL certificate.
Test mode won’t turn off
First, try clearing your browser cache and any caching plugins. Check that you switched to live mode in both the plugin settings and in your Stripe dashboard.
Customer can’t complete payment
Make sure you get the exact error message. “Card declined” means their bank rejected it. They need to contact their bank or try another card. Generic errors usually mean a configuration problem on your end.
Stripe and WordPress FAQs
How much does Stripe cost?
Stripe charges 2.9% + 30¢ per transaction in the US. International cards add 1%. Currency conversion adds 1%. Some plugins add fees on free versions. WP Simple Pay adds 3%.
Do I need technical knowledge to use Stripe?
No. The setup wizards handle the technical parts. If you can install a WordPress plugin, you can set up Stripe.
How long does setup take?
Basic setup takes 15 minutes with WP Simple Pay. Add 10-15 minutes for testing. WooCommerce takes longer (30-60 minutes) because you’re setting up an entire store.
Can I test without real money?
Yes. Test mode is completely separate from live payments. Use card number 4242 4242 4242 4242 with any future expiration date. No real money moves.
Is SSL required?
Yes. SSL is mandatory for PCI compliance. Stripe won’t work without it. Most hosts provide free SSL certificates. Your payment forms won’t function without HTTPS.
Closing Thoughts: How to Integrate Stripe with WordPress
Learning how to integrate Stripe with WordPress is pretty straightforward once you pick the right plugin. With WP Simple Pay, you can accept payments in about 30 minutes including testing.
For most sites, WP Simple Pay gives you everything you need. Yes, the free version adds 3% to transactions. But you can upgrade later when sales justify the cost.
If you need a full shopping cart, use WooCommerce. For digital products, Easy Digital Downloads saves you from manual file delivery. But don’t overcomplicate things. A simple payment option often does the job, especially when you’re first getting started.
The key is testing everything before going live. Use those test card numbers. Check every scenario customers might face. A few minutes of testing prevents hours of support problems later.
Payment processing needs to work perfectly, so take time to set it up right and test it properly. Your customers will have a smooth payment experience that builds trust in your business.
Did you integrate Stripe with WordPress? Please share your experience or questions in the comments below.
Ready to build your WordPress site?
Try our service free for 14 days. No obligation, no credit card required.


